
If you are a streamer looking to step up your game and provide professional-quality content to your viewers, streaming from a DSLR camera can give you the edge you need. With its superior image quality and versatility, a DSLR camera can elevate the visual experience of your stream. In this article, we will guide you through the process of streaming to Twitch from a DSLR camera using OBS (Open Broadcaster Software), the popular streaming software.
Step 1: Setting up your DSLR camera
Before you start streaming, you need to ensure your DSLR camera is set up correctly. Connect your camera to your computer using a USB cable. Make sure your camera is in video mode and set the output to “clean HDMI” or “HDMI out”. This will ensure that the camera’s live video feed is sent to your computer without any overlays or settings menus.
Step 2: Installing OBS
Download and install OBS on your computer from the official OBS website. OBS is a free and open-source streaming software that is widely used by gamers and content creators. Once installed, open OBS and familiarize yourself with the layout and settings.

Step 3: Adding the DSLR camera as a source
In OBS, create a new scene by clicking on the plus icon in the Scenes section. Then, click on the plus icon again in the Sources section and select “Video Capture Device”. Give the source a name and click OK. In the properties window, select your DSLR camera from the drop-down menu. Make sure the resolution and frame rate settings match your camera’s capabilities. Click OK to add the DSLR camera as a source.
Step 4: Configuring your stream settings
In OBS, go to the Settings menu and navigate to the Stream tab. Select Twitch as the streaming service and log in to your Twitch account. Enter your stream key, which can be found in your Twitch dashboard. Set the desired bitrate, resolution, and frame rate for your stream. Click Apply and then OK to save the settings.
Step 5: Going live on Twitch

You are now ready to go live on Twitch using your DSLR camera. Start your stream by clicking on the Start Streaming button in OBS. Head to your Twitch dashboard, and you should see your stream preview. Enter a title, add tags, and choose the appropriate category for your stream. When you’re ready, click the Go Live button to start streaming to your audience.
Streaming to Twitch from a DSLR camera using OBS opens up new possibilities for content creators. With its superior image quality and advanced settings, your stream will stand out from the crowd. Follow the steps in this article, and take your streaming game to the next level!
How to Stream to Twitch from DSLR Camera OBS
Streaming to Twitch from a DSLR camera using OBS (Open Broadcaster Software) can provide a higher quality and more professional stream for your viewers. Here’s a step-by-step guide on how to achieve this:
Requirements:
- A DSLR camera with HDMI output
- An HDMI cable to connect your camera to your computer
- A computer with OBS installed
- A stable internet connection
- A Twitch account
Step 1: Connect Your Camera to Your Computer
Connect your DSLR camera to your computer using an HDMI cable. Make sure the camera is powered on and set to the appropriate video mode.
Step 2: Install OBS and Configure the Settings
- Download and install OBS from the official website.
- Open OBS and go to “Settings”.
- Under the “Video” tab, set the “Base (Canvas) Resolution” to match your desired stream resolution.
- Under the “Output” tab, select “Advanced” and set the “Encoder” to your preferred option.
- Go to the “Audio” tab and make sure your microphone or any other audio devices are properly set up.
- Save the settings.
Step 3: Add Your DSLR Camera as a Video Capture Device
- In the OBS main window, click on the “+” icon under the “Sources” box and select “Video Capture Device”.
- Give the source a name and click “OK”.
- In the properties window, select your DSLR camera from the “Device” dropdown menu.
- Configure any additional settings for your camera feed, such as resolution and framerate.
- Click “OK” to save the settings.
Step 4: Set Up Twitch Streaming
- Login to your Twitch account and go to your channel dashboard.
- Click on your profile picture and select “Creator Dashboard”.
- Under the “Stream Manager” section, click on the “Stream Setup” tab.
- Copy the “Stream Key” provided.
Step 5: Configure OBS for Twitch Streaming
- Go back to OBS and click on “Settings”.
- Under the “Stream” tab, select “Twitch” as the streaming service.
- Paste the Twitch “Stream Key” into the field provided.
- Configure any additional streaming settings, such as bitrate and resolution.
- Save the settings.
Step 6: Start the Twitch Stream
- In OBS, click on “Start Streaming” to begin your Twitch stream.
- Monitor your stream on your Twitch channel dashboard to ensure everything is working correctly.
- Interact with your viewers and have a great stream!
Streaming to Twitch from a DSLR camera using OBS can significantly enhance the visual quality of your stream. Now you can showcase your content with professional-grade visuals and engage your audience like never before.
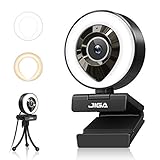
Choosing the Right DSLR Camera for Twitch Streaming
Streaming on Twitch with a DSLR camera can significantly enhance your streaming experience by providing better video quality and more creative control. However, choosing the right DSLR camera for Twitch streaming can be overwhelming with so many options available in the market. Here are some factors to consider when selecting a DSLR camera for streaming on Twitch.
- Video Quality: Look for a camera that can record videos in at least 1080p resolution, as this is the standard quality for most Twitch streams.
- Low Light Performance: Since streaming setups often involve low lighting conditions, choose a camera with good low-light performance to ensure clear and sharp video even in dimly lit environments.
- Autofocus: Twitch streaming requires continuous autofocus to keep the subject in focus as you move around. Look for a camera that offers fast and accurate autofocus capabilities.
- External Microphone Support: While DSLR cameras have built-in microphones, they may not always provide the best audio quality. Opt for a camera that has an external microphone input, so you can use a dedicated microphone for crystal-clear sound.
- Live Streaming Capabilities: Some DSLR cameras have built-in Wi-Fi or HDMI outputs that allow direct streaming to platforms like Twitch. Check if the camera you’re considering has these features for convenient live streaming.
- Price: Consider your budget and find a camera that offers a good balance between features and price. While more expensive cameras may offer better specs, there are also affordable options that can deliver decent results for Twitch streaming.
Remember to do thorough research and read reviews before making a purchase. Additionally, check if the camera is compatible with streaming software such as OBS, as this will ensure a smoother streaming experience without any compatibility issues.
Ultimately, the right DSLR camera for Twitch streaming will depend on your specific needs and preferences. Finding a camera that meets the above criteria will help you capture high-quality video and provide an immersive streaming experience for your viewers on Twitch.
Setting up OBS for Twitch Streaming
Streaming to Twitch from a DSLR camera requires configuring OBS (Open Broadcaster Software) to ensure a smooth and high-quality live stream. Follow these steps to set up OBS for Twitch streaming:
Step 1: Install OBS
First, download and install OBS on your computer. You can find OBS on their official website and choose the version compatible with your operating system.

Step 2: Launch OBS
Once installed, open OBS on your computer.
Step 3: Adding your DSLR camera as a video source
- Connect your DSLR camera to your computer using a USB cable.
- In OBS, click on the “+” icon under the “Sources” box.
- Select “Video Capture Device” from the drop-down menu.
- In the “Create/Select Source” window, give your video source a name, such as “DSLR Camera.”
- Choose your DSLR camera from the “Device” drop-down menu.
- Click “OK” to add the DSLR camera as a video source.
Step 4: Configuring video settings
- In the “Sources” box, right-click on the “DSLR Camera” video source and select “Filters.”
- In the “Filters” window, click on the “+” icon and select “Crop/Pad.”
- Adjust the crop/pad settings to fit your desired video resolution.
- Click “OK” to apply the settings.
Step 5: Configuring audio settings
- In OBS, click on “Settings” in the lower-right corner.
- Go to the “Audio” tab.
- Under the “Devices” section, select your DSLR camera as the audio device.
- Adjust the audio levels as needed.
- Click “OK” to save the audio settings.
Step 6: Configuring streaming settings
- Go to the “Stream” tab in the OBS settings.
- Choose “Twitch” as the streaming platform.
- Enter your Twitch stream key in the designated field.
- Adjust other streaming settings, such as bitrate and resolution, as desired.
- Click “OK” to save the streaming settings.
Once you have completed these steps, you are ready to start streaming to Twitch from your DSLR camera using OBS. Remember to test your stream before going live to ensure everything is working properly. Happy streaming!
Configuring Your DSLR Camera for Twitch Streaming
Streaming to Twitch from a DSLR camera can greatly enhance the quality of your live streams, providing your viewers with incredible visuals. To get started, you’ll need to properly configure your DSLR camera. Here are the steps to follow:
- Connect your camera to your computer: Use the appropriate USB cable to connect your DSLR camera to your computer. Make sure the camera is powered on before connecting.
- Install camera software: Depending on your camera model, you might need to install the camera software on your computer. This software will allow your computer to communicate with your DSLR camera.
- Set the camera to Live View mode: Live View mode is necessary for streaming. Go to your camera settings and enable Live View mode.
- Adjust camera settings: To optimize your stream’s quality, adjust the camera settings such as exposure, white balance, and focus. Make sure the video output matches your streaming settings.
- Frame your shot: Use the camera’s live view on your computer to frame your shot. Adjust the composition and make sure your subject is in focus.
- Set up a stable camera tripod: A stable camera tripod is essential to prevent shaky footage. Mount your DSLR camera securely on a tripod.
- Connect your camera to OBS: Download and install OBS (Open Broadcaster Software). In OBS, add a new video capture device and select your DSLR camera as the input source.
- Configure OBS settings: In OBS, configure the video settings according to your preferred streaming resolution and bitrate. Test different settings to find the optimal balance between quality and performance.
- Start streaming: Once you’ve configured your DSLR camera and OBS, you’re ready to start streaming to Twitch. Click the “Start Streaming” button in OBS, and your DSLR camera feed will be live on Twitch.
By following these steps and configuring your DSLR camera properly, you can elevate the production value of your Twitch streams and deliver a more professional and engaging experience for your viewers.
Connecting Your DSLR Camera to Your Computer
Streaming to Twitch from your DSLR camera using OBS requires a proper connection between your camera and computer. Here are the steps to connect your DSLR camera to your computer:

Step 1:
Ensure that you have the necessary cables to connect your DSLR camera to your computer. Most cameras use a USB cable or an HDMI cable for video transfer.
Step 2:
Power off your DSLR camera and your computer before making any connections.
Step 3:
Connect one end of the USB cable or HDMI cable to the respective port on your DSLR camera.
Step 4:
Connect the other end of the USB cable or HDMI cable to an available USB port or HDMI port on your computer.
Step 5:
Once the cables are securely connected, power on your DSLR camera and your computer.
Step 6:
Wait for your computer to recognize the connected DSLR camera. If it doesn’t automatically detect the camera, you may need to install the required drivers or software provided by the camera manufacturer.
Step 7:
Launch OBS (Open Broadcaster Software) on your computer. OBS is a free and open-source software used for streaming.
Step 8:
In OBS, go to the “Sources” section and click on the “+” icon to add a new source.
Step 9:
Select the “Video Capture Device” option from the drop-down menu.
Step 10:
Choose the DSLR camera as the video device from the available options.
Step 11:
Adjust the settings for the video device, such as resolution and frame rate, according to your preferences.
Step 12:
Click on the “OK” button to add the DSLR camera as a video source in OBS.
Step 13:

You can now start streaming to Twitch using your DSLR camera as the video source in OBS.
Note: Make sure to configure the audio settings in OBS as well to include audio from your DSLR camera or an external microphone, if desired.
Adjusting Camera Settings for Optimal Twitch Streaming
Streaming to Twitch from a DSLR camera using OBS can greatly enhance the quality of your stream and provide a professional look to your content. However, to achieve the best streaming experience, it is important to adjust your camera settings accordingly. Here are some tips for optimizing your DSLR camera settings for Twitch streaming:
- Resolution: Set your camera’s resolution to match the streaming resolution you have set in OBS. This will ensure that the video quality remains consistent and eliminates any unnecessary downscaling.
- Frame rate: Choose a frame rate that is suitable for streaming. A frame rate of 30fps or 60fps is commonly used for Twitch streaming.
- Exposure: Adjust the exposure settings to avoid overexposed or underexposed footage. Use the camera’s exposure compensation or manual mode to achieve the desired exposure levels.
- White balance: Set the white balance to match the lighting conditions in your streaming environment. This will ensure that the colors appear accurate and natural.
- Focusing: Use manual focus rather than auto focus to maintain a consistent focus throughout your stream. This is especially important if you move around or have objects/people at varying distances from the camera.
- Audio: Although not directly camera-related, it is crucial to ensure that your audio is clear and balanced. Use a separate microphone or an external audio source for better audio quality.
By adjusting these camera settings, you can enhance the visual quality of your Twitch stream and deliver a more professional presentation. Remember to test and fine-tune the settings to achieve the desired results before going live. Happy streaming!
Setting up Audio for Twitch Streaming with a DSLR Camera
When it comes to Twitch streaming with a DSLR camera, having good audio quality is just as important as having a clear video feed. In this guide, we will walk you through the steps of setting up audio for Twitch streaming using a DSLR camera and OBS.
1. Connect your DSLR camera to your computer using a compatible USB cable. Make sure the camera is set to “movie” mode.
2. Launch OBS (Open Broadcaster Software) on your computer and go to the “Settings” menu.
3. In the “Settings” menu, select the “Audio” tab on the left side.
4. Under the “Devices” section, choose your DSLR camera as the audio input device.
5. Adjust the audio settings to your preference. You can set the audio bitrate, sample rate, and channel number here.
6. Click on the “Apply” button to save the changes.
7. Open Twitch in a web browser and log in to your Twitch account.
8. In Twitch, go to the “Creator Dashboard” and click on “Stream Manager” in the left sidebar.
9. On the “Stream Manager” page, click on the “Settings” tab.
10. In the “Settings” tab, select “Stream” on the left side.
11. Under the “Audio” section, choose “Capture Device” as the audio input source.
12. Click on the “Save Changes” button to apply the settings.
With these steps, you have successfully set up audio for Twitch streaming using a DSLR camera and OBS. You can now start streaming with high-quality audio to enhance your viewers’ experience. Make sure to do a test stream and adjust the audio levels as needed before going live.
| Troubleshooting Tips: |
|---|
| If you are not getting any audio from your DSLR camera, make sure the camera’s audio output is enabled and the volume is turned up. |
| If the audio quality is poor or distorted, try adjusting the audio settings in OBS and on your DSLR camera. |
| Consider using an external microphone for better audio quality. You can connect it to your DSLR camera or your computer directly. |
Testing Your Stream before Going Live on Twitch
Before going live on Twitch with your DSLR camera and OBS, it’s important to test your stream to ensure everything is working properly. Here are some steps you can follow to test your stream:
1. Connect your DSLR camera to your computer using a USB cable. Make sure the camera is set to “PC” or “USB” mode.
2. Open OBS and go to the “Sources” tab. Add a new source and select “Video Capture Device”. Choose your DSLR camera from the dropdown menu.
3. Check the video preview in OBS to see if your camera is working properly. Make sure the video is clear and there are no issues with the image quality.
4. Go to the “Settings” in OBS and navigate to the “Stream” tab. Enter your Twitch stream key, which can be found in your Twitch account settings.
5. Open Twitch on your computer or mobile device and go to your channel. Make sure your stream is set to private or unlisted so that only you can see it during the testing phase.
6. In OBS, click on “Start Streaming” to begin streaming to Twitch. Monitor your stream on Twitch to see if everything is working properly. Pay attention to the audio and video quality, as well as any potential lag or buffering issues.
7. During the testing phase, it’s a good idea to ask a friend or colleague to join your stream and provide feedback. They can help you identify any technical issues or improvements that need to be made.
8. Once you are satisfied with the test stream, you can set your Twitch stream to public and start streaming to your audience. Remember to promote your stream on social media or other platforms to attract viewers.
Testing your stream before going live on Twitch is crucial to ensure a smooth and professional-looking broadcast. By following these steps and making any necessary adjustments, you can confidently stream from your DSLR camera using OBS.
Tips and Tricks for Successful Twitch Streaming with a DSLR Camera
If you are considering streaming on Twitch with a DSLR camera, there are a few tips and tricks that can help you achieve a successful stream. Here are some things to keep in mind:
- Invest in quality equipment: A DSLR camera is a great choice for streaming on Twitch, but make sure you have a high-quality camera and lens to capture clear and crisp footage. Additionally, invest in a good tripod or stabilizer to ensure steady shots.
- Adjust camera settings: Take the time to adjust your camera settings before you start streaming. Experiment with different exposure settings, white balance, and focus to find the best look for your stream.
- Lighting is key: Proper lighting can make a big difference in the quality of your stream. Make sure you have sufficient light sources and try to avoid harsh shadows or overexposed areas. Consider using softboxes or diffusers to achieve a more professional look.
- Use a capture card: To stream with a DSLR camera, you will need a capture card to connect your camera to your computer. Choose a reliable and high-quality capture card to ensure smooth and stable streaming.
- Frame your shots: Composition is important in streaming. Experiment with different angles and framing techniques to create visually appealing shots. Keep in mind the Rule of Thirds and utilize leading lines to guide the viewer’s eye.
- Test your setup: Before going live, always test your setup. Make sure your camera is properly connected, audio levels are balanced, and your streaming software is configured correctly. Doing a test stream can help you identify any issues and make necessary adjustments.
- Engage with your audience: Streaming on Twitch is all about building a community. Interact with your viewers, respond to comments and questions, and create a welcoming environment. Engaging with your audience will encourage them to stick around and come back for more.
- Promote your stream: Don’t forget to promote your stream on social media and other platforms. Let your followers know when you’ll be streaming and what to expect. Cross-promotion can help you reach a wider audience and attract new viewers.
By following these tips and tricks, you’ll be well on your way to successful Twitch streaming with a DSLR camera. Remember to have fun and enjoy the process!
Question-answer:
How can I stream to Twitch using a DSLR camera?
To stream to Twitch using a DSLR camera, you will need a capture card. Connect your DSLR camera to the capture card via an HDMI cable. Then, connect the capture card to your computer using a USB cable. Open OBS (Open Broadcaster Software) and add your DSLR camera as a video capture device. Configure the settings in OBS and start streaming to Twitch.
What is OBS and how can I use it to stream to Twitch?
OBS (Open Broadcaster Software) is a free and open-source streaming and recording software. It allows you to capture video and audio from various sources, such as your computer screen, webcam, and DSLR camera, and stream it to platforms like Twitch. To use OBS, download and install the software on your computer, then set up your sources and configure the settings for your stream before going live.
Can I stream to Twitch from my DSLR camera without a capture card?
No, you cannot stream to Twitch from a DSLR camera without a capture card. A capture card is necessary to convert the HDMI output from your DSLR camera into a format that your computer can recognize. Without a capture card, your DSLR camera cannot be recognized as a video source by streaming software like OBS, and therefore you will not be able to stream to Twitch.


