
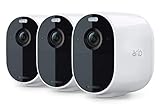
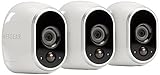
If you have an Arlo camera and an iPhone, you might be wondering how to sync them together to monitor your home or office remotely. Luckily, the process is simple and straightforward. In this article, we will guide you through the steps to sync your Arlo camera to your iPhone, so you can keep an eye on things no matter where you are.
Step 1: Download the Arlo app
The first thing you need to do is download the Arlo app from the App Store. This app allows you to access your Arlo camera from your iPhone and provides you with additional features and functionality. Once you have downloaded the app, open it and sign in to your Arlo account or create a new one if you don’t already have an account.
Step 2: Set up your Arlo camera
After signing in to your Arlo account, you need to set up your Arlo camera. Follow the instructions provided in the Arlo app to connect your camera to your Wi-Fi network and position it in the desired location. Make sure you have a stable and reliable internet connection for the best performance.

Step 3: Sync your Arlo camera to your iPhone
Once your Arlo camera is set up, it’s time to sync it to your iPhone. In the Arlo app, go to the settings menu and select the option to add a new device. Follow the on-screen instructions to pair your iPhone with your Arlo camera. This may involve scanning a QR code, entering a device ID, or pressing a sync button on your camera.
That’s it! You have successfully synced your Arlo camera to your iPhone. Now, you can use the Arlo app to view live video feeds, receive motion detection alerts, and even communicate through the camera’s two-way audio feature.
Remember to keep your Arlo camera and iPhone updated with the latest firmware and app versions to ensure compatibility and access to the latest features and improvements. Enjoy the peace of mind of having a reliable and convenient way to monitor your surroundings with your Arlo camera and iPhone.
Syncing Arlo Camera to iPhone: A Step-by-Step Guide
If you own an Arlo camera and want to sync it with your iPhone, this step-by-step guide will walk you through the process. By syncing your Arlo camera to your iPhone, you can conveniently monitor your home or office from anywhere.

Step 1: Install the Arlo App
The first step is to download and install the Arlo app from the App Store on your iPhone. Open the App Store, search for “Arlo,” and tap on the app to install it. Once the installation is complete, open the app and create an Arlo account if you don’t have one already.
Step 2: Power on the Arlo Camera
Ensure that your Arlo camera is powered on and connected to a stable Wi-Fi network. The camera should have a solid power and internet connection to successfully sync with your iPhone. If the camera is not powered on or disconnected from the internet, the syncing process may fail.
Step 3: Add Device
Launch the Arlo app on your iPhone and tap on the “Add Device” option. The app will guide you through the process of adding a new Arlo device. Make sure to follow the instructions carefully to ensure a successful sync.
Step 4: Sync the Arlo Camera
Next, press the sync button on your Arlo camera. This button is usually located on the back or bottom of the camera. The camera’s LED light will start blinking, indicating that it is ready for syncing.
Go back to the Arlo app on your iPhone and follow the on-screen instructions to complete the syncing process. The app will prompt you to hold your iPhone in front of the camera for a few seconds to establish a connection.

Step 5: Test the Connection
Once the syncing process is complete, the Arlo app will display a message confirming the successful connection between your Arlo camera and iPhone. To ensure the sync was successful, test the connection by viewing the camera’s live feed on your iPhone.
That’s it! You have successfully synced your Arlo camera to your iPhone. Now you can enjoy the convenience of monitoring your surroundings from your iPhone, no matter where you are.
Prepare Your Arlo Camera and iPhone
Before you can sync your Arlo camera to your iPhone, you need to make sure that both your camera and iPhone are properly prepared. Follow the steps below to ensure that everything is set up correctly:
1. Set up your Arlo camera:
- Make sure the camera is powered on and connected to a stable Wi-Fi network.
- Double-check that the batteries in your camera are fully charged or that the camera is connected to a power source.
- Position your camera in the desired location, making sure it has a clear view of the area you want to monitor.
2. Prepare your iPhone:
- Make sure your iPhone is connected to a stable Wi-Fi network.
- Ensure that your iPhone has enough storage space for the Arlo app and any captured footage.
- Check that your iPhone is running the latest version of iOS.
By properly preparing both your Arlo camera and iPhone, you will have a smoother experience when syncing your camera to your iPhone. Follow the next steps to complete the sync process.
Connect Your Arlo Camera to Wi-Fi
When setting up your Arlo camera, it is essential to connect it to your Wi-Fi network to enable remote viewing and access through your iPhone. Follow the steps below:

- Ensure your Wi-Fi network is working: Make sure your Wi-Fi router is functioning correctly and providing an internet connection. You can test this by connecting other devices to the network.
- Place your Arlo camera: Position your Arlo camera within the range of your Wi-Fi network. It is best to keep it relatively close to the router during the setup process.
- Power on your Arlo camera: Insert batteries or connect your Arlo camera to a power source, then wait for it to power on.
- Download the Arlo app: On your iPhone, open the App Store and search for the Arlo app. Download and install it.
- Launch the Arlo app: Open the Arlo app on your iPhone and sign in with your Arlo account. If you don’t have an account, you will need to create one.
- Add your Arlo camera: Tap on the plus sign (+) or the “Add Device” option in the app to begin adding your Arlo camera to your account.
- Follow the on-screen instructions: The Arlo app will guide you through the setup process. Select your Arlo camera model and follow the prompts to connect it to your Wi-Fi network.
- Connect to your Wi-Fi network: When prompted, enter your Wi-Fi network password or use the WPS (Wi-Fi Protected Setup) button on your router, if available, for a faster and easier connection.
- Wait for connection confirmation: The Arlo app will attempt to connect your camera to the Wi-Fi network. Wait for the app to confirm a successful connection before proceeding.
- Repeat for additional cameras: If you have multiple Arlo cameras to set up, repeat the above steps for each camera.
Once your Arlo camera is connected to your Wi-Fi network, you can now access it through the Arlo app on your iPhone. You can view live streams, review recordings, and manage camera settings all from your iPhone.
Download and Install the Arlo App on Your iPhone
If you want to sync your Arlo camera to your iPhone, the first step is to download and install the Arlo app from the App Store. Follow the steps below to get started:
Step 1: Open the App Store
Tap on the App Store icon on your iPhone’s home screen to open it.
Step 2: Search for Arlo
In the App Store, tap on the Search tab at the bottom of the screen. In the search bar at the top, type “Arlo” and tap the Search button.
Step 3: Find the Arlo App
Scroll through the search results until you find the Arlo app. Look for the official Arlo logo to make sure you’re downloading the correct app.
Step 4: Download and Install
Tap on the Arlo app to view its details. On the app page, tap the “Get” button. If prompted, authenticate your download with Touch ID, Face ID, or your Apple ID password.
Wait for the app to download and install on your iPhone. This may take a few moments depending on your internet connection speed.
Step 5: Open the Arlo App
Once the Arlo app is installed, tap on the Open button to launch it.
Congratulations! You have successfully downloaded and installed the Arlo app on your iPhone. Now you can proceed with the camera sync process to connect your Arlo camera to your iPhone.
Create an Arlo Account
To sync your Arlo camera to your iPhone, you first need to create an Arlo account. Follow these steps to create your account:
- Open the Arlo mobile app on your iPhone.
- Tap on the “New to Arlo?” button on the login screen.
- Fill in the required information, including your email address and a strong password.
- Agree to the terms and conditions by checking the box.
- Tap on the “Sign Up” button to create your Arlo account.
Once you have created your account, you will be able to sync your Arlo camera to your iPhone and start using all the features and functionalities of the Arlo system.
Link Your Arlo Camera to Your Arlo Account
Before you can sync your Arlo camera to your iPhone, you need to make sure it is properly linked to your Arlo account. Here’s how you can do it:
Create an Arlo Account
- Open a web browser on your computer or mobile device and go to the Arlo website.
- Click on the “New System Setup” button.
- Follow the instructions to create a new Arlo account.
Add Your Arlo Camera to Your Arlo Account
- Log in to your Arlo account.
- Click on the “New Device” option.
- Select “Wire-Free” as the camera type.
- Follow the on-screen instructions to connect your Arlo camera to your Arlo account.
Once your Arlo camera is linked to your Arlo account, you can then sync it to your iPhone using the Arlo mobile app. Make sure you have downloaded and installed the app from the App Store before proceeding.
By following these steps, you will be able to easily link your Arlo camera to your Arlo account and enjoy the benefits of remote monitoring and surveillance on your iPhone.
Set Up Camera Preferences
Once you have successfully synced your Arlo camera to your iPhone, you can now set up your camera preferences according to your liking. This will allow you to customize your camera’s settings for optimal performance and convenience.

To set up camera preferences, follow these steps:
| Step 1: | Launch the Arlo app on your iPhone and login to your account. |
| Step 2: | Tap on the “Settings” tab at the bottom of the screen. |
| Step 3: | Select the camera you want to customize from the list of connected devices. |
| Step 4: | Tap on “Camera Settings” to access the camera preferences. |
| Step 5: | Adjust the settings according to your preferences. You can customize options such as resolution, video quality, motion detection sensitivity, and more. |
| Step 6: | Once you have made the desired changes, tap on “Save” to apply the settings to your camera. |
By setting up your camera preferences, you can ensure that your Arlo camera functions exactly the way you want it to. Whether you want to receive notifications for every detected motion or adjust the camera’s field of view, customizing the settings will help you achieve the desired surveillance experience.
Access Your Arlo Camera on Your iPhone
If you own an Arlo camera and an iPhone, you can easily access your camera’s live feed and recordings from your iPhone. Follow these steps to sync your Arlo camera to your iPhone:
1. Download and Install the Arlo App
Visit the App Store on your iPhone and search for the Arlo app. Tap on the app to download and install it on your device.
2. Create an Arlo Account
Open the Arlo app and tap on “New to Arlo? Sign Up” to create a new account. Follow the on-screen instructions to provide the necessary information and complete the account creation process.
3. Connect Your Arlo Camera to Wi-Fi
Ensure that your Arlo camera is powered on and connected to a reliable Wi-Fi network. Refer to the camera’s user manual for specific instructions on how to connect it to Wi-Fi.
4. Add Your Arlo Camera to the Arlo App
Open the Arlo app on your iPhone and log in to your Arlo account. Tap on the “+” icon to add a new device. Follow the on-screen instructions to configure your camera and connect it to your Arlo account.
5. Access Your Arlo Camera on Your iPhone
Once your Arlo camera is successfully added to the Arlo app, you can access its live feed and recorded footage by simply opening the app on your iPhone. Tap on your camera’s name to view the live feed and swipe through the timeline to access recorded footage.
With these easy steps, you can easily sync your Arlo camera to your iPhone and keep an eye on your surroundings from anywhere at any time.
Enable Notifications for Arlo Camera on Your iPhone
If you want to receive notifications for your Arlo Camera on your iPhone, you’ll need to enable the notification settings in the Arlo app. Follow the steps below to ensure you never miss important information from your Arlo Camera:
Step 1: Open the Arlo App
To begin, locate the Arlo app on your iPhone and tap on it to open.
Step 2: Go to Settings
Within the Arlo app, navigate to the “Settings” menu. You can usually find this by tapping on the gear icon in the bottom right-hand corner of the screen.
Step 3: Select Arlo Camera
Next, select the specific Arlo Camera for which you want to enable notifications. If you have multiple cameras, make sure to choose the one you want to receive notifications from.
Step 4: Enable Notifications
Once you have selected the desired Arlo Camera, look for the “Notifications” option and tap on it.
Step 5: Customize Notification Settings
Within the “Notifications” settings, you can customize your preferences. Toggle the switch to enable notifications, and choose whether you want to receive alerts for motion detection, audio detection, or both.
Note: Make sure that the notifications for the Arlo app are also enabled in the general settings of your iPhone. Otherwise, you may not receive any notifications.
Congratulations! You have successfully enabled notifications for your Arlo Camera on your iPhone. Now you can stay informed about any activities or events captured by your Arlo Camera.
Troubleshooting Tips for Arlo Camera and iPhone Connection Issues
If you are experiencing issues syncing your Arlo camera to your iPhone, there are several troubleshooting steps you can take to resolve the problem. This article will guide you through common connection issues and provide solutions to help you establish a successful connection.
1. Check Network Connectivity
First, ensure that your iPhone and Arlo camera are connected to the same Wi-Fi network. Verify that both devices have a stable internet connection by testing other apps or websites.
If you are experiencing a weak signal, try moving your Arlo camera closer to the router or consider using a Wi-Fi extender to enhance the signal strength.
2. Restart Devices
Power off your iPhone and Arlo camera, then turn them back on again. This simple step often resolves minor software glitches that can cause connection issues.
After restarting, ensure that your Arlo camera firmware and the Arlo app on your iPhone are up to date. Outdated software can sometimes lead to compatibility issues.
3. Reset Network Settings
If the issue persists, try resetting your network settings on your iPhone. To do this, go to Settings, select General, and then tap Reset. Choose Reset Network Settings and confirm your selection. Keep in mind that this action will remove saved Wi-Fi networks, so be prepared to re-enter passwords.
4. Reinstall the Arlo App
If the previous steps did not resolve the issue, consider reinstalling the Arlo app on your iPhone. First, delete the app from your device, then visit the App Store to download and reinstall the latest version. Launch the app and follow the necessary steps to reconnect your Arlo camera.
5. Contact Arlo Support
If none of the above steps resolve the connection issues, it is recommended to contact Arlo customer support for further assistance. They will be able to troubleshoot the problem and provide specific solutions tailored to your setup.
| Issue | Solution |
|---|---|
| Weak Wi-Fi signal | Move camera closer to router or use Wi-Fi extender |
| Outdated firmware | Update Arlo camera firmware and app |
| Reset network settings | Go to Settings > General > Reset > Reset Network Settings |
| Reinstall Arlo app | Delete app and reinstall from App Store |
| Contact Arlo support | Reach out to Arlo customer support for assistance |
FAQ
Do I need to have an Arlo account to sync the camera to my iPhone?
Yes, you will need to have an Arlo account to sync the camera to your iPhone. The Arlo account is used to manage and access your Arlo cameras from any device, including your iPhone. You can create a new Arlo account directly within the Arlo app or sign in with your existing account if you already have one.
Can I sync my Arlo camera to my iPhone without the Arlo app?
No, you cannot sync your Arlo camera to your iPhone without the Arlo app. The Arlo app is required to set up and manage your Arlo cameras. It allows you to view live video feeds, customize camera settings, receive alerts, and more. Make sure to download and install the Arlo app from the App Store to sync your Arlo camera to your iPhone.


