
We are all fascinated by the beauty of the moon, and capturing its majesty with a smartphone camera can be a challenging yet rewarding experience. With the right tools and techniques, you can take stunning photos of the moon using your iPhone camera and a pair of binoculars. This article will guide you through the process, helping you make the most out of your equipment and capture breathtaking shots of the moon.
Step 1: Gather the necessary equipment
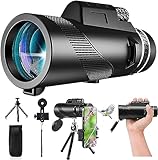
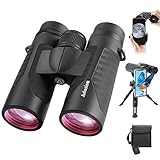
Before you start taking photos, make sure you have the right equipment. Alongside your iPhone camera, you will need a pair of binoculars with a tripod adapter, a sturdy tripod, and a mobile phone holder for the tripod. It is important to invest in good-quality binoculars with a high magnification power to ensure clear and detailed shots of the moon.
Step 2: Set up your equipment
Mount your iPhone onto the mobile phone holder and attach it to the tripod. Connect your iPhone to the binoculars using the tripod adapter, ensuring a secure and stable connection. Adjust the settings of your iPhone camera to optimize its performance in low-light conditions. Lower the ISO, increase the exposure time, and turn off the flash to avoid overexposure.

Step 3: Align your binoculars
Align your binoculars with the moon using the tripod. Make sure the binoculars are stable and properly focused. Take your time to adjust the focus and zoom until the moon appears crisp and clear through the binoculars. Use the zoom function on your iPhone camera to capture even more detail and magnify the moon’s features.
Step 4: Capture the perfect shot
With your equipment set up and aligned, it’s time to take the shot. Press the shutter button on your iPhone camera gently to avoid any movement that could result in blurry photos. Experiment with different exposure times and zoom levels to find the perfect balance and capture the moon’s beauty in all its glory.
In conclusion, taking photos of the moon with your iPhone camera and binoculars is a rewarding experience that allows you to admire the moon’s splendor up close. By following these steps and experimenting with your equipment, you can take stunning shots that showcase the moon’s intricate details and mesmerizing beauty. So grab your iPhone and binoculars, head outside, and let the magic of the moon inspire your photography!
Choose the Right Moon Binoculars for Your iPhone Camera
When it comes to capturing stunning images of the moon with your iPhone camera, one of the best ways to get a detailed view is by using moon binoculars. These specialized binoculars are designed specifically for observing the moon and offer a unique viewing experience. However, with so many options available, it can be difficult to choose the right moon binoculars for your iPhone camera.
Here are a few factors to consider when choosing moon binoculars:
- Magnification: Look for moon binoculars with a magnification level that suits your needs. Higher magnification allows for closer and more detailed views of the moon, but it also increases image shake. Consider the balance between magnification and stability for the best results.
- Objective Lens Size: The size of the objective lens determines the amount of light that enters the binoculars, which affects image brightness and clarity. Larger objective lenses let in more light, resulting in brighter and sharper images. However, they may also make the binoculars heavier and harder to hold steady.
- Image Stabilization: Stability is crucial when it comes to capturing clear, detailed images of the moon. Some moon binoculars come with built-in image stabilization technology to compensate for hand movements and vibrations. This feature can greatly improve the quality of your images.
- Compatibility: Ensure that the moon binoculars you choose are compatible with your iPhone camera. Look for binoculars that come with the necessary adapters or accessories to attach them securely to your iPhone.
Additionally, it’s worth considering the weight and size of the moon binoculars for convenience and portability. Remember to read reviews and compare different models before making a purchase to find the best moon binoculars that suit your needs and budget.
Explore the Moon with Your iPhone Camera and Binoculars
If you’re fascinated by the moon and want to capture its beauty using your iPhone camera, combining it with binoculars can give you even better results. With the right techniques, you can take amazing close-up shots of the moon and explore its craters, mountains, and other interesting features.
Why use binoculars?

Using binoculars with your iPhone camera allows you to increase the magnification power, allowing you to capture more details and get a closer look at the moon. Binoculars with a magnification power of 10x or higher are recommended for best results.
Things you’ll need:
- An iPhone with a good camera
- Binoculars with a magnification power of at least 10x
- A tripod or other stable surface to mount your iPhone on
- A moon viewing app or guide to help you locate interesting features
Preparing your equipment:
Before you start capturing photos of the moon, make sure your iPhone camera is clean and free of any smudges or dirt. Attach your binoculars to a tripod or find a stable surface to stabilize your iPhone for better results.
Adjusting the focus:
Using your binoculars, adjust the focus until the moon appears sharp and clear. Once you have a sharp image, use the focus lock feature on your iPhone camera to lock the focus in place. This will prevent accidental refocusing and help you capture sharp images.
Using the moon viewing app:
Download a moon viewing app or refer to a moon guide to help you identify interesting features on the moon. These apps can provide information about the moon’s phase, rise and set times, and the location of craters, mountains, and other landmarks. Use this information to plan your photoshoots and explore the moon’s surface.
Photo composition:
When capturing the moon with your iPhone camera and binoculars, consider the composition of your photo. Include other elements like trees, buildings, or mountains to add context and create an interesting composition. Experiment with different angles and lighting conditions to create unique and captivating moon photos.
Quick tips:
- Use the burst mode on your iPhone camera to capture multiple shots in quick succession. This can help you capture sharp images even if your hands are not perfectly steady.
- Experiment with different exposure settings on your iPhone camera to adjust the brightness of the moon. This can help highlight different features and create different moods in your photos.
By combining your iPhone camera with binoculars, you can unlock new possibilities for moon photography. Start exploring the moon’s surface, capture its beauty, and share your stunning photos with others.

Capture Clear and Detailed Moon Images Using iPhone Camera and Binoculars
Capturing clear and detailed moon images using an iPhone camera and binoculars is an exciting way to explore the wonders of space. With the right equipment and techniques, you can capture stunning images of the moon right from your backyard. Follow these steps to get started:
1. Gather the Right Equipment
To capture moon images with your iPhone camera and binoculars, you will need:
- An iPhone with a high-quality camera
- A pair of binoculars with a steady mount or tripod
- A smartphone adapter for attaching the phone to the binoculars
2. Set Up Your Equipment
Attach your iPhone to the smartphone adapter, and then attach the adapter to the binoculars. Make sure the phone is securely attached and aligned with the binoculars’ lenses.
3. Choose the Right Time
Plan your moon photo session during the night when the moon is visible. Check the moon phase and choose a night when the moon is nearly full for the best results. Also, check the weather forecast to ensure clear skies.
4. Find a Stable Position
Set up your binoculars on a steady mount or tripod to minimize camera shake. This will help you capture clearer and sharper moon images.

5. Adjust the Camera Settings
Launch your iPhone’s camera app and access the manual settings. Adjust the exposure settings to ensure the moon is properly exposed. Experiment with different exposure values to find the best settings for your specific conditions.
6. Focus on the Moon
Look through the binoculars and adjust the focus until the moon appears clear and detailed. Use your iPhone’s manual focus feature to fine-tune the focus on the moon.
7. Take the Shot
Once you have everything set up and in focus, use the iPhone camera’s timer function or a remote shutter release to minimize camera shake when capturing the shot. Take multiple photos to increase your chances of capturing the perfect moon image.
8. Edit and Enhance
After capturing your moon images, transfer them to your computer or use editing apps on your iPhone to enhance the details and make the moon stand out. Adjust the brightness, contrast, and sharpness to bring out the best in your photos.
With these tips and techniques, you can capture clear and detailed moon images using your iPhone camera and binoculars. Enjoy the experience of photographing the moon and explore the beauty of our celestial neighbor.

Learn How to Align Your iPhone Camera with Moon Binoculars
If you want to capture stunning photos of the moon using your iPhone camera and a pair of moon binoculars, it’s important to understand how to align them properly. With the right alignment, you’ll be able to get clear and detailed shots of the moon’s craters and surface features.
Here are the steps to align your iPhone camera with moon binoculars:
- Start by setting up your moon binoculars on a stable surface or a tripod. This will help reduce any potential shaking or movement.
- Next, align the binoculars with the moon by looking through them. Make sure you have a clear view of the moon and adjust the focus to get a crisp image.
- Once you have the moon properly aligned in the binoculars, it’s time to align your iPhone camera. Open the camera app on your iPhone and switch to the telephoto lens option, if available.
- Hold your iPhone up to one of the eyepieces of the binoculars, making sure the camera lens is aligned with it. You may need to adjust your position or the position of the binoculars to get the right alignment.
- Once your iPhone camera is aligned with the moon binoculars, you can start capturing photos or videos. Use the manual settings on your camera app to adjust the exposure and focus for the best results.
Remember to use a remote shutter or the timer function on your iPhone to avoid any movement or shaking when capturing the photo. Additionally, consider using an app or editing software to enhance the details and colors of your moon photos.
With some practice and patience, you’ll be able to capture stunning moon photos using your iPhone camera and moon binoculars. Happy stargazing!
Tips for Adjusting the Focus on Your iPhone Camera with Moon Binoculars
When using your iPhone camera with moon binoculars, adjusting the focus is crucial to capture sharp and clear images. Here are some helpful tips to ensure you get the best focus:
1. Clean the lens
Before you begin, make sure to clean the lens of your iPhone camera as well as the binocular lenses. Dust or smudges can negatively impact the image quality.
2. Stabilize your setup
Using moon binoculars for photography can be challenging, especially when it comes to keeping your iPhone steady. Consider using a tripod or a stable surface to minimize camera shake and achieve better focus.
3. Zoom in and focus manually
Zoom in on the moon using the binoculars and position your iPhone camera lens at the eyepiece. Manually adjust the focus on your iPhone camera until the image appears sharp and clear. This process may require some trial and error, so be patient.
4. Try different exposure settings
Experiment with different exposure settings on your iPhone camera to achieve the desired brightness and clarity. The moon can be quite bright, so adjusting the exposure can help capture more details.
5. Use the timer or a remote shutter
To further minimize camera shake, use the timer function on your iPhone camera or a remote shutter. This allows you to take photos without touching the camera screen, resulting in clearer images.
By following these tips, you’ll be able to adjust the focus on your iPhone camera with moon binoculars and capture stunning images of the moon.
Enhance Your Moon Photography with iPhone Camera and Binoculars
Introduction
The moon has always captivated humans with its awe-inspiring beauty. Whether you are an amateur or professional photographer, capturing stunning moon photographs can be a rewarding experience. By using the powerful camera on your iPhone and a pair of binoculars, you can take your moon photography to the next level.
Choosing the Right Binoculars
When it comes to moon photography, having a pair of binoculars can greatly enhance your experience. Look for binoculars with a high magnification power, such as 10x or 12x. This will allow you to see the moon’s surface in greater detail and capture more intricate shots. Additionally, opt for binoculars with a wide field of view, as it will make it easier to locate and track the moon.
Preparing Your iPhone Camera
To optimize your iPhone camera for moon photography, there are a few settings to consider. First, make sure your camera is set to capture images in the highest resolution possible. This will ensure that your moon photos have the sharpest details. Additionally, you can experiment with different exposure settings to achieve the desired level of brightness and contrast. Don’t forget to clean the lens of your iPhone to avoid any unwanted smudges or blurriness in your photos.
Using Binoculars with Your iPhone Camera
Now that you have your binoculars and iPhone camera ready, it’s time to combine them for incredible moon photography. Attach your iPhone to a tripod or a stable surface to avoid any blurriness caused by hand movements. Then, position your binoculars in front of the camera lens, aligning the moon in their field of view. Adjust the focus on both the binoculars and iPhone camera until you achieve a clear and sharp image of the moon.
Experimenting with Zoom
Another technique to enhance your moon photography is to experiment with zoom capabilities using your binoculars and iPhone camera. Start by using the maximum zoom on your binoculars and adjust the position of your iPhone camera accordingly. This will allow you to capture close-up shots of specific areas on the moon’s surface, revealing intricate details that are not visible to the naked eye.
Conclusion
With the right equipment and some experimentation, you can elevate your moon photography using your iPhone camera and binoculars. Don’t be afraid to try different settings and techniques to achieve the desired results. Remember, patience and practice are key when it comes to capturing stunning moon photographs.
Experiment with Different Settings on Your iPhone Camera for Moon Photography
Taking photos of the moon with your iPhone camera can be a thrilling and rewarding experience. However, to capture the moon in all its glory, you need to experiment with different settings on your iPhone camera. Here are a few tips to help you get started:
1. Use Manual Mode
Start by switching your iPhone camera to manual mode. This will give you more control over the settings and allow you to adjust them according to the lighting conditions. To access manual mode, simply open the camera app and swipe left until you reach the “Manual” option.
2. Adjust Exposure
When photographing the moon, exposure is crucial. To get a detailed shot, slightly underexpose the image by adjusting the exposure slider to the left. This will help you capture the moon’s texture and prevent it from appearing as a bright white circle.
3. Set Focus and Lock It
Next, you need to set the focus on the moon. To do this, tap on the moon in the camera viewfinder. Once the focus on the moon is set, you can lock it by pressing and holding on the screen until you see the AE/AF Lock indicator. This will keep the moon in focus, even if you adjust the composition.
4. Use a Telephoto Lens
If you have an iPhone model with a telephoto lens, such as the iPhone X or newer, use it to zoom in on the moon. This will allow you to capture more details and create a more dramatic composition. Zoom in by pinching your fingers on the screen or by using the zoom slider.
5. Consider Using a Tripod
Using a tripod is highly recommended when taking photos of the moon. It will help stabilize your iPhone and prevent any blurriness or shake. Attach your iPhone to a tripod or place it on a stable surface to ensure sharp and clear images.
6. Use a Self-Timer or Remote Trigger
To further reduce any camera shake caused by pressing the shutter button, use the self-timer or a remote trigger. Set a 2-second or 10-second self-timer delay to give the camera enough time to stabilize before capturing the photo. Alternatively, use a remote trigger to capture the photo without touching your iPhone.
Remember, experimenting with different settings and techniques is key to capturing stunning moon photos with your iPhone camera. Don’t be afraid to try different exposure, focus, and composition options until you achieve the desired result. Happy moon photography!
How to Stabilize Your iPhone Camera When Using Moon Binoculars
Using moon binoculars with your iPhone can provide fantastic close-up views of the moon. However, capturing clear images and videos can be challenging due to the shaking and movement caused by handholding the binoculars. To overcome this issue, it’s important to stabilize your iPhone camera. Here are some tips to help you get clear and steady shots:
1. Use a Tripod or Mount
A tripod or mount can provide a stable platform for your iPhone. Attach the mount securely to the binoculars or tripod and place your iPhone into the mount. This will reduce shaking and allow you to keep your iPhone steady while capturing images or videos of the moon.
2. Enable Gridlines
Enable the gridlines on your iPhone camera app to help you align your shot. The gridlines will appear as horizontal and vertical lines on your camera screen, acting as a guide to keep your composition level and balanced.
3. Use the Self-Timer or a Remote Shutter
Using the self-timer or a remote shutter can help eliminate any movement caused by pressing the shutter button on your iPhone. Set a short delay on the self-timer or use a remote shutter to capture images without touching your iPhone. This will ensure that your shots are sharp and free from any camera shake.
4. Use Burst Mode
Burst mode can be useful for capturing fast-moving objects like the moon. When using moon binoculars, activate burst mode on your iPhone to take a series of rapid-fire shots. This will increase your chances of capturing a clear and detailed image of the moon, as it eliminates any blurriness caused by camera shake.
5. Adjust Exposure and Focus Manually
Manually adjusting the exposure and focus on your iPhone camera can help you achieve better results when capturing the moon. Tap your screen to bring up the exposure and focus controls, then adjust them manually to ensure that the moon is properly exposed and in focus.
By following these tips, you can stabilize your iPhone camera when using moon binoculars and capture stunning images and videos of the moon. Experiment with different techniques and settings to find what works best for you and enhances your moon-watching experience.
The Benefits of Using Moon Binoculars with Your iPhone Camera
When it comes to capturing stunning images of the moon, using moon binoculars with your iPhone camera can provide several benefits. These powerful optical devices can enhance your lunar photography experience in many ways.
One of the main advantages of using moon binoculars is their ability to magnify the moon, allowing you to capture intricate details that are not visible to the naked eye. With the help of your iPhone camera, you can take close-up shots of lunar craters, mountains, and other fascinating lunar features.
Another benefit of moon binoculars is their portability. Unlike traditional telescopes, moon binoculars are lightweight and easy to carry around. This makes them a convenient tool for capturing lunar images on the go. With your iPhone camera attached, you can quickly snap breathtaking moon pictures wherever you are.
In addition, moon binoculars offer improved stability when compared to holding your iPhone camera alone. This stability is crucial for capturing sharp and clear images, especially when dealing with long exposures. By using moon binoculars, you can eliminate shaky hands and keep your images steady.
Furthermore, moon binoculars can help you overcome atmospheric disturbances. These disturbances, including atmospheric turbulence and light pollution, can impact image quality. Moon binoculars with large objective lenses allow more light to enter, which improves image brightness and overall quality.
Lastly, using moon binoculars with your iPhone camera opens up opportunities for astrophotography. With the right technique and setup, you can take stunning pictures of the moon, planets, and even deep-sky objects. This can be a rewarding and fulfilling hobby for photography enthusiasts.
Overall, integrating moon binoculars with your iPhone camera can enhance your lunar photography experience. It allows you to capture intricate details, provides portability and stability, improves image quality, and opens up possibilities for astrophotography. So, grab your moon binoculars, attach your iPhone camera, and start exploring the wonders of the moon.
Share Your Stunning Moon Photos Taken with iPhone Camera and Binoculars
Capturing stunning photos of the moon using just your iPhone camera and a pair of binoculars is an exciting and accessible way to explore the night sky. With the right techniques, you can achieve incredible results that showcase the beauty and detail of our closest celestial neighbor. We encourage you to share your best moon photos taken with these tools to inspire and connect with fellow astronomy enthusiasts.
How to Take Moon Photos with iPhone Camera and Binoculars
To capture breathtaking moon photos with your iPhone camera and binoculars, follow these steps:
- Securely mount your iPhone onto a tripod or stable surface to minimize camera shake.
- Attach your binoculars to a tripod adapter or use a smartphone adapter to align your iPhone with the binoculars.
- Find a good vantage point with a clear view of the moon.
- Adjust the focus of your binoculars to achieve a clear image of the moon.
- Open the camera app on your iPhone and switch to manual mode if available. Otherwise, use the default photo mode.
- Adjust the exposure and focus manually if needed.
- Use the timer function or a remote shutter release to prevent camera shake when capturing the photo.
- Experiment with different exposure settings and zoom levels to capture the moon’s beauty in various ways.
- Take multiple shots to increase your chances of capturing the perfect image.
Sharing Your Moon Photos
Once you have captured an amazing moon photo using your iPhone camera and binoculars, there are several ways to share it:
You can post your photo on social media platforms like Instagram, Facebook, or Twitter, using relevant hashtags such as #MoonPhotography #iPhoneAstroPhotography.
Another option is to join online photography communities or forums dedicated to astrophotography. Share your photo with fellow enthusiasts and receive feedback and tips for further improvement.
You can also submit your photo to astronomy-related websites or magazines that feature user-submitted content. This can provide exposure for your work and inspire others with your stunning moon photos.
Capturing the Moon’s Beauty
When capturing moon photos with your iPhone camera and binoculars, keep in mind that practice and experimentation are key to achieving great results. Don’t be discouraged if your initial attempts don’t turn out as expected. Keep practicing and refining your technique, and soon you’ll be capturing stunning moon photos that you’ll be proud to share.
| Advantages | Disadvantages |
|---|---|
| Accessible and affordable equipment | Limited zoom capabilities compared to a dedicated telescope |
| Portable and easy to set up | Possible image quality limitations due to binoculars |
| No need for complex astrophotography setups | Dependence on weather conditions for clear views |
FAQ
What are the best binoculars for taking photos of the moon with an iPhone camera?
There are several options available, but some of the best binoculars for taking photos of the moon with an iPhone camera are the Celestron SkyMaster Giant 15×70 Binoculars, the Nikon 7296 Monarch ATB 10×42 Binoculars, and the Canon 10×42 L Image Stabilization Waterproof Binoculars.
How do I attach my iPhone camera to the binoculars?
You can attach your iPhone camera to the binoculars using a smartphone adapter. There are various smartphone adapters available on the market that are specifically designed to connect your iPhone camera to binoculars. These adapters usually have adjustable brackets to secure your iPhone in place and allow you to align the camera lens with the binocular eyepiece.
What camera settings should I use when photographing the moon with binoculars?
When photographing the moon with binoculars, it is recommended to use manual mode on your iPhone camera. Set the ISO to a low value (around 100-200) to reduce noise, use a fast shutter speed (around 1/1000th of a second) to capture the details of the moon’s surface, and adjust the focus manually until the moon appears sharp and clear in the viewfinder.
Are there any apps that can help me capture better photos of the moon with binoculars and my iPhone camera?
Yes, there are several apps available that can help you capture better photos of the moon with binoculars and your iPhone camera. Some popular apps include NightCap Camera, Camera+ 2, and ProCamera. These apps offer features such as manual control over exposure settings, image stabilization, and burst mode for capturing multiple photos in quick succession.


