
Photography has become more accessible than ever before with the rise of digital cameras. Not only can everyone now own a camera, but they can also capture high-quality images without the need for expensive equipment or extensive technical knowledge. With the right techniques and a little practice, you can take professional-looking pictures that tell a story and captivate your audience.
First and foremost, it is essential to understand your camera’s features and settings. Take the time to read the manual and familiarize yourself with the various buttons and options available. Knowing how to adjust the exposure, focus, shutter speed, and ISO will give you more control over the outcome of your photos.
Composition plays a crucial role in taking professional-looking pictures. Pay attention to the rule of thirds, leading lines, and symmetry. Break the habit of always centering the subject in the frame and experiment with different angles and perspectives. Remember, the goal is to create visually compelling images that draw the viewer’s eye in and keep them engaged.
Lighting is another key aspect of photography. Natural light can significantly enhance your photos, so try to shoot during the golden hours of sunrise and sunset. If shooting indoors or in low-light situations, consider investing in a good quality external flash or learn how to use the available lighting to your advantage. Play with shadows and highlights to add depth and dimension to your pictures.
Lastly, post-processing can elevate your images to a whole new level. With editing software like Adobe Lightroom or Photoshop, you can enhance colors, sharpen details, and remove unwanted distractions. However, it’s essential to exercise restraint and maintain a natural look. Over-editing can make your photos appear fake and detract from their professional quality.

By understanding your camera, mastering composition, harnessing lighting, and applying minimal post-processing, you can take professional-looking pictures that showcase your artistic vision and resonate with your audience. Remember, practice makes perfect, so don’t be afraid to experiment and keep pushing the boundaries of your creativity.
Understanding digital cameras for professional photography
When it comes to capturing professional-looking pictures, understanding how a digital camera works is essential. Digital cameras have revolutionized the photography industry, providing photographers with tools and features that were unimaginable with traditional film cameras.
To produce high-quality photographs with a digital camera, it is important to have a good understanding of the camera’s components and settings. Here are a few key aspects to consider:
1. Sensor size
The sensor is one of the most critical components of a digital camera. It captures the light that enters the camera and converts it into an image. The size of the sensor affects the amount of light the camera can gather and the level of detail it can capture. Larger sensors generally result in higher image quality.
2. Megapixels
Megapixels refer to the number of pixels a camera sensor can capture. While higher megapixels may seem like a desirable feature, it does not always guarantee better image quality. The lens quality, sensor size, and other factors also play a significant role in determining the overall image quality.
Keep in mind that higher megapixels can result in larger file sizes, so it is important to consider your storage capabilities when choosing a camera with a specific megapixel count.
3. Manual mode
Professional photographers often prefer to have full control over their camera settings. Therefore, it is essential to choose a camera with a manual mode that allows you to adjust various settings such as aperture, shutter speed, and ISO levels. This level of control ensures that you can achieve the desired exposure and creative effects.
In conclusion, understanding the various aspects of a digital camera is crucial for capturing professional-looking photographs. By considering factors such as sensor size, megapixels, and manual mode capabilities, you can make informed decisions when choosing a camera that suits your photography needs.
Choosing the right digital camera for professional results
When it comes to capturing professional-looking pictures, choosing the right digital camera is crucial. With so many options available on the market, it’s important to consider a few key factors before making your decision.

1. Sensor size
The sensor is one of the most important components of a digital camera. A larger sensor will allow more light to be captured, resulting in better image quality, especially in low light conditions. Professionals often prefer cameras with full-frame sensors, as they offer superior image quality.
2. Megapixel count
While the number of megapixels are not the sole determinant of image quality, a higher megapixel count can provide more detail in your photos. It’s recommended to choose a camera with a minimum of 12 megapixels, especially if you plan on printing your images in large formats.
3. Lens options
The quality and versatility of the lenses you can use with your camera are essential. Professionals often prefer cameras with interchangeable lens systems, as they allow them to use specialized lenses for different types of photography. Consider the availability and variety of lenses before making your purchase.
Important Note: Depending on your needs and budget, you may also want to consider additional factors such as camera size and weight, ISO range, autofocus speed, and image stabilization capabilities.
By carefully considering these factors, you’ll be able to choose the right digital camera that meets your needs and helps you achieve professional-looking results.

Mastering the manual settings of your digital camera
One of the best ways to take professional-looking pictures with your digital camera is to master the manual settings. While many photographers rely on automatic modes, taking control of the settings allows you to have more creative freedom and achieve better results.
Understanding the Exposure Triangle
The exposure triangle consists of three key settings: aperture, shutter speed, and ISO. These settings work together to control the amount of light that enters the camera and ultimately affect the brightness, sharpness, and depth of field of your photos.
| Setting | Description |
|---|---|
| Aperture | Controls the size of the camera’s aperture, which determines the amount of light that enters the lens. A smaller aperture (higher f-number) results in a larger depth of field, while a larger aperture (lower f-number) creates a shallower depth of field. |
| Shutter Speed | Determines the duration of time that the camera’s shutter remains open. A faster shutter speed freezes motion, while a slower shutter speed allows for motion blur. |
| ISO | Specifies the sensitivity of the camera’s image sensor to light. A lower ISO value is less sensitive and suitable for bright conditions, while a higher ISO value is more sensitive and ideal for low-light situations. |
Experimenting with Different Settings
Once you understand the basics of the exposure triangle, it’s time to experiment with different settings and see how they affect your photos. Try adjusting the aperture to achieve a desired depth of field, experiment with different shutter speeds to capture motion, and change the ISO to achieve the right exposure in different lighting conditions.
Don’t be afraid to take multiple shots with different settings and compare the results. By doing so, you’ll gain a better understanding of how each setting affects the final image, and you can refine your skills accordingly.
Remember, mastering the manual settings takes time and practice. The more you use them, the more comfortable you’ll become with adjusting them on the fly and capturing the perfect shot in any situation.

Setting up your shot for professional looking pictures
When it comes to taking professional-looking pictures with a digital camera, setting up your shot is crucial. By paying attention to a few key elements, you can ensure that your photos have a polished and high-quality look. Here are some tips to help you set up your shot effectively:
1. Consider the composition
Composition plays a vital role in the overall aesthetic appeal of your photos. Take the time to carefully frame your shot and consider the placement of your subject within the frame. Use the rule of thirds to create a balanced and visually pleasing composition. Experiment with different angles and perspectives to add interest and depth to your images.
2. Pay attention to lighting
Lighting has a significant impact on the mood and tone of your photos. Natural light is often the most flattering, so try to shoot in well-lit areas or during the golden hours of the day (early morning or late afternoon). If shooting indoors, experiment with different lighting setups, such as using a softbox or reflector to control the intensity and direction of the light.
Pro tip: Avoid harsh shadows or overexposed areas by diffusing the light source or adjusting your camera’s exposure settings.
3. Use a tripod (optional)

While not always necessary, using a tripod can be beneficial when aiming for professional-looking photos. It eliminates camera shake and allows you to capture sharp, clear images, especially in low-light situations or when shooting long exposures. A tripod also enables you to take more time composing your shot and adjusting settings without the fear of introducing blur into the image.
Pro tip: If you don’t have a tripod, you can stabilize your camera by leaning against a steady surface or using a makeshift stabilizer, such as a beanbag or a stack of books.
By following these tips, you can set up your shot in a way that enhances the overall quality and professionalism of your photos. Remember to experiment and have fun with different techniques to develop your own unique style.
Finding the perfect lighting for professional photography
When it comes to taking professional looking pictures with a digital camera, finding the perfect lighting is essential. The right lighting can make all the difference in creating a stunning photograph. Here are some tips to help you achieve that professional look:
1. Natural Lighting
Natural lighting is always a great choice for professional photography. Look for soft, diffused light that is not too harsh or direct. The best time to shoot outdoors is during the golden hour, which occurs shortly after sunrise or before sunset. This is when the light is warm and soft, creating a beautiful glow.

2. Artificial Lighting
If you’re shooting indoors or in a space with limited natural light, you’ll need to use artificial lighting. Invest in a good quality external flash or continuous lighting setup. You can also experiment with different light modifiers, such as softboxes or umbrellas, to create softer, more flattering light.
When using artificial lighting, make sure to balance it with the ambient light in the scene. This will help create a natural look and prevent harsh shadows or overexposed areas.
3. Direction of Light
The direction of light is also important in professional photography. One of the most flattering lighting setups is the side lighting, where the light source is coming from the side of the subject. This creates depth and dimension, emphasizing texture and details.
Backlighting, where the light source is behind the subject, can also create a dramatic effect. This works well for silhouettes or when you want to create a sense of atmosphere in your photo.
4. Avoid Harsh Shadows
Harsh shadows can ruin an otherwise perfect shot. To avoid them, try diffusing the light source or using reflectors to bounce light onto the subject. This will help soften the shadows and create a more flattering look.
5. Experiment and Practice
Finding the perfect lighting for professional photography requires experimentation and practice. Don’t be afraid to try different lighting setups and techniques. Take the time to study how light interacts with your subject and learn what works best for different situations.
Remember, lighting is one of the most important aspects of photography, and mastering it will greatly improve the quality of your photos. So, take your time, practice, and don’t be afraid to get creative with your lighting setups!
Composition Tips for Professional Looking Pictures
Composition plays a key role in capturing professional looking pictures with a digital camera. The way you frame and arrange the elements within your photograph can greatly enhance its overall impact. Here are some composition tips to help you take your photography to the next level:
1. Rule of Thirds
The rule of thirds is a widely used guideline in photography composition. Imagine dividing your frame into a 3×3 grid, and place the main subjects or points of interest along these lines or at the intersections. This adds balance and visual interest to your photo.
2. Leading Lines
Leading lines are lines within the photograph that guide the viewer’s eye towards the main subject. They can be actual lines such as roads or fences, or implied lines created by the arrangement of other elements. Utilize leading lines to create depth and draw attention to your subject.
3. Framing
Framing involves using elements within the scene to create a frame around your subject. This can be done by shooting through a window, using branches or doorways, or even utilizing natural surroundings like trees or rocks. Framing helps to draw attention to your subject and adds depth to your image.
4. Symmetry and Patterns
Symmetry and patterns can create visually pleasing and balanced compositions. Look for reflections, architecture, or natural formations to utilize in your photos. Symmetrical compositions can add a sense of harmony and balance, while patterns bring a repetitive and visually appealing element to your image.
5. Rule of Odds
The rule of odds suggests that an odd number of elements in a composition is more visually interesting than an even number. Try to include three or five main elements in your frame to create a sense of balance and engagement for the viewer.
By incorporating these composition tips into your photography, you can greatly improve the overall quality and professionalism of your digital camera pictures. Experiment with different techniques and practice regularly to develop your own unique style.
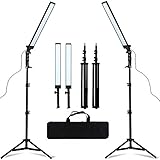
Using accessories to enhance your photography
Aside from having a good digital camera, using the right accessories can greatly enhance your photography skills. These tools can help you achieve professional-looking results and take your photos to the next level. Here are some recommended accessories that can help you elevate your photography game:
1. Tripod: A tripod is a stable platform that keeps your camera steady, reducing the risk of shaky or blurry photos. It is especially useful in low-light situations or when shooting long-exposure shots. Invest in a sturdy tripod to achieve sharp and clear images.
2. External Flash: Built-in camera flashes often produce harsh and unflattering light. Investing in an external flash, such as a speedlight, can help you achieve more natural and evenly lit photographs. An external flash can also be used to bounce light off walls or ceilings, creating a softer and more flattering effect.
3. Lens Filters: Lens filters are a great way to manipulate and enhance your images. Neutral density filters can help you control the amount of light entering your camera, allowing you to achieve longer exposures or widen your aperture in bright conditions. Polarizing filters, on the other hand, can help reduce glare and enhance color saturation, especially when shooting landscapes or water scenes.
4. Remote Shutter Release: Using a remote shutter release allows you to trigger your camera without touching it, reducing the risk of camera shake. This is especially useful when shooting long-exposure shots or self-portraits.
5. Camera Bag: Investing in a good camera bag is essential for protecting your gear and keeping it organized. Look for a bag that has adjustable compartments and provides sufficient padding to safeguard your camera, lenses, and accessories from accidental bumps or falls.
6. Lens Hood: A lens hood is a simple accessory that can make a big difference in your photography. It helps minimize lens flare and protect your lens from direct sunlight or unwanted light sources, resulting in clearer and more contrasted images.
7. Memory Cards and Extra Batteries: Having enough memory cards and spare batteries is crucial, especially during long shooting sessions or when traveling. Always carry extra memory cards to ensure you don’t run out of storage space, and pack spare batteries to avoid missing out on capturing important moments.
By utilizing these accessories, you can greatly enhance your photography skills and take professional-looking pictures with your digital camera.
Editing and post-processing techniques for professional results
While capturing great photos in-camera is essential, editing and post-processing play a significant role in achieving professional-looking results with your digital camera. Here are some key techniques to consider:
1. Color correction: Adjusting the colors in your photos can greatly enhance the overall look and mood. Use editing software to correct any white balance issues and adjust the saturation and vibrancy levels to achieve the desired visual impact.
2. Exposure adjustment: Sometimes, photos may appear too bright or too dark. Using editing tools, you can adjust the exposure levels to bring out the details in both the highlights and shadows. This technique can help create a well-balanced and visually appealing image.
3. Crop and straighten: To improve composition and eliminate distractions, use cropping and straightening tools to focus on the main subject and align the image. This technique helps to create a more professional and polished look.
4. Retouching: Remove any imperfections or blemishes using retouching tools. Whether it’s removing stray hairs, dust spots, or unwanted objects, careful retouching can enhance the overall quality of the photo.
5. Sharpening: Apply selective sharpening techniques to enhance the details and crispness of the photo. However, be mindful not to oversharpen, as it can lead to an unnatural look.
6. Noise reduction: Digital noise can appear in photos taken in low-light conditions or at high ISO settings. Utilize noise reduction tools to minimize graininess and achieve a cleaner and more professional look.
7. Adding filters and effects: Experiment with various filters and effects to add creativity and uniqueness to your photos. However, use them judiciously and ensure they enhance the image rather than overpower it.
Remember, the goal of editing and post-processing is to enhance and refine your photos, not to completely transform them. Use these techniques with moderation, keeping in mind the intended style and purpose of your images. With practice and experimentation, you can achieve professional results that showcase your talent and creativity.
Developing your own unique style in professional photography
Developing a unique style is essential for professional photographers who want to stand out in a competitive industry. While technical skills and equipment are important, it’s your personal style that will set you apart from others and attract clients. Here are some tips to help you develop your own unique style in professional photography:
|
1. Find your inspiration: Look for inspiration in various sources such as art, fashion, nature, and other photographers. Study different styles and techniques to understand what resonates with you and what you want to communicate through your photography. |
|
2. Experiment with different genres: Explore different genres of photography, including landscapes, portraits, street photography, and still life. By experimenting with different genres, you can discover what subject matter and style you enjoy the most and feel most comfortable shooting. |
|
3. Develop your editing skills: Editing plays a significant role in defining your style. Experiment with different techniques and software to enhance your photos according to your vision. Adjusting colors, contrast, and saturation can greatly impact the mood and aesthetic of your images. |
|
4. Pay attention to details: Developing a keen eye for details can help you create unique and captivating images. Pay attention to composition, lighting, and small elements that can add depth and interest to your photographs. |
|
5. Be consistent: Consistency is key in developing your style. Try to maintain a consistent aesthetic or theme in your work, so that viewers can recognize your signature style. This doesn’t mean you can’t explore new styles or experiment, but having a consistent overall look will help define your unique style. |
Remember, developing your own unique style takes time and practice. It’s important to be patient and allow your style to evolve naturally over time. Keep experimenting, exploring, and refining your skills, and your unique style will shine through in your professional photography.
Question-answer:
What is the rule of thirds in photography?
The rule of thirds is a composition technique in photography that suggests dividing an image into a grid of nine equal parts by placing two equally spaced horizontal lines and two equally spaced vertical lines. The main subject of the image should then be placed along these lines or at the intersections, rather than in the center of the frame. This creates a more balanced and visually appealing composition.
Can you recommend any post-processing software for enhancing photos?
There are several post-processing software options available for enhancing photos, depending on your level of expertise and budget. Some popular choices among photographers include Adobe Photoshop, Lightroom, and Capture One. These software offer a wide range of tools and features for adjusting exposure, colors, sharpness, and other aspects of your photos. Additionally, there are also free or more affordable alternatives like GIMP and Pixlr that can be used for basic editing tasks.


