
Transferring photos from your iPhone camera roll to a hard drive is a great way to free up space on your device and keep your valuable memories safe. Whether you’re looking to back up your photos or simply want to organize them on a larger storage device, this article will guide you through the process.
Step 1: Connect your iPhone to your computer
Start by connecting your iPhone to your computer using the USB cable that came with your device. Make sure your iPhone is unlocked and trust the computer if prompted. Your computer should recognize your iPhone and open the appropriate software, such as iTunes or Photos.
Step 2: Import photos to your computer
Next, open the software that is compatible with your iPhone. In iTunes, click on the device icon and select “Photos” from the left menu. Check the box next to “Sync Photos” and choose the folder where you want to store your photos. Click “Apply” to start importing.

Step 3: Copy photos to your hard drive
Once your photos are imported to your computer, open the folder where they are stored. Connect your hard drive to your computer and locate the destination folder where you want to transfer your photos. Simply copy and paste the photos from your computer folder to the hard drive folder.
Step 4: Safely eject your devices
After the transfer is complete, make sure to safely eject your iPhone and hard drive from your computer. This will prevent any potential data loss or corrupted files. In iTunes, click on the device icon and select “Eject” next to your iPhone. Right-click on the hard drive icon and choose “Eject” to safely remove it from your computer.
By following these simple steps, you can easily transfer your iPhone camera roll to a hard drive, ensuring that your photos are safe and accessible whenever you need them. Now you can free up space on your device and continue capturing new memories with peace of mind.
Why Transfer iPhone Camera to Hard Drive
Transferring photos from your iPhone camera to a hard drive can offer several benefits:
Preserve Storage Space
As a dedicated photographer, you know how quickly your iPhone’s storage can fill up with high-resolution photos. By transferring your iPhone camera photos to a hard drive, you can free up valuable space on your device for other important files and apps.
Backup and Security
Accidents happen, and losing precious photos from your iPhone camera can be devastating. By regularly transferring your photos to a hard drive, you create a backup that protects your memories in case your iPhone gets lost, damaged, or stolen. This adds an extra layer of security and peace of mind.
Additionally, a hard drive can offer password protection, encryption, and other security features to ensure that your photos are kept safe from unauthorized access.
Long-Term Archiving
Photos captured with your iPhone camera can hold sentimental value and may serve as important memories of significant events or people. Transferring them to a hard drive ensures that they are safely stored for the long term. Hard drives provide a reliable storage medium that can keep your photos intact for years to come.

Furthermore, you can organize your photos on a hard drive in a more structured manner, making it easier to locate specific images when needed.
In conclusion, transferring your iPhone camera photos to a hard drive is a practical and secure solution to preserve storage space, backup your photos, and ensure long-term archiving. By taking these steps, you can protect your valuable memories and have peace of mind knowing they are safely stored.
Benefits of Transferring iPhone Camera to Hard Drive
Transferring the photos and videos captured on your iPhone camera to a hard drive has several benefits:
- Backup: By transferring your iPhone camera content to a hard drive, you create a reliable backup for your precious memories. In case your iPhone gets lost, stolen, or damaged, you still have all your photos and videos safely stored on a separate device.
- Storage Space: iPhones often have limited storage capacity, especially if you have an older model with lower storage options. Transferring your iPhone camera content to a hard drive frees up valuable space on your device, allowing you to capture more moments without worrying about running out of storage.
- Organizational Efficiency: Storing your iPhone camera content on a hard drive enables you to organize your photos and videos more efficiently. You can create folders, categorize them by date, location, event, or any other custom criteria you prefer. This makes it easier and faster to find specific photos or videos when you need them.
- Improved Performance: Transferring iPhone camera content to a hard drive can also help improve the overall performance of your iPhone. When you have a lot of photos and videos stored on your device, it can slow down its performance, especially when accessing the camera app or loading media files. By offloading the content to a hard drive, you can experience faster and smoother operation.
- Sharing and Collaboration: Having your iPhone camera content on a hard drive makes it easier to share and collaborate with others. You can easily transfer the files to other devices or share them with friends, family, or colleagues. This way, everyone can access and enjoy the captured memories without having to rely on your iPhone.
Transferring your iPhone camera content to a hard drive is a simple and practical solution that ensures the safety of your photos and videos, enhances your iPhone’s performance, and gives you more storage space for new memories.
Preparing Your iPhone for File Transfer
Before transferring your iPhone camera files to a hard drive, it’s important to properly prepare your device to ensure a smooth and successful transfer process. Follow these simple steps:

1. Update your iPhone: To ensure compatibility and optimal performance, make sure your iPhone is running the latest version of iOS. You can update your device by going to Settings > General > Software Update.
2. Clean up your iPhone storage: Before transferring files, it’s a good idea to free up some space on your iPhone by deleting any unnecessary photos, videos, or apps. This will help ensure that you have enough storage to transfer your camera files.
3. Connect your iPhone to your computer: Use the Lightning cable provided with your iPhone to connect it to your computer. Make sure the cable is securely plugged into both your iPhone and the USB port on your computer.
4. Trust your computer: If this is the first time you are connecting your iPhone to the computer, you may need to unlock your iPhone and tap “Trust” when prompted on the screen. This will establish a secure connection between your iPhone and your computer.
5. Unlock your iPhone: To prevent any interruption during the file transfer process, make sure your iPhone is unlocked. Enter your passcode or use Touch ID/Face ID to unlock your device.

6. Allow access to photos: In some cases, you may need to grant your computer access to your iPhone’s photos. Look for a prompt on your iPhone asking for permission to access your photos and tap “Allow” to grant access.
7. Open the file transfer software: Depending on the type of computer you’re using, open the appropriate file transfer software such as iTunes for Windows or Finder for Mac. These software will detect your connected iPhone and allow you to access its files.
8. Navigate to your iPhone’s camera files: Once you have opened the file transfer software, navigate to the folder or section where your iPhone camera files are stored. This may be named “DCIM” or “Camera Roll”.
9. Select and transfer your camera files: Select the camera files you want to transfer to your hard drive and choose the destination folder on your computer where you want to save them. Simply drag and drop the selected files from your iPhone to your computer.
Note: It is recommended to create a new folder on your computer for easy organization of the transferred camera files.

10. Safely disconnect your iPhone: After the file transfer is complete, safely eject your iPhone from your computer by clicking on the appropriate option in the file transfer software or by right-clicking on your iPhone device and selecting “Eject”. Wait for the confirmation message before physically disconnecting the Lightning cable.
By following these steps, you can ensure that your iPhone is prepared for file transfer and that the process goes smoothly. Now you can enjoy the convenience of having your camera files stored on your hard drive. Happy transferring!
Choosing a Hard Drive for the Transfer
When it comes to transferring your iPhone camera files to a hard drive, choosing the right hard drive is crucial. There are several factors you should consider when selecting a hard drive for this purpose:
Storage Capacity
The storage capacity of the hard drive is an important consideration. The size of your iPhone camera files can vary depending on the quality and length of the videos or the resolution and size of the photos. It is advisable to choose a hard drive with ample storage capacity to accommodate all your files, as it is always better to have more space than to run out of it.
Speed and Transfer Rate
The speed and transfer rate of the hard drive determine how quickly you can transfer your iPhone camera files. Opt for a hard drive with a high-speed interface, such as USB 3.0 or Thunderbolt, as it will ensure faster data transfer and save you valuable time. Additionally, look for a hard drive with a higher RPM (rotations per minute) as it indicates faster read and write speeds.

Portability
Consider the portability of the hard drive if you plan to transfer your iPhone camera files on the go. A portable and lightweight hard drive will make it easier to carry and use wherever you need. Additionally, look for a hard drive with a durable casing or shockproof features to protect your files from accidental drops or impacts.
Compatibility
Ensure that the hard drive you choose is compatible with your iPhone and computer system. Some hard drives are only compatible with specific operating systems, so check the specifications before making a purchase. It is also worth considering a hard drive that supports both Windows and Mac operating systems if you use multiple devices.
By considering these factors and weighing your requirements, you can choose the perfect hard drive for transferring your iPhone camera files. Remember to backup your files regularly to ensure the safety of your precious memories!
Transferring iPhone Camera to Hard Drive using Windows
Transferring your iPhone camera photos to your Windows computer and saving them on a hard drive is a convenient and reliable way to back up your precious memories. In this guide, we will walk you through the steps to easily transfer your iPhone camera photos to a hard drive using Windows.
Step 1: Connect your iPhone to your computer
To begin the transfer process, connect your iPhone to your Windows computer using the USB cable that came with your device. Ensure that your computer is turned on and running properly.
Step 2: Unlock your iPhone and trust the computer
Unlock your iPhone using your passcode or Touch ID/Face ID. You may also need to enter your device’s passcode on your iPhone screen and choose to trust the computer if you have never connected it to your computer before.
Step 3: Open the Photos app on your Windows computer
On your Windows computer, click the “Start” button and search for the “Photos” app. Once you find it, click to open the app.
Step 4: Import photos from your iPhone to Windows
In the Photos app, click on the “Import” button located at the top right corner of the window. The Photos app will automatically detect your connected iPhone and display the available photos. You can choose whether to import all the photos or select specific ones by checking the boxes next to them. Once you have made your selection, click on the “Continue” button at the bottom right corner.
Step 5: Select the destination location on your hard drive
On the next screen, select the destination location on your hard drive where you want to save the imported iPhone camera photos. You can also create a new folder if you prefer to keep them organized. Once you have chosen the destination, click on the “Import” button to begin the transfer process.
Step 6: Wait for the transfer to complete
The Photos app will start transferring the selected photos from your iPhone to the chosen destination on your hard drive. The progress will be displayed on the screen, and you can monitor it until the transfer is complete. The time required for the transfer will depend on the number and size of the photos being transferred.
Note: It’s important not to disconnect your iPhone during the transfer process to avoid any potential data loss.
Step 7: Verify the transfer
Once the transfer is complete, navigate to the destination location on your hard drive where you saved the iPhone camera photos. Open the folder and verify that all the transferred photos are present and in proper order. Congratulations! You have successfully transferred your iPhone camera photos to your hard drive using Windows.
By following these simple steps, you can ensure that your iPhone camera photos are safely stored on your hard drive, providing you with a backup solution and freeing up space on your iPhone for more memories to capture.
Remember to regularly back up your iPhone camera photos to your hard drive to safeguard your memories!
Step-by-Step Guide to Transfer iPhone Camera to Hard Drive on Windows
Transferring your iPhone camera photos to a hard drive on Windows can help you free up space on your device, as well as provide a reliable backup for your precious memories. Follow these step-by-step instructions to easily transfer your iPhone camera photos to a hard drive.
Step 1: Connect your iPhone to your Windows computer
Start by connecting your iPhone to your Windows computer using a USB cable. Make sure your iPhone is unlocked and the screen is on.
Step 2: Trust the computer
When prompted on your iPhone screen, tap “Trust” to establish a connection with your computer. This will allow your computer to access your iPhone’s files and photos.
Step 3: Open File Explorer
On your Windows computer, open File Explorer by either clicking on the folder icon in the taskbar or by pressing the Windows key + E on your keyboard.
Step 4: Locate your iPhone
In File Explorer, you should see your iPhone listed under the “Devices and drives” section. Click on your iPhone to access its files.
Step 5: Navigate to your iPhone’s camera photos
Locate the “DCIM” folder on your iPhone. This folder contains all the photos captured by your iPhone camera. Double-click on the “DCIM” folder to open it.
Step 6: Select the photos you want to transfer
In the “DCIM” folder, you will see various folders with names such as “100APPLE” or “101APPLE”. These folders contain the actual photos taken by your iPhone camera. Open the folders to view the photos inside, and select the ones you want to transfer to your hard drive.
Step 7: Copy the selected photos
Right-click on the selected photos and choose “Copy” from the context menu. Alternatively, you can use the keyboard shortcut Ctrl + C to copy the photos.
Step 8: Navigate to your hard drive
In File Explorer, navigate to the location on your hard drive where you want to transfer the photos. It can be a specific folder or the root directory of your hard drive.
Step 9: Paste the copied photos
Right-click in the destination folder and choose “Paste” from the context menu. Alternatively, you can use the keyboard shortcut Ctrl + V to paste the photos. The selected photos will now be transferred from your iPhone to your hard drive.
| Step | Description |
|---|---|
| Step 1 | Connect your iPhone to your Windows computer |
| Step 2 | Trust the computer |
| Step 3 | Open File Explorer |
| Step 4 | Locate your iPhone |
| Step 5 | Navigate to your iPhone’s camera photos |
| Step 6 | Select the photos you want to transfer |
| Step 7 | Copy the selected photos |
| Step 8 | Navigate to your hard drive |
| Step 9 | Paste the copied photos |
Transferring iPhone Camera to Hard Drive using Mac
Transferring photos and videos from your iPhone camera to a hard drive is a great way to save storage space and keep your memories safe. If you are using a Mac, there are several ways to accomplish this task. In this article, we will guide you through the different methods.
Method 1: Using the Photos App
The easiest way to transfer your iPhone camera to a hard drive is through the Photos app. Follow these steps:
- Connect your iPhone to your Mac using a USB cable.
- Unlock your iPhone and trust the computer if prompted.
- Launch the Photos app on your Mac.
- Select your iPhone under the “Devices” section in the sidebar.
- Choose the photos and videos you want to transfer.
- Click on the “Import Selected” or “Import All New Items” button.
- Specify the location on your hard drive where you want to save the files.
- Click on the “Import” button to start the transfer.
Method 2: Using Image Capture
If you prefer a more customizable approach, you can use the Image Capture application on your Mac. Here’s how:
- Connect your iPhone to your Mac using a USB cable.
- Unlock your iPhone and trust the computer if prompted.
- Launch the Image Capture application on your Mac.
- Select your iPhone from the list of devices.
- Choose the destination folder on your hard drive.
- Select the photos and videos you want to transfer.
- Click on the “Import” button to start the transfer.
Using the Photos app or Image Capture, you can easily transfer your iPhone camera contents to a hard drive and free up space on your device. Remember to safely eject your iPhone after the transfer to avoid any data loss.
Step-by-Step Guide to Transfer iPhone Camera to Hard Drive on Mac
With the increasing amount of photos and videos we capture on our iPhones, it’s important to regularly transfer them to a hard drive to free up space and ensure they are safely backed up. If you’re using a Mac, the process is relatively simple. Follow these steps to transfer your iPhone camera roll to a hard drive:
Step 1: Connect your iPhone to your Mac
Use a USB cable to connect your iPhone to your Mac. Make sure your iPhone is unlocked and trust your Mac when prompted.
Step 2: Open the Photos App
Launch the Photos app on your Mac. It should automatically open when your iPhone is connected.
Step 3: Select the photos and videos to transfer
In the Photos app, click on your iPhone name under the “Devices” section in the left sidebar. Then, select the photos and videos from your camera roll that you want to transfer to your hard drive. You can hold down the “Command” key and click on multiple items to select them.
Step 4: Export the selected photos and videos
Next, click on “File” in the menu bar and select “Export” > “Export [number] Photos/Videos”. Choose the location on your hard drive where you want to save the exported files and click “Export [number] Photo(s)” or “Export [number] Video(s)”.
Step 5: Wait for the transfer to complete
The Photos app will start transferring the selected photos and videos to the specified location on your hard drive. The time it takes will depend on the number of files being transferred and the speed of your Mac and hard drive.
Step 6: Verify the transfer
Once the transfer is complete, navigate to the location on your hard drive where you saved the exported files. Open a few of the files to ensure they transferred correctly and can be viewed without any issues.
Step 7: Delete the transferred files from your iPhone
If you want to free up space on your iPhone, you can delete the transferred photos and videos from your camera roll. However, make sure you have verified that the transfer was successful before doing so.
Following these step-by-step instructions, you can easily transfer your iPhone camera roll to a hard drive on your Mac. Remember to regularly back up your files to keep them safe and free up space on your device.
Organizing Transferred Photos on the Hard Drive
Once you have successfully transferred the photos from your iPhone camera to your hard drive, it is important to organize them effectively for easy access and retrieval. By following some simple steps, you can create a well-structured system for your transferred photos.
Create Folders
Start by creating specific folders on your hard drive to categorize your transferred photos. Think about the different criteria you want to use for organizing your photos, such as date, event, or location. Create folders accordingly and give them clear and descriptive names. For example, you could have folders named “2019 Vacations,” “Family Gatherings,” or “Birthdays.”
Sort Photos
Once you have set up your folders, go through your transferred photos and sort them into the appropriate folders. This step can be time-consuming, but it will make it much easier to find specific photos later on. You can use the file explorer or a dedicated photo management software to assist you in this process.
Consider sorting your photos in chronological order, starting with the most recent ones. Alternatively, you can organize them based on events or locations. Choose a method that works best for you and stick to it consistently throughout your organization process.
Add Keywords and Tags
To make it even easier to locate specific photos, consider adding descriptive keywords or tags to the file names or metadata of the photos. This could include information like names of people, places, or significant events captured in the photo. Adding keywords and tags allows you to quickly search for photos using these identifiers, saving you time and effort.
Some photo management software also offers the ability to automatically recognize and tag photos based on facial recognition or scene recognition. Take advantage of these features to further enhance the organization of your transferred photos.
Regularly Back Up Your Photos
Lastly, remember to regularly back up your transferred photos to ensure their safety and prevent any potential loss. You can use external hard drives, cloud storage services, or both to have multiple copies of your valuable photos. This way, even if something happens to your primary storage, you can still access your photos.
In conclusion, organizing your transferred photos on the hard drive is crucial for easy retrieval and enjoyment of your memories. By creating folders, sorting photos, adding keywords, and regular backups, you can establish an organized system that keeps your photos secure and easily accessible.
Tips for Organizing Photos on the Hard Drive
When it comes to organizing your photos on the hard drive of your computer, having a system in place can save you a lot of time and frustration. Here are some tips to help you keep your photo collection organized:
Create Folders
Start by creating folders on your hard drive to categorize your photos. For example, you can create separate folders for different events or occasions, such as birthdays, vacations, and weddings. This will make it easier for you to locate specific photos when you need them.
Use Descriptive File Names
Instead of using generic file names such as “IMG_001”, try to use descriptive file names that give you a clear idea of what the photo is. For instance, you can name a photo from a vacation in Hawaii as “Hawaii_Beach_Sunset.jpg”. This will help you easily identify and find photos without having to open them.
Consider including dates in your file names as well, especially if you have a large collection of photos from different years. This will help you sort and organize photos chronologically.
Additionally, try to avoid using special characters or spaces in your file names as it can cause compatibility issues with different operating systems.
Use Subfolders for further Organization
If you have a large number of photos, consider creating subfolders within your main folders to further organize them. For example, within your vacation folder, you can create subfolders for each destination or year.
This will help you keep your photo collection more manageable and make it easier to navigate and find specific photos.
Remember to regularly backup your photos to an external hard drive or cloud storage to ensure their safety and prevent data loss.
FAQ
Is it possible to transfer iPhone camera photos to a hard drive?
Yes, it is possible to transfer photos taken with an iPhone camera to a hard drive. There are several methods you can use to do this.
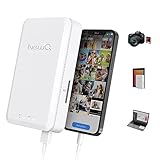
Can I transfer iPhone camera photos to a hard drive without a computer?
Yes, you can transfer iPhone camera photos to a hard drive without a computer. One option is to use a Lightning to USB adapter to connect your iPhone directly to the hard drive. Another option is to use a wireless storage device that is compatible with your iPhone.


