Are you tired of using your built-in webcam during online meetings and video calls? Or maybe the quality of your current webcam just isn’t up to par? Well, you’re in luck! With a few simple steps, you can easily transform your digital camera into a high-quality web camera.
Turning a digital camera into a web camera not only allows you to enjoy superior video and image quality, but it also opens up a world of possibilities, especially if you’re someone who uses video conferencing or live streaming regularly.
If you already have a digital camera, chances are it’s capable of producing much better image quality compared to your standard webcam. So why not make the most out of your camera and give your video calls and online meetings a professional touch?
Don’t worry, you don’t need to be a tech expert to make this happen. Here’s a simple guide to help you get started:
The benefits of using a digital camera as a web camera
Nowadays, many people are relying on digital cameras for various purposes, from capturing precious moments to creating professional-quality content. However, did you know that you can also use your digital camera as a web camera? This can bring numerous benefits, especially when it comes to video conferencing, live streaming, and online meetings.
1. High image quality
One of the major advantages of using a digital camera as a web camera is the superior image quality it offers. Unlike traditional web cameras, which often produce grainy or pixelated images, digital cameras are equipped with advanced sensors and lenses that can capture stunningly sharp and detailed visuals. As a result, you can enjoy a more professional and immersive video experience.
2. Versatility
Digital cameras generally offer a wide range of customizable features and settings that allow you to enhance the video quality according to your requirements. You can adjust the exposure, white balance, focus, and other parameters to achieve the desired look. Additionally, many digital cameras also offer manual controls, providing you with even more flexibility and creative freedom.
Furthermore, digital cameras often come with different lens options, allowing you to choose the focal length and depth of field that best suits your needs. This versatility makes digital cameras a great option for various applications, whether you need a web camera for video conferencing, content creation, or live streaming.
3. Improved audio quality
In addition to superior image quality, digital cameras also tend to have better audio capabilities compared to traditional web cameras. They often feature high-quality built-in microphones or support for external microphones, enabling you to capture crystal-clear sound during your online meetings or videos. This can make a significant difference, especially when it comes to communication and delivering presentations effectively.
Overall, using a digital camera as a web camera can significantly enhance your online video experience. With its high image quality, versatility, and improved audio capabilities, you can enjoy a more professional and immersive communication and content creation.

What you need to get started
Turning your digital camera into a web camera requires a few essential tools and components. Here’s what you’ll need:
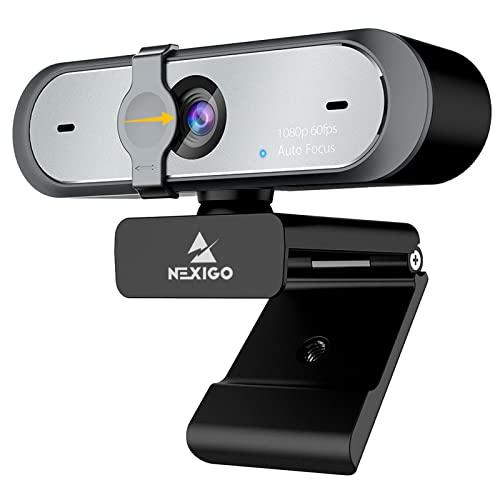
- Digital camera: Ensure that your digital camera has a USB port. This will be needed to connect it to your computer.
- USB cable: You’ll need a compatible USB cable to connect your digital camera to your computer.
- Computer: Make sure you have a computer with a USB port and a compatible operating system.
- Software driver: Check if your digital camera comes with a software driver that allows it to be used as a web camera. If not, you may need to download and install third-party software.
- Webcam software: To use your digital camera as a web camera, you’ll need webcam software that can access and utilize the camera’s features.
- Internet connection: For video calls or live streaming, a stable internet connection is necessary.
Once you have all the necessary tools and components, you’ll be ready to start using your digital camera as a web camera. Just follow the instructions provided by the webcam software and enjoy the new functionality of your digital camera!
Step 1: Connect your digital camera to your computer
To turn your digital camera into a web camera, the first step is to connect it to your computer.
Most digital cameras come with a USB cable that allows you to connect it to your computer.
Here is how you can connect your digital camera to your computer:
- Locate the USB port on your digital camera.
- Plug one end of the USB cable into the USB port on your camera.
- Plug the other end of the USB cable into an available USB port on your computer.
When the camera is successfully connected to the computer, you might see a notification on your camera’s screen or hear a sound from your computer indicating that the connection has been established.
Note: Some cameras might require you to install corresponding software or drivers on your computer. If prompted, follow the on-screen instructions to complete the installation process.
Once your camera is connected, you are ready to move on to the next step of the process.
Step 2: Install the necessary drivers
Before you can start using your digital camera as a web camera, you will need to install the necessary drivers. These drivers allow your computer to recognize and communicate with your camera as a webcam.
Here are the steps to install the drivers:

1. Check your camera’s manufacturer website
Visit the website of the manufacturer of your digital camera and navigate to the support or downloads section. Look for the drivers specifically designed for your camera model. Most manufacturers provide drivers for their cameras on their websites.
2. Download and install the drivers
Once you have located the drivers for your camera, click on the download button or link to start downloading the installation file. Save the file to a location you can easily access, such as your desktop.
After the download is complete, locate the installation file and double-click on it to start the installation process. Follow the on-screen instructions to install the drivers. Make sure to read any prompts or agreements carefully before proceeding with the installation.
3. Restart your computer
After the drivers have been successfully installed, it is a good idea to restart your computer. This will ensure that the changes take effect and your computer can properly recognize the camera as a webcam.
Once your computer has restarted, you can proceed to the next step in configuring your digital camera as a web camera.
Step 3: Set up the camera as a web camera
Once you have connected your digital camera to your computer, you will need to configure it to be recognized as a web camera. Here’s how you can set up your camera:
1. Install the camera software (if required)
Some digital cameras come with their own software that you need to install on your computer. This software will provide the necessary drivers and tools to use your camera as a web camera. Insert the camera’s installation CD or download the software from the manufacturer’s website, and follow the on-screen instructions to install it.
2. Check your camera’s settings
Open the camera’s software or settings menu and look for an option to enable the camera as a web camera. The location of this option may vary depending on your camera model and software. Once you find the option, make sure it is enabled.
3. Connect the camera to your video conferencing application
Open your preferred video conferencing or streaming application, such as Zoom or Skype. Go to the settings or preferences menu and look for an option to select your camera source. Choose your digital camera from the available options. You may need to restart the application for the changes to take effect.
Once you have completed these steps, your digital camera should be recognized as a web camera by your computer and video conferencing applications. You can now use it for video calls, live streaming, or any other purpose that requires a web camera.

Step 4: Adjust the settings
Once you have connected your digital camera to your computer and installed the necessary software, it’s time to adjust the camera settings to use it as a web camera.
First, open the software that came with your camera or download a third-party webcam software that is compatible with your camera model. This software will allow you to access and control the camera settings.
Next, locate the “Settings” or “Preferences” section in the software. In this section, you will find options to adjust the image resolution, frame rate, exposure, white balance, and other camera settings.
Adjust the image resolution and frame rate according to your needs. Higher resolutions and frame rates will result in better image quality but may require more bandwidth and processing power. Experiment with different settings to find the ideal balance between image quality and performance.
You may also want to adjust the exposure and white balance settings to ensure the image looks natural and well-lit. Many software programs offer automatic options that can adjust these settings for you, but you can also manually adjust them if desired.

Once you have made the necessary adjustments, save the settings and exit the software. Your digital camera is now ready to be used as a web camera with the new settings applied.
Step 5: Test the camera
Before you start using your digital camera as a webcam, it is important to test if it is working correctly. Follow these steps to ensure a successful connection:
1. Check for compatibility:
Make sure that your digital camera is compatible with being used as a webcam. Refer to the camera’s user manual or the manufacturer’s website for information on compatibility.
2. Connect your camera:
Using the USB cable that came with your camera, connect it to your computer. Depending on the camera model, you may need to enter “Webcam” mode or USB mode on the camera.
3. Switch on the camera:
Turn on your digital camera and wait for it to initialize. The camera’s display screen should turn on and show the live feed from the camera.
4. Configure camera settings:
If necessary, access the camera’s settings menu and make sure that the camera is set to function as a webcam. Adjust any necessary settings such as resolution, frame rate, and autofocus.
5. Launch the webcam software:
To use your camera as a webcam, you will need webcam software installed on your computer. Launch the webcam software and select your digital camera as the video input source.
6. Test the camera:
Once the camera is connected and the software is running, check the live feed on the webcam software to verify that the camera is working properly. Test the video quality and make adjustments as needed.
Note: Some digital cameras may require additional drivers or software to be installed on your computer before they can be used as webcams. Refer to the camera’s user manual or the manufacturer’s website for instructions.
Question-answer:
Can I use my digital camera as a web camera?
Yes, you can use your digital camera as a web camera with certain software and setups.
What software do I need to turn my digital camera into a web camera?
To turn your digital camera into a web camera, you will need software that can capture and stream video from your camera. Some popular options include CameraFi, SparkoCam, and OBS (Open Broadcaster Software).
Are there any specific requirements for turning a digital camera into a web camera?
Yes, there are a few requirements to turn your digital camera into a web camera. Firstly, your camera needs to have a video-out feature or be capable of functioning as a webcam. Additionally, you will need a USB or HDMI connection to connect your camera to your computer. Lastly, you will need the necessary software to stream the video from your camera.
Can I use any digital camera as a web camera?
No, not all digital cameras can be used as web cameras. Some cameras do not have the necessary features or connections to function as a webcam. It is important to check your camera’s specifications or consult the manufacturer to see if it can be used as a web camera.


