Reolink security cameras are known for their high-quality images and reliable performance. These cameras offer advanced features and settings that allow users to customize their surveillance system to meet their specific needs. One of the important settings is to turn on the camera image, which allows users to see the live view of their camera on their smartphone, tablet, or computer.
To turn on the camera image on a Reolink security camera, you will need to follow a few simple steps. First, make sure that your camera is properly connected to your network. You can do this by connecting the camera to your router using an Ethernet cable or by connecting it wirelessly using the camera’s built-in Wi-Fi functionality.
Once your camera is connected to the network, you will need to access the camera’s settings through the Reolink app or through the camera’s web interface. In the camera settings, look for the option to enable the live view or camera image. This option may be located under the “Display” or “Video” section of the settings menu.
After enabling the camera image, you should be able to see the live view of your Reolink security camera on your smartphone, tablet, or computer. You can also customize the display settings, such as adjusting the brightness, contrast, or resolution, to ensure the best image quality.
In conclusion, turning on the camera image on a Reolink security camera is a simple process that can be done through the camera’s settings. By enabling the camera image, you can enjoy the live view of your camera and customize the display settings to suit your preferences.

What is a reolink security camera?
A reolink security camera is a type of surveillance camera that is designed to provide reliable and high-quality video monitoring for home or business environments. It is a security device that captures and records video footage, allowing users to monitor their property remotely. Reolink security cameras are known for their advanced features, ease of use, and affordability.
Reolink security cameras are typically equipped with high-resolution image sensors, which allow for clear and detailed video recordings. They often come with a built-in storage system, such as an SD card or a hard drive, where the recorded footage can be stored. Some models also support cloud storage, enabling users to access their video recordings from anywhere with an internet connection.
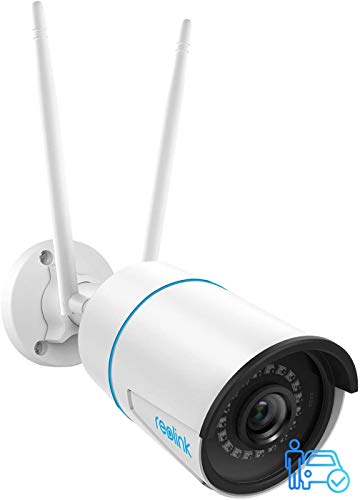
These cameras are designed to be weatherproof and durable, making them suitable for both indoor and outdoor use. They often feature night vision capabilities, allowing for surveillance even in low-light conditions. Reolink security cameras can be easily integrated into existing home or business security systems, offering a comprehensive security solution.
| Key Features of Reolink Security Cameras: |
| High-resolution video capture |
| Weatherproof and durable design |
| Night vision capabilities |
| Remote access via smartphone or computer |
| Built-in storage or cloud storage option |
| Easy integration with existing security systems |
| Motion detection and alert notifications |
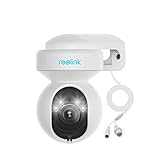
| Wide-angle view |
Overall, a reolink security camera is a reliable and effective tool for enhancing security and surveillance. With its advanced features and easy installation, it provides peace of mind for homeowners and businesses alike.
Why should you use a Reolink security camera?
Enhanced security:
Investing in a Reolink security camera can significantly enhance the security of your property. With its advanced features and high-resolution image quality, you can monitor your home or business premises with ease. The camera provides clear and detailed images, making it easier to identify any potential threats.
24/7 surveillance:
A Reolink security camera offers 24/7 surveillance, ensuring you have continuous monitoring and protection. Whether you want to keep an eye on your property during the day or night, the camera’s infrared night vision feature allows you to capture clear images in low-light conditions.
Remote access:
One of the great advantages of using a Reolink security camera is the ability to access the live feed remotely. With the Reolink app or web browser, you can view the camera’s feed from anywhere at any time. This feature is especially useful for homeowners or business owners who travel frequently or want to keep an eye on their property while away.

Easy installation and setup:
Installing a Reolink security camera is a hassle-free process. The cameras are designed for DIY installation, and you don’t need any professional assistance to set them up. With clear instructions and user-friendly interfaces, you can have your security system up and running in no time.
Durable and weatherproof:
Reolink security cameras are built to withstand various weather conditions, thanks to their durable and weatherproof design. Whether it’s rain or shine, the cameras will continue to operate efficiently, ensuring continuous surveillance and protection.
Overall, a Reolink security camera provides unparalleled security, convenience, and peace of mind. With its advanced features and user-friendly interface, it is an excellent investment for anyone looking to enhance their property’s security.

Step 1: Setting up your reolink security camera
Before you can turn on the camera image on your Reolink security camera, you need to set it up properly. Follow these steps to get started:
1. Choose the installation location
First, decide on the ideal location to install your Reolink security camera. Consider factors such as the camera’s field of view, any potential obstructions, and the area you want to monitor.
2. Mount the camera
Once you have chosen the installation location, use the provided brackets and screws to securely mount the camera. Ensure that it is positioned at the desired angle for optimal coverage.
3. Connect the camera
Next, connect the camera to a power source using the provided power adapter. Make sure the camera is receiving power before proceeding.
4. Set up Wi-Fi connection
If your Reolink security camera supports Wi-Fi, you can connect it to your local network for remote access. Refer to the camera’s manual for specific instructions on how to connect it to Wi-Fi.

5. Configure camera settings
Once your camera is powered and connected, you may need to configure its settings. This may include adjusting the camera’s resolution, motion detection settings, and notification preferences. Consult the camera’s manual for guidance on accessing and modifying these settings.
6. Test the camera
Finally, test the camera by accessing its live feed. Use the Reolink app or software to view the camera’s image on your smartphone, tablet, or computer. Make sure the camera is capturing the intended area and adjust its position if necessary.
By following these steps, you can effectively set up your Reolink security camera and prepare it for capturing and displaying the camera image.
Locate a suitable position for your camera
Before you can turn on the camera image on your Reolink security camera, you need to find a suitable position for the camera. Choosing the right location is crucial for optimizing the camera’s performance and ensuring maximum coverage of your desired area.
Here are some considerations to keep in mind when positioning your camera:
- Identify the area you want to monitor: Determine the specific area or areas that you want your camera to cover. This could be the front door, back yard, or any other area of interest.
- Ensure proper field of view: Make sure the camera is positioned in a way that provides a clear view of the desired area. Avoid obstructions such as trees, walls, or furniture that can block the camera’s line of sight.
- Consider lighting conditions: Take into account the lighting conditions in the area where you want to place the camera. If the area is dimly lit at night, consider a camera with built-in night vision capabilities or install additional lighting sources.
- Protect the camera from the elements: If you’re placing the camera outdoors, choose a location that protects it from harsh weather conditions such as rain, snow, or direct sunlight. Look for a spot that offers some natural cover or consider installing a protective housing.
- Ensure accessibility for maintenance: Make sure the camera is easily accessible for maintenance and adjustments. Avoid placing it too high or in hard-to-reach locations, as this can make it challenging to perform routine tasks such as cleaning or repositioning.
By considering these factors and finding a suitable position for your Reolink security camera, you can ensure optimal performance and get the most out of your camera’s image capabilities.
Connect your camera to power
To turn on your Reolink security camera and start viewing the camera image, you need to connect it to a power source. Follow these steps to ensure a successful connection:
- Locate the power adapter: The package includes a power adapter that comes with your Reolink camera. Find it and make sure it is in good condition.
- Plug in the power adapter: Connect the power adapter to an available power outlet in the vicinity of the camera. Make sure the outlet is functioning properly.
- Connect the power cable: Connect one end of the power cable to the power adapter and the other end to the power input port on the camera. Ensure the connection is secure.
- Power on the camera: Once the power cable is connected, the camera will start receiving power. You can check the power indicator on the camera to see if it is powered on.
Note: It is important to connect your Reolink camera to a stable power source to ensure continuous operation and uninterrupted surveillance. Avoid using extension cords or power strips, as they may cause power fluctuations or interference.
Connect your camera to your network
To turn on the camera image on your Reolink security camera, you first need to connect the camera to your network. Here are the steps to follow:
- Check the camera’s power source and make sure it’s connected properly.
- Connect the camera to your router using an Ethernet cable. One end of the cable should be plugged into the LAN port on the back of the camera, and the other end should be plugged into an available LAN port on your router.
- Make sure your router is connected to the internet and functioning properly.
- Power on the camera by plugging it into a power outlet.
- Wait for the camera to boot up. This may take a few minutes.
- Once the camera has booted up, you can access the camera image on your Reolink app or by typing the camera’s IP address into a web browser.
By following these steps, you will be able to connect your Reolink security camera to your network and start viewing the camera image on your preferred device.

Step 2: Accessing the Camera Image
Once you have successfully connected your Reolink security camera to your network, you can easily access the camera image.
To access the camera image, follow these steps:
1. Launch the Reolink App
Open the Reolink app on your smartphone or tablet. If you don’t have the app installed yet, you can download it from the App Store (for iOS devices) or the Google Play Store (for Android devices).
2. Log in to Your Account
After launching the app, log in to your Reolink account using the credentials you used during the initial setup. If you haven’t created an account yet, you can easily create one by following the on-screen instructions.
3. Select Your Camera
Once you are logged in, the app will display a list of all the cameras connected to your account. Select the camera you want to view the image from by tapping on it.
4. View the Camera Image
The app will open the live stream from the selected camera, allowing you to view the camera image in real-time. You can use the app’s features to control the camera, such as panning, tilting, zooming, or taking snapshots.
Note: Make sure your smartphone or tablet is connected to the same network as the Reolink security camera for seamless access to the camera image.
By following these simple steps, you can easily access the camera image on your Reolink security camera using the Reolink app on your smartphone or tablet.
Download and install the Reolink app
To view the camera image on your Reolink security camera, you will need to download and install the Reolink app on your smartphone or tablet. The Reolink app is available for both Android and iOS devices and can be found in the respective app stores (Google Play Store for Android, App Store for iOS).
Here are the steps to download and install the Reolink app:
- Open the app store on your smartphone or tablet.
- Search for “Reolink” in the search bar.
- Locate the Reolink app in the search results and tap on it.
- Tap on the “Install” button to begin the download and installation process.
- Wait for the app to download and install on your device.
- Once the installation is complete, tap on the “Open” button to launch the Reolink app.
After installing the app, you will need to follow the in-app setup process to connect your Reolink security camera to the app. This process may vary depending on the specific camera model and your network setup. Please refer to the user manual or the Reolink website for detailed instructions on how to complete the setup process.
Once the setup is complete, you will be able to view the camera image on your Reolink security camera through the Reolink app on your smartphone or tablet. The app provides various features and settings to customize your viewing experience and manage your camera.
Launch the app and log in to your account
To turn on the camera image on your Reolink security camera, you’ll need to start by launching the Reolink app on your mobile device. If you haven’t downloaded the app yet, you can find it in the App Store for iOS devices or the Google Play Store for Android devices.
Once you have the app installed, open it and log in to your account using your registered email address and password. If you haven’t created an account yet, you’ll need to sign up for one before proceeding.
After logging in, you’ll be taken to the app’s home screen, where you’ll see a list of all the devices connected to your account. Locate your Reolink security camera from the list and tap on it to view the live feed.
If you have multiple cameras, you may need to swipe or scroll through the app to find the specific camera you want to turn on the image for.
Once you’ve selected the camera, the app will load the live feed, and you should now be able to see the camera’s image on your mobile device’s screen. You can tap on the screen to access additional features or settings, depending on the capabilities of your Reolink camera.
If you’re experiencing any issues with the camera image or are unable to log in to your account, make sure that you have a stable internet connection and that your camera is properly set up and powered on. You may also want to check for any available firmware updates for your Reolink camera through the app to ensure you have the latest software version.
Select your camera from the app interface
Once you have installed the Reolink app on your mobile device and logged in, you will need to select your camera from the app interface. The app will display a list of available cameras that are connected to your local network. You can easily identify your camera by its name, which is usually set during the initial setup process.
To select your camera, simply tap on its name in the app interface. This will open the live view of your camera, allowing you to see the current camera image in real-time. You can then proceed to adjust the camera settings, view recorded videos, and perform various other actions from the app interface.
If you have multiple cameras connected to your network, you can easily switch between them by selecting the desired camera from the list. This allows you to monitor different areas of your property or keep an eye on multiple locations using a single app.
By selecting your camera from the app interface, you gain full access to its features and functionalities. Whether you want to monitor your home, office, or any other location, the app provides a user-friendly interface that allows you to control and view your security camera effortlessly.
Step 3: Turning on the camera image
To turn on the camera image on your Reolink security camera, follow these steps:
1. Connect the camera to power
Ensure that the camera is properly connected to a power source. This can be done by plugging in the camera’s power adapter to an electrical outlet.
2. Connect the camera to your NVR or router
If you are using an NVR (Network Video Recorder), connect the camera to the NVR using an Ethernet cable. Alternatively, if you are not using an NVR, connect the camera directly to your router using an Ethernet cable.
3. Access the camera’s settings
Open your web browser and enter the camera’s IP address in the address bar. Press Enter to access the camera’s login page.
4. Log in to the camera
Enter the username and password for your Reolink camera and click on the “Log in” button to proceed.
5. Enable the camera image
Once you have successfully logged in, navigate to the camera settings and look for the option to enable the camera image. This can usually be found under the “Live View” or “Camera settings” section.
Click on the option to enable the camera image and save the changes.
After following these steps, the camera image on your Reolink security camera should be turned on and accessible through your web browser or the Reolink mobile app.
Adjust camera settings for live view
When using a Reolink security camera and accessing the live view, you may need to adjust the camera settings to ensure optimal image quality. Here are the steps to adjust the settings:
Step 1: Log in to the camera’s web interface
To access the camera settings, you need to log in to the camera’s web interface. Open a web browser and enter the camera’s IP address in the address bar. Then, enter your login credentials to log in. If you haven’t changed the default username and password, you can find them in the camera’s user manual.
Step 2: Navigate to the camera settings
Once you are logged in, navigate to the camera settings page. Look for a tab or menu option that says “Settings” or “Configuration”. The exact location may vary depending on the camera model.
Step 3: Adjust image settings
In the camera settings, you will find various options to adjust the image settings. Look for options such as brightness, contrast, saturation, and sharpness. These settings allow you to fine-tune the image quality to your preference. Experiment with different values to find the optimal settings for your environment.
Note: It’s important to keep in mind that adjusting the image settings may impact the overall quality of the live view. Make sure to find the right balance to achieve clear and detailed images without sacrificing other important factors like low-light performance or motion detection.
Step 4: Save and apply the settings
Once you are satisfied with the adjustments, save and apply the settings. Look for a “Save” or “Apply” button in the camera settings interface. Click on it to save the changes and apply them to the live view.
By adjusting the camera settings for live view, you can enhance the image quality and ensure that you capture clear and detailed footage with your Reolink security camera.


