
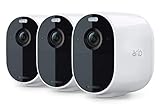
If you’re looking to turn off your Arlo security cameras, you’ve come to the right place. Arlo cameras are known for their advanced features and high-quality video surveillance capabilities. Whether you’re going away on vacation or simply need a break from constant monitoring, it’s important to know how to properly turn off your Arlo cameras.
Step 1: Access the Arlo app
To begin, you’ll need to access the Arlo app on your smartphone or tablet. Open the app and navigate to the Devices tab. This will display a list of all the Arlo cameras that are connected to your account.
Step 2: Select the camera
Next, select the camera that you want to turn off. This will bring up the live feed from that camera, along with various settings and options.

Step 3: Disable the camera
Within the camera settings, you’ll find an option to disable or turn off the camera. This may be located under a tab labeled “Mode” or “Settings.” Simply toggle the switch to the off position to disable the camera.
It’s important to note that disabling your Arlo security camera will stop it from recording and sending notifications to your device. However, the camera will still be powered on and connected to your Arlo system. If you want to completely power off your Arlo camera, you may need to unplug it from its power source.
Step 4: Repeat for additional cameras
If you have multiple Arlo security cameras, you’ll need to repeat the process for each camera that you want to turn off. Access the Arlo app, select the camera, and disable it using the steps outlined above.

Turning off your Arlo security cameras can provide you with a sense of privacy and peace of mind. Whether you’re stepping out of your home or just need a break, following these simple steps will ensure that your Arlo cameras are turned off in a proper manner.
Turning off Arlo security cameras: An essential guide
Arlo security cameras provide a reliable and efficient way to monitor your home or office. However, there are times when you might need to turn these cameras off temporarily. Whether you’re going on vacation or simply want some privacy, understanding how to switch off your Arlo security cameras is crucial.
Here is a step-by-step guide to help you turn off your Arlo security cameras:
- Open the Arlo app on your mobile device or access the Arlo website on your computer.
- Sign in to your Arlo account using your username and password.
- Once you’re logged in, navigate to the Devices section.
- Select the specific Arlo security camera that you want to turn off.
- Tap on the “Settings” button, usually represented by a gear icon.
- In the camera settings, look for the option to enable or disable the camera.
- Toggle the switch to the “Off” position to disable the camera.
- Confirm your selection when prompted.
Congratulations! You have successfully turned off your Arlo security camera. It’s important to note that disabling the camera will only stop it from recording and streaming live footage. The camera will still remain connected to your Arlo system and can be turned back on whenever needed.
Keep in mind that the steps to turn off an Arlo security camera may vary slightly depending on the model and firmware version you have. Always refer to the Arlo user manual or the official Arlo website for specific instructions related to your device.
By following this guide, you can ensure that your Arlo security cameras are turned off whenever you need them to be. Whether it’s for privacy reasons or conserving battery life, having control over your cameras’ activity is essential.
Ensuring your privacy and saving battery life
When it comes to Arlo security cameras, ensuring your privacy and saving on battery life are two important considerations. Here are some tips to help you achieve both:
1. Disable audio recording: If you are concerned about your privacy, you can disable audio recording on your Arlo cameras. This ensures that no audio is recorded while still allowing you to capture high-quality video footage.
2. Adjust motion detection settings: By adjusting the motion detection sensitivity of your Arlo cameras, you can reduce the number of recordings triggered by false alarms. This not only saves on battery life but also reduces the amount of footage you need to review.
3. Optimize camera placement: Proper camera placement is essential to ensure both privacy and battery life. Avoid pointing your cameras towards areas that may capture sensitive information or cause unnecessary recordings. Additionally, make sure your cameras are not exposed to direct sunlight, as this can drain the battery faster.

4. Set up custom activity zones: Arlo cameras allow you to create custom activity zones, which specify the areas you want your cameras to monitor. By setting up custom activity zones, you can focus the camera’s attention on specific areas, reducing unnecessary recordings and conserving battery life.
5. Monitor battery levels: Regularly check the battery levels of your Arlo cameras to ensure they are not running low. Arlo cameras provide battery level indicators in their respective apps or web interface, allowing you to plan for battery replacements or recharging as needed.
6. Schedule camera downtime: If there are specific times when you know you won’t need your Arlo cameras, consider scheduling downtime for them. This can be particularly useful during periods of lower activity or when you are at home. Scheduling downtime helps conserve battery life and gives you additional privacy during those times.
By following these tips, you can ensure your privacy while also prolonging the battery life of your Arlo security cameras. Remember to regularly review and update your camera settings to suit your specific needs and preferences.
Understanding different modes
Arlo security cameras have different modes that allow you to control how they behave. Understanding these modes can help you effectively manage your Arlo security system. Here are some of the different modes you should be familiar with:

- Armed: In armed mode, your Arlo cameras are actively monitoring for motion or sound triggers. When these triggers are detected, the cameras will begin recording and send you instant notifications.
- Disarmed: Disarmed mode disables motion and sound detection, meaning your Arlo cameras won’t start recording or send notifications even if triggers occur.
- Schedule: With the schedule mode, you can set specific time periods when your cameras should be armed or disarmed. For example, you can configure them to automatically arm during the night and disarm during the day.
- Geofencing: Geofencing mode uses your smartphone’s location to automatically arm or disarm your Arlo cameras when you enter or leave a predefined area. This mode can be useful if you want your cameras to be armed when you’re away from home and disarmed when you’re back.
- Custom: The custom mode allows you to create a personalized combination of armed, disarmed, and scheduled settings. This mode provides flexibility to tailor your Arlo cameras’ behavior to your specific needs.
By understanding and utilizing these different modes, you can have better control over your Arlo security cameras and ensure they operate according to your preferences and security requirements.
Steps to turn off Arlo security cameras temporarily
Arlo security cameras are a great way to keep your home or business safe, but there may be times when you need to temporarily turn them off. Whether you are having a party, performing maintenance, or simply want some privacy, here are the steps to follow:
Step 1: Open the Arlo app
To begin, open the Arlo app on your smartphone or tablet. The app allows you to control all aspects of your Arlo security system, including turning the cameras on and off.
Step 2: Select the camera
Once you have opened the app, select the camera that you want to turn off. If you have multiple cameras, you will need to repeat the process for each one.
Step 3: Go to camera settings
After selecting the camera, locate and tap on the “Settings” icon. This will take you to a menu where you can adjust various settings for the chosen camera.

Step 4: Turn off the camera
In the camera settings menu, find the option to turn off the camera. This may be labeled as “Enable/Disable Camera” or something similar. Tap on it to toggle the camera off. You may also have the option to schedule the camera to turn off and on at specific times.
Note: Turning off the camera will prevent it from recording or detecting any motion events, but it will still be connected to your Arlo base station.
Step 5: Repeat for other cameras (if applicable)
If you have more than one Arlo camera that you want to turn off, repeat steps 2-4 for each additional camera. Ensure that all cameras you want to turn off are set to the desired setting.
Step 6: Verify the cameras are off
Once you have turned off all the desired cameras, you can verify their status by checking the camera list in the Arlo app. The camera(s) you just turned off should be labeled as “Off” or show a grayed-out icon.
Following these steps will temporarily turn off your Arlo security cameras, providing you with privacy or the ability to perform maintenance without interruptions. Remember to turn the cameras back on when you no longer require them to be off.
Turning off Arlo security cameras via the Arlo app
If you want to turn off your Arlo security cameras, you can easily do so using the Arlo app. With just a few steps, you’ll be able to disable your cameras and ensure your privacy.
Step 1: Open the Arlo app
Launch the Arlo app on your smartphone or tablet. Make sure you are logged in to your Arlo account to access all the necessary features.
Step 2: Select the camera you want to turn off
From the home screen of the app, tap on the camera you wish to disable. This will open up the live feed from that camera and display additional options.
Step 3: Access camera settings
In the live feed view, locate and tap on the gear icon or the three dots in the upper right corner of the screen. This will open up the camera settings menu.
Step 4: Disable the camera
In the camera settings menu, look for the option to disable the camera. This might be labeled as “Disable”, “Turn Off”, or a similar term. Tap on this option to turn off the camera.
Note: Disabling the camera will prevent it from recording and transmitting any video or audio.
Step 5: Confirm the disabling
After tapping on the disable option, you may be prompted to confirm your action. This is to prevent accidental disabling of the camera. Confirm your selection to proceed.
Repeat Steps 2-5 for each camera you wish to turn off.
Once you have disabled all the desired cameras, they will no longer be operational. You can turn them back on at any time by following these steps again and selecting the appropriate enable option in the camera settings menu.
| Troubleshooting tip: |
|---|
| If you encounter any difficulties with disabling your Arlo security cameras or have further questions, refer to the Arlo app’s user guide or contact Arlo support for assistance. |
Disabling Arlo security cameras with a physical switch
Arlo security cameras are designed to provide convenient and reliable surveillance for your home or business. However, there may be times when you need to temporarily disable your cameras. One easy way to do this is by using the physical switch on the back of the Arlo camera.
To disable your Arlo security camera using the physical switch, follow these steps:
| Step 1: | Locate the physical switch on the back of the Arlo camera. |
| Step 2: | Turn the switch to the “Off” position. |
| Step 3: | The camera’s LED indicator will turn off, indicating that the camera is now disabled. |
Disabling your Arlo security cameras can be useful in situations where you want to temporarily suspend surveillance, such as during a party or when you have guests over. By using the physical switch, you can easily turn off your cameras without needing to access the Arlo app or website.
It’s important to note that disabling your Arlo security cameras using the physical switch will only temporarily turn off the camera. The camera will automatically turn back on once the physical switch is turned back to the “On” position. Additionally, disabling the camera with the physical switch does not affect any scheduled recording or motion detection settings.
Remember to use this feature responsibly and only disable your Arlo security cameras when necessary. Always ensure that your cameras are properly re-enabled when you want to resume surveillance.
Tips for Turning Off Arlo Security Cameras While on Vacation
When going on vacation, it is important to ensure the safety of your home and belongings. Turning off your Arlo security cameras properly can help save battery life and ensure that you don’t receive unnecessary notifications while you are away. Here are a few tips for turning off your Arlo security cameras while on vacation:
1. Open the Arlo app on your smartphone or tablet.
2. Tap on the “Devices” tab at the bottom of the screen.
3. Select the Arlo security camera that you want to turn off.
4. Tap on the settings icon for the selected camera.
5. Scroll down and tap on the “Device Settings” option.
6. Toggle the “Armed” or “Enabled” switch to the off position.
7. Repeat steps 3-6 for each Arlo security camera that you want to turn off.
8. Close the Arlo app and ensure that your cameras are disconnected from any power sources.
By following these steps, you can effectively turn off your Arlo security cameras while on vacation. Remember to turn them back on and reconnect to power sources when you return to resume the monitoring of your home. Enjoy your vacation with peace of mind knowing that your Arlo security cameras are temporarily disabled.
Turning off motion detection and live streaming
If you want to turn off motion detection and live streaming on your Arlo security cameras, you can follow the steps below:
- Launch the Arlo app on your smartphone or tablet.
- Tap on the “Devices” tab at the bottom of the screen.
- Select the camera you want to change the settings for.
- Tap on the “Settings” icon (represented by a gear) in the top-right corner.
- In the camera settings, scroll down until you find the “Motion Detection” option.
- Toggle the switch next to “Motion Detection” to turn it off.
- Similarly, scroll down to find the “Live Streaming” option.
- Toggle the switch next to “Live Streaming” to turn it off.
By following these steps, you will successfully turn off motion detection and live streaming on your Arlo security camera. Keep in mind that turning off motion detection may affect the camera’s ability to detect and record any movements or events.
How to turn off Arlo Pro cameras
If you want to temporarily disable your Arlo Pro cameras, you can follow these steps:
Using the Arlo app
- Open the Arlo app on your mobile device.
- Tap on the “Devices” tab at the bottom of the screen.
- Select the Arlo Pro camera that you want to turn off.
- Tap on the camera settings icon.
- Scroll down and tap on the “Camera Status” option.
- Toggle the switch to the “Off” position to disable the camera.
Using the Arlo web portal
- Go to the Arlo web portal on your computer.
- Login to your Arlo account.
- Click on the “Devices” tab.
- Select the Arlo Pro camera that you want to turn off.
- Click on the camera settings icon.
- Scroll down and click on the “Camera Status” option.
- Toggle the switch to the “Off” position to disable the camera.
Remember, turning off your Arlo Pro cameras will stop them from recording and monitoring your surroundings. You can turn them back on using the same steps if you want to resume their functionality.
Troubleshooting common issues while turning off Arlo security cameras
Arlo security cameras are designed to be simple and user-friendly, but sometimes you may encounter issues when trying to turn them off. Here are some common problems and their solutions:
1. Camera won’t turn off
If your Arlo security camera won’t turn off, try these steps:
- Make sure the camera is plugged in and receiving power.
- Check the camera’s settings in the Arlo app to ensure it is not set to stay on continuously.
- If the camera has a physical power button, press and hold it for a few seconds to turn it off.
- If nothing works, try resetting the camera by removing and reinserting the batteries or disconnecting and reconnecting the power source.
2. Camera is unresponsive
If your Arlo security camera is unresponsive when trying to turn it off, follow these steps:
- Check the camera’s battery level. If it’s low, try charging or replacing the batteries.
- Ensure that the camera is within range of the Arlo base station or Wi-Fi network.
- Restart the Arlo base station and check if the camera responds.
- If the camera still doesn’t respond, perform a factory reset by holding the reset button on the camera for about 10 seconds.
3. Camera is turning off unexpectedly
If your Arlo security camera is turning off unexpectedly, try these solutions:
- Check the camera’s power source to ensure it is securely connected and not loose.
- Make sure that the camera’s battery is fully charged and not running low.
- Check the camera’s motion detection settings, as it may be set to turn off after a certain period of inactivity.
- If the issue persists, contact Arlo customer support for further assistance.
By following the troubleshooting steps above, you should be able to resolve common issues encountered while trying to turn off your Arlo security cameras.
FAQ,
What are Arlo security cameras?
Arlo security cameras are wireless surveillance cameras that can be used to monitor your home or business. They are easy to install and offer high-quality video footage.
How do I turn off Arlo security cameras?
To turn off your Arlo security cameras, you can either remove the batteries or disconnect them from the power source. This will ensure that the cameras are completely turned off and not recording any footage.


