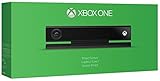
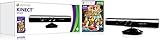
If you have a Microsoft Kinect lying around and you’re looking for a way to repurpose it, turning it into a security camera can be a great solution. The Kinect, originally developed as a motion-sensing device for gaming, can now be used as a powerful tool for home security.
By utilizing the Kinect’s advanced sensors and cameras, you can set up a reliable and affordable security system that can help protect your home. In this guide, we will walk you through the process of transforming your Kinect into a fully functional security camera, allowing you to monitor your property from anywhere.
Why use a Kinect as a security camera?
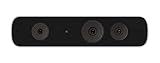
There are several advantages to using a Kinect as a security camera. Firstly, the Kinect is equipped with a 3D depth sensor, which means it can accurately detect and track objects in its field of view. This makes it highly effective in capturing any movements or disturbances that occur within its range.
Additionally, the Kinect’s wide-angle field of view enables it to cover a large area, providing you with comprehensive surveillance coverage. The device also has built-in microphones, allowing you to capture audio along with video, which can be essential for identifying potential threats or intruders.
In this article, we will guide you through the steps to turn your Kinect into a security camera and provide you with tips on how to optimize its performance for the best results.
Introductory steps to turn your Kinect into a security camera
Step 1: Install necessary software
Before you can turn your Kinect into a security camera, you need to make sure that you have the necessary software installed on your computer. This includes the Kinect for Windows SDK and any additional applications or drivers that may be required.
Step 2: Connect your Kinect
Next, you will need to connect your Kinect sensor to your computer. Use the appropriate cable to connect the sensor to a USB port on your computer. Make sure that the sensor is securely connected and that there are no loose cables.

Step 3: Set up the Kinect
Once your Kinect is connected, you will need to set it up. Follow the instructions provided with the Kinect software to complete the setup process. This may involve calibrating the sensor or adjusting the angle and position of the device.
Step 4: Install security camera software
After your Kinect is set up, you will need to install security camera software on your computer. There are various third-party applications available that can turn your Kinect into a security camera. Choose a suitable software and follow the installation instructions provided.
Step 5: Configure and customize

Once the security camera software is installed, you will need to configure it according to your preferences. This may include setting up motion detection, adjusting video quality, or enabling remote access. Take your time to explore the software’s features and customize it to meet your security needs.
Step 6: Test and monitor
Finally, test the setup by monitoring the footage captured by your Kinect turned security camera. Make sure that the camera is positioned correctly and that it captures the desired areas. Monitor the live feed or review recorded footage to ensure that your new security camera system is working effectively.
By following these introductory steps, you can easily turn your Kinect into a security camera and enhance the security of your home or office.
Step 1: Gathering the required materials
Before you can turn your Kinect into a security camera, you will need to gather a few essential materials. Here is a list of what you will need:
- A Kinect sensor
- A computer or laptop
- An internet connection
- Software to enable Kinect as a security camera
- A USB cable to connect the Kinect to your computer
Make sure to check that your Kinect sensor is in good working condition before proceeding. Additionally, ensure that your computer meets the system requirements for running the software needed to enable the Kinect as a security camera.
Step 2: Installing the necessary software
Once you have set up your Kinect camera, the next step is to install the required software to turn it into a security camera. There are a few different software options available, but one popular choice is the iSpy application.
1. Download the iSpy software
Start by visiting the official iSpy website (www.ispyconnect.com) and navigating to the Downloads section. Ensure that you select the correct version for your operating system.
2. Install the software
After the download is complete, locate the setup file in your computer’s Downloads folder and double-click on it to start the installation process. Follow the on-screen prompts to complete the installation.
3. Configure the software
Once the installation is finished, launch the iSpy software. You will be prompted to enter a username and password for your security camera system. Choose a strong and unique password to help protect your camera from unauthorized access.
Next, you will need to configure the settings for your Kinect camera. Click on the “Add” button and select “IP Camera/VidCap” from the drop-down menu. Enter a name for your camera and select the appropriate driver for the Kinect camera. You may need to consult the iSpy software documentation or website for specific driver information.
4. Test the camera
After you have configured the camera settings, click on the “OK” button to save your changes. The iSpy software will then connect to your Kinect camera and start displaying the live video feed. Take a moment to test the camera and make sure everything is functioning as expected.
Once you have successfully installed and configured the necessary software, you are ready to move on to the next step of setting up your Kinect camera as a security system.
Step 3: Setting up the kinect device
To set up your kinect device as a security camera, you will need to follow a few steps:
1. Connect the kinect to your computer: Start by connecting the kinect device to your computer using the USB cable provided. Ensure that the kinect is securely connected and powered on.

2. Install the kinect driver: Next, you will need to install the kinect driver on your computer. This driver allows your computer to recognize and communicate with the kinect device. You can find the latest version of the kinect driver on the official Microsoft website.
3. Download and install a compatible software: After installing the kinect driver, you will need to download and install software that is compatible with the kinect device. There are several options available, such as OpenNI, Kinect for Windows SDK, or Kinect2Scratch. Choose the software that best fits your needs and follow the installation instructions provided.
4. Configure the software: Once you have installed the software, you will need to configure it to work with the kinect device. This usually involves selecting the kinect as the video input source and adjusting any necessary settings or preferences. Refer to the software’s documentation or support resources for guidance on how to configure it properly.
5. Test the kinect camera: After setting up the kinect device, it is important to test the camera to ensure that it is working correctly. Launch the software you installed and check if the kinect camera is streaming live video. Make any necessary adjustments to the positioning or settings to optimize the camera’s view.
By following these steps, you can successfully set up your kinect device as a security camera. Remember to keep the kinect and computer connected at all times for continuous monitoring.
Step 4: Configuring the Kinect as a Security Camera
Now that you have your Kinect connected to your computer and the necessary software installed, it’s time to configure it as a security camera. Follow these steps to get started:
- Launch the Kinect camera software on your computer.
- Go to the settings or preferences menu to access the configuration options.
- Choose the “Camera” or “Device” tab to select your Kinect camera.
- Adjust the camera settings according to your preferences, such as frame rate, resolution, and exposure.
- Enable any additional features or settings that are available, such as motion detection or alarm triggers.
- Test the camera feed to ensure it is working properly.
Once you have configured your Kinect as a security camera, you can now position it in the desired location and start using it to monitor your home or office. Don’t forget to set up any additional software or applications that you want to use alongside your Kinect camera for real-time monitoring or recording of the footage.
Note: It is important to secure your Kinect camera and the computer it is connected to. Make sure to set up strong passwords, enable encryption if available, and keep your software and firmware up to date to prevent unauthorized access or tampering.
Remember, turning your Kinect into a security camera can provide an affordable and versatile solution for home or office surveillance, but it is essential to take the necessary security measures to protect your privacy and keep your data secure.
Step 5: Connecting to a monitoring device
Once you have set up your Kinect as a security camera and configured the necessary software, you can now connect it to a monitoring device for remote access. This will allow you to view the live feed and receive alerts wherever you are.
First, ensure that both your Kinect and monitoring device are connected to the same network. This can be done either through Wi-Fi or by connecting them directly via an Ethernet cable.
Next, open the software or app that you installed earlier to access the camera feed. Look for the option to add a new device or connect to an existing one. Select this option and follow the on-screen prompts to establish a connection.
During the setup process, you will be prompted to enter the IP address or network name of your Kinect camera. This information can usually be found in the settings menu of your Kinect software. Enter the details correctly to proceed with the connection.
Once the connection is established, the monitoring device should be able to display the live video feed from your Kinect camera. You may need to provide login credentials if prompted.
Additionally, you may have the option to customize the monitoring settings, such as adjusting motion detection sensitivity or enabling push notifications for alerts. Explore the settings menu of your software or app to configure these preferences to your liking.
Now that you have successfully connected your Kinect camera to a monitoring device, you can monitor your home or office remotely, ensuring the safety and security of your premises at all times.
Step 6: Customizing security camera settings
Now that you have your Kinect set up as a security camera, it’s time to customize the settings to fit your specific needs. This will allow you to tailor your security system to your preferences and enhance its effectiveness.
1. Adjust the field of view
One important setting to customize is the field of view of your Kinect security camera. Depending on the area you want to monitor, you may need to adjust the camera’s angle to capture the desired view. Experiment with different angles and positions until you find the optimal field of view for your needs.
2. Configure motion detection sensitivity
Motion detection is a crucial feature of any security camera system. To avoid false alarms or missing important events, make sure you adjust the motion detection sensitivity according to your environment. If you’re monitoring a busy area, you may need to set the sensitivity higher to detect any suspicious activity. On the other hand, if you’re monitoring a less active area, lowering the sensitivity can prevent unnecessary notifications.
Additionally, most Kinect security camera software allows you to set specific zones to monitor for motion. For example, you can exclude areas like trees or moving objects that are not of interest. This feature can help reduce false alarms and focus the camera on the areas that matter most.
By customizing these security camera settings, you can ensure that your Kinect surveillance system is tailored to your needs and provides you with reliable and accurate monitoring capabilities.
Step 7: Testing the kinect security camera
After setting up your Kinect as a security camera and configuring the necessary settings, it is crucial to test and ensure that it is working correctly before relying on it for security purposes.
Here are the steps to test the Kinect security camera:
- Ensure that the Kinect is properly connected to your computer or device.
- Launch the security camera software or application that you have installed, or open the command line if you are using a script.
- Check if the software recognizes the Kinect and displays the live feed from the camera. This can usually be found in the settings or options menu of the application.
- Verify that the camera angle and view are to your desired preference and adjust if necessary. The Kinect can usually move up and down, which allows you to set the camera at the desired height.
- Trigger motion detection or any other security feature you have enabled to test if the camera responds accordingly. You can do this by either moving in front of the camera or using an object to simulate motion.
- Observe if the camera captures the motion and reacts as expected. It should either start recording, send a notification, or perform any other action specified in the security settings.
- Repeat the test multiple times to ensure that the Kinect security camera consistently responds to motion detection or any other security features.
If the Kinect security camera successfully passes the testing phase, you can confidently rely on it for your security needs. However, if any issues arise during the testing, you may need to troubleshoot and adjust the settings or seek assistance from the software manufacturer or the Kinect community forums.
Step 8: Increasing the security camera’s effectiveness
To enhance the effectiveness of your Kinect-turned-security camera, consider the following tips:
1. Proper Placement
Position your Kinect camera at a strategic location within the target area. Ensure that it has a wide field of view and covers all the important angles. Avoid obstructions such as furniture or walls that might hinder the camera’s view.
2. Optimal Lighting
Make sure the area you intend to monitor has adequate lighting. Insufficient lighting can result in blurry or distorted footage. Consider using additional sources of light such as lamps or adjusting the existing lighting to ensure clear visibility.
3. Regular Maintenance
Clean the Kinect camera lenses regularly to avoid dust or smudges that can affect image quality. Additionally, check for any loose connections or wiring issues that may impact the camera’s functionality. Perform routine maintenance to keep your security camera in optimal condition.
4. Secure Network
Ensure that your security camera operates on a secure network with a strong password. Regularly update the password and change it immediately if you suspect any unauthorized access. By securing your network, you can prevent any potential breaches or hacking attempts on your camera system.
5. Motion Detection
Configure your Kinect camera to focus on detecting motion. This feature allows the camera to capture specific events and reduce the amount of recorded footage. By enabling motion detection, you can save storage space and make it easier to review any relevant incidents.
6. Remote Monitoring
Utilize software or apps that enable remote monitoring of your Kinect security camera. This allows you to access live feeds or recorded footage from any location through your mobile device or computer. With remote monitoring, you can keep an eye on your property even when you’re not physically present.
7. Notifications
Set up notifications or alerts for any unusual activity or detected motion. These notifications can be sent to your email or mobile device, providing you with real-time updates on any potential security issues. Stay proactive by staying informed about any suspicious movements or events.
By implementing these strategies, you can maximize the efficacy of your Kinect security camera and ensure enhanced security for your property or premises.
FAQ,
Can I turn my Kinect into a security camera?
Yes, you can turn your Kinect into a security camera by using third-party software and configuring it to detect motion and record video.
What are the benefits of using Kinect as a security camera?
Using Kinect as a security camera offers several benefits. First, it utilizes the existing Kinect hardware, which saves you the cost of purchasing a separate camera. Second, Kinect has built-in depth sensing capabilities, which allows for more accurate motion detection. Lastly, Kinect can be easily integrated with other smart home devices and systems, providing a comprehensive security solution.
What software do I need to turn my Kinect into a security camera?
To turn your Kinect into a security camera, you will need third-party software such as “Kinect for Windows SDK” or “OpenNI” framework. These software packages provide the necessary tools and APIs to access and control the Kinect’s functions.