
Security cameras play a crucial role in protecting businesses, homes, and public areas. They provide an extra layer of surveillance, keeping a watchful eye on the surroundings to ensure safety and security. In order to access the footage recorded by these cameras, one must know how to navigate through the system’s user interface.
One of the primary tools for navigating through security camera systems is the mouse. It allows users to interact with the software, view and manage recorded videos, customize settings, and perform various other tasks. Whether you are a security professional, business owner, or homeowner, understanding how to effectively use the mouse can greatly enhance your ability to utilize the full capabilities of your security camera system.
When using a mouse on a security camera system, there are a few key functions to keep in mind. First and foremost, the mouse is used to control the on-screen cursor, allowing you to select and click on various options within the user interface. This includes accessing menus, adjusting settings, and viewing different camera feeds. The mouse can also be used for zooming in on specific areas of interest, panning across the surveillance footage, and navigating between different screens or tabs.
To ensure smooth navigation, it’s important to have a responsive and reliable mouse. A wireless mouse with a good range can provide greater flexibility, allowing you to control the system from a comfortable distance. Additionally, a mouse with programmable buttons can be customized to perform specific functions, providing even more efficiency and convenience.
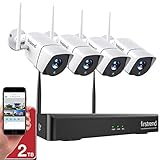
Choosing the Right Security Camera
When it comes to selecting a security camera for your property, there are several factors that you need to consider. The right camera can help keep your premises safe and give you peace of mind.
Firstly, think about the purpose of the camera. Do you want to monitor your home or office? Or are you looking for outdoor surveillance? Understanding your specific needs will help you choose the right type of camera.
Next, consider the resolution of the camera. Higher resolution cameras provide clearer images, making it easier to identify people or objects. However, keep in mind that higher resolution cameras may require more storage space to save the footage.
Another important consideration is the camera’s field of view. The wider the field of view, the more area the camera can cover. This is especially important for outdoor surveillance where you want to monitor a large area.
Consider the camera’s night vision capabilities as well. If you need to monitor your property during the night, make sure the camera has infrared LEDs or other technology that allows for clear footage in low light conditions.
Connectivity is another factor to think about. Some cameras are wireless, allowing for easy installation and flexibility in where you place them. Others need to be wired, which may require professional installation.

Lastly, consider the storage options for the camera. Some cameras save footage to a local storage device, while others offer cloud storage. Think about how much storage you need and what option works best for you.
By considering these factors and defining your specific needs, you can choose the right security camera for your property. Remember to research different brands and models, read reviews, and seek advice if needed. With the right security camera in place, you can enhance the safety of your premises and ensure peace of mind.
Installing the Security Camera
Installing a security camera is an important step in ensuring the safety and security of your property. By following these steps, you can properly install your security camera system.
1. Determine the Placement
The first step in installing a security camera is to determine the placement. Consider the areas that you want to monitor and place the cameras strategically. Make sure the camera has a clear view of the area you want to monitor.
2. Mount the Camera
Once you have determined the placement, mount the camera securely. Use the appropriate mounting accessories provided with the camera. Make sure the camera is steady and secure to avoid any movement or dislodging. The camera should be positioned at a height that allows for optimal viewing angle and coverage.

3. Connect the Cables
After mounting the camera, connect the necessary cables. This usually includes power cables and video cables. Follow the instructions provided with your camera to ensure proper connection. Make sure the cables are hidden and protected to prevent tampering.
4. Set Up the Camera System
Once the camera is mounted and the cables are connected, you need to set up the camera system. This involves configuring the settings, such as the motion detection sensitivity and recording options. Refer to the instruction manual or user interface for your specific camera system to complete the setup process.
5. Test and Adjust
After the installation and setup process, test the camera to ensure proper functionality. Check the camera’s video feed and make any necessary adjustments to the position or settings. Test the camera’s night vision capabilities if applicable.
By following these steps, you can effectively install a security camera and have peace of mind knowing that your property is being monitored and protected.
Connecting the Mouse to the Security Camera
When setting up a security camera system, it is essential to connect a mouse to the camera for ease of use and navigation. The mouse allows you to interact with the camera’s interface and access its various features and settings. Here are the steps to connect a mouse to a security camera:

- Ensure that your security camera system supports mouse connectivity. Most modern security camera systems come with USB ports that allow you to connect a mouse.
- Locate the USB port on your security camera system. It is usually located either on the back panel or along the sides of the system unit.
- Plug the USB connector of the mouse into the USB port of the security camera system.
- Once connected, power on the security camera system and wait for it to boot up.
- Once the system has booted up, move the mouse cursor over the screen by sliding the mouse on a mouse pad or a flat surface.
- Click on the mouse buttons to perform various actions such as selecting menu options, zooming in/out, and navigating through the camera’s interface.
- If the mouse cursor does not appear on the screen, check the connections and ensure the mouse is properly plugged in.
Following these steps will enable you to connect a mouse to your security camera system, allowing for easier control and navigation. Make sure to refer to the user manual of your specific security camera system for any additional instructions or troubleshooting steps.
Using the Mouse to Navigate the Security Camera
When it comes to monitoring the safety and security of your premises, a security camera is an invaluable asset. With advanced technology, many security cameras now come equipped with the ability to be controlled using a computer mouse. This allows you to manipulate the camera’s view, zoom in and out, and access various features with ease.
To use your mouse to navigate a security camera, follow these simple steps:
Step 1: Connect the Mouse
Start by connecting your mouse to the computer that is connected to the security camera system. Ensure that the mouse is properly plugged into a USB port and that it is functioning correctly. You may need to install any required drivers or software specific to the mouse.
Step 2: Open the Camera Software
Launch the camera software on your computer. This software is typically provided by the manufacturer of the security camera system. Once the software is open, you will see the live feed from the camera on your screen.

Step 3: Navigate with the Mouse
Move the cursor of your mouse over the live camera feed. You will notice that the cursor changes shape, indicating that it can be used for navigation. To pan the camera, click and hold the left mouse button, and then move your mouse in the desired direction. This allows you to change the camera’s viewing angle.
Additionally, you may use the mouse wheel to zoom in or out. Scroll forward to zoom in and scroll backward to zoom out. This feature can be handy when you need to get a closer look at a specific area.
Step 4: Access Additional Features
Depending on the camera software, there may be additional features accessible with the mouse. These features could include adjusting the camera’s focus, adjusting the brightness or contrast, or even setting up motion detection areas. Check the software’s user manual or help section to explore these options.
Using a mouse to navigate a security camera system offers a convenient way to control the camera’s movements and access various features. With a simple click and drag, you can change the camera’s view, zoom in and out, and ensure that you have the best possible surveillance coverage.
Adjusting Camera Settings with the Mouse
Using a mouse to adjust camera settings can be a convenient and efficient way to customize the viewing experience. With just a few clicks and movements, you can optimize the camera angles, focus, and zoom to suit your needs.

1. Adjusting Camera Angles
By simply moving the mouse, you can pan, tilt, and rotate the security camera to achieve the desired angle. To pan, click and hold the left mouse button while dragging the cursor left or right. To tilt, click and hold the right mouse button while moving the cursor up or down. Rotating the camera can be done by pressing the scroll wheel and moving the mouse left or right.
2. Focusing and Zooming
To adjust the camera’s focus, you can use the scroll wheel on the mouse. Scroll up to focus on objects closer to the camera, and scroll down to focus on objects farther away. This feature is particularly useful when you want to enhance the clarity of specific areas or objects in the camera’s field of view.
Zooming in and out can also be achieved using the scroll wheel. Scroll up to zoom in and get a closer view of a target area, and scroll down to zoom out and have a wider view of the surroundings. The zoom feature allows you to capture details or get a broader perspective, depending on your monitoring requirements.
Using a mouse to adjust camera settings brings flexibility and ease of use to your security system. Whether you need to change the camera angles or optimize the focus and zoom, the mouse provides a simple and intuitive way to control and configure your surveillance cameras.
Troubleshooting Mouse Issues
If you’re experiencing issues with your mouse while using security cameras, there are a few troubleshooting steps you can try before seeking professional help. Here are some common problems and their solutions:

1. Unresponsive Mouse: If your mouse isn’t responding, first check the connections. Ensure that the mouse is properly plugged into the USB port of your computer or DVR. If the mouse is wireless, ensure that the batteries are not dead or low. Try using a different USB port or using a different mouse to confirm if the issue is with the mouse or the port. Restarting the system can also help resolve some connectivity issues.
2. Cursor Not Moving: If your mouse is connected but the cursor isn’t moving on the screen, try cleaning the mouse’s sensor on the bottom. Dust or debris can sometimes interfere with the sensor, preventing it from accurately tracking movement. Use a soft cloth or cotton swab to gently clean the sensor. Additionally, check if the mouse pad or surface you’re using is causing any tracking issues. Using a mouse pad specifically designed for optical mice can help improve tracking accuracy.
3. Inaccurate or Jerky Movement: If your mouse’s movements are inaccurate or jerky, try adjusting the mouse settings. Go to the Control Panel or Settings menu on your computer and look for the Mouse settings. You can adjust the sensitivity and acceleration settings to better suit your preferences. Additionally, ensure that you have the latest drivers installed for your mouse. Visit the manufacturer’s website to download and install any available updates.
4. Buttons Not Working: If the buttons on your mouse aren’t functioning properly, ensure that you haven’t accidentally disabled any mouse buttons through the settings. You can also try pressing and holding the buttons for a few seconds to see if they respond. If the issue persists, it may be a hardware problem with the mouse itself, and you may need to replace it.
If none of these troubleshooting steps resolve your mouse issues, it’s recommended to contact a professional technician or the manufacturer for further assistance. They can help diagnose the problem and provide the appropriate solution.
FAQ,
How do I use a mouse with security cameras?
To use a mouse with security cameras, first, make sure that your security camera system is compatible with a mouse. Most security camera systems have USB ports that allow you to connect a mouse. Simply plug the mouse into the USB port, and you should be able to control the cameras by moving the cursor on the screen and clicking on the desired options.
What is the purpose of using a mouse with security cameras?
The purpose of using a mouse with security cameras is to provide an easier and more convenient way to navigate through the camera system’s user interface. With a mouse, you can easily control the camera’s position, zoom in or out, and access various settings and options. It allows for more precise control and makes it faster to navigate through the camera system’s menus.
Can I use a wireless mouse with security cameras?
Yes, you can use a wireless mouse with security cameras as long as your camera system supports wireless mouse connectivity. Some security camera systems have built-in Bluetooth or Wi-Fi capabilities that allow you to connect a wireless mouse. Before purchasing a wireless mouse, make sure to check the compatibility requirements of your camera system to ensure it will work properly.


