
If you’ve recently purchased a DSLR camera and are feeling overwhelmed by the numerous buttons and settings, fear not! With a little practice and guidance, you’ll be capturing stunning photos in no time.
Using a DSLR camera allows you to have full control over your photography, giving you the freedom to adjust various settings and experiment with different techniques. Whether you’re an amateur or aspiring professional photographer, this step-by-step guide will help you navigate your DSLR camera and unlock its full potential.
Step 1: Familiarize yourself with the camera. Before you start shooting, take some time to explore the different buttons, dials, and features of your DSLR camera. Read the manual, watch video tutorials, and experiment with the settings to understand how each function works. This will make it easier for you to make adjustments on the go and capture your desired shots.
Step 2: Set the shooting mode. DSLR cameras offer various shooting modes, such as manual, aperture priority, shutter priority, and scene modes. Depending on your photography goals, select the appropriate shooting mode. If you’re just starting out, you can begin with the automatic or program mode and gradually switch to manual mode as you gain confidence and become more familiar with the camera’s settings.
Step 3: Adjust the exposure settings. The exposure settings, including ISO, aperture, and shutter speed, play a crucial role in determining the overall look and feel of your photos. Experiment with different settings to achieve the desired exposure. Use a low ISO setting for well-lit scenes and a higher ISO for low-light environments. Adjust the aperture to control the depth of field, and set the shutter speed to freeze action or create motion blur.

Step 4: Focus on composition. Composition is key to creating visually appealing photographs. Use the rule of thirds to place the main subject off-center for a balanced composition. Experiment with different angles, perspectives, and framing techniques to add depth and interest to your images. Remember to pay attention to the background, as a cluttered or distracting background can take away from the main subject.
Step 5: Review and edit your images. After capturing your shots, review them on the camera’s LCD screen to ensure you’ve achieved the desired results. If necessary, make adjustments and take additional shots. Once you’re satisfied with your photos, transfer them to your computer and use photo editing software to enhance the colors, contrast, and sharpness. However, it’s important to remember that editing should only enhance the image and not fix major flaws.
With patience, practice, and a bit of creativity, you’ll soon become a master of your DSLR camera. So grab your camera and start capturing those breathtaking moments that will last a lifetime!
Choosing the Right DSLR Camera
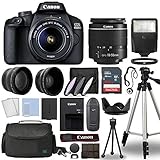
When it comes to choosing the right DSLR camera, there are a few key factors to consider. With so many options available on the market, it can be overwhelming to find the perfect camera for your needs. Here are some important things to think about when making your decision:
1. Determine Your Needs
Before you start shopping, it’s important to define your photography needs. Are you a beginner looking to learn the basics? Or are you a professional photographer in need of a high-quality camera for your work? Understanding what you will primarily use the camera for will help narrow down your options.

2. Consider Your Budget
Another crucial aspect to consider is your budget. DSLR cameras can vary greatly in price, so it’s essential to determine how much you are willing to spend. Set a realistic budget and stick to it while exploring your options. Keep in mind you may also need to budget for additional lenses and accessories.
3. Research and Compare Models
Take the time to research and compare different DSLR camera models. Look for user reviews and expert recommendations to get a sense of the pros and cons of each camera. Pay attention to key features such as sensor resolution, ISO range, autofocus capabilities, and shooting modes to find the right fit for your needs.
Pro tip: Consider checking out online forums and photography communities to get insights from experienced photographers who have used the cameras you’re interested in.
4. Try Before You Buy
Before making a final decision, it’s always a good idea to try out the camera in person. Visit a photography store or attend photography events where you can handle different DSLR models. This will give you a better idea of how the camera feels in your hands and if it suits your shooting style.
5. Think About Future Growth
Lastly, consider your potential growth as a photographer. While it’s important to choose a camera that fits your current needs, it’s also wise to think about how your photography journey may evolve. Look for a DSLR camera that allows you to expand your capabilities with interchangeable lenses and advanced features.

By taking these steps and carefully considering your needs, budget, and future aspirations, you will be well on your way to choosing the right DSLR camera.
Understanding DSLR Camera Functions
When using a DSLR camera, it is important to have a good understanding of the various functions and settings it offers. This knowledge will enable you to take full control of your camera and capture the best possible images. Here are some key functions you should be familiar with:
| Function | Description |
|---|---|
| Aperture | The aperture controls the amount of light that enters the camera through the lens. It also affects the depth of field, or the amount of the image that is in focus. |
| Shutter Speed | The shutter speed determines how long the camera’s shutter remains open. It affects the amount of time the image sensor is exposed to light, and it can be used to freeze or blur motion. |
| ISO | The ISO setting determines the camera’s sensitivity to light. A higher ISO allows you to capture images in low-light conditions, but it can introduce noise or graininess. |
| White Balance | White balance ensures that colors appear natural in your images, regardless of the lighting conditions. It adjusts the camera’s interpretation of colors based on the type of light source. |
| Focusing Mode | The focusing mode determines how the camera focuses on the subject. You can choose between autofocus, manual focus, or even different autofocus modes like continuous or single shot. |
| Metering Mode | Metering mode measures the amount of light in a scene to determine the exposure settings. There are different metering modes, such as spot metering, center-weighted, and evaluative. |
By understanding these key functions of a DSLR camera, you will be able to adjust your settings appropriately for different shooting scenarios, resulting in better photographs. Experimenting with these functions and practicing their usage will help you become more comfortable and confident with your camera.
Setting Up Your DSLR Camera
When you first get your DSLR camera, it’s important to set it up properly to ensure you get the best results. Follow these steps to get started:
1. Insert the battery
Before you can start using your DSLR camera, you need to insert the battery. Locate the battery compartment, usually on the bottom or side of the camera, and open it. Insert the battery in the correct orientation and close the compartment securely.

2. Attach the lens
Next, you’ll need to attach the lens to your camera. Remove the lens cap and align the lens mount on the camera with the lens attachment point. Rotate the lens clockwise until it’s securely attached. Make sure you hear a click to ensure it’s properly locked in place.
3. Set the date and time
Most DSLR cameras require you to set the date and time before you can start shooting. Look for the menu button or settings option on your camera and navigate to the date and time section. Use the camera’s controls to adjust the settings to the correct date and time.
4. Format the memory card
Before you can start taking photos, it’s a good idea to format the memory card in your DSLR camera. Formatting will erase any existing data and prepare the card for use with your camera. Locate the format option in the camera menu and follow the prompts to format the memory card.
5. Adjust the settings
Once your camera is set up, take some time to adjust the settings according to your preferences. You can change the shooting mode, image quality, ISO, white balance, and other settings to ensure your photos turn out exactly as you want them to.
| Troubleshooting Tip |
|---|
| If you’re unsure how to adjust any of the camera settings, refer to the user manual that came with your DSLR camera. It will provide detailed instructions and explanations for each setting. |
Adjusting the Camera Settings
Once you have familiarized yourself with the basic controls and functions of your DSLR camera, it’s important to understand how to adjust the camera settings to capture the best possible photos. Here are step-by-step instructions on how to adjust the key camera settings:

1. ISO: The ISO setting determines the camera’s sensitivity to light. Higher ISO settings work well in low light conditions, but they can also introduce more noise or grain into your photos. Lower ISO settings are ideal for well-lit environments, as they produce cleaner and sharper images. Experiment with different ISO settings to find the right balance for your shooting conditions.
2. Aperture: The aperture controls the amount of light that enters the camera through the lens. It also affects the depth of field, or the range of sharpness in your photos. A wider aperture (lower f-stop number) creates a shallow depth of field, perfect for capturing portraits with a blurred background. A smaller aperture (higher f-stop number) increases the depth of field, suitable for landscape photography where you want everything in focus.
3. Shutter Speed: The shutter speed determines the length of time the camera’s shutter remains open, allowing light to hit the camera sensor. It affects the amount of motion blur in your photos. A faster shutter speed freezes action, while a slower shutter speed allows for intentional motion blur. Experiment with different shutter speeds to capture the desired effect, whether it’s a sharp sports shot or a dreamy long exposure.
4. White Balance: The white balance setting ensures that the colors in your photos appear accurate and balanced under different lighting conditions. You can choose from various presets such as Auto, Daylight, Cloudy, or manually set the white balance using a white reference card or by adjusting the Kelvin temperature. Understanding white balance will help you avoid unnatural color casts and ensure your photos look true to life.
5. Shooting Mode: DSLR cameras offer a range of shooting modes such as Manual, Aperture Priority, Shutter Priority, and Program Mode. Manual mode gives you full control over all camera settings, while the priority modes allow you to prioritize either aperture or shutter speed while the camera adjusts the other settings automatically. Experiment with different shooting modes to become comfortable with their capabilities and find what works best for different shooting scenarios.

By adjusting these key camera settings, you can have more control over the outcome of your photos, creating images that reflect your creative vision. Remember to practice and experiment to truly understand how each setting impacts your photographs.
Mastering Exposure
Exposure is one of the most important concepts to understand when using a DSLR camera. It refers to the amount of light that reaches the camera’s sensor, and it directly affects the brightness and overall look of your photographs. Learning how to control exposure is essential for capturing well-exposed and balanced images.
There are three main components that determine exposure: aperture, shutter speed, and ISO. Aperture controls the amount of light that enters through the lens by adjusting the size of the lens opening. Shutter speed determines how long the camera’s sensor is exposed to light, and ISO measures the sensitivity of the sensor to light.
To achieve a proper exposure, you need to find the right balance between these three settings. There are different exposure modes on your DSLR camera that can help simplify the process:
| Exposure Mode | Description |
|---|---|
| Auto Mode | The camera automatically determines the exposure settings based on its built-in algorithms. While it can be convenient, it limits your control over the final result. |
| Program Mode (P) | This mode allows you to control certain settings while letting the camera choose the best exposure settings. It’s a good option for beginners. |
| Aperture Priority Mode (A or Av) | In this mode, you set the desired aperture, and the camera selects the appropriate shutter speed to achieve a proper exposure. It’s ideal for controlling depth of field. |
| Shutter Priority Mode (S or Tv) | Here, you set the desired shutter speed, and the camera determines the appropriate aperture. It’s useful for freezing or blurring motion. |
| Manual Mode (M) | This mode gives you full control over all exposure settings. It requires more experience and practice but offers the most flexibility. |
Regardless of the exposure mode you choose, keep in mind that the camera’s built-in light metering system plays a crucial role in determining the exposure. It measures the light in the scene and suggests the appropriate settings. You can often adjust the metering mode to prioritize different areas of the frame, such as spot metering for precise measurements or matrix metering for balanced overall exposure.
Experimenting with different exposure settings and understanding their impact on your images is essential for mastering exposure. Keep in mind that exposure can be subjective, and different scenes may require different settings. Practice regularly to develop your skills and achieve consistent and well-exposed photographs.
Focusing Techniques
Mastering the art of focusing is essential to capturing sharp and in-focus images with a DSLR camera. Here are some step-by-step techniques to help you achieve accurate focus:
1. Autofocus
Many DSLR cameras come equipped with autofocus (AF) capabilities. This feature automatically adjusts the lens to focus on the subject. To use autofocus:
- Set your camera to AF mode.
- Point the camera at your subject and half-press the shutter button.
- The camera will focus on the subject, and you will see focus confirmation in the viewfinder or on the LCD screen.
- Once the focus is confirmed, fully press the shutter button to take the photo.
2. Manual Focus
Manual focus (MF) allows you to take full control over the focus of your images. Use manual focus in situations where autofocus may struggle, such as in low light or when shooting through obstacles. To use manual focus:
- Switch your lens to manual focus mode.
- Rotate the focus ring on the lens to adjust focus.
- Use the viewfinder or the camera’s magnification feature to ensure accurate focus.
Experimenting with different focusing techniques and practicing with your DSLR camera will help you become more confident and proficient in achieving sharp focus in your photos.
Using Different Camera Modes
DSLR cameras offer various shooting modes to help you capture the perfect shot in different situations. Here are some common camera modes and how to use them:
1. Manual Mode (M): This mode gives you full control over settings like aperture, shutter speed, and ISO. It is ideal for experienced photographers who want complete creative control.
How to use: Adjust the aperture, shutter speed, and ISO based on the lighting conditions and desired effect. Use a lower aperture for a blurry background or a higher aperture for a greater depth of field.
2. Aperture Priority Mode (A or Av): In this mode, you set the desired aperture, and the camera chooses the corresponding shutter speed for proper exposure. It is suitable for controlling depth of field.
How to use: Dial in the desired aperture and let the camera adjust the shutter speed automatically.
3. Shutter Priority Mode (S or Tv): Here, you set the shutter speed, and the camera selects the appropriate aperture for correct exposure. This mode is useful for capturing motion.
How to use: Set the desired shutter speed to freeze or blur motion, and let the camera adjust the aperture accordingly.
4. Program Mode (P): This mode automatically sets the aperture and shutter speed, while allowing you to make adjustments for other settings like ISO or exposure compensation.
How to use: Rotate the command dial to make adjustments or override the automated settings.
5. Auto Mode: In this mode, the camera makes all the decisions regarding exposure, focus, and other settings. It is suitable for beginners or when you want to quickly capture a moment without worrying about technical settings.
How to use: Simply press the shutter button and let the camera do all the work.
6. Scene Modes: DSLR cameras often have pre-set scene modes to optimize settings for specific scenarios like landscapes, portraits, sports, or night photography.
How to use: Select the appropriate scene mode based on your subject or shooting conditions, and the camera will adjust the settings accordingly.
Remember: Experiment with different modes to understand how they affect your photos. Take time to practice and learn about the capabilities of your DSLR camera to enhance your photography skills.
Exploring Creative Features
Once you’re familiar with the basic functions of your DSLR camera, it’s time to dive into the world of creative photography. DSLR cameras offer a variety of features that allow you to take your photography to the next level.
Manual Mode: One of the most powerful features of a DSLR camera is manual mode. In this mode, you have complete control over the exposure settings, including aperture, shutter speed, and ISO. By experimenting with different settings, you can achieve unique and artistic effects.
Aperture Priority: Aperture priority mode allows you to control the depth of field, which determines how much of your photo is in focus. By adjusting the aperture, you can create a shallow depth of field, blurring the background and highlighting your subject, or a deep depth of field, keeping both the subject and background in sharp focus.
Shutter Priority: Shutter priority mode gives you control over the shutter speed, which determines how long the camera’s sensor is exposed to light. With fast shutter speeds, you can freeze action and capture crisp images of moving subjects. Slow shutter speeds can be used to create motion blur or capture long exposures of subjects such as flowing water or light trails.
Focus Modes: DSLR cameras often offer multiple focus modes, including single point, zone, and continuous autofocus. Experimenting with different focus modes can help you capture fast-moving subjects or create unique compositions by selecting a specific area of focus.
White Balance: White balance determines the color temperature of your photos. Different lighting conditions can create different color casts, so adjusting the white balance settings can help you achieve accurate colors. Additionally, adjusting the white balance creatively can give your photos a warm or cool tone.
Artistic Filters: Many DSLR cameras come with built-in artistic filters that can add special effects to your photos. These filters can simulate film grain, create a vintage look, or even add fun distortions. Experiment with these filters to give your photos a unique and creative touch.
Bracketing: Bracketing is a technique where the camera takes a series of photos at different exposure settings. This can be useful for capturing high dynamic range (HDR) images or for experimenting with different exposures to achieve the desired effect.
Remember, the best way to explore the creative features of your DSLR camera is through practice and experimentation. Don’t be afraid to step out of your comfort zone and try new techniques. With time and experience, you’ll develop your own unique style and capture stunning photographs.
Tips and Tricks for DSLR Photography
Mastering DSLR photography takes both practice and knowledge of various techniques. Here are some tips and tricks to help you make the most out of your DSLR camera:
1. Understand your camera settings
Take the time to familiarize yourself with the various settings on your DSLR camera. Understand how to adjust the aperture, ISO, shutter speed, and white balance. Knowing how to manipulate these settings will allow you to capture the perfect shot in any situation.
2. Use a tripod
Using a tripod can greatly improve the sharpness and stability of your photos. It allows you to keep the camera steady, especially in low light situations or when using longer exposures. Invest in a good quality tripod to achieve professional-looking results.
3. Experiment with different lenses
Don’t be afraid to try out different lenses to achieve different types of shots. Wide-angle lenses can capture sweeping landscapes, while telephoto lenses can create beautiful bokeh effects and zoom in on distant subjects. Understanding the strengths and limitations of each lens will enhance your overall photography skills.
4. Learn to shoot in manual mode
While automatic settings are convenient, mastering manual mode will give you more control over your photos. It allows you to adjust the exposure settings based on the lighting conditions and desired effect. Practice using manual mode to improve your understanding of exposure and achieve more creative shots.
5. Pay attention to composition
Composition is key in photography. Take the time to frame your shots carefully and consider the rule of thirds, leading lines, and symmetry. Experiment with different angles and perspectives to add interest to your photos.
Remember, practice is key when it comes to DSLR photography. Take your camera with you wherever you go and experiment with different techniques to find your unique style and perspective.
Question-answer:
What is a DSLR camera?
A DSLR camera, or Digital Single Lens Reflex camera, is a type of digital camera that uses a mirror and prism system to direct light from the lens to the optical viewfinder, allowing the photographer to see exactly what will be captured in the image.
Why should I use a DSLR camera?
There are several reasons to use a DSLR camera. DSLRs typically have larger sensors, which allow for better image quality and low-light performance. They also offer more manual control over settings such as aperture and shutter speed, allowing for more creative freedom in your photography. Additionally, DSLRs have interchangeable lenses, giving you the ability to choose the best lens for each particular shot.
How do I choose the right DSLR camera for me?
When choosing a DSLR camera, there are several factors to consider. First, determine your budget and what features are most important to you. Consider the size and weight of the camera, as well as the availability and cost of compatible lenses. Additionally, it may be helpful to read reviews and compare sample images taken with different camera models to get an idea of their image quality.
What are some basic settings I need to know for using a DSLR camera?
When using a DSLR camera, it’s important to understand basic settings such as aperture, shutter speed, and ISO. Aperture controls the depth of field, or how much of the image is in focus. Shutter speed determines how long the camera’s shutter is open, affecting motion blur. ISO controls the camera’s sensitivity to light. Learning how to balance these settings will help you achieve the desired exposure and creative effect in your photos.


