
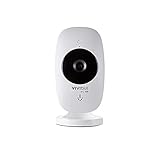
Are you a beginner in the world of digital photography? Or perhaps you’ve recently acquired a vivicam v54 digital camera and are eager to discover how to make the most of its features? In either case, you’ve come to the right place! This article will provide you with an easy-to-follow guide on how to use the vivicam v54 digital camera and take stunning photos.
Step 1: Familiarize yourself with the camera’s basic functions
Before you start using your vivicam v54 digital camera, it’s essential to get acquainted with its basic functions. Take a few minutes to carefully read through the user manual and experiment with the camera’s buttons and settings. By doing so, you’ll gain a better understanding of how the camera works, which will help you navigate through its features confidently.
Step 2: Set up your camera
Once you feel comfortable with the basic functions of the vivicam v54, it’s time to set up the camera according to your preferences. From adjusting the date and time to selecting the desired resolution, take your time to configure the camera’s settings to suit your needs. By personalizing the camera’s setup, you’ll make each shooting experience more tailored to your photographic style.

Step 3: Master the art of composition
One of the key elements in capturing captivating photos with your vivicam v54 digital camera is mastering the art of composition. Keep in mind the rule of thirds – a principle that suggests dividing your frame into thirds both horizontally and vertically and placing your subject along those lines or at their intersections. This technique can add depth and interest to your photographs, making them more visually pleasing.
Step 4: Experiment with different shooting modes
Another way to unleash the full potential of your vivicam v54 digital camera is to experiment with its various shooting modes. Whether you’re capturing a landscape, portrait, or action shot, selecting the appropriate mode can significantly enhance the outcome of your photographs. Take the time to explore these modes and familiarize yourself with their specific features and advantages.
Step 5: Practice and have fun!

Like any skill, mastering the art of digital photography takes practice. Take your vivicam v54 on your adventures and capture the world around you. Don’t be afraid to make mistakes – it’s all part of the learning process. Remember to have fun along the way and let your creativity shine through!
Now that you have a better understanding of how to use your vivicam v54 digital camera, it’s time to start capturing beautiful moments. Follow these steps, get creative, and let your photographic journey begin!
Basic controls and settings
Power on/off: The power button for the Vivitar V54 camera is located on the top right-hand side of the camera. Press and hold the power button to turn the camera on or off.
Mode selection: Use the mode selection button, located on the top left-hand side of the camera, to choose between different shooting modes. You can select from options such as Auto, Portrait, Landscape, and more.
Zoom: The zoom buttons are located on the top of the camera near the shutter button. Use the zoom in and zoom out buttons to adjust the camera’s lens and get closer or further away from your subject.

Shutter button: The shutter button is the large button on the top right-hand side of the camera. Pressing this button halfway down will focus the camera, and pressing it all the way down will take a photo.
Flash: The flash button is located on the back of the camera near the display screen. Press the flash button to toggle between different flash modes, such as auto flash, fill flash, and no flash.
Display screen: The Vivitar V54 camera features a 2.4-inch LCD display screen on the back. This screen allows you to view and review your photos, as well as navigate through the camera’s settings and menus.
Menu button: The menu button is located on the back of the camera next to the display screen. Press the menu button to access the camera’s settings and options. You can adjust settings such as image resolution, white balance, and exposure.
Navigation buttons: The navigation buttons are located on the back of the camera surrounding the menu button. Use these buttons to navigate through the camera’s menus and settings.

Memory card slot: The memory card slot is located on the side of the camera. Insert a compatible memory card to store your photos and videos.
Battery compartment: The battery compartment is located on the bottom of the camera. Open the compartment to insert the required batteries for the camera to function.
USB port: The USB port is located on the side of the camera. Use a USB cable to connect the camera to your computer for transferring photos and videos.
Tripod mount: The tripod mount is located on the bottom of the camera. Use this mount to attach the camera to a tripod for stable shots.
Capturing photos
When using your Vivitar V54 digital camera, capturing photos is a straightforward process. Follow these steps to ensure you get the best shots:

1. Power on the camera
Press the power button located on the top or side of the camera to turn it on. Wait a few seconds for the camera to start up.
2. Set the mode dial
Use the mode dial on the top of the camera to select the desired shooting mode. The camera offers various options such as Auto, Portrait, Landscape, and more. Choose the mode that best suits the scene you want to capture.
3. Compose your shot
Look through the viewfinder or use the LCD screen on the back of the camera to frame your shot. Use the zoom buttons to adjust the zoom level and get closer or further away from your subject.
4. Focus on your subject
Press the shutter button halfway down to focus on your subject. You will hear a beep or see a green light to indicate that focus has been achieved. If the subject is not in focus, adjust the distance or focus mode to try again.
5. Take the photo
Press the shutter button fully down to capture the photo. Try to keep the camera as steady as possible to avoid blurry images. If necessary, use a tripod or stabilize your hands on a surface.

Pro tip: Experiment with different angles, perspectives, and lighting conditions to add creativity to your photos.
6. Review and delete unwanted photos
After taking a photo, review it on the LCD screen and delete any unwanted images. Press the playback button and use the navigation buttons to scroll through the photos. Press the delete button to remove unwanted photos from the camera’s memory.
Remember to regularly transfer your photos to a computer or external storage device to free up space on your camera’s memory card and ensure you don’t lose any valuable moments.
Follow these steps to capture stunning photos using your Vivitar V54 digital camera. With practice and experimentation, you can improve your photography skills and create memorable images.
Recording videos
To record videos with your vivicam v54 digital camera, follow these simple steps:

1. Prepare your camera
Make sure your camera’s battery is fully charged and that you have enough storage space on your memory card to record the desired video.
2. Set the video mode
Turn on your camera and use the mode selector dial to switch to video mode. The video mode is usually represented by a small camera icon with a movie symbol.
3. Frame your shot
Hold the camera steady and frame your shot by looking at the LCD screen. Make sure your subject is well in focus and properly positioned within the frame.
4. Start recording
Press the dedicated video recording button to start capturing the video. The button is usually marked with a red dot or a video camera icon. The camera will indicate that it is recording by displaying a timer or status bar on the screen.
5. Capture the desired footage
Keep the camera steady and ensure you capture the desired footage. Be mindful of the camera’s limitations and avoid excessive movement that may result in blurry or shaky footage.
6. Stop recording
To stop recording, press the video recording button again. The camera will stop capturing the video and save it to the memory card.
7. Playback and review
You can then playback and review the recorded video on your camera’s LCD screen. Use the navigation buttons to navigate through the recorded videos.
8. Transfer to a computer

If desired, you can transfer the recorded videos to a computer using the USB cable provided with the camera. Connect the camera to the computer and follow the prompts to transfer the files.
9. Edit and share
Once the video is transferred to your computer, you can edit it using video editing software and share it with others via email, social media, or other platforms.
Following these steps will allow you to effectively record videos using your vivicam v54 digital camera.
Using different shooting modes
The Vivicam V54 digital camera offers various shooting modes, allowing you to capture different types of photos depending on your needs and preferences. Here are some of the main shooting modes available:
Auto mode
In Auto mode, the camera automatically adjusts settings such as exposure, focus, and white balance to optimize your shot. This is a great mode for beginners or when you don’t want to fuss with manual settings.
Portrait mode
Portrait mode is designed to capture beautiful and well-focused portraits. It blurs the background to make the subject stand out, resulting in professional-looking portrait shots.
Landscape mode
Landscape mode is ideal for capturing wide scenic views. It optimizes settings to enhance colors and details in landscape photos, allowing you to capture the beauty of nature with ease.
Sports mode
Sports mode is specifically designed for capturing fast-moving subjects. It adjusts the camera settings to freeze the action and reduce blur, making it perfect for photographing sports events or any other action-packed scenes.
Macro mode
Macro mode is used for capturing close-up shots of small objects or details. It allows you to focus on subjects that are very close to the camera, resulting in highly detailed and magnified images.
To switch between different shooting modes, simply turn the mode dial on the top of the camera to the desired mode. Experiment with each mode to explore the capabilities of your Vivicam V54 and take your photography to the next level!
Understanding camera settings
When using the Vivitar V54 digital camera, it’s important to understand the various camera settings in order to capture the best photos possible. Here are some key settings to be familiar with:
1. Resolution
The resolution setting determines the number of pixels that make up the image. Higher resolution images have more detail, but also take up more storage space. For everyday use, a resolution of 8 megapixels is often sufficient.
2. White Balance
White balance adjusts the colors in a photo to accurately represent the true colors of the scene. Different lighting situations can cause a photo to appear too warm or too cool. The camera offers several white balance modes, such as Auto, Daylight, Cloudy, and Fluorescent, to ensure your photos look natural.
3. Exposure
The exposure setting controls the amount of light that enters the camera. Bright conditions require less exposure, while darker conditions require more exposure. The camera allows you to adjust the exposure compensation to get the perfect balance between light and dark in your photos.
Additionally, the camera offers various shooting modes, such as portrait, landscape, sports, and night mode, which adjust settings to optimize the camera for different scenes. Experiment with these modes to find the best settings for your specific photography needs.
Remember: It’s always a good idea to refer to the camera’s user manual for a detailed explanation of each setting and how to adjust them on the Vivitar V54 digital camera. Taking the time to understand and experiment with the camera settings will greatly improve the quality of your photos and enhance your overall photography experience.
Happy shooting!
Transferring and managing files
Once you have captured photos or recorded videos using your Vivicam V54 digital camera, you may want to transfer them to your computer for further editing, sharing, or storage purposes. Here are the steps to transfer and manage files from your Vivicam V54.
1. Connecting the camera to your computer
To start the file transfer process, you will need to connect your Vivicam V54 to your computer using a USB cable. Locate the USB port on your camera and the corresponding USB port on your computer.
Insert one end of the USB cable into the USB port on your camera and the other end into an available USB port on your computer.
2. Accessing your camera on the computer
Once the camera is connected to your computer, it should be recognized as an external storage device. You can then access your camera by following these steps:
- Go to “My Computer” or “This PC” on your computer.
- You should see your camera listed as a removable storage device. Click on it to open.
3. Transferring files
Once you have accessed your camera on your computer, you can start transferring files from your camera to your computer. Here’s how:
- Select the files you want to transfer by clicking and dragging your mouse cursor over them or holding the Ctrl key while individually selecting files.
- Right-click on the selected files and choose “Copy.”
- Navigate to the desired location on your computer where you want to store the files.
- Right-click on the desired location and choose “Paste.”
4. Managing files
Now that your files are transferred to your computer, you can manage them efficiently. Here are some management options:
- Organize your files into folders for better categorization.
- Rename files to give them more meaningful names.
- Delete unwanted files to free up storage space.
- Backup your files to an external hard drive or cloud storage for extra security.
By following these steps, you can easily transfer and manage files from your Vivicam V54 digital camera, allowing you to make the most of your captured moments.
Troubleshooting common issues
While using the Vivitar Vivicam V54 digital camera, you may encounter some common issues. Here are some troubleshooting tips to help you resolve them:
1. Battery problems
If your camera does not turn on or is not functioning properly, the battery may be the issue. Make sure the battery is inserted correctly and fully charged. If you have been using the camera for an extended period of time and the battery level is low, try replacing it with a new one.
2. Memory card errors
If you receive an error message related to the memory card, ensure that it is inserted correctly and not full. If the memory card is full, delete some files or transfer them to a computer to free up space. If you are experiencing ongoing issues with the memory card, consider formatting it or replacing it with a new one.
It is also important to note that some memory cards may not be compatible with the Vivitar Vivicam V54 camera. Check the camera’s user manual or contact the manufacturer for a list of recommended memory cards.
If you continue to experience issues with your Vivitar Vivicam V54 digital camera, consider checking the user manual for additional troubleshooting tips. You can also reach out to the manufacturer’s customer support for further assistance.
Question-answer:
What is a vivicam v54 digital camera?
The Vivitar Vivicam V54 is a digital camera that allows you to capture photos and videos digitally. It is compact, lightweight, and easy to use.
How do I turn on the vivicam v54 digital camera?
To turn on the Vivitar Vivicam V54, locate the power button on the camera’s top panel. Press and hold the power button until the camera turns on. The LCD screen will activate, indicating that the camera is ready to use.


