If you love taking photos with your iPhone and want to take your photography skills to the next level, using a camera tripod is a must. A camera tripod is a three-legged stand that provides stability for your iPhone while capturing a photo or recording a video. It allows you to keep your iPhone steady, resulting in sharp and clear images.
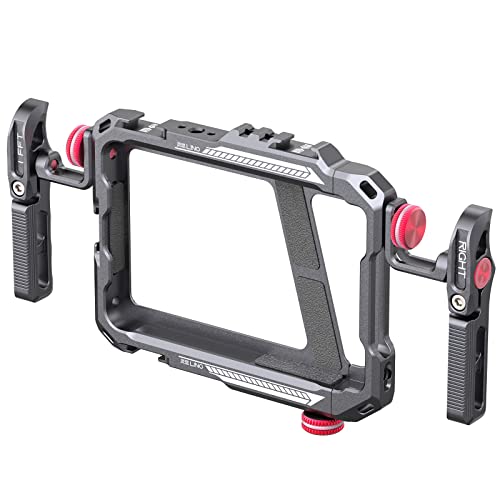
Using a camera tripod with your iPhone is simple and easy. First, you need to ensure that your iPhone is compatible with the tripod. Most tripods come with a universal smartphone mount that can hold any smartphone, including iPhones. Make sure your iPhone is securely attached to the mount before proceeding.
Once your iPhone is attached to the tripod, you can adjust the height and angle of the tripod to get the desired composition. The tripod legs usually have adjustable sections that allow you to extend or retract them. This feature is particularly useful when you want to capture photos or videos from different heights, such as low-angle shots or overhead shots.
When using the camera tripod with your iPhone, it’s crucial to use the timer or a remote shutter release to avoid any camera shake. Even the slightest movement of your iPhone can result in blurry photos. Set the timer or use a remote shutter release to eliminate camera shake caused by pressing the shutter button manually. This will ensure that your photos are sharp and clear.
In conclusion, using a camera tripod with your iPhone is a game-changer for your photography. It provides stability, allowing you to capture sharp and clear images. Make sure your iPhone is securely attached to the tripod and use the timer or a remote shutter release to avoid camera shake. With a camera tripod, you can take your iPhone photography to new heights.

How to Choose the Right Camera Tripod for Your iPhone
When it comes to taking photos or videos with your iPhone, a camera tripod can be a useful accessory that provides stability and flexibility. However, with so many options available, it can be overwhelming to choose the right one. Here are some tips to help you select the perfect camera tripod for your iPhone.
1. Consider the Size and Weight
Since you’ll be using the tripod with your iPhone, it’s important to choose one that is compact and lightweight. Look for tripods that are designed specifically for smartphones and have a flexible mount that can securely hold your device.
2. Evaluate the Stability
Stability is a crucial factor to consider when selecting a camera tripod. Ensure that the tripod you choose has sturdy legs and a robust center column. Look for features like rubber feet or spikes, which provide extra stability on different surfaces.
3. Check the Height Range
The height range of a tripod is another important aspect to consider. Think about how you plan to use your tripod and whether you need it to be compact or have a higher reach. Look for tripods with adjustable height options that suit your shooting needs.

4. Consider Portability
If you’re always on the go, a portable tripod is essential. Look for tripods that can be folded down to a compact size and easily fit in your bag or pocket. Consider the tripod’s weight as well, as you don’t want it to add unnecessary bulk to your gear.
5. Explore Additional Features
Some tripods come with extra features that can enhance your shooting experience. Look for options like a detachable Bluetooth remote control, a built-in level, or a rotating head. These additional features can make it easier to capture those perfect shots.
In conclusion, choosing the right camera tripod for your iPhone involves considering factors like size, stability, height range, portability, and additional features. By carefully evaluating your needs and preferences, you can find a tripod that will enhance your photography and videography skills with your iPhone.
Tips for Setting Up Your iPhone on a Camera Tripod
Using a camera tripod with your iPhone can help you capture more stable and professional-looking photos and videos. Here are some tips to help you set up your iPhone on a camera tripod:

1. Choose a Compatible Tripod
Before setting up your iPhone on a camera tripod, ensure that the tripod you have is compatible with your iPhone model. Some tripods come with adjustable mounts that can fit different smartphone sizes, while others may require additional accessories.
2. Attach Your iPhone to the Tripod Mount
Once you have a compatible tripod mount for your iPhone, attach it securely to the tripod. Make sure it is tightly fastened to avoid any accidental slips or falls. The tripod mount should have a secure grip on your iPhone, allowing you to position it at different angles.
3. Position Your iPhone
Once your iPhone is attached to the tripod mount, position it according to your intended shot. You can adjust the tripod legs and the mount to achieve the desired height and angle. Take into consideration the composition and framing of your shot to capture the best image or video.
4. Use a Remote Shutter or Self-Timer
To avoid any camera shake while taking photos or recording videos, consider using a remote shutter or the self-timer function on your iPhone. This will allow you to trigger the camera without physically touching the device, resulting in sharper and more stable shots.
5. Lock the iPhone Orientation
If you want to shoot videos or capture photos in a specific orientation, make sure to lock the iPhone’s orientation. This will prevent the device from automatically rotating the screen when you tilt it. You can do this by swiping up from the bottom of the screen to access the Control Center and tapping on the lock icon.

Conclusion
Using a camera tripod with your iPhone can significantly improve the quality of your photos and videos. By following these tips, you can set up your iPhone on a tripod correctly and capture stable and professional-looking shots. Experiment with different angles and compositions to unleash your creativity and take your photography to the next level.
Understanding the Different Types of Tripod Heads for Your iPhone
When it comes to using a camera tripod with your iPhone, one of the most important things to consider is the type of tripod head you will be using. The tripod head is the part of the tripod that connects to your iPhone, allowing you to adjust and position it just the way you want.
There are several different types of tripod heads available, each with its own unique features and benefits.
1. Ball Head: The ball head is the most popular type of tripod head for iPhone photography. It uses a ball and socket design, which allows for smooth and fluid movement in all directions. It is easy to use and provides excellent stability.

2. Fluid Head: The fluid head is commonly used for video recording. It utilizes a fluid-filled chamber to provide smooth and controlled movements. It is ideal for capturing panning shots and ensures that your videos are free from jerky movements.
3. Pistol Grip Head: The pistol grip head is a versatile option that allows for quick and easy adjustments. It features a handle that you can squeeze to release the lock and move the tripod head in any direction. This type of head is preferred by many photographers for its simplicity and convenience.
4. Geared Head: The geared head is a more advanced option that offers precise control over the positioning of your iPhone. It features gears that allow you to make micro-adjustments, making it perfect for macro photography or any situation where precise positioning is required.
5. Panoramic Head: As the name suggests, the panoramic head is designed specifically for capturing panoramic photos. It enables you to rotate your iPhone horizontally, capturing a wide field of view. This type of head is essential for achieving seamless and distortion-free panoramic shots.
Choosing the right tripod head for your iPhone will depend on the type of photography or videography you will be doing. Consider your specific needs and preferences to find the best tripod head that will help you capture stunning images and videos with your iPhone.

The Benefits of Using a Camera Tripod with Your iPhone
Using a camera tripod with your iPhone can greatly enhance the quality of your photos and videos. Here are some key benefits of using a tripod:
1. Stability
One of the primary advantages of using a camera tripod with your iPhone is the stability it provides. Holding your iPhone by hand can often result in shaky footage or blurry photos, especially in low light conditions. By using a tripod, you can eliminate camera shake and achieve sharper images and smoother videos.
2. Versatility
Camera tripods are designed to be highly adjustable, allowing you to position your iPhone at different angles and heights. This versatility is especially useful for capturing unique perspectives or challenging shots. Whether you want to shoot a selfie, a landscape, or a time-lapse video, a tripod gives you the freedom to explore different creative possibilities.
3. Hands-Free Operation
Using a tripod allows you to operate your iPhone hands-free. This can be particularly useful when you want to include yourself in a group photo or when you need to set up your iPhone for a video recording. By using a tripod, you can position your iPhone in the desired frame and then use a timer or a remote shutter release to capture the perfect shot without having to hold your phone.
4. Long Exposure Photography
With a camera tripod, you can easily experiment with long exposure photography. Long exposure shots, which involve leaving the camera’s shutter open for an extended period of time, can create stunning effects like light trails or silky smooth water. By stabilizing your iPhone on a tripod, you can keep it perfectly still during the long exposure, resulting in breathtaking images.

5. Improved Nighttime Photography
When shooting in low light conditions, a camera tripod can be a game-changer. The longer exposure times required for nighttime photography can be difficult to achieve without a tripod, as even the slightest movement can cause blurriness. By mounting your iPhone on a tripod, you can capture well-exposed and sharp images in low light situations.
In conclusion, using a camera tripod with your iPhone brings several advantages, including increased stability, versatility, hands-free operation, the ability to experiment with long exposure photography, and improved results in low light conditions. Investing in a tripod can significantly improve your mobile photography and take it to the next level.
How to Stabilize Your iPhone Videos with a Tripod
Shooting videos with your iPhone can produce stunning results, but it can be challenging to keep the footage stable and avoid shaky footage. Thankfully, using a tripod can solve this problem and give your videos a professional look. Here’s a step-by-step guide on how to stabilize your iPhone videos with a tripod:
Step 1: Choose the right tripod
There are various tripods available on the market specifically designed for iPhones. Look for a tripod that is lightweight, portable, and compatible with your iPhone model. Consider factors like stability, height, and additional features such as adjustable legs or a smartphone mount.
Step 2: Attach your iPhone to the tripod
Most tripods come with a smartphone mount that holds your iPhone securely in place. Attach the mount to the tripod head, ensuring that it is tight and stable. Place your iPhone in the mount, making sure it is secure and won’t easily slide out.
Step 3: Adjust the tripod height and position
Position the tripod in the desired location and adjust its height accordingly. Make sure the tripod is leveled and stable by using the adjustable legs or tripod head. Position your iPhone in landscape or portrait mode, depending on your preferences and the type of video you are shooting.
Step 4: Use a remote or self-timer
To reduce the risk of shaking your iPhone when pressing the record button, consider using a remote control or the self-timer feature. This will allow you to start recording without touching your iPhone, resulting in smoother, more stable footage.
Step 5: Utilize the tripod’s additional features
Some tripods come with additional features that can further improve the stability of your videos. For example, a tripod with a built-in level can help you ensure that your footage is straight and aligned. You can also use a tripod with a swivel head to follow the action smoothly.
Step 6: Practice panning and tilting
To add cinematic effects to your videos, practice panning (moving the camera horizontally) and tilting (moving the camera vertically) with your tripod. This will give your videos a more professional look and make them visually engaging.
Step 7: Edit your videos if necessary
After capturing your videos, you may need to do some post-processing to enhance the quality further. Use video editing software to trim unwanted footage, stabilize shaky parts, adjust brightness and contrast, and add any necessary effects.
By following these steps and using a tripod, you can stabilize your iPhone videos and take your videography skills to the next level. So grab your tripod, set up your iPhone, and start shooting stunning, shake-free videos!
Step-by-Step Guide on Attaching Your iPhone to a Camera Tripod
Introduction
Using a camera tripod with your iPhone can greatly improve the quality of your photos and videos. In this guide, we will walk you through the process of attaching your iPhone to a camera tripod to help you achieve more stable shots.
Step 1: Choose the Right Tripod Mount
The first step is to find a tripod mount that is compatible with your iPhone model. There are various options available on the market, including universal mounts and specialized mounts for specific iPhone models. Choose a mount that securely holds your iPhone and provides easy access to its buttons and features.
Step 2: Set Up Your Camera Tripod
Next, set up your camera tripod on a stable surface. Extend the legs and adjust the height of the tripod to your desired level. Make sure the tripod is stable and securely locked in place.
Step 3: Attach the Tripod Mount to Your iPhone
Attach the tripod mount to your iPhone by aligning the mount with your iPhone’s camera and gently pressing it into place. Ensure that the mount is securely attached and that your iPhone is centered within the mount.
Step 4: Secure Your iPhone onto the Tripod
Once the mount is attached to your iPhone, carefully mount your iPhone onto the tripod by aligning the mount’s screw hole with the tripod’s screw. Twist the mount clockwise to tighten it onto the tripod securely.
Step 5: Adjust and Level Your iPhone
Use the tripod’s adjustment knobs or levers to level your iPhone. This will ensure that your photos and videos are properly aligned and not tilted. Adjust the tripod’s head as needed to achieve the desired framing and angle for your shots.
Step 6: Test and Adjust
After attaching your iPhone to the camera tripod, it’s important to test its stability. Adjust the tripod and ensure that your iPhone is securely mounted before capturing any photos or videos. Make any necessary adjustments to the tripod’s position or angle to achieve the desired shot.
Conclusion
Attaching your iPhone to a camera tripod is a simple process that can greatly enhance your photography and videography. By following this step-by-step guide, you can ensure that your iPhone is securely attached and stable, allowing you to capture professional-looking shots with ease.
Best Practices for Adjusting the Height and Angle of Your iPhone on a Tripod
When using a camera tripod with your iPhone, it is important to properly adjust the height and angle to capture the best photos and videos. Here are some best practices to keep in mind:
- Ensure that your tripod is stable and secure before attaching your iPhone. This will prevent any wobbling or shaking while capturing media.
- Adjust the height of your tripod so that your iPhone is at eye level or slightly higher. This will help you frame your shots more accurately and reduce strain on your neck and shoulders.
- Once you have adjusted the height, tighten the tripod legs and ensure that they are locked in place to prevent any accidental adjustments while using your iPhone.
- Consider using a tripod with a tilt or swivel head to allow for easy adjustment of the angle. This will enable you to capture photos and videos from different perspectives without needing to move the entire tripod.
- Experiment with different angles and perspectives to add variety to your shots. Try shooting from a low angle to make objects appear larger or from a high angle for a more dramatic effect.
- Use the gridlines on your iPhone’s camera app to help align your shots. This will help you achieve a level horizon and maintain a balanced composition.
- If shooting in low-light conditions, consider using a tripod with a smartphone mount that has built-in stabilization features. This will help eliminate any blur caused by camera shake.
- Always check the stability of your tripod and adjust it accordingly if necessary. Windy conditions or uneven surfaces can cause your tripod to become unstable, which can result in blurry photos or damage to your iPhone.
- After adjusting the height and angle of your iPhone on the tripod, take a test shot and review the composition before capturing your final photos or videos. This will allow you to make any necessary adjustments before committing to a shot.
By following these best practices, you can maximize the functionality of your camera tripod and capture stunning photos and videos with your iPhone. Remember to practice and experiment with different techniques to find what works best for your specific needs and creative vision.
Maintaining Your Tripod and iPhone Mount for Longevity
Keeping your camera tripod and iPhone mount in good condition is essential for long-term use. By following these simple maintenance tips, you can ensure that your equipment stays in optimal working condition:
- Regularly clean your tripod and iPhone mount to remove dirt, dust, and debris. Use a soft cloth or brush to gently wipe down the surfaces.
- Check for any loose screws or parts. Tighten them if necessary to prevent any potential damage.
- Store your tripod and iPhone mount in a dry and safe place when not in use. Avoid exposing them to extreme temperatures or humidity.
- If your tripod has extendable legs, make sure to extend and retract them carefully. Avoid forcing or bending the legs, as this can cause damage.
- Inspect the mount regularly for any signs of wear or damage. If any parts are worn out or broken, replace them promptly to avoid further issues.
- When attaching or detaching your iPhone from the mount, handle it with care to prevent any accidental drops or damage.
- Avoid overloading your tripod with heavy equipment. Check the weight capacity of your tripod and ensure that it is not exceeded to prevent any potential accidents.
- When transporting your tripod, use a protective carrying case or bag to avoid scratches or other damage.
- Consider investing in a smartphone tripod mount with adjustable features that can accommodate different phone sizes and camera positions.
By following these maintenance tips, you can extend the lifespan of your tripod and iPhone mount, ensuring that they continue to be reliable tools for capturing high-quality photos and videos.
Exploring Different Photography Techniques with a Tripod and iPhone
Using a tripod with your iPhone opens up a world of possibilities for exploring various techniques to create stunning photography. With the stability and flexibility that a tripod provides, you can capture images with precision and control, allowing you to experiment and push the boundaries of your creativity.
One technique to try is long exposure photography. By securing your iPhone on a tripod, you can capture long exposure shots, where the camera’s shutter stays open for an extended period. This technique is great for capturing flowing waterfalls, light trails, and starry night skies. With the steady foundation of the tripod, your iPhone can capture these mesmerizing scenes without any blurriness.
In addition to long exposure shots, a tripod can also help you with macro photography. By using a tripod, you can keep your iPhone perfectly still, allowing you to get up close and capture stunning details of small subjects. Whether it’s capturing the intricate patterns on a flower petal or the delicate features of an insect, a tripod ensures sharp and focused images.
Another technique to explore is panoramic photography. With a tripod, you can easily capture a series of images and then stitch them together to create a wide-angle or 360-degree panoramic shot. This technique is great for capturing breathtaking landscapes or crowded cityscapes. By using a tripod, you can ensure that each image is taken from the same perspective, resulting in a seamless and professional-looking panoramic image.
When shooting in low light conditions, a tripod becomes essential. It eliminates the risk of camera shake, allowing you to capture sharp and well-exposed images even in dimly lit environments. This opens up opportunities for night photography or capturing the mood and ambiance of a candlelit scene.
Lastly, using a tripod can also enhance your composition skills. With the ability to precisely position your iPhone, you can experiment with different angles, perspectives, and framing techniques. The tripod allows you to take your time to compose the shot, leading to more thoughtful and visually engaging photographs.
In conclusion, using a tripod with your iPhone offers numerous photography techniques to explore. From long exposures to macro photography and panoramic shots, a tripod provides stability and precision that can take your iPhone photography to the next level. So grab your tripod, unleash your creativity, and start capturing stunning images with your iPhone.
Frequently Asked Questions about Using a Tripod with Your iPhone
Q: Can I use any tripod with my iPhone?
A: Yes, you can use any tripod that has a universal smartphone mount. This allows you to securely attach your iPhone to the tripod and capture stable photos or videos.
Q: How do I attach my iPhone to a tripod?
A: To attach your iPhone to a tripod, you will need a tripod mount or a smartphone holder. These accessories securely hold your iPhone in place and allow you to connect it to the tripod’s mounting plate or head.
Q: Can I take selfies with a tripod and iPhone?
A: Absolutely! Using a tripod with your iPhone allows you to take better selfies by eliminating shaky hands and achieving a more stable composition. You can set up the tripod at the desired angle and distance, set a timer or use a remote, and easily capture stunning selfies.
Q: Are tripods portable?
A: Yes, most tripods designed for iPhones are portable. They are made from lightweight materials and have collapsible legs, making them easy to carry in a backpack or camera bag. Some tripods even come with a travel case for added convenience.
Q: Can I adjust the height of a tripod?
A: Yes, most tripods allow you to adjust the height. You can extend or retract the legs to set the tripod at the desired height. Some tripods also have a center column that can be extended for additional height adjustment.
Q: Can I use a tripod for recording videos with my iPhone?
A: Absolutely! Using a tripod for recording videos with your iPhone is highly recommended. It helps stabilize your shots, resulting in smooth and professional-looking videos. You can pan, tilt, and capture different angles with ease when using a tripod.
Q: Can I use a tripod for time-lapse photography with my iPhone?
A: Yes, a tripod is an essential tool for time-lapse photography with your iPhone. It allows you to keep your device steady for an extended period, ensuring that each frame aligns perfectly. Using a tripod also helps eliminate movement or shaking that would compromise the quality of your time-lapse footage.
Q: Are there any tips for using a tripod with an iPhone?
A: Yes, here are some tips:
- Use a tripod with adjustable legs and a ball head for maximum flexibility in positioning your iPhone.
- Consider using a remote shutter or timer to avoid any vibration caused by pressing the screen.
- Experiment with different angles and heights to find the best composition for your shots.
- Use the grid feature on your iPhone to ensure a level horizon and straight lines.
- When shooting outdoors, bring a stabilizing weight to prevent the tripod from tipping over in windy conditions.
By following these tips, you can make the most out of your tripod and iPhone combination for capturing stunning photos and videos.
FAQ
What is a camera tripod?
A camera tripod is a three-legged stand used to stabilize and support a camera or smartphone while taking photos or videos.
Can I use a camera tripod with my iPhone?
Yes, you can use a camera tripod with your iPhone. There are tripod mounts available that allow you to securely attach your iPhone to a standard camera tripod.


