
Are you tired of the grainy and low-quality video that your built-in webcam provides? Do you want to take your video conferencing and streaming game to the next level? Look no further! In this guide, we will show you how to use your Canon DSLR camera as a webcam, enabling you to capture high-quality video with stunning clarity and detail.
Canon DSLR cameras are known for their exceptional image quality and advanced features, making them a popular choice among both amateur and professional photographers. But did you know that you can also use your Canon DSLR camera for live streaming, video conferencing, and online content creation? With just a few simple steps and the right tools, you can unlock the full potential of your camera and get professional-looking video that will impress your audience.
So how can you use your Canon DSLR camera as a webcam? The first thing you will need is a USB cable to connect your camera to your computer. Most Canon DSLR cameras come with a USB cable, but if you don’t have one, you can easily find a compatible cable online or at your local electronics store. Once you have the cable, make sure your camera is fully charged and turned on.
Using a Canon DSLR Camera as a Webcam: Overview
Canon DSLR cameras are known for their exceptional image quality and advanced features. With the rise of online meetings, streaming, and content creation, many people are now looking for ways to use their Canon DSLR as a webcam to upgrade their video quality.
Using a Canon DSLR as a webcam has several advantages. Firstly, the image quality is significantly better compared to built-in webcams on laptops or desktop computers. DSLR cameras have larger sensors, resulting in sharper details, vibrant colors, and better low-light performance.

To use your Canon DSLR as a webcam, you will need some additional equipment and software. The first thing you’ll need is a USB cable to connect your camera to your computer. Make sure to check your camera model for the specific type of USB cable required.
Next, you will need software that allows your computer to recognize your DSLR as a webcam. One popular software option is the Canon Webcam Utility, which is available for Canon DSLR cameras starting from the EOS 1D X Mark III, EOS R5, and EOS R6 models. This software enables you to use your camera’s Live View mode as a webcam.
Once you have connected your DSLR to your computer and installed the necessary software, you will need to configure your video conferencing or streaming application to recognize your camera as the video input source. Applications such as Zoom, Microsoft Teams, OBS Studio, and many others support using external cameras as webcams.
It’s worth noting that using a DSLR as a webcam may drain the camera’s battery faster than normal, so it’s recommended to have the camera powered by an AC adapter for longer use. Additionally, consider using a tripod or a camera mount to stabilize the camera and avoid shaky video footage.
In conclusion, using a Canon DSLR camera as a webcam is a great way to enhance the quality of your video communication or content creation. With the right equipment and software, you can take advantage of your DSLR’s superior image quality and enjoy a more professional-looking video experience.

Step-by-Step Guide: Connecting Your Canon DSLR Camera to Your Computer
If you want to use your Canon DSLR camera as a webcam for video conferencing, live streaming, or other online activities, you can easily connect it to your computer. Follow these steps to get started:
Step 1: Check camera compatibility
Make sure your Canon DSLR camera model supports the use of the camera as a webcam. You can check the official Canon website or the camera’s user manual for information on compatibility.
Step 2: Install necessary software
Download and install the necessary software for connecting your Canon DSLR camera to your computer. Canon provides dedicated software like Canon EOS Webcam Utility for Windows and Mac users that allows you to use your camera as a webcam.
Step 3: Connect your camera to your computer
Using the provided USB cable, connect your Canon DSLR camera to your computer. Make sure both devices are powered on before connecting.
Step 4: Set the camera to the appropriate mode
Switch your Canon DSLR camera to the appropriate mode for using it as a webcam. This mode may vary depending on your camera model. Refer to your camera’s user manual for instructions on setting the camera to webcam mode.

Step 5: Open the webcam software
Launch the webcam software that you installed in step 2. The software should detect your Canon DSLR camera automatically. If not, check the software’s settings or troubleshooting guide for assistance.
Step 6: Configure camera settings
In the webcam software, adjust the settings according to your preferences. This may include selecting the camera input, setting video resolution, adjusting frame rate, and configuring audio options if necessary.
Step 7: Start using your Canon DSLR camera as a webcam
Once you have configured the camera settings, you can start using your Canon DSLR camera as a webcam. Open the video conferencing or streaming application of your choice and select your Canon camera as the video input device.
That’s it! You have successfully connected your Canon DSLR camera to your computer and can now use it as a webcam for various online activities. Enjoy the enhanced video quality and features that your Canon camera offers.
Configuring Camera Settings for Webcam Use
Before you can start using your Canon DSLR camera as a webcam, you need to configure some camera settings to ensure optimal performance. Follow the steps below to get started:

| Step | Description |
|---|---|
| 1 | Connect your Canon DSLR camera to your computer using a USB cable. |
| 2 | Power on your camera and set it to “Movie Mode” or a similar mode that allows for video recording. |
| 3 | Access your camera settings by pressing the “Menu” button on your camera. |
| 4 | Navigate to the “Live View” settings and enable it. This will allow your camera to provide a live preview of the video feed. |
| 5 | Adjust the video resolution and frame rate settings to match your desired quality and streaming capabilities. |
| 6 | Enable the “Auto Power Off” setting to ensure that your camera doesn’t turn off automatically during long webcam sessions. |
| 7 | Set the white balance, exposure, and focus settings according to your environment and lighting conditions. |
| 8 | Save any changes you made to the camera settings and exit the menu. |
| 9 | You are now ready to use your Canon DSLR camera as a webcam. Open your preferred video conferencing or streaming application and select your camera as the video input device. |
By configuring these camera settings, you can optimize the video quality and ensure a smooth webcam experience with your Canon DSLR camera. Feel free to experiment with different settings to find the best configuration for your needs.
Selecting the Right Software for Canon DSLR Webcam Functionality
When using your Canon DSLR camera as a webcam, it is essential to choose the right software that will allow you to fully utilize its features and capabilities. Here are some top options to consider:
1. Canon EOS Webcam Utility
The Canon EOS Webcam Utility is a versatile software developed by Canon specifically for Canon DSLR cameras. It allows you to connect your camera to your computer via USB and use it as a high-quality webcam for video conferencing, live streaming, and content creation. With this software, you can easily adjust camera settings, such as exposure, focus, and white balance, directly from your computer.
2. OBS Studio
OBS Studio, short for Open Broadcaster Software, is a popular open-source software widely used by professional streamers and content creators. It supports Canon DSLR cameras as webcams with the help of third-party plugins, such as Canon’s EOS Webcam Utility plugin. OBS Studio offers advanced features like scene switching, audio mixing, and custom overlays, making it an excellent choice for live streaming and recording.
3. SparkoCam
SparkoCam is another software that enables you to use your Canon DSLR camera as a webcam. It offers a range of features, including virtual webcam, green screen, face tracking, and live effects. SparkoCam supports various Canon DSLR models and allows you to customize camera settings and effects in real-time. The software is compatible with popular video conferencing applications like Skype and Zoom, making it suitable for both personal and professional use.
Before selecting your software, ensure compatibility with your specific Canon DSLR camera model and check for any additional system requirements. Additionally, consider the ease of use, available features, and compatibility with your preferred video conferencing or streaming platform.
By selecting the right software for your Canon DSLR webcam functionality, you can take full advantage of your camera’s superior image quality, control, and versatility for a seamless and professional video experience.
Tips and Tricks for Optimising Your Canon DSLR Webcam Experience
Using a Canon DSLR camera as a webcam can greatly enhance your online video conferencing and streaming experience. To ensure you get the best out of your camera, here are some tips and tricks to optimise your Canon DSLR webcam setup.
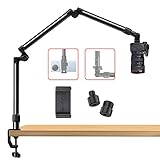
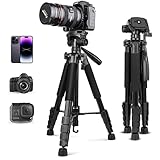
1. Use a Stable Mount
To prevent any shakiness or blur in your webcam footage, it is important to use a stable mount for your Canon DSLR camera. A tripod is a great option as it allows you to adjust the height and angle of the camera, ensuring a steady and professional-looking frame throughout your video call or live stream.
2. Choose the Right Lens
The lens you use with your Canon DSLR camera can have a significant impact on the image quality of your webcam footage. For video conferencing, a versatile lens such as a standard zoom lens or a wide-angle lens can provide a good field of view and ensure you capture all the necessary details. Experiment with different lenses to find the best option for your specific needs.

3. Adjust Camera Settings
Your Canon DSLR camera offers various settings that you can adjust to optimise your webcam experience. Make sure to set the camera to video mode and adjust the resolution and frame rate settings according to your preference. It is also advisable to turn off any image stabilization features, as they can cause a slight delay in the video feed.
Pro Tip: Check for any firmware updates for your Canon DSLR camera, as they may include improvements and new features specifically for webcam usage.
4. Lighting is Key
Good lighting is essential for a clear and professional-looking webcam feed. Consider setting up your workspace in a well-lit area with natural light if possible. If natural light is not available or insufficient, invest in some affordable LED lights or a ring light to illuminate your face evenly and eliminate shadows.
5. Audio Matters
While the video quality is important, audio quality is equally vital for effective communication during online meetings. Consider using an external microphone or a dedicated audio setup to ensure clear and crisp audio. This will help you communicate more effectively and enhance the overall experience for your viewers or participants.
6. Test and Practice
Before your important video call or live stream, take the time to test your Canon DSLR webcam setup. Connect the camera, adjust the settings, and make a test call to ensure everything is working as expected. It is also a good idea to practice using the camera as a webcam before going live to become more familiar with its features and functionality. The more comfortable you are with the setup, the smoother your online sessions will be.
By following these tips and tricks, you can make the most out of your Canon DSLR camera as a webcam. Enjoy a superior video conferencing and streaming experience with improved image quality and professional-looking results.
Troubleshooting Common Issues with Canon DSLR Webcam Setup
If you are using a Canon DSLR camera as a webcam, you might encounter some common issues during the setup process. Here are some troubleshooting tips to help you fix these problems:
1. Incorrect or Missing Drivers:
One common issue is when your computer doesn’t recognize the Canon DSLR camera as a webcam. This is often due to incorrect or missing drivers. To resolve this, you can visit the Canon website and download the appropriate drivers for your camera model. Once installed, restart your computer and reconnect the camera.
2. USB Connection Problems:
If you are experiencing connection issues between your Canon DSLR camera and your computer, try the following troubleshooting steps:
– Ensure that the USB cable is securely connected to both the camera and the computer.
– Try using a different USB cable or port to rule out any faulty connections.
– Restart both your camera and computer, then reconnect them.
3. Camera Settings:
Make sure your camera settings are correctly configured for webcam use. Here are the recommended settings:
– Set the camera mode to Manual (M) or Aperture Priority (Av).
– Disable any auto power-off settings to prevent the camera from turning off during use.
– Adjust the camera’s focus mode to manual for better control over focus.
– Set the video output format to 1080p or the desired resolution compatible with your video conferencing software.

4. Power and Battery:
A low battery level or inadequate power supply can cause issues during webcam use. Ensure that your camera is connected to a reliable power source or use a fully charged battery. Avoid relying solely on battery power, as it may drain quickly during prolonged use.
5. Software Compatibility:
Some video conferencing applications may not support Canon DSLR cameras as webcams. Make sure that you have installed the latest webcam utility software provided by Canon. Additionally, check the system requirements of your video conferencing software to ensure compatibility.
If you have followed these troubleshooting tips and are still experiencing issues, it’s recommended to consult the Canon support website for further assistance or contact their customer support.
Question-answer:
Can I use my Canon DSLR camera as a webcam?
Yes, you can use your Canon DSLR camera as a webcam. However, you will need to install additional software and connect your camera to your computer using a USB cable.
What software do I need to use my Canon DSLR camera as a webcam?
To use your Canon DSLR camera as a webcam, you will need to download and install software such as Canon’s EOS Webcam Utility or OBS Studio. These software solutions allow your camera to be recognized as a webcam by your computer.
How do I connect my Canon DSLR camera to my computer to use it as a webcam?
To connect your Canon DSLR camera to your computer as a webcam, you will need to use a USB cable. Connect one end of the USB cable to your camera and the other end to your computer. Make sure your camera is in the correct mode for webcam use.
Can I use my Canon DSLR camera as a webcam for video conferencing?
Yes, you can use your Canon DSLR camera as a webcam for video conferencing. By using software such as Canon’s EOS Webcam Utility or OBS Studio, you can set up your camera as a webcam and use it with video conferencing platforms like Zoom, Microsoft Teams, or Skype.
What are the advantages of using a Canon DSLR camera as a webcam?
Using a Canon DSLR camera as a webcam comes with several advantages. DSLR cameras generally have higher image quality and better low-light performance compared to standard webcams. This means that your video image will be crisper and clearer. Additionally, using a DSLR camera allows you to have more control over settings such as exposure and depth of field, resulting in a professional-looking video.


