
Are you a beginner amateur photographer who wants to learn how to use a Canon DSLR camera? Look no further – this comprehensive guide will help you get started on your photography journey. In this article, we will explore the basics of using a Canon DSLR camera, from understanding the different modes and settings to capturing stunning photos.
Canon DSLR cameras are known for their excellent image quality, versatility, and user-friendly interface. However, if you are new to photography or using a DSLR camera, the array of buttons, dials, and settings can be overwhelming at first. This guide aims to simplify the process and provide beginner-friendly instructions, tips, and techniques to help you make the most out of your Canon DSLR camera.
One of the first steps to mastering your Canon DSLR camera is understanding the different shooting modes. Canon cameras typically offer various shooting modes, including Auto, Program (P), Aperture Priority (Av), Shutter Priority (Tv), and Manual (M). Each mode has its own advantages and is designed to capture specific types of photos. By experimenting with these modes, you can gain a better understanding of how different settings affect your images and develop your own signature style.
In addition to shooting modes, it is crucial to become familiar with essential camera settings such as ISO, aperture, and shutter speed. The ISO determines the camera’s sensitivity to light, the aperture controls the depth of field, and the shutter speed determines the amount of time the camera’s sensor is exposed to light. Learning how these settings work together will enable you to have more control over your photos and achieve the desired effect. Remember, practice makes perfect, so don’t hesitate to experiment and take plenty of shots to refine your skills!
Whether you aspire to become a professional photographer or simply want to capture beautiful moments with friends and family, learning how to use a Canon DSLR camera is an exciting and rewarding experience. By understanding the basics of the camera’s modes and settings, you can elevate your photography skills and unleash your creativity. So grab your Canon DSLR camera, refer to this guide, and start capturing stunning images today!

Understanding the Basics of Canon DSLR Cameras
When you first start using a Canon DSLR camera, it can seem overwhelming and complicated. However, by understanding the basics, you can quickly become more comfortable with your camera and begin taking fantastic photos.
The Camera Body
The camera body is the main part of your Canon DSLR camera. It houses all the essential components like the imaging sensor, lens mount, and controls. Familiarize yourself with the various buttons, dials, and screens on the camera body, as these will be crucial for adjusting settings and capturing the perfect shot.
The Lens
The lens is an integral part of a DSLR camera and plays a significant role in image quality. Canon DSLRs feature interchangeable lenses, allowing you to use different lenses for various purposes. Experiment with different lenses to understand how they affect the perspective, depth of field, and overall look of your photos.
Additionally, take the time to learn about different lens focal lengths and their uses. Wide-angle lenses, for example, are ideal for capturing expansive landscapes, while telephoto lenses are perfect for zooming in on distant subjects.
Camera Modes
Canon DSLR cameras offer different shooting modes, allowing you to adjust settings according to your shooting conditions and preferences. The most basic modes include:

- Auto Mode: In this mode, the camera automatically adjusts settings like aperture, shutter speed, and ISO based on the scene.
- Program Mode: This mode provides some control over settings like exposure compensation, flash, and ISO while still having the camera set the aperture and shutter speed.
- Aperture Priority Mode: In this mode, you can manually set the aperture while the camera adjusts the shutter speed accordingly.
- Shutter Priority Mode: This mode allows you to set the desired shutter speed while the camera adjusts the aperture.
- Manual Mode: In manual mode, you have full control over all settings, giving you the flexibility to experiment and achieve your desired effect.
Take the time to understand each mode and experiment with them to see how they impact your photos.
By taking the time to understand the fundamentals of your Canon DSLR camera, you will be able to confidently capture stunning photos and unlock the full potential of your camera.
Choosing the Right Canon DSLR Camera Model
When it comes to choosing a Canon DSLR camera, there are several factors to consider. Canon offers a wide range of models that cater to different needs and budgets. Here are a few things to keep in mind when deciding on the right Canon DSLR camera model for you:
1. Consider Your Skill Level
Are you a beginner or an experienced photographer? Your skill level will play a role in determining the right Canon DSLR camera for you. If you are just starting out, it might be wise to choose a model that offers user-friendly features and automatic shooting modes. On the other hand, if you have more experience and want greater control over settings and customization options, a high-end Canon DSLR might be a better fit.
2. Think About Your Photography Goals
What do you plan to use the camera for? Are you interested in landscape photography, portraits, sports, or wildlife? Different Canon DSLR models offer various features and capabilities that can enhance specific types of photography. For example, if you are into sports or wildlife photography, you might want a camera with a faster burst rate and advanced autofocus system. On the other hand, if you are interested in capturing stunning landscapes, a camera with a high-resolution sensor and good dynamic range might be more important.

Remember: It’s essential to align the camera’s capabilities with your photography goals to ensure the best results.
3. Budget Considerations
How much are you willing to spend on a Canon DSLR camera? The price range for Canon DSLR cameras varies greatly, from budget-friendly entry-level models to professional-level options that can be quite costly. It’s important to set a budget and consider what features are most important to you. Remember that lenses and accessories can also add to the overall cost, so factor those into your budget as well.
By considering your skill level, photography goals, and budget, you can narrow down the options and find the right Canon DSLR camera model that meets your needs. Take the time to research different models, read reviews, and even try out the cameras in person if possible. With the right camera in hand, you’ll be on your way to capturing stunning images and exploring the world of photography.
Familiarizing Yourself with the Canon DSLR Camera Body
When starting out with a Canon DSLR camera as a beginner, it’s important to familiarize yourself with the various components and controls of the camera body. Understanding how each part works and what it does will help you gain confidence in using your camera and capturing better photos.
1. Camera Body
The camera body is the main part of your Canon DSLR camera. It houses all the internal components, including the image sensor, processor, and various controls. It’s important to handle the camera body with care and keep it clean to prevent any damage or dust from affecting the image quality.

2. Lens Mount
The lens mount is located on the front of the camera body and is used to attach different lenses. Canon DSLR cameras use the EF or EF-S mount system. When attaching a lens, align the red dot on the lens with the corresponding dot on the camera body and twist it clockwise until it locks into place.
3. Mode Dial
The mode dial is usually found on the top of the camera body and allows you to select different shooting modes. As a beginner, it’s recommended to start with the “Auto” or “Program” mode, which automatically adjusts the camera settings for you. As you gain more experience, you can explore other shooting modes such as aperture priority, shutter priority, or manual mode.
4. Shutter Button
The shutter button is located on the top right of the camera body and is used to capture photos. Pressing the shutter button halfway will autofocus the camera, and pressing it all the way down will take a photo. Practice gently pressing the shutter button to avoid camera shake and blurry photos.
5. Control Buttons and Dials
Canon DSLR cameras have various control buttons and dials located on the back and top of the camera body. These buttons and dials allow you to navigate the camera menu, adjust settings, and control exposure. It’s important to refer to the camera’s user manual to understand the functions of each button and dial.
6. LCD Screen
The LCD screen is located on the back of the camera body and is used to review and preview photos, navigate the camera menu, and change settings. It’s a good practice to review your photos on the LCD screen to ensure they are properly exposed and focused.

Familiarizing yourself with the Canon DSLR camera body is the first step in mastering your camera as a beginner. Take the time to explore each component and understand its purpose. With practice and experimentation, you’ll soon be capturing stunning photos with your Canon DSLR camera.
Learning Essential Camera Settings for Beginners
When starting out with a Canon DSLR camera, it’s important to learn and understand the essential camera settings. These settings will help you take control of your photos and achieve the desired results. In this guide, we will cover some of the key settings that every beginner should know.
1. Shooting Modes
The shooting modes on your Canon DSLR camera allow you to adjust the camera settings according to the type of scene you are photographing. The two basic modes you should start with are:
- Auto Mode: This mode is perfect for beginners as the camera takes care of all the settings automatically. It’s a great way to familiarize yourself with the camera and its capabilities.
- Program Mode: In this mode, you have more control over certain settings such as ISO, exposure compensation, and white balance while the camera handles the rest. It’s a step up from Auto mode and a good starting point for learning manual mode.
2. ISO
ISO determines the camera’s sensitivity to light. A lower ISO (e.g., 100) is ideal for well-lit conditions, while a higher ISO (e.g., 800 or above) is suitable for low-light situations. However, a higher ISO can introduce noise or graininess in your images, so it’s important to find a balance.
3. Aperture
The aperture controls the amount of light entering the camera through the lens. It also affects the depth of field, which determines how much of the scene is in focus. A wide aperture (low f-number) is great for portraits or subject isolation, while a narrow aperture (high f-number) is suitable for landscape photography.
4. Shutter Speed
The shutter speed determines the duration of time that the camera’s shutter remains open. It controls the amount of light that reaches the camera’s sensor and also affects the motion blur. A faster shutter speed freezes action, while a slower shutter speed creates motion blur. Experimenting with different shutter speeds can give your photos a creative and unique look.
With time and practice, you’ll become more comfortable with these settings and be ready to explore other advanced features of your Canon DSLR camera. Remember, the more you practice and experiment, the better understanding you will develop.
Exploring Different Shooting Modes on Canon DSLR Cameras
Canon DSLR cameras come with a variety of shooting modes that can help beginners capture great photos in different situations. Understanding and exploring these modes will allow you to unleash the full potential of your camera. Here are some of the most commonly used shooting modes:
- Auto Mode: This is the simplest mode to use, as the camera takes care of all the settings for you. It’s perfect for beginners who want to capture quick shots without having to worry about technical details.
- Program Mode: In this mode, the camera still takes care of most of the settings, but it allows you to have more control over certain aspects like exposure compensation and white balance. It’s a step up from Auto mode and gives you more creative freedom.
- Aperture Priority Mode: This mode allows you to manually set the aperture while the camera adjusts other settings such as shutter speed and ISO accordingly. It’s great for controlling depth of field and capturing sharp images.
- Shutter Priority Mode: In this mode, you can manually set the shutter speed while the camera adjusts other settings. It’s ideal for capturing fast-moving subjects or creating motion blur effects.
- Manual Mode: This mode gives you full control over all settings, including aperture, shutter speed, ISO, and more. It requires some knowledge of photography, but it offers the most flexibility and allows you to experiment with different techniques.
Experimenting with these different shooting modes will help you understand how they affect the final image and improve your photography skills. It’s recommended to read the camera’s manual to fully understand the functionality and options available in each mode. Practice using different modes in various shooting situations to find the ones that work best for you.
Mastering the Art of Composition and Framing
When it comes to photography, composition and framing are two fundamental aspects that can greatly enhance the visual impact of your images. Understanding how to effectively compose and frame your shots can take your photography skills to the next level. In this section, we will explore some key techniques and tips to help you master the art of composition and framing.
1. Rule of Thirds
The rule of thirds is a widely used technique in photography that involves dividing your frame into nine equal sections using two horizontal lines and two vertical lines. The idea is to place your main subject on or near one of the four intersecting points, rather than in the center of the frame. This can create a more visually appealing and balanced composition.
For example, when capturing a portrait, you might position the subject’s eyes along one of the horizontal lines, while leaving some negative space on either side. This can help draw the viewer’s attention to the subject’s eyes and create a more engaging composition.
2. Leading Lines
Leading lines are a powerful compositional tool that can guide the viewer’s eye and create a sense of depth and movement in your images. These lines can be natural or man-made, such as roads, fences, or even the curves of a river. By positioning these lines strategically, you can draw attention to your main subject or create a sense of perspective.
For instance, when photographing a landscape, you might use a road or a path that leads from the foreground to the background, leading the viewer’s eye through the image. Similarly, if you’re capturing a portrait, you could use the lines of a staircase or a railing to lead the viewer’s gaze towards the subject.
Remember, the key is to experiment with different angles and perspectives to find the most compelling lines for your composition.
3. Framing
Framing involves using elements within your scene to create a frame around your main subject. This can add depth, context, and visual interest to your images. Look for objects like archways, doorways, or even tree branches that can serve as natural frames.
For example, if you’re photographing a landscape, you might position yourself behind a tree branch to create a natural frame around the scene. This can help draw the viewer’s attention to the main subject and make the image more dynamic. Similarly, if you’re capturing a portrait, you could use a window or a doorway to frame the subject’s face, adding a sense of context and storytelling to the image.
Remember to pay attention to the size and position of your frame within the composition to avoid distracting the viewer from the main subject.
In conclusion, mastering the art of composition and framing is essential for creating visually appealing and compelling photographs. By using techniques such as the rule of thirds, leading lines, and framing, you can elevate your photography skills and capture images that truly stand out.
Understanding Exposure and Using the Camera’s Light Meter
One of the most important aspects of photography is understanding exposure. Exposure refers to the amount of light that reaches the camera’s image sensor, and getting it right can greatly impact the quality of your photos. Canon DSLR cameras come equipped with a built-in light meter, which measures the level of light in the scene and helps you achieve proper exposure.
When using a Canon DSLR camera, you can access the camera’s light meter through the viewfinder or the LCD screen. The light meter is represented by a scale that ranges from -3 to +3, with a zero mark in the middle. A properly exposed image is indicated when the needle or bar aligns with the zero mark on the scale.
Using the Light Meter in Manual Mode
In manual mode, you have full control over the exposure settings of your camera. To use the light meter to achieve proper exposure, follow these steps:
- Set your camera to manual mode by rotating the mode dial to “M”.
- Compose your shot and adjust the aperture, shutter speed, and ISO settings according to your desired creative vision.
- Look through the viewfinder or the LCD screen and observe the light meter.
- If the needle falls to the negative side of the scale, it means the image is underexposed and lacking sufficient light. Increase the exposure by opening up the aperture, slowing down the shutter speed, or increasing the ISO.
- If the needle falls to the positive side of the scale, it means the image is overexposed and receiving too much light. Decrease the exposure by closing down the aperture, increasing the shutter speed, or lowering the ISO.
- Keep adjusting the exposure settings until the needle aligns with the zero mark on the scale.
Using the Light Meter in Semi-Automatic Modes
If you’re not yet comfortable with manual mode, Canon DSLR cameras offer semi-automatic modes such as aperture priority (Av) and shutter priority (Tv). In these modes, you choose one exposure setting while the camera automatically adjusts the others to achieve proper exposure.
When using a semi-automatic mode, you can still rely on the camera’s light meter to guide you. Follow these steps:
- Select either aperture priority (Av) or shutter priority (Tv) by rotating the mode dial to the respective mode.
- Set your desired aperture or shutter speed, depending on the mode you’ve chosen.
- Look through the viewfinder or the LCD screen and observe the light meter.
- Follow the same steps as in manual mode to adjust the exposure settings until the needle aligns with the zero mark on the scale.
Understanding exposure and effectively using your camera’s light meter are crucial skills for beginner photographers. By mastering these concepts, you’ll be able to capture well-exposed and visually pleasing images with your Canon DSLR camera.
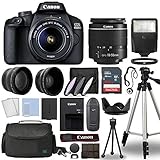
Using Lenses and Accessories with Canon DSLR Cameras
If you have recently purchased a Canon DSLR camera, you may be wondering about the different lenses and accessories available to enhance your photography experience. Here are some tips on how to use lenses and accessories with your Canon DSLR camera:
Lenses
One of the advantages of using a DSLR camera is the ability to interchange lenses for different shooting situations. Canon offers a wide range of lenses for various purposes:
1. Prime Lenses: Prime lenses have a fixed focal length, which means they cannot zoom in or out. However, they often provide superior image quality and wider apertures, allowing for better low-light performance and bokeh effects.
2. Zoom Lenses: Zoom lenses offer the flexibility to zoom in or out, which is useful for capturing subjects from different distances. They are available in a range of focal lengths, such as wide-angle, standard, and telephoto.
3. Macro Lenses: Macro lenses are designed for close-up photography, allowing you to capture intricate details of small subjects, such as flowers or insects. They provide a high magnification ratio and often have a longer minimum focusing distance.
Accessories
In addition to lenses, there are various accessories that can enhance your Canon DSLR camera’s performance:
1. Tripod: A tripod is a sturdy three-legged stand that helps stabilize your camera, especially in low-light situations or when capturing long exposure shots. It can also be useful for achieving steady shots with zoom lenses.
2. External Flash: An external flash can improve your photography in low-light situations by providing a more powerful and adjustable light source. It allows for greater control over lighting and can reduce unflattering shadows.
3. Remote Shutter Release: A remote shutter release is a handy tool that enables you to trigger your camera’s shutter without physically touching it. This minimizes camera shake, especially during long exposures or when using a tripod.
4. Lens Filters: Lens filters are accessories that you can attach to the front of your lens to achieve various effects. For example, a UV filter can protect your lens from scratches and dust, while a polarizing filter can reduce glare and enhance color saturation.
Remember, experimenting with different lenses and accessories is a great way to explore your creativity and expand your photography skills. So, don’t be afraid to try new combinations and techniques with your Canon DSLR camera!
Enhancing Your Photography Skills through Practice and Experimentation
When it comes to photography, practice makes perfect. The more you use your Canon DSLR camera, the more familiar you will become with its features and settings. By continuously experimenting with different shooting modes, exposure settings, and composition techniques, you will be able to push the boundaries of your photography skills.
One way to improve your skills is to practice shooting in different lighting conditions. Try taking photos in the golden hour, when the sunlight is softer and creates a warm glow. Experiment with shooting in low light situations, using a tripod or adjusting your camera’s ISO settings to capture stunning night scenes.
| Practice | Experimentation |
|---|---|
| Practice using different camera modes, such as aperture priority, shutter priority, and manual mode, to understand how they affect the final image. | Experiment with different lenses to achieve different perspectives and effects in your photos. |
| Practice composing your shots by paying attention to the rule of thirds, leading lines, and symmetry. | Experiment with different white balance settings to achieve the desired color temperature in your photos. |
| Practice capturing action shots by adjusting your camera’s shutter speed and using burst mode. | Experiment with long exposure photography to create stunning motion blur effects or capture light trails. |
Don’t be afraid to make mistakes and learn from them. Take the time to review your photos and analyze what worked and what didn’t. Seek feedback from others, whether it’s through photography communities, workshops, or online forums. This will help you gain valuable insights and perspectives on how to improve your photography skills.
Remember, photography is a continuous learning process. The more you practice and experiment, the better you will become. So grab your Canon DSLR camera and start capturing moments that tell your unique story!
Question-answer:
What is a DSLR camera?
A DSLR camera is a type of digital camera that uses a mirror mechanism to direct light from the lens to an optical viewfinder, which allows the photographer to see exactly what they are capturing.
Why would I choose a Canon DSLR camera as a beginner?
Canon DSLR cameras are often recommended for beginners because they offer a wide range of models to suit different needs and budgets. They also have an intuitive user interface and a vast selection of lenses and accessories to enhance your photography skills.
Where can I find a PDF guide on how to use a Canon DSLR camera for beginners?
You can find PDF guides on how to use Canon DSLR cameras for beginners on Canon’s website, photography blogs, and online photography forums. You can also search for specific camera models on websites like Amazon or eBay.
What are some basic settings I should know when using a Canon DSLR camera?
Some basic settings you should know when using a Canon DSLR camera are aperture, shutter speed, ISO, white balance, and focusing. Understanding how these settings work together will help you control the exposure, depth of field, and overall quality of your photographs.


