
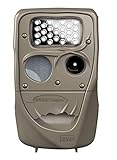
Cuddeback digital camera is a revolutionary device that has changed the way we capture and document wildlife. With its advanced technology and user-friendly interface, it has become a favorite among outdoor enthusiasts, hunters, and nature photographers alike.
Whether you are a seasoned professional or a beginner, this guide will take you through the steps of using the Cuddeback digital camera to its fullest potential. From setting up the camera to capturing high-quality images, you will learn everything you need to know to capture those unforgettable moments in the wild.
First and foremost, it is essential to properly set up your Cuddeback digital camera. This involves selecting the ideal location and angle for mounting the camera, as well as adjusting the settings to suit your specific needs. The camera should be positioned in an area where the wildlife activity is high, such as near trails, feeders, or watering holes. By choosing the right location, you increase your chances of capturing breathtaking photos.
Once your Cuddeback digital camera is set up, it’s time to explore the various features and settings it offers. The camera boasts impressive capabilities, such as high-resolution image capture, motion detection, and time-lapse mode. Experiment with these features to find the settings that work best for your desired outcome. Additionally, using accessories such as external flashes or tripods can further enhance your photography experience.
Benefits of Cuddeback Digital Camera
The Cuddeback digital camera offers several benefits that make it an excellent choice for capturing high-quality images. Whether you are a professional wildlife photographer or an outdoor enthusiast, this camera provides the features you need to capture stunning shots in any environment.

- High Resolution: The Cuddeback digital camera boasts a high resolution, ensuring that your photos are crisp and clear. With its advanced sensor technology, you can capture detailed images even in low-light conditions.
- Fast Trigger Speed: This camera has a fast trigger speed, allowing you to capture wildlife in action without any delay. You won’t miss any crucial moments as the camera can quickly snap photos when it detects movement.
- Wide Detection Range: The Cuddeback digital camera has a wide detection range, making it ideal for surveillance and wildlife photography. With its expansive field of view, you can capture images of animals from a distance, ensuring that you don’t disturb them.
- Long Battery Life: This camera is equipped with a long-lasting battery, allowing you to take photos for an extended period without worrying about the power running out. This is especially beneficial for long outdoor trips or when using the camera for surveillance purposes.
- Durable and Weatherproof: The Cuddeback digital camera is designed to withstand the harshest outdoor conditions. It is weatherproof, ensuring that it remains functional even in rain, snow, or extreme temperatures. The durable construction of the camera ensures that it can withstand bumps and knocks while you’re on the go.
- Multiple Shooting Modes: This camera offers various shooting modes, including time-lapse, burst mode, and video recording. These options provide flexibility and allow you to capture images or videos in different ways, depending on your needs.
With its high resolution, fast trigger speed, wide detection range, long battery life, durability, and multiple shooting modes, the Cuddeback digital camera is a top choice for photographers and outdoor enthusiasts. It delivers exceptional performance and ensures that you can capture stunning images in any outdoor setting.
Selecting the Right Cuddeback Camera for Your Needs
When it comes to choosing a Cuddeback digital camera, it’s important to consider your specific needs and preferences. Cuddeback offers a range of cameras, each with its own unique features and capabilities. To help you make an informed decision, here are some factors to consider:
| Factor | Consideration |
|---|---|
| Resolution | Cuddeback cameras come in various resolutions, ranging from 8 to 24 megapixels. Higher resolution cameras will capture more detail, but keep in mind that they may also produce larger file sizes. |
| Trigger Speed | If you’re interested in capturing fast-moving subjects, such as wildlife, consider a camera with a fast trigger speed. Cuddeback cameras typically have trigger speeds ranging from 0.25 to 0.5 seconds. |
| Flash Type | Cuddeback cameras are available in both infrared and black flash options. Infrared flashes are invisible to animals and humans, making them ideal for capturing undisturbed images. Black flash cameras use low-glow LEDs that are less likely to spook animals. |
| Battery Life | Consider how long you want your camera to be active in the field. Cuddeback cameras have varying battery life and power options, including AA batteries or external power sources. |
| Memory Capacity | Think about how many images you want your camera to store before needing to be reset or have the memory card changed. Cuddeback cameras support different memory capacities, so choose one that suits your needs. |
| Additional Features | Lastly, consider any additional features that may be important to you, such as time-lapse mode, video recording capability, or wireless connectivity options. |
By carefully considering these factors and your specific requirements, you can choose the right Cuddeback digital camera that will meet your needs and enhance your photography experience.
Setting up Your Cuddeback Digital Camera
Before you start using your Cuddeback digital camera, it is important to properly set it up to ensure optimal performance. Follow the instructions below to get started:
Step 1: Inserting Batteries
The first step is to insert the batteries into your Cuddeback digital camera. Open the battery compartment and insert the appropriate batteries according to the camera’s specifications. Close the compartment securely.

Step 2: Inserting the SD Card
Next, you will need to insert the SD card into the camera. Locate the SD card slot and gently insert the card. Make sure it is securely in place before proceeding.
Step 3: Adjusting the Settings
Now it is time to adjust the settings of your Cuddeback digital camera. Turn on the camera and navigate to the settings menu. Here, you can choose the desired resolution, image quality, and other settings based on your preferences. Make sure to save your settings once you are done.
Step 4: Mounting the Camera
Once the camera settings are adjusted, you will need to mount it in the desired location. Choose a suitable spot where you want to capture images or videos, and ensure that the camera is securely attached to a stable surface or tree using the provided mounting straps.
Step 5: Testing and Troubleshooting
After setting up the camera, it is essential to test it to ensure that it is functioning correctly. Take a few test shots or videos to verify that the camera is capturing the expected footage. If you encounter any issues, consult the user manual or contact Cuddeback customer support for troubleshooting assistance.
| Note: | It is recommended to regularly check the battery levels and SD card space to ensure uninterrupted operation of your Cuddeback digital camera. |
Following these steps will help you set up your Cuddeback digital camera effectively and get you ready to capture high-quality images and videos of wildlife or any other subjects you are interested in.

Choosing the Right Location for Your Cuddeback Camera
When it comes to using your Cuddeback digital camera effectively, one of the most important factors to consider is the location. Choosing the right spot to place your camera can greatly increase the chances of capturing high-quality images of wildlife or any other subject you are interested in.
To help you make the best choice, here are some key points to consider:
| 1. Purpose | Define the purpose of your camera placement. Are you primarily interested in monitoring wildlife activity, home security, or something else? Identifying your purpose will help you decide where to position the camera. |
| 2. Coverage Area | Identify the area you want to cover with your camera. This can be a specific trail, a feeding area, or any location where you expect wildlife to frequent. |
| 3. Accessibility | Consider the ease of accessing and maintaining the camera. Choose a location that allows you to conveniently check and retrieve the camera’s memory card without disturbing the surroundings. |
| 4. Distance | Take into account the distance between the camera and the subject you want to capture. Different Cuddeback camera models have varying detection and flash ranges, so be sure to familiarize yourself with the specifications to choose an appropriate location. |
| 5. Height | Consider the ideal height for your camera placement. Mounting the camera at an appropriate height can help you achieve better angles and minimize the risk of detection by wildlife. |
| 6. Lighting | Take into account the lighting conditions of the chosen location. Consider the direction and intensity of natural light sources, as well as any artificial lighting that may affect the image quality. |
| 7. Concealment | Choose a location that provides natural cover or camouflage for the camera. This will make it less noticeable to wildlife and decrease the chance of interference with your desired subjects. |
| 8. Stability | Ensure that the chosen location is stable and secure enough to support the weight of the camera. Avoid placing the camera in areas prone to strong winds or vibrations. |
By carefully considering these factors, you can find the perfect location for your Cuddeback camera and maximize its effectiveness in capturing the images you desire. Happy scouting!
Optimizing Your Cuddeback Camera’s Performance
Your Cuddeback digital camera is a powerful tool for capturing wildlife, but to get the best performance out of it, there are a few things you can do. Follow these tips to optimize your camera’s performance and improve your chances of capturing high-quality images.
1. Proper Placement
The placement of your Cuddeback camera plays a crucial role in capturing great footage. Carefully select the location where you believe wildlife activity is high, such as near trails, water sources, or feeding areas. Make sure to position the camera at a height and angle that provides a clear view of the target area without obstructions.

Additionally, ensure that your camera is securely fastened to a tree or pole using the straps or mounts provided. This will prevent unnecessary movement and ensure stability during various weather conditions.
2. Optimal Settings
Adjusting the camera’s settings is essential for capturing the desired footage. Use the camera’s menu or controls to set the appropriate resolution, sensitivity, and trigger speed. Lower resolutions can conserve storage space but may result in reduced image quality, so find the right balance for your needs.
Consider setting a longer delay between photos to avoid filling up the memory card too quickly. You can also experiment with different sensitivity levels to find the optimal setting for capturing wildlife without triggering false alarms from smaller movements like branches swaying in the wind.
Lastly, make sure the camera’s date and time settings are accurate to maintain a consistent record of wildlife activity.
3. Battery Life
Maximize your camera’s battery life by using high-quality batteries and following proper battery maintenance practices. Opt for lithium or alkaline batteries, as they tend to last longer than other types.
Regularly check the battery levels to prevent unexpected interruptions in camera operation and replace them promptly when needed. It’s also a good idea to carry spare batteries with you, especially during extended trips or when placing the camera in remote locations.
Make sure to power off your camera when not in use to conserve battery life and switch to power-saving modes whenever available.
By following these tips, you can optimize your Cuddeback camera’s performance and increase your chances of capturing stunning wildlife images. Happy photography!
Using the Advanced Features of Your Cuddeback Camera
Once you have mastered the basic features of your Cuddeback camera, you can unlock its full potential by utilizing its advanced features. These features will allow you to capture even more stunning wildlife photos with ease.
1. Time Lapse Mode: This feature allows you to take a series of photos at set intervals, capturing the gradual changes that occur over time. It is perfect for capturing the growth of plants, the movement of clouds, or any other slow processes.

2. Burst Mode: With Burst Mode, your camera can capture multiple photos in quick succession. This is ideal for capturing fast-moving subjects, such as birds in flight or running animals. Burst Mode ensures you don’t miss any action-packed moments.
3. Video Mode: Your Cuddeback camera can also record high-quality videos. This feature is great for capturing longer wildlife moments, such as the movement of an animal or its behavior patterns. Video Mode allows you to delve deeper into the world of wildlife.
4. Time-lapse Plus Mode: This advanced feature combines the best of both Time Lapse Mode and Motion Detection Mode. It captures time-lapse images during specific times of the day and switches to Motion mode during peak wildlife activity. It ensures you don’t miss any crucial moments.
5. Ultra HD Images: Your Cuddeback camera is capable of capturing ultra-HD images with incredible clarity and detail. This feature allows you to see every intricate detail of the wildlife you photograph, immersing you in their world.
6. Advanced Motion Sensing: The advanced motion sensor in your Cuddeback camera ensures that it captures wildlife with precision. It distinguishes between small movements, such as leaves swaying in the wind, and larger movements, such as an animal crossing the frame. This feature helps eliminate false triggers.

By utilizing these advanced features, you can take your wildlife photography to the next level. Explore and experiment with each feature to capture stunning images and videos, and gain a deeper understanding of the incredible world around you.
Tips and Techniques for Capturing Great Photos with Your Cuddeback Camera
Using a Cuddeback digital camera can greatly enhance your photography experience. Whether you are a professional photographer or just an enthusiast, there are several tips and techniques you can utilize to capture stunning photos with your Cuddeback camera.
1. Location is Key
Choosing the right location for setting up your camera is crucial for capturing great photos. Look for areas with high wildlife activity, such as game trails, feeding areas, or water sources. Mount your camera at the proper height and angle to get the best results.
2. Set Up Properly
Make sure to read your camera’s manual and set it up correctly before using it. Check the battery level and memory card capacity to avoid missing any shots. Set the camera to the desired mode, such as time-lapse or motion-activated, depending on your photography goals.
3. Experiment with Placement
Don’t be afraid to try different camera placements to find the best angles and views. Play around with height, distance, and angles to get unique perspectives. Remember to keep a safe distance from wildlife and respect their habitat.
4. Outdoor Lighting
Pay attention to the lighting conditions when setting up your camera. Early morning and late evening hours often offer the best natural lighting for wildlife photography. Consider using the camera’s built-in flash or external lighting equipment for nighttime shots.
5. Maintain Stealth
When setting up your camera in the wild, it’s important to be as discreet as possible. Use camouflage tape or covers to blend the camera with its surroundings. This will help minimize any disturbance to the wildlife and increase your chances of capturing candid shots.
6. Explore Different Settings
Get familiar with your camera’s settings and experiment with different options. Adjust the sensitivity settings to prevent false triggers or missed shots. Try different image resolutions and formats to find the ones that suit your needs best.
7. Regular Maintenance
Maintaining your Cuddeback camera is essential for optimal performance. Regularly check and clean the lens, sensor, and housing to ensure clear and sharp images. Replace the batteries and memory cards regularly to avoid any unexpected issues during your photo shoots.
By following these tips and techniques, you can maximize the potential of your Cuddeback camera and capture impressive wildlife photographs. Remember, patience and practice are key to mastering wildlife photography, so keep exploring and honing your skills.
Reviewing and Managing Your Cuddeback Camera’s Images
After setting up and using your Cuddeback digital camera to capture images of wildlife or other subjects, it is important to know how to review and manage those images. This will allow you to select the best photos, delete unwanted images, and organize your collection efficiently. Here are some steps to help you effectively review and manage your Cuddeback camera’s images:
1. Transferring Images
To begin, you will need to transfer the images from your Cuddeback camera to a computer or other device. Use the provided USB cable or remove the memory card from the camera and insert it into a card reader connected to your computer. Once the images are accessible on your device, you can proceed to review and manage them.
2. Sorting and Selecting
Start by sorting the images based on your preferences. You can organize them by date, subject, or any other criteria that makes sense to you. By doing this, you can easily find specific images later on. Next, go through the images one by one, evaluating the composition, clarity, and overall quality of each. Select the best images that you want to keep and move them to a separate folder or mark them for further processing.
3. Deleting Unwanted Images
While reviewing the images, it is inevitable that you will come across some that are unwanted or of poor quality. To keep your collection organized and to save storage space, delete these images. Be cautious while deleting, as this action cannot be undone. Double-check that you are deleting the correct images before proceeding.
4. Backing Up and Archiving
After you have sorted, selected, and deleted images, it is crucial to back up your collection. Create multiple copies of your image files and store them in different locations to prevent data loss in case of accidents or hardware failures. Consider using cloud storage, external hard drives, or DVDs for backup. Additionally, create an archive of your best images for long-term preservation, ensuring that they are safe and accessible even after many years.
5. Managing Metadata
Check and manage the metadata associated with your images. Metadata contains information such as date, time, location, and camera settings. This data can be useful for future reference or for categorizing your images. There are various software applications available that allow you to view and edit metadata easily.
By following these steps, you will be able to effectively review and manage the images captured by your Cuddeback digital camera. This will help you organize your collection, select the best images, and ensure their long-term preservation.
Question-answer:
What is a Cuddeback digital camera?
A Cuddeback digital camera is a trail camera that is specifically designed for wildlife photography or hunting purposes. It is a camera that can be mounted on a tree or other stationary object to capture photos or videos of animals in their natural habitat.
How does a Cuddeback digital camera work?
A Cuddeback digital camera works by using motion detection sensors to trigger the camera when an animal or object moves within its range. Once triggered, the camera captures a photo or records a video depending on its settings. The captured media is then stored on a memory card for later retrieval.
What are the key features of a Cuddeback digital camera?
A Cuddeback digital camera typically includes features such as high-resolution image quality, fast trigger speed, long battery life, invisible infrared flash for night photography, time-lapse mode, and a durable weatherproof design. Some models may also offer wireless connectivity for remote access to photos and videos.


