
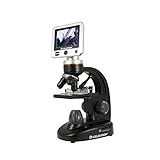
The Celestron Digital Microscope Kit is a powerful tool that allows you to explore and capture the microscopic world. One of the most exciting features of this kit is its built-in digital camera, which allows you to take high-quality photos and videos of the specimens you observe. In this article, we will guide you through the process of using the digital camera on your Celestron Digital Microscope Kit.
Step 1: Set Up the Microscope
Before you can start using the digital camera, you need to set up your Celestron Digital Microscope Kit. Begin by assembling the microscope according to the instructions provided. Make sure all the components are securely connected.
Tip: It’s important to have a stable surface to place the microscope on while using the digital camera. This will ensure that your photos and videos are clear and focused.
Step 2: Connect the Camera

Once your microscope is set up, it’s time to connect the digital camera. Locate the USB port on the microscope and insert the USB cable into it. Then, connect the other end of the cable to your computer or another compatible device. The camera should now be recognized by your device.
Tip: Make sure your device has the necessary software installed to interface with the digital camera. Refer to the instruction manual for specific software requirements.
Step 3: Adjust the Camera Settings
Now that your camera is connected, you can adjust the settings to achieve the desired results. Depending on the software you are using, you may be able to adjust parameters such as exposure, brightness, contrast, and zoom level. Experiment with these settings to find the best configuration for your needs.
Tip: It’s a good idea to take a few test shots and review them on your computer screen. This will help you fine-tune the camera settings for optimal image quality.

Step 4: Capture and Save Images
Once you have the camera settings dialed in, you’re ready to start capturing images. Use the microscope’s focus knobs to bring your specimen into sharp focus. Then, click the capture button on the software interface to take a photo. The image will be saved to your computer’s storage.
Tip: To ensure accurate color reproduction, it’s recommended to use consistent lighting conditions and avoid strong light sources that may cause overexposure.
Congratulations! You have successfully learned how to use the digital camera on your Celestron Digital Microscope Kit. With this knowledge, you can now explore the microscopic world and capture stunning images of the unseen.
Choosing the Right Digital Camera for Your Celestron Microscope Kit
When using a Celestron microscope kit, it is important to choose the right digital camera to capture high-quality images and videos of your observations. Here are some factors to consider when selecting a digital camera for your Celestron microscope:

- Resolution: Look for a camera with a high resolution to ensure clear and detailed images. Higher resolution cameras will allow you to capture finer details and produce better quality photos.
- Sensor Size: A larger sensor size will generally result in better image quality and improved low light performance. Consider cameras with larger sensors for sharper and more vibrant images.
- Connectivity: Check if the camera is compatible with your microscope. Some Celestron microscope kits may require specific camera models or adapters for proper attachment.
- Features: Consider the features that are important for your specific needs. Some cameras offer manual settings for greater control, while others have built-in image stabilization or Wi-Fi connectivity for easy sharing of images.
- Budget: Determine your budget for a digital camera and find one that fits within your price range. There are options available for every budget, so you can find a camera that suits your needs without breaking the bank.
Once you have chosen the right digital camera for your Celestron microscope kit, make sure to follow the manufacturer’s instructions for proper installation and use. With the right camera, you can enhance your microscope experience and capture stunning images of the microscopic world.
Setting up Your Digital Camera on Celestron Microscope Kit
Using a digital camera with your Celestron microscope kit can greatly enhance your microscopy experience and allow you to capture high-quality images and videos of your specimens. Here are the steps to set up your digital camera:
Step 1: Check camera compatibility
Before attaching your digital camera to the microscope kit, make sure it is compatible. Refer to the user manual or check the camera manufacturer’s website for compatibility information.
Step 2: Prepare the camera and microscope

Ensure your camera is fully charged or has fresh batteries. Turn off the camera before proceeding. Prepare your microscope by securely mounting it on a stable surface and turning it on.
Step 3: Attach the camera to the microscope
Locate the camera port on your microscope kit. Depending on the model, this may be on the eyepiece tube or the trinocular head. Carefully attach the camera using the appropriate adapter or tube. Ensure a secure fit to prevent any wobbling during use.
Step 4: Adjust camera settings
Turn on your camera and enter its menu settings. Adjust the image quality, resolution, and other relevant settings as desired. Consult your camera’s user manual for specific instructions on adjusting these settings.
Step 5: Focus and position your specimen
Use the microscope’s focus knobs to bring your specimen into sharp focus. Adjust the stage, lighting, and other settings to achieve the desired image. Make sure the specimen is centered within the field of view.
Step 6: Capture images and videos
Once everything is set up, you can start capturing images or recording videos. Use your camera’s shutter button or designated record button to capture the desired shots. Experiment with different camera settings and microscope adjustments to achieve the best results.
Step 7: Transfer and edit captured media

Connect your camera to a computer using the provided USB cable to transfer the images and videos. Use image editing software to crop, enhance, or annotate the captured media to further improve its quality or add additional information.
Step 8: Share and enjoy your work
After editing, you can share your captured media with others. Use social media platforms, email, or printing to showcase your work or seek feedback from fellow microscopy enthusiasts.
Following these steps will ensure a smooth setup and utilization of your digital camera on your Celestron microscope kit. Enjoy your explorations through the lens of your camera!
Adjusting the Camera Settings for Optimal Image Quality
When using the Celestron digital microscope kit with the built-in camera, it’s important to adjust the camera settings to ensure the best possible image quality. Here are a few tips to help you get started:

- Resolution: When capturing images, make sure to set the camera to its highest resolution. This will result in sharper and more detailed images.
- Exposure: Adjust the exposure settings to control the amount of light that reaches the camera sensor. Experiment with different exposure levels to find the right balance for your specific situation.
- White Balance: White balance plays a crucial role in maintaining accurate colors in your images. Set the white balance according to the lighting conditions to avoid any color distortions.
- Focus: Achieving sharp focus is essential for capturing clear and detailed images. Use the focus adjustment dial on the microscope to fine-tune the focus until you achieve the desired clarity.
- ISO: Adjusting the ISO setting can help you capture images in low-light conditions without introducing too much noise. Increase the ISO value if you’re experiencing low-light situations, but be cautious as higher ISO values can introduce graininess.
By adjusting these camera settings, you can enhance the image quality and capture stunning images with your Celestron digital microscope kit. Experiment with different settings and don’t be afraid to try new techniques to achieve the desired results.
Capturing and Saving Images with Your Celestron Microscope Digital Camera
Once you have set up your Celestron Digital Microscope Kit and connected the digital camera, you will be ready to capture and save images. Follow the steps below to effectively use the camera feature of your microscope:
Step 1: Adjust the Camera Settings
Before capturing images, make sure to adjust the camera settings for optimal results. Use the control buttons or knobs on the camera to adjust the brightness, contrast, and focus. It’s important to set the camera to capture high-quality images that meet your specific requirements.
Step 2: Prepare the Specimen
Place the specimen or slide on the microscope’s stage and adjust the focus until the image is clear and in focus. Ensure that the specimen is well-lit and positioned appropriately for the best image quality.
Step 3: Capture the Image
Once the camera and specimen are properly set up, you can capture the image by pressing the capture button on the camera or using the designated capture function on the microscope. Make sure to keep the camera steady while capturing to avoid blurry images.
Step 4: Review and Edit the Image
After capturing the image, review it on the camera’s LCD screen or transfer it to a computer for a larger view. Use image editing software to make adjustments, such as cropping, enhancing colors, removing artifacts, or adding annotations, if desired.
Step 5: Save and Export the Image
Once you are satisfied with the image, save it in a suitable file format, such as JPEG or PNG, to preserve the details and quality. You can also export the image to other devices or share it online for further analysis or collaboration.
Remember to regularly clean your camera lens and microscope to maintain image clarity and prevent dust or dirt accumulation. Experiment with different camera settings and specimen preparations to capture unique and stunning images using your Celestron Microscope Digital Camera.
Sharing and Editing Your Captured Images
Once you have captured images using your Celestron digital microscope kit, you may want to share and edit them to enhance their quality or show them to others. Here are some tips on sharing and editing your captured images:
1. Transferring Images to Your Computer
To begin, connect your digital camera to your computer using the provided USB cable. Once connected, your computer should recognize the camera as a removable storage device. You can then navigate to the folder where your camera stores the captured images and copy them to your computer’s hard drive.
2. Editing Images
There are several photo editing software options available that you can use to enhance and edit your captured images. Some popular options include Adobe Photoshop, GIMP, and Lightroom. These software programs provide a wide range of tools and features like cropping, adjusting brightness and contrast, removing unwanted objects, and applying filters to make your images look even better.
3. Sharing Images
Once you have edited your images to your satisfaction, you can easily share them with others. Here are a few ways to share your images:
-
Email: You can attach the images to an email and send them to your desired recipients. Most email providers have a file size limit, so make sure to resize or compress your images if they are too large.
-
Social Media: You can upload your images to popular social media platforms like Facebook, Instagram, or Twitter. This allows you to share your images with a wider audience and receive feedback and comments from your friends and followers.
-
Online Photo Sharing Platforms: There are numerous online photo sharing platforms like Flickr, Imgur, or Google Photos, where you can upload and share your images. These platforms often provide options for organizing your images into albums and allow you to share them with specific individuals or the public.
By following these steps, you can easily transfer, edit, and share your captured images from your Celestron digital microscope kit. Whether you want to enhance the quality of your images or showcase your discoveries to the world, these tips will help you make the most of your digital microscope camera. Happy sharing and editing!
Troubleshooting Common Issues with the Digital Camera on Celestron Microscope Kit
No Image Capture
If you are unable to capture any images with the digital camera on your Celestron microscope kit, there are a few potential issues to consider:
- Make sure the camera is securely connected to the microscope. Check that all cables are properly attached and not loose.
- Ensure that the camera is turned on and functioning properly. Check the camera’s power source and battery level.
- Verify that the camera settings are configured correctly. Make sure it is set to capture images, not video, and that the resolution is set to an appropriate level.
- Check if the microscope’s light source is working. Insufficient lighting can cause the camera to produce dark or blurry images.
Blurry Images
If the images captured by the digital camera on your Celestron microscope kit are consistently blurry, try the following troubleshooting steps:
- Adjust the focus of the microscope. Use the focus knobs to achieve a clear image before capturing.
- Ensure that the camera lens is clean and free from dust or debris. Use a lens cleaning cloth or solution to gently clean the lens if necessary.
- Check that the camera settings are appropriate for the subject being captured. Certain magnifications may require different settings to achieve sharper images.
- If using a tripod, make sure it is stable and not moving during image capture. Shaky hands or a loose tripod can result in blurry images.
Software Errors
If you encounter software errors or issues while using the digital camera on your Celestron microscope kit, try the following steps:
- Restart the software or application you are using to capture and view images. Often, a simple restart can resolve minor glitches.
- Verify that the software is up to date. Check the manufacturer’s website for any available updates or patches.
- Ensure that your computer meets the minimum system requirements for the camera software. Insufficient hardware or outdated operating systems may cause compatibility issues.
- If possible, try using different software or applications to capture images. This can help determine if the issue is specific to the software or the camera itself.
Unresponsive Camera
If the digital camera on your Celestron microscope kit is unresponsive or not functioning correctly, consider the following troubleshooting steps:
- Reset the camera by turning it off, unplugging any cables, and then plugging them back in before turning it back on.
- Ensure that the camera is properly connected to the microscope and that all cables are securely attached.
- Check if there are any firmware updates available for the camera. Updating the firmware can often resolve bugs or software issues.
- If possible, test the camera on a different microscope or device to determine if the issue is with the camera or the microscope itself.
If you continue to experience issues with the digital camera on your Celestron microscope kit, it may be helpful to consult the user manual or contact Celestron customer support for further assistance.
Question-answer:
Can I use a digital camera with the Celestron digital microscope kit?
Yes, you can use a digital camera with the Celestron digital microscope kit. The microscope kit is equipped with a camera adapter that allows you to connect a digital camera to the microscope.
What type of digital camera is compatible with the Celestron digital microscope kit?
The Celestron digital microscope kit is compatible with most digital cameras that have a removable lens. You will need to use the camera adapter that comes with the microscope kit to attach the camera to the microscope.
How do I attach a digital camera to the Celestron digital microscope kit?
To attach a digital camera to the Celestron digital microscope kit, you will need to use the camera adapter that comes with the kit. Simply screw the camera adapter onto the microscope eyepiece, and then attach the camera to the adapter using the camera’s lens mount.
Can I use a smartphone camera with the Celestron digital microscope kit?
Yes, you can use a smartphone camera with the Celestron digital microscope kit. To do this, you will need a smartphone adapter that is compatible with your specific smartphone model. The adapter will allow you to attach the smartphone to the microscope and capture images or videos through the phone’s camera.
What are the benefits of using a digital camera with the Celestron digital microscope kit?
Using a digital camera with the Celestron digital microscope kit allows you to capture high-resolution images and videos of the microscopic samples you observe. This can be useful for documenting your findings, sharing them with others, or conducting further analysis and measurements on a computer.


