
Welcome to the world of DSLR photography! If you’re a beginner who just bought a Nikon DSLR, you’re in for an exciting journey into the realm of high-quality photography. Learning how to use your new camera may seem daunting at first, but with a little guidance, you’ll be capturing stunning images in no time.
Get to Know Your Camera
Before you start shooting, it’s important to familiarize yourself with the various buttons, dials, and settings on your Nikon DSLR. Take your time to read the user manual and explore the camera’s features. Understanding how each function works will help you make the most of your photography experience.
Pro tip: Don’t be afraid to experiment! Practice makes perfect, and the more you play around with your camera’s settings, the better you’ll become at using it effectively.

Master the Basics
Shooting in auto mode is a great way to get started, especially if you’re new to DSLR photography. This mode allows the camera to make most of the decisions for you, such as setting the aperture, shutter speed, and ISO. As you gain confidence, gradually switch to semi-manual modes like aperture priority and shutter priority to have more control over your images.
Pro tip: Don’t forget to practice using different shooting modes and learn how they affect the outcome of your photos. Understanding exposure is key to capturing well-lit shots.
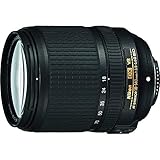
Invest in Good Lenses
While the kit lens that comes with your Nikon DSLR can produce decent results, investing in additional lenses can greatly enhance your photography. Consider buying prime lenses for their sharpness and low-light capabilities or zoom lenses for versatility. Don’t forget to research and choose lenses that suit your photography style and needs.

Pro tip: Start with one or two lenses to avoid overwhelming yourself with too many options. As you progress, you can gradually expand your lens collection.
Remember, learning how to use a DSLR camera takes time and practice. Don’t be discouraged by initial challenges; instead, embrace them as opportunities to grow and improve. With dedication, patience, and a passion for photography, you’ll soon be capturing breathtaking shots like a pro.
Understanding Nikon DSLR Camera Models
When it comes to choosing a DSLR camera, Nikon offers a wide range of models with various features and capabilities. Understanding the different Nikon DSLR camera models can help beginners make an informed decision about which camera would suit their needs and preferences. Here are some key factors to consider:
- Entry-Level Models: Nikon offers entry-level DSLR models like the Nikon D3500 and D5600. These cameras are suitable for beginners and offer user-friendly features and controls, making it easy to get started with DSLR photography.
- Mid-Range Models: Intermediate photographers may opt for mid-range models like the Nikon D7500 or D500. These cameras offer advanced features and improved image quality, making them suitable for photographers looking to take their skills to the next level.
- Professional Models: For professional photographers or enthusiasts who demand the highest level of performance and image quality, Nikon offers professional DSLR models like the Nikon D850 or D5. These cameras often come with larger image sensors, faster continuous shooting speeds, and advanced autofocus systems.
When choosing a Nikon DSLR camera, it’s important to consider your budget, as advanced features often come with a higher price tag. Additionally, factors such as megapixel count, ISO range, autofocus capabilities, and video recording options should also be taken into account.
Before making a final decision, it’s recommended to research and compare different Nikon DSLR camera models to determine which one would best suit your specific photography needs and goals. Reading reviews and seeking advice from experienced photographers can also be helpful in making an informed decision.
By understanding the different Nikon DSLR camera models and considering your own requirements, you can make a wise investment in a camera that will accompany you on your photography journey for years to come.
Basic Functions and Settings of a Nikon DSLR Camera
When you first start using a Nikon DSLR camera, it’s important to understand the basic functions and settings. These will help you to take better photos and navigate through the camera’s various options.
1. Shooting Modes
Nikon cameras offer various shooting modes to accommodate different shooting scenarios. Some common shooting modes include:
- Auto Mode: This mode allows the camera to automatically adjust settings such as aperture, shutter speed, and ISO.
- Program Mode: In this mode, the camera sets the aperture and shutter speed, but you have control over other settings.
- Aperture Priority Mode: This mode allows you to manually set the aperture while the camera adjusts other settings.
- Shutter Priority Mode: With this mode, you can choose the shutter speed while the camera adjusts other settings.
- Manual Mode: In manual mode, you have full control over all camera settings, including aperture, shutter speed, and ISO.
2. Focus Settings
Understanding the focus settings is essential for getting clear and sharp images. Nikon DSLR cameras offer various focus modes, including:
- Single Autofocus (AF-S): The camera focuses on a single subject when you press the shutter button halfway.
- Continuous Autofocus (AF-C): This mode is ideal for tracking moving subjects, as it continuously adjusts focus as long as the shutter button is held down.
- Manual Focus: With manual focus, you have complete control over focusing by adjusting the focus ring on the lens.
3. White Balance
White balance refers to the color temperature of the light in your scene. Nikon DSLR cameras have various white balance settings to ensure accurate colors in different lighting conditions. Some common white balance presets include:

- Auto: The camera automatically adjusts the white balance based on the scene.
- Daylight: This setting is suitable for outdoor shots under natural daylight.
- Cloudy: Use this setting on overcast days to warm up the colors.
- Incandescent: This setting is ideal for indoor shots under tungsten lighting.
- Fluorescent: Use this setting when shooting under fluorescent lighting to avoid color casts.
4. ISO Settings
ISO determines the camera’s sensitivity to light. Adjusting the ISO setting allows you to capture better images in low-light conditions. Keep in mind that higher ISO values may introduce more digital noise. Some common ISO settings include:
- Auto: The camera automatically adjusts the ISO based on the lighting conditions.
- Low ISO: Use this setting when shooting in bright conditions.
- Medium ISO: This setting is suitable for average lighting conditions.
- High ISO: Increase the ISO for low-light situations, but be aware of potential noise.
By familiarizing yourself with the basic functions and settings of your Nikon DSLR camera, you can take control of your photography and capture stunning images in various situations.
Choosing the Right Lens for Your Nikon DSLR Camera
When it comes to photography, choosing the right lens for your Nikon DSLR camera is essential. A good lens can make a significant difference in the quality of your images, allowing you to capture stunning details and create beautiful compositions. Here are some factors to consider when selecting a lens:
- Focal Length: The focal length of a lens determines its field of view. A shorter focal length, such as a wide-angle lens, is great for capturing landscapes or group shots. On the other hand, a longer focal length, like a telephoto lens, is ideal for zooming in on distant subjects.
- Aperture: The aperture affects the amount of light that enters the lens. A wider aperture (denoted by a smaller f-number) allows more light and is great for low-light situations and achieving a shallow depth of field. However, lenses with wider apertures are usually more expensive.
- Zoom or Prime: Decide whether you prefer a zoom lens or a prime lens. Zoom lenses offer versatile focal lengths that can be adjusted, while prime lenses have a fixed focal length. Prime lenses are often favored for their sharper image quality and wider maximum apertures.
- Image Stabilization: Consider a lens with built-in image stabilization if you shoot in challenging lighting conditions or often handhold your camera. Image stabilization helps reduce camera shake, resulting in sharper images.
- Compatibility: Ensure that the lens you choose is compatible with your Nikon DSLR camera. Check the lens mount and make sure it matches your camera model.
It’s important to note that Nikon offers a wide range of lenses to suit different photography needs and budgets. Research and read reviews to find the lens that best fits your requirements. Additionally, consider renting lenses before making a purchase to test them out and see which focal lengths and types of lenses you prefer.
Overall, finding the right lens for your Nikon DSLR camera can greatly enhance your photography experience and help you capture amazing shots. Experiment with different lenses and explore the creative possibilities they offer!

Adjusting Exposure and Shutter Speed on Your Nikon DSLR Camera
When using a DSLR camera like the Nikon, one of the essential aspects to master is adjusting exposure and shutter speed. These settings directly affect the amount of light that reaches the camera’s sensor, allowing you to capture well-exposed and sharp images.
To adjust exposure, you can use the camera’s exposure compensation feature. This allows you to make the image brighter or darker by adjusting the exposure value (EV). To access this feature on a Nikon DSLR camera, locate the “+/-” button usually found on the top or back of the camera body. By pressing this button while turning the command dial, you can increase or decrease the EV value in increments of 1/3 or 1/2 stops.
Another way to adjust exposure is by using the camera’s metering modes. Nikon DSLR cameras typically offer several metering modes, such as matrix/evaluative, center-weighted, and spot. Each metering mode measures the brightness of the scene differently and can affect how the camera calculates the exposure. You can switch between metering modes using the camera’s menu or a dedicated button, depending on your camera model.
Shutter speed determines how long the camera’s shutter remains open, allowing light to reach the sensor. It also affects the motion blur in your photos. To adjust shutter speed on your Nikon DSLR camera, turn the main command dial, usually located near the shutter release button. The shutter speed is measured in fractions of a second, with slower speeds resulting in more light being captured and a longer exposure time.
When adjusting shutter speed, you need to consider the amount of natural light available, as well as the amount of movement in your scene. For example, a fast shutter speed like 1/1000th of a second is ideal for freezing fast-moving subjects, while a slower speed like 1/30th of a second can create a sense of motion or blur.

It’s worth noting that changing the shutter speed might require adjusting other exposure settings, such as the aperture or ISO, to maintain a proper exposure. These settings are also essential factors in achieving the desired exposure and image quality.
Remember: practice and experimentation are key when learning to adjust exposure and shutter speed on your Nikon DSLR camera. Take your camera out in various lighting conditions and try different settings to see the effects they have on your photos. With time, you’ll develop a better understanding of how to make the most out of your camera’s exposure and shutter speed controls.
Mastering Aperture and Depth of Field with Your Nikon DSLR Camera
Understanding and effectively using aperture and depth of field is essential for creating stunning photographs with your Nikon DSLR camera. Aperture controls the amount of light that enters the camera and also dictates the depth of field, which refers to the range of sharpness in a photograph.
Here are some tips to help you master aperture and depth of field with your Nikon DSLR camera:
- Learn about aperture and f-stop values: Aperture is measured in f-stop values, which control the size of the lens opening. Lower f-stop values (e.g. f/2.8) result in a larger opening and shallower depth of field, while higher f-stop values (e.g. f/16) create a smaller opening and greater depth of field. Experiment with different f-stop values to understand their effects on depth of field.
- Use aperture priority mode: Aperture priority mode allows you to set the desired f-stop value while the camera automatically adjusts the shutter speed to achieve proper exposure. This mode gives you control over depth of field without worrying about other exposure settings.
- Consider the subject and creative intent: The chosen aperture should align with your creative intent and the subject you are photographing. A wide aperture (low f-stop value) is great for portraits, as it creates a blurred background that makes the subject stand out. On the other hand, a narrow aperture (high f-stop value) is suitable for landscape photography, as it ensures a wider depth of field and sharpness throughout the scene.
- Focus on the subject: Pay attention to where you focus within the frame. When using a wide aperture, it’s important to focus accurately on the subject to ensure sharpness. Use autofocus or manual focus to achieve the desired focus.
- Experiment with different focal lengths: Different lenses have varying effects on depth of field. Wide-angle lenses generally have a greater depth of field, while telephoto lenses tend to produce a shallower depth of field. Try using different lenses to achieve the desired depth of field effect.
- Review and adjust: After taking a shot, review the image on your Nikon DSLR camera’s LCD screen. Check if the desired depth of field has been achieved and make adjustments as necessary. Practice and experimentation will help you develop an intuition for determining the ideal aperture settings for different situations.
By mastering aperture and depth of field, you can take your photography to the next level with your Nikon DSLR camera. Practice regularly and experiment with different settings to unlock the creative possibilities that aperture control offers.

Using Autofocus and Manual Focus on Your Nikon DSLR Camera
One of the most essential features of a DSLR camera, including Nikon models, is the ability to focus on your subject with precision. Two primary focus modes available on Nikon DSLR cameras are autofocus (AF) and manual focus (MF).
Autofocus (AF)
The autofocus feature allows your Nikon camera to automatically focus on your subject by analyzing the contrast and edges within the frame. Here’s how to use autofocus:
- Select your autofocus mode: Depending on your Nikon camera model, you may have several autofocus modes to choose from, such as Single AF, Continuous AF, and Auto-area AF. Single AF is suitable for stationary subjects, Continuous AF is ideal for moving subjects, and Auto-area AF lets the camera automatically choose the focus point.
- Choose your autofocus point: Use the camera’s multi-selector or touchscreen (if available) to select the desired focus point. This determines where the camera will focus within the frame.
- Half-press the shutter button: Press the shutter button halfway to initiate autofocus. The camera will attempt to focus on the selected point, and you’ll see the focus indicator appear in the viewfinder or on the LCD screen.
- Recompose if necessary: After achieving focus, you can recompose the frame by moving the camera while keeping the shutter button half-pressed. This allows you to adjust the composition without changing the focus point.
- Take the shot: Once you’re satisfied with the focus and composition, fully press the shutter button to capture the image.
Manual Focus (MF)
If you prefer to have complete control over the focus, you can switch to manual focus mode. Here’s how to use manual focus on your Nikon camera:

- Switch the lens to manual focus: Locate the switch on the side of your lens and set it to the “M” or “MF” position. This disengages the autofocus mechanism and allows you to manually adjust the focus.
- Turn the focusing ring: Rotate the focusing ring on the lens to adjust the focus manually. Look through the viewfinder or use the camera’s Live View mode to see the changes in real-time.
- Aid with focus confirmation: Some Nikon DSLR cameras offer a focus confirmation indicator, which is a visual or audible signal that confirms when the subject is in focus. Check your camera’s manual to see if this feature is available and how to enable it.
- Take the shot: Once you have achieved your desired focus, press the shutter button to take the picture.
By mastering both autofocus and manual focus techniques, you can ensure that your Nikon DSLR camera captures sharp and accurately focused images in various shooting conditions.
Tips for Shooting in Different Lighting Conditions with Your Nikon DSLR Camera
Mastering the art of photography requires understanding how to work with different lighting conditions. Here are some tips that will help you capture stunning images with your Nikon DSLR camera, no matter the lighting:
1. Natural Light:
Take advantage of natural light whenever possible. Shoot during the golden hour, which is the hour after sunrise and the hour before sunset, when the light is soft and warm. If shooting under direct sunlight, try to find shade or use a diffuser to soften the harsh light.
2. Low Light:
When shooting in low light conditions, use a tripod or stabilize your camera to avoid blur caused by camera shake. Increase your ISO to allow more light into the camera, but be mindful of noise that may be introduced at higher ISO settings. Consider using a prime lens with a wide aperture to capture more light.
3. Indoor Lighting:
When photographing indoors, pay attention to the type of lighting available. Tungsten lighting will create a warm yellow-orange cast, while fluorescent lighting can create a cool, greenish-blue cast. Adjust your white balance settings accordingly or experiment with custom white balance settings to achieve accurate colors.
4. Backlit Scenes:
Capturing backlit scenes can be challenging, but it can also lead to stunning results. Use your camera’s exposure compensation feature to adjust the exposure and prevent the subject from appearing too dark. Consider using a fill flash or reflector to balance the exposure between the subject and the background.
5. Nighttime Photography:
When shooting at night, use a tripod to steady your camera, as longer exposures will be necessary. Experiment with longer shutter speeds to capture light trails or starry skies. Use a remote shutter release or the camera’s timer function to minimize camera shake during the exposure.
- Use these tips to confidently shoot in a variety of lighting conditions with your Nikon DSLR camera.
- Practice and experiment with different techniques to find your own style and create unique images.
- Remember to always be aware of your surroundings and have fun exploring the possibilities of your camera.
Exploring Creative Shooting Techniques with Your Nikon DSLR Camera
Your Nikon DSLR camera is a powerful tool that can help you capture stunning photos. While the automatic mode is great for beginners, exploring its manual settings and creative shooting techniques can take your photography skills to the next level. Here are some techniques you can try:
1. Long Exposure Photography
Long exposure photography involves capturing a scene over an extended period of time. This technique is commonly used to create beautiful light trails, smooth water effects, and night sky shots. To try this technique, set your camera to manual mode, select a small aperture (high f-stop number), and experiment with different shutter speeds.
2. Depth of Field
Controlling the depth of field allows you to create a blurred background or foreground, emphasizing the main subject. This technique is often used in portrait photography. To achieve a shallow depth of field, choose a wide aperture (low f-stop number) and focus on your subject. For a larger depth of field, select a small aperture (high f-stop number).

3. Panning
Panning involves following a moving subject with your camera, resulting in a sharp subject against a blurred background. This technique is perfect for capturing fast-moving subjects such as cars or athletes. To achieve this effect, set your camera to shutter priority mode and choose a slower shutter speed. Keep your subject in the center of the frame while smoothly moving your camera along with it.
4. Silhouettes
Silhouettes can create dramatic and striking images. To capture a silhouette, position your subject against a bright background, such as the sunset or a light source. Set your camera to spot metering mode to ensure the subject remains dark and underexposed.
5. HDR Photography
High Dynamic Range (HDR) photography combines multiple exposures of the same scene to create a final image with enhanced dynamic range. This technique is ideal for scenes with high contrast, such as landscapes with bright skies and dark shadows. Set your camera to bracketing mode and take multiple shots at different exposures, then use post-processing software to merge them into an HDR image.
Remember, the best way to master these techniques is through practice. Don’t be afraid to experiment and push the boundaries of your Nikon DSLR camera. Happy shooting!
Post-Processing and Editing Your Photos from a Nikon DSLR Camera
Once you have taken stunning shots with your Nikon DSLR camera, it’s time to enhance and perfect them through post-processing and editing. With the right techniques and tools, you can transform your images into masterpieces.
Choosing the Right Editing Software
When it comes to editing your photos, choosing the right editing software is crucial. There are several options available, but some popular and powerful ones include Adobe Photoshop, Lightroom, and Capture NX-D (Nikon’s own software). Research and experiment with different software to find the one that suits your needs and preferences.
Basic Editing Techniques
Before diving into advanced editing techniques, it’s important to master the basics. Some common adjustments you can make include:
| Technique | Description |
|---|---|
| Exposure adjustments | Modify the brightness, contrast, and levels of your photo to achieve the desired exposure. |
| White balance | Correct the color temperature of your photo to ensure accurate and natural-looking colors. |
| Sharpness and clarity | Enhance the details and sharpness of your image to make it more visually appealing. |
| Crop and straighten | Remove unwanted elements and adjust the composition of your photo. |
| Noise reduction | Reduce the digital noise in your image to make it cleaner and smoother. |
Advanced Editing Techniques
Once you have mastered the basics, you can experiment with more advanced editing techniques to take your photos to the next level. Some techniques include:
- Selective adjustments: Target specific areas of your photo for more precise edits.
- Retouching: Remove blemishes, wrinkles, or other imperfections to make your subjects look flawless.
- Color grading: Enhance the mood and atmosphere of your photo by adjusting the color tones.
- Sharpening: Apply selective sharpening to specific areas to draw attention and enhance details.
- Filters and effects: Apply creative filters and effects to add a unique touch to your photos.
Keep in mind that post-processing should enhance your photos, not completely transform them. Aim for a natural and realistic look while still adding your personal touch.
Remember, editing is a skill that improves with practice and experimentation. Take your time, learn new techniques, and develop your own editing style. With dedication and creativity, you can turn your Nikon DSLR camera photos into stunning works of art.
Question-answer:
What is DSLR?
DSLR stands for Digital Single-Lens Reflex. It is a type of camera that uses a mirror and prism system to direct light from the lens to the optical viewfinder.


