
டிஜிட்டல் வேர்க்கர் உள்ளவர்களுக்கு, இது சுவாரஸ்யமானது இருக்கிறது. ஒரு டிஜிட்டல் வேர்ப்புகள் (DSLR) வாரியாக படத்தை பற்றிய துரதிகளை மறுபடியும் சேர்த்துக் கொள்ளுங்கள். இது உங்களுக்கு சரி வந்தால், அது சமூக வலைத்தளங்களில் தனிப்பட்ட சூழல் சிறப்பாக மாறிவிடும். வானொலி மட்டுமே இல்லை, அவாசரிக்காத எதிர்பார்ப்பு பெற உயர்வுகளை எதிர்த்து வரலாம்.
ஏதாவது பொருள் பற்றி பொருந்தவும். முதலாவது, DSLR என்பது படத்தை பற்றி அடிப்படை அறிவையும் தெளிவாக்கத்தையும் வழங்குகிறது. இது ஒரு கைப்பற்ற வசதி, துறையைக் கைக்கு கொண்டு இந்தரங்கத்தில் அனுபவம் செய்ய ஒரு பொறுப்புடைய மொபைலில் இருக்கும்.
இது அவன்ச் செயலியாகும். திட்டத்தின் தொடக்கப்பைப் பதிவேற்றியும், படங்களைப் பாருங்கள் முடித்து, ஒவ்வொன்றாலும் எதிர்த்துவங்களை வடிகட்டுவீர்கள். இது முதல் அடிப்படைப்படி இருக்கும்.
Understanding DSLR Camera Basics
Before you start using a DSLR camera, it’s essential to have a basic understanding of how it works. Here are some key concepts you need to know:
1. Camera Body
The camera body is the main part of the DSLR camera. It houses the image sensor, controls, buttons, and LCD screen.

DSLR cameras come in different sizes and shapes, so it’s important to choose one that feels comfortable in your hands.
2. Image Sensor
The image sensor is a crucial component of a DSLR camera. It captures light and converts it into a digital image. There are two types of image sensors: CMOS and CCD.
CMOS sensors are more common nowadays due to their better noise performance and power efficiency. CCD sensors, on the other hand, are known for their superior image quality.
3. Lens
The lens is an interchangeable component of a DSLR camera. It determines the field of view, focusing ability, and overall image quality. There are various types of lenses available, each serving a different purpose.
When choosing a lens, consider factors like focal length, aperture settings, and image stabilization features. Remember, different lenses are suited for different types of photography.

4. Shutter and Aperture
The shutter and aperture are two critical elements that control the exposure of a photo.
The shutter speed determines how long the camera’s sensor is exposed to light. Faster shutter speeds freeze motion, while slower ones allow more light in, resulting in motion blur.
Aperture refers to the size of the opening in the lens through which light passes. It affects the depth of field, determining how much of the image is in focus.
5. ISO
ISO measures the sensitivity of the camera’s image sensor to light. A lower ISO value (e.g., 100) is ideal for well-lit conditions, while a higher ISO value (e.g., 1600) is suitable for low-light situations.
However, higher ISO settings may introduce more noise or graininess in the image, so it’s crucial to find the right balance based on the lighting conditions.

By understanding these basic DSLR camera concepts, you’ll be better equipped to take full advantage of the features and capabilities of your camera.
Learn the essential functions and components of a DSLR camera
A DSLR camera (Digital Single-Lens Reflex) is a powerful tool that allows photographers to capture high-quality images with full manual control. Understanding the functions and components of a DSLR camera is essential for beginners to take full advantage of its capabilities. Here are some key features and parts to familiarize yourself with:
1. Lens
The lens is one of the most important components of a DSLR camera. It determines the angle of view, focal length, and the amount of light entering the camera. There are different types of lenses available, such as wide-angle, telephoto, and prime lenses, each serving specific purposes.
2. Sensor
The sensor is the part of the camera that captures the image. It converts the light that enters the camera through the lens into an electrical signal, which is then processed to produce the final image. The size and type of sensor can have a significant impact on image quality.
3. Mode Dial
The mode dial is used to select different shooting modes offered by the camera. These modes include manual, aperture priority, shutter priority, and automatic modes. As a beginner, it is advisable to start with the automatic mode and gradually switch to manual mode to have better control over the camera settings.

4. Shutter Button
The shutter button is located on the top of the camera and is used to capture the image. When pressed halfway, it focuses the camera, and when pressed fully, it opens and closes the shutter to expose the sensor and capture the photo.
5. Viewfinder
The viewfinder is the small window on the camera where you can look through to frame and compose your shot. It helps you see what the lens sees and allows for better control and precision when taking photos.
6. Settings Display
The settings display is usually located on the back of the camera and shows information about the current camera settings, such as shutter speed, aperture, ISO, and exposure compensation. It allows you to make adjustments and see the impact of those adjustments in real-time.
Understanding these essential functions and components of a DSLR camera is the first step towards mastering photography. Experiment with different settings, practice shooting in various lighting conditions, and soon you’ll be capturing stunning images with your DSLR camera!
Choosing the Right DSLR Camera
When starting out with DSLR photography, it’s important to choose the right camera that suits your needs and budget. Here are some factors to consider when making your decision:

1. Budget: DSLR cameras can vary greatly in price, so it’s important to determine how much you’re willing to spend. Think about what features are most important to you and allocate your budget accordingly.
2. Megapixels: The number of megapixels determines the quality and resolution of the images. While more megapixels can result in higher-quality photos, it’s not always necessary for beginners. A camera with around 18-24 megapixels is usually sufficient.
3. Sensor Size: The sensor size affects the camera’s ability to capture light and produce high-quality images. A larger sensor generally performs better in low-light conditions and offers more control over depth of field. Look for cameras with APS-C or full-frame sensors for better image quality.
4. Lens Compatibility: Consider the availability and cost of lenses for the camera you choose. Canon and Nikon have the widest range of lenses, making it easier to find suitable lenses for different types of photography.
5. Features and Controls: Look for cameras with easy-to-use controls and features that align with your photography goals. Consider aspects like autofocus points, continuous shooting speed, image stabilization, and video capabilities.
6. Brand: It’s advisable to stick to well-known brands like Canon, Nikon, and Sony, as they offer a wide range of lenses, accessories, and customer support.
7. Ergonomics: The comfort and feel of the camera in your hand are important, especially if you plan to use it for extended periods. Visit a store if possible and handle different models to see which feels best to you.
By considering these factors, you can choose a DSLR camera that meets your needs and helps you capture the best photos possible as a beginner.
Considerations for selecting the best DSLR camera for beginners
To start your journey in photography as a beginner, it is important to choose the right DSLR camera that suits your needs and preferences. Here are some considerations to keep in mind while selecting a camera:
1. Budget: Determine your budget before purchasing a DSLR camera. There are various models available in the market with different price ranges. Decide how much you are willing to spend and look for cameras within that range.
2. Megapixels: Higher megapixels mean more details and larger prints. However, for beginners, a camera with around 14-16 megapixels would suffice, as it provides good image quality for everyday use.
3. Lens Compatibility: DSLR cameras offer interchangeable lenses, allowing you to experiment with different types of photography. Check whether the camera you are considering has a variety of lenses available within your budget.
4. Easy-to-Use: As a beginner, you would want a camera that is user-friendly and easy to operate. Look for cameras with intuitive controls and an interface that you can navigate easily.
5. Auto Mode and Guide Mode: Having an auto mode helps you capture great photos without much technical knowledge. Additionally, a guide mode can assist beginners with step-by-step instructions, making it easier to learn photography techniques.
6. Image Stabilization: DSLR cameras equipped with image stabilization technology help reduce camera shake, resulting in sharper images. This feature can be particularly useful for beginners who may not have steady hands.
7. Video Recording: If you have an interest in videography, consider a DSLR camera that offers high-quality video recording capabilities. Look for cameras with options for different video resolutions and frame rates.
8. Battery Life: Consider the battery life of the camera as it affects the amount of time you can shoot without needing to recharge. Look for cameras that can handle extended shooting sessions.
9. Reviews and Recommendations: Before making a final decision, read reviews and seek recommendations from photographers or friends who have experience with DSLR cameras. Their insights can help you make an informed choice.
10. Brand Reputation: Brand reputation and customer support are important factors to consider when purchasing a DSLR camera. Choose a brand that is known for its reliability and offers good after-sales service.
By considering these factors, you can select the best DSLR camera for beginners that aligns with your interests, budget, and photographic goals, helping you kickstart your photography journey with confidence.
Mastering Manual Mode
Manual mode is a key feature of DSLR cameras that allows you to have full control over your photography. While it may seem intimidating at first, mastering manual mode will give you the ability to capture stunning images with complete creative control. Here are some tips to help you get started with using manual mode on your DSLR camera.
Understanding the Exposure Triangle
Before diving into manual mode, it’s important to understand the three key elements of exposure: aperture, shutter speed, and ISO. Aperture controls the amount of light entering the camera through the lens, shutter speed determines how long the shutter remains open, and ISO measures the camera’s sensitivity to light. Balancing these three elements is crucial for achieving the desired exposure.
Setting the Aperture
The aperture is indicated by an f-number on your camera’s display. A lower f-number (e.g., f/1.8) means a larger aperture opening and a shallower depth of field, while a higher f-number (e.g., f/16) means a smaller aperture opening and a greater depth of field. Experiment with different aperture settings to achieve the desired focus and background blur.
Controlling the Shutter Speed
Shutter speed refers to the length of time the camera’s shutter remains open. It is measured in fractions of a second, such as 1/200 or 1/1000. A faster shutter speed freezes motion, while a slower shutter speed allows for motion blur. Adjust the shutter speed to capture the desired effects in your photographs.
Pro tip: Use a tripod when shooting with a slow shutter speed to avoid camera shake.
Managing the ISO
ISO determines the sensitivity of the camera’s sensor to light. A lower ISO (e.g., ISO 100) is ideal for bright lighting conditions, while a higher ISO (e.g., ISO 1600) is necessary for low-light situations. Keep in mind that a higher ISO can introduce more noise into your images, so find the right balance for optimal image quality.
Pro tip: Try to keep the ISO as low as possible to reduce noise in your photos.
By mastering manual mode, you can unleash your creativity and capture images with complete control over exposure. Practice using different combinations of aperture, shutter speed, and ISO to develop your own style and achieve the desired effects in your photographs. With time and experience, you’ll become more confident in using manual mode to create stunning images.
Explore the benefits and techniques of using manual mode
Using the manual mode on your DSLR camera can help you have more control over your photos, allowing you to achieve the desired results. Although it may seem intimidating at first, mastering manual mode can greatly improve your photography skills.
Benefits of manual mode
1. Control over exposure: Manual mode allows you to manually adjust the aperture, shutter speed, and ISO settings. This control gives you the ability to properly expose your photos in any lighting condition, ensuring accurate and balanced results.
2. Creative freedom: Manual mode gives you the opportunity to experiment with different exposure settings, allowing you to create unique and artistic images. You can play with shutter speed to capture motion blur or freeze action, adjust aperture for depth of field control, and modify ISO to control image noise.
3. Better understanding of exposure: Using manual mode encourages you to learn about the exposure triangle, which consists of aperture, shutter speed, and ISO. By manually adjusting these settings, you will develop a deeper understanding of how they work together to create a well-exposed image.
Techniques for using manual mode
1. Metering: Use your camera’s built-in light meter to determine the correct exposure settings. Aim for a balanced exposure, where the meter is at 0 or close to it. Adjust the aperture, shutter speed, and ISO until you achieve the desired exposure.
2. ISO selection: Choose a low ISO setting (e.g., 100 or 200) when shooting in bright light conditions, and increase the ISO when shooting in low light situations to maintain a proper exposure. Be mindful of the potential increase in image noise as you raise the ISO.
3. Shutter speed and motion: Adjust the shutter speed to control the amount of motion blur or freeze action in your photos. Use faster shutter speeds to freeze fast-moving subjects and slower shutter speeds to capture motion blur, such as flowing water or moving cars.
4. Aperture and depth of field: Experiment with different aperture settings to control the depth of field in your photos. A wider aperture (lower f-number) will result in a shallower depth of field, with the subject in focus and the background blurred. A narrower aperture (higher f-number) will result in a greater depth of field, keeping more of the scene in focus.
In conclusion, using manual mode on your DSLR camera can significantly enhance your photography skills. The benefits include increased control over exposure, creative freedom, and a better understanding of exposure principles. By practicing different techniques and experimenting with exposure settings, you can achieve stunning and professional-looking images.
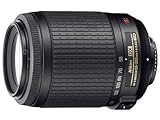
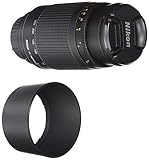
Exploring Different Camera Lenses
When using a DSLR camera, it is important to understand the different types of camera lenses available and how they can enhance your photography. Here are some commonly used lenses:
1. Prime Lenses
Prime lenses have a fixed focal length, which means they do not have zoom capabilities. However, they offer exceptional image quality and are often faster than zoom lenses, allowing you to capture clearer photos in low light conditions. Prime lenses are great for portraits and street photography.
2. Zoom Lenses
Zoom lenses have variable focal lengths, allowing you to zoom in and out while maintaining focus on your subject. These lenses are versatile and convenient, as they offer a range of focal lengths in a single lens. They are perfect for capturing a wide variety of subjects, from landscapes to wildlife.
3. Wide-Angle Lenses
Wide-angle lenses have a shorter focal length, typically ranging from 10mm to 35mm. They capture a wider field of view, making them ideal for landscape, architecture, and interior photography. These lenses can also create unique perspectives by exaggerating the distance between objects.
4. Telephoto Lenses
Telephoto lenses have a longer focal length, usually starting from 70mm and going up to 300mm or more. They allow you to zoom in on distant subjects, making them perfect for sports, wildlife, and candid photography. These lenses compress perspective, which can create stunning background blur and isolate your subject.
5. Macro Lenses
Macro lenses are designed for close-up photography and have a high magnification capability. They allow you to capture intricate details of small subjects such as insects, flowers, and jewelry. Macro lenses also have a shallow depth of field, creating a beautiful background blur.
By experimenting with different lenses, you can expand your creative possibilities and capture a wide range of subjects with your DSLR camera. Understanding the characteristics and applications of each lens will help you choose the right one for the desired effect in your photographs.
Understand various types of lenses and their uses
When using a DSLR camera, understanding the different types of lenses available and their uses is essential for taking great photos. Each type of lens has its own characteristics and is suitable for specific types of photography.
1. Prime lenses
Prime lenses have a fixed focal length, meaning they do not zoom in or out. They are known for their sharpness and wide maximum aperture, which allows for better low-light shooting and shallow depth of field. Prime lenses are great for portrait photography, street photography, and capturing details.
2. Zoom lenses
Zoom lenses, on the other hand, have a variable focal length, allowing you to adjust the zoom level. They provide versatility and convenience as you can zoom in and out without changing lenses. Zoom lenses are commonly used for landscape photography, wildlife photography, and events where you need to quickly switch between different focal lengths.
Tip: When buying a zoom lens, pay attention to its range. For example, a 18-55mm lens offers a wide-angle view at 18mm and a moderate telephoto view at 55mm.
3. Macro lenses
Macro lenses are designed for close-up photography, allowing you to capture small subjects with incredible detail. They have a high magnification ratio and can focus at very short distances. Macro lenses are ideal for capturing the intricate details of flowers, insects, and other small objects.
4. Wide-angle lenses
Wide-angle lenses have a short focal length and capture a wider field of view. They are perfect for landscape photography, architectural photography, and capturing large groups of people. Wide-angle lenses can create a sense of depth and add drama to your photos.
Note: Be careful with distortion when using wide-angle lenses, as they can cause objects to appear stretched or distorted at the edges of the frame.
By understanding the different types of lenses and their uses, you can choose the right lens for the type of photography you want to pursue with your DSLR camera. Experiment with different lenses to see how they affect your photos and explore different styles of photography.
Question-answer:
தொழில்நுட்ப துறையில் DSLR கேமராவை எப்படி பயன்படுத்தலாம்?
முதன்முதலில், DSLR கேமராவை மெய்நிகர்ச்சியாக அறியுங்கள். கேமராவை நிலையான நிபுணர் அல்லாத நேரத்தில் அடைகிறால், அதன் வேலைக்காற்றில் அரட்டை ஏற்படும் முடிவுக்கு வந்துவிடும். அதனால், DSLR கேமரா முழுவதும் நிபுணர்களுக்கானது என்பதை மறவாமல் கொள்ளுங்கள்.
சிறந்த திரைப்பட படங்களை எப்படி டெலிகாமராஸ் வைத்திருக்கும்?
சிறந்த திரைப்பட படங்களை எப்படி டெலிகாமராஸ் படைக்கலாம் என்பதை அறிந்து கொள்ளலாம். முதன்முதலில், நீங்கள் அதிக கம்பச் திரைப்படங்களை பார்க்கும்போது, உங்கள் டெலிகாமராட்டை மின்புத்திரை சினிமா வடிவத்தில் மாற்றவும். இதன் மூலம் உங்கள் திரைப்பட படங்கள் அதிக நீர்ப்பிலக்கத்துடன் உள்ளது என்பதை கண்டறியலாம்.
டிஎஸ்எல்ஆர் கேமராவை துவக்கக்காரர்களுக்கு எப்படி பயன்படுத்தலாம்?
டிஎஸ்எல்ஆர் கேமராவை முதலில் பயன்படுத்த விரும்புகின்றோம், இது பிராரம்பமான வடிவமைப்புகளைக் கொண்டிருக்கும் வகையில் சிறிது குறிப்புகளை அளிக்கின்றது. இந்த கேமராவை பொதுவாக பயன்படுத்துவர்.
டிஎஸ்எல்ஆர் கேமராவில் உள்ள பல்வேறு உள்ளீட்டு அம்சங்களை நான் எப்படி பயன்படுத்தலாம்?
டிஎஸ்எல்ஆர் கேமராவில் உள்ள பல்வேறு உள்ளீட்டு அம்சங்களை அணுகலாம், அவைகள் எப்படி பயன்படுத்தப்படுகின்றன என்பதில் பெரும் அணுகல்கள் உள்ளன.
டிஎஸ்எல்ஆர் கேமராவில் RAW கோப்பு வடிவமைப்பை எப்படி செய்வது?
டிஎஸ்எல்ஆர் கேமராவில் RAW கோப்பை ஏற்றியது எப்படி போகும்


