If you are a photography enthusiast, you probably know the value of a DSLR camera when it comes to capturing high-quality images. However, carrying a bulky DSLR camera everywhere you go can be cumbersome. What if you could use your iPhone 7 Plus as a DSLR camera? Yes, you heard it right! The iPhone 7 Plus comes with a dual-camera system that can transform your smartphone into a powerful DSLR camera.
Step 1: Familiarize Yourself with the Camera
Before diving into the DSLR-like features of the iPhone 7 Plus, it is essential to familiarize yourself with the camera app. The Camera app on your iPhone 7 Plus is easy to access, and you can launch it by tapping on the camera icon on your home screen. Once you have opened the app, explore the various shooting modes and settings available to you.
Step 2: Master Portrait Mode
One of the standout features of the iPhone 7 Plus is its Portrait mode. This mode allows you to capture stunning portraits with a shallow depth of field, making your subject stand out from the background. To activate Portrait mode, select it from the shooting modes at the bottom of the screen. Keep in mind that Portrait mode works best when you have good lighting conditions and a suitable subject.
Step 3: Experiment with Manual Controls
While the iPhone 7 Plus does not have the same level of manual control as a traditional DSLR camera, it still allows you to make adjustments to achieve your desired results. By tapping on the screen, you can adjust the focus and exposure. Additionally, you can enable the grid to help you compose your shots better. Don’t be afraid to experiment with the manual controls and find the settings that work best for your style of photography.
Step 4: Utilize Third-Party Apps
If you want to take your iPhone 7 Plus’s DSLR capabilities to the next level, consider using third-party camera apps. These apps offer additional features and controls to enhance your photography experience. Some popular third-party camera apps for iPhone include ProCamera, Camera+, and Halide. Explore these apps and find the one that suits your needs and preferences.
By following these steps and learning how to use the DSLR-like features of your iPhone 7 Plus, you can elevate your photography skills and capture stunning images without the need for a bulky DSLR camera.
Tips for using a DSLR camera in iPhone 7 Plus
1. Familiarize yourself with the camera features:
Before you start using the DSLR camera in your iPhone 7 Plus, take some time to explore and understand its features. Read the user manual or search online for tutorials to learn about the different modes, settings, and controls available on your iPhone’s camera.
2. Use the manual mode:
The manual mode in the DSLR camera of iPhone 7 Plus allows you to have more control over your photos. Experiment with different settings such as aperture, shutter speed, and ISO to capture the desired effect or mood in your photographs.
3. Make use of the portrait mode:

The portrait mode in the iPhone 7 Plus DSLR camera allows you to capture stunning portraits with a shallow depth of field and sharp focus on the subject. This can give your photos a professional look and make the subject stand out.
4. Use a tripod or stabilizer:
To get steady and blur-free shots with your iPhone’s DSLR camera, consider using a tripod or stabilizer. This will help eliminate any camera shake and ensure sharp and clear images, especially in low-light conditions or when shooting long-exposure photos.
5. Experiment with different lenses:
If you want to take your iPhone 7 Plus DSLR camera photography to the next level, try using different lenses. There are various third-party lenses available that can be attached to your phone to enhance the capabilities of the camera, such as wide-angle, fisheye, or telephoto lenses.

6. Edit your photos:
After capturing your photos with the DSLR camera in iPhone 7 Plus, don’t forget to edit them to enhance their quality. There are many photo editing apps available that allow you to make adjustments to the exposure, contrast, saturation, and other aspects of your photos.
7. Practice and experiment:
Using the DSLR camera in your iPhone 7 Plus requires practice and experimentation. Take the time to try out different techniques, settings, and subjects to improve your photography skills and discover your own unique style.
Remember, the more you practice and explore the capabilities of your iPhone’s DSLR camera, the better your photos will become. So, don’t be afraid to step out of your comfort zone and capture amazing moments with your iPhone 7 Plus.

Adjusting Camera Settings
When using a DSLR camera on an iPhone 7 Plus, you have the ability to adjust various settings to enhance your photography experience. Here are some important camera settings you should know:
1. Exposure
Exposure refers to the amount of light that enters the camera sensor. You can manually adjust the exposure to make your photos brighter or darker. To do this, tap on the screen where you want to focus, and then swipe up or down to adjust the exposure level.
2. Focus
Having a sharp and clear focus is essential for capturing great photos. To adjust the focus, tap on the screen where you want the camera to prioritize focus. The camera will automatically adjust the focus based on your selection.
3. White Balance
White balance determines the color temperature in your photos. By adjusting white balance settings, you can make your photos appear warmer or cooler. To change the white balance, go to the camera settings and select the appropriate white balance option that matches the lighting conditions.
4. ISO
ISO refers to the sensitivity of the camera sensor to light. Higher ISO values result in brighter photos, but they can also introduce more noise. It is recommended to keep the ISO as low as possible in well-lit conditions and increase it when shooting in low-light environments. You can change the ISO settings in the camera settings menu.

5. Shooting Modes
The iPhone 7 Plus offers various shooting modes, such as portrait, landscape, and night mode. Each mode is designed to optimize the camera settings for specific types of photography. Experiment with different shooting modes to achieve the desired results.
| Setting | Description |
|---|---|
| Exposure | Adjusts the brightness of the photo |
| Focus | Determines the sharpness and clarity of the photo |
| White Balance | Controls the color temperature in the photo |
| ISO | Determines the sensitivity of the camera sensor to light |
| Shooting Modes | Optimizes camera settings for specific types of photography |
Understanding and adjusting these camera settings will allow you to capture stunning photos using your DSLR camera on the iPhone 7 Plus. Take the time to experiment with different settings and modes to find the perfect balance for your photography style.
Using manual controls
With the iPhone 7 Plus, you have the option to use manual controls when utilizing the DSLR camera. This gives you more control over the settings and allows you to capture professional-quality photos.
1. Adjusting the aperture
The aperture determines the amount of light that enters the camera lens. To adjust it manually, tap on the aperture icon and use the slider to increase or decrease the aperture size. A larger aperture (smaller f-number) allows more light to enter, which is ideal for low light conditions. A smaller aperture (larger f-number) reduces the amount of light and is suitable for bright environments.
2. Setting the shutter speed
The shutter speed refers to the duration for which the camera’s sensor is exposed to light. Tap on the shutter speed icon to manually adjust it. A slower shutter speed allows more light to enter the sensor, resulting in brighter images. On the other hand, a faster shutter speed is useful for capturing fast-moving subjects without any motion blur.
Note: When using a slower shutter speed, it’s essential to keep the camera steady to avoid any blurriness caused by camera shake. Consider using a tripod or resting the phone on a stable surface for best results.
By experimenting with different combinations of aperture and shutter speed settings, you can modify the exposure and create various artistic effects, such as capturing motion blur or freezing action.
Remember, practice is key when using manual controls. Take the time to experiment with different settings and scenes to understand the impact of each element on your photos.
Exploring different shooting modes
One of the great features of using a DSLR camera in the iPhone 7 Plus is the ability to explore different shooting modes. These modes allow you to take control of your photos and experiment with different settings to achieve the desired effect.
Here are some popular shooting modes you can explore:
| Shooting Mode | Description |
|---|---|
| Auto | This mode is perfect for beginners. The camera automatically adjusts the settings based on the scene and lighting conditions to give you the best results. |
| Portrait | This mode helps you capture stunning portraits with a shallow depth of field. It creates a beautiful bokeh effect, blurring the background and keeping the subject in focus. |
| Landscape | If you’re shooting wide landscapes or scenic views, this mode is ideal. It optimizes the camera settings to capture the vastness of the landscape in crisp detail. |
| Macro | Macro mode allows you to capture extreme close-up shots of small objects or details. It’s perfect for capturing the intricate details of flowers, insects, or jewelry. |
| Low Light | In low-light conditions, this mode helps you take better photos by adjusting the settings to reduce noise and improve clarity. It’s perfect for capturing nightscapes or indoor shots without flash. |
Experimenting with these shooting modes will allow you to expand your photography skills and capture stunning photos with your iPhone 7 Plus DSLR camera.
Mastering focus and exposure
One of the key aspects of photography is achieving proper focus and exposure in your photos. In order to capture sharp and well-exposed images with your DSLR camera on the iPhone 7 Plus, it’s important to understand and master these two essential elements.
Focusing
When it comes to focus, you have several options on your iPhone 7 Plus. You can use the Auto Focus (AF) mode, which automatically adjusts the focus based on the scene and subject. Simply tap on the area you want to focus on, and the camera will do the rest. This is great for quick and easy focusing on the go.
Alternatively, you can switch to the Manual Focus (MF) mode, which gives you more control over the focus. To do this, go to the camera settings and set the focus mode to Manual. You can then use the focus ring or the on-screen slider to manually adjust the focus until your subject appears sharp and clear. This is especially useful when you want to achieve a specific focus point or when dealing with tricky lighting conditions.
Exposure
Exposure refers to the amount of light that enters the camera sensor and affects the brightness and overall tonal range of your photo. To achieve proper exposure, you can use the iPhone’s built-in exposure compensation feature. This allows you to adjust the exposure level by making the image brighter or darker.
To access the exposure compensation, simply tap on the screen while in the camera app and slide your finger up or down to increase or decrease the exposure respectively. You can see the exposure level changing in real-time as you adjust it. This is particularly useful when dealing with scenes that have high contrast or when you want to create a specific mood in your photos.
| Tip: | It’s always a good idea to use the camera’s focus and exposure lock feature to ensure consistent settings across multiple shots. To do this, simply tap and hold on the screen until you see the AE/AF Lock indicator appear. This will lock the focus and exposure settings so you can recompose your shot without worrying about changes in focus or exposure. |
|---|
By mastering focus and exposure, you can take your iPhone 7 Plus photography to the next level. Experiment with different focusing techniques and exposure levels to create stunning and professional-looking images.
Utilizing third-party apps
While the built-in camera app on iPhone 7 Plus provides many features, there are also several third-party apps available that can enhance the functionality of the DSLR camera.
One popular app is Camera+, which offers advanced controls and settings for shooting photos and videos. With Camera+, you can adjust exposure, focus, and white balance, as well as use advanced shooting modes like burst mode and timer mode.
Another useful app is ProCamera, which provides manual controls for settings such as ISO, shutter speed, and focus. This app also includes features like a histogram, which can help you achieve better exposure in your photos.
Editing and sharing options
In addition to offering advanced shooting features, many third-party camera apps also include editing and sharing options. Apps like VSCO, Snapseed, and Adobe Lightroom allow you to edit your photos with various filters and adjustments.
Once you have edited your photos, you can easily share them on social media platforms like Instagram and Facebook directly from the third-party app.
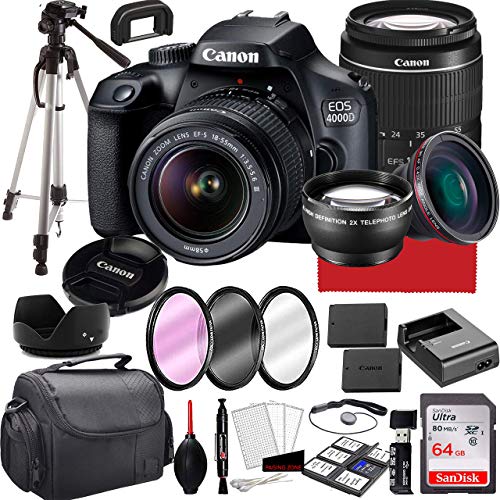
Accessories and add-ons
In addition to using third-party camera apps, there are also various accessories and add-ons that can help you further enhance your DSLR camera experience on iPhone 7 Plus.
For example, you can purchase external lenses like wide-angle or telephoto lenses that attach to your iPhone 7 Plus to expand your shooting options. There are also tripod mounts, stabilizers, and other accessories that can help you capture steady and professional-looking photos and videos.
By exploring the world of third-party apps and accessories, you can take your DSLR camera capabilities on iPhone 7 Plus to the next level and unleash your creativity.
Editing and sharing your DSLR-quality photos
One of the great advantages of using a DSLR camera with your iPhone 7 Plus is the ability to capture high-quality photos that can rival those taken with professional cameras. However, capturing a great shot is only the beginning. To truly make your photos shine, you’ll need to edit them and share them with others. Here are some tips on how to do just that:
1. Transfer your photos to your iPhone
Once you have captured your photos with your DSLR camera, you’ll need to transfer them to your iPhone 7 Plus. You can do this by using a memory card reader or by connecting your camera directly to your phone using a USB cable.
2. Choose a photo editing app
There are many great photo editing apps available for iPhone 7 Plus that will allow you to make professional-level edits to your DSLR-quality photos. Some popular options include Adobe Lightroom, Snapseed, and VSCO. Experiment with different apps to find the one that suits your editing needs.
3. Enhance your photos
Once you have chosen an editing app, you can begin enhancing your photos. This may include adjusting the exposure, contrast, and saturation levels, cropping the image, or applying filters. Take your time to experiment with different edits and find the look that you desire for each photo.
4. Save and share your edited photos
After you have finished editing your photos, be sure to save them in a high-quality format. This will allow you to easily share your DSLR-quality photos with others. You can share your photos on social media platforms like Instagram, Facebook, or Twitter, or you can send them directly to friends and family through messaging apps or email.
By editing and sharing your DSLR-quality photos, you can showcase your photography skills and impress others with the stunning images you have captured. So go ahead and unleash your creativity with your DSLR camera and iPhone 7 Plus!
Question-answer:
Can I use a DSLR camera with my iPhone 7 Plus?
Yes, you can use a DSLR camera with your iPhone 7 Plus. By using specialized adapters or connectors, you can connect your DSLR camera to your iPhone and control it using various photography apps.
What equipment do I need to use a DSLR camera with my iPhone 7 Plus?
To use a DSLR camera with your iPhone 7 Plus, you will need a DSLR camera itself, an adapter or connector that connects the camera and iPhone, and a photography app that allows you to control the camera settings. Additionally, you may also need a tripod or other camera accessories for added stability and convenience.