Have you ever struggled with taking photos in low light conditions on your iPhone 6s Plus? Well, worry no more! With the built-in flash feature, you can capture stunning images even in the darkest environments. In this article, we will guide you on how to effectively use the flash on your iPhone 6s Plus camera.
Step 1: Enable the Flash
Before you start using the flash, make sure it is turned on. To do this, open the Camera app on your iPhone 6s Plus and tap on the lightning bolt icon located at the top of the screen. You will see three options: Auto, On, and Off. Select the “On” option to enable the flash.
Note: The “Auto” option allows your iPhone to automatically determine when to use the flash based on the lighting conditions.
Step 2: Adjust Flash Intensity

Once the flash is enabled, you can adjust its intensity to suit your needs. To access this feature, tap on the downward arrow next to the lightning bolt icon. You will see three intensity options: Low, Medium, and High. Select the intensity level that best matches the lighting conditions of your surroundings.
Note: Selecting a higher intensity level may result in a brighter image, but it can also cause overexposure in certain situations.
Step 3: Capture Brilliant Photos
Now that you have enabled the flash and adjusted its intensity, you are ready to capture amazing photos in low light. Simply frame your shot, tap the shutter button, and let the flash work its magic. The flash will illuminate the scene, ensuring that your subjects are well-lit and the details are captured beautifully.
Note: Keep in mind that using flash excessively or in inappropriate situations may result in unnatural lighting and shadows. Use it wisely and experiment with different settings to achieve the desired effect.

With these simple steps, you can make the most out of the flash feature on your iPhone 6s Plus camera. Whether you’re capturing memories at a dimly lit event or taking stunning portraits indoors, the flash will be your best friend. So, go ahead and explore the world of low light photography with your iPhone 6s Plus!
Overview of the iPhone 6s Plus camera
The iPhone 6s Plus comes equipped with a powerful camera that allows you to capture high-quality photos and videos. With a 12-megapixel rear camera and a 5-megapixel front camera, you can create stunning images and selfies.
The camera features advanced technologies such as optical image stabilization, which helps to reduce blur caused by movement or shaky hands. This feature is particularly useful when taking photos in low-light conditions or recording videos on the go.
The iPhone 6s Plus camera also supports Live Photos, which captures a short video clip before and after you press the shutter button, bringing your photos to life. You can view Live Photos by pressing and holding on the image in the Photos app, or even set them as animated wallpapers on your lock screen.
In addition, the camera offers a range of shooting modes and options, allowing you to customize and enhance your photos. The HDR (High Dynamic Range) mode automatically combines multiple exposures to ensure that both the highlights and shadows in your photos are properly exposed.
The iPhone 6s Plus camera also includes a burst mode, which allows you to capture a series of photos by holding down the shutter button. This is particularly useful when trying to capture fast-moving subjects, such as sports or action shots.
Furthermore, the camera app offers various filters and editing tools that allow you to apply creative effects and adjustments to your photos. You can adjust the exposure, saturation, and contrast, among other settings, to achieve the desired look.
Overall, the iPhone 6s Plus camera is a versatile and powerful tool that allows you to capture and create stunning images and videos. Whether you’re a professional photographer or just an avid smartphone user, the camera capabilities of the iPhone 6s Plus are sure to impress.
Understanding the flash functionality
The flash on the iPhone 6s Plus camera is an important feature that helps in capturing well-lit photos in low-light conditions. It provides additional light to the subject, compensating for the lack of natural light, and ensuring that the photo is properly exposed.
Flash Modes
The iPhone 6s Plus camera offers different flash modes to suit different lighting situations:
| Flash Mode | Description |
|---|---|
| Auto | The camera automatically determines whether or not to use the flash based on the lighting conditions. |
| On | The flash is always enabled and will fire with every photo you take, regardless of the lighting conditions. |
| Off | The flash is disabled and will not fire, even in low-light situations. This can be useful when you want to capture the natural ambience of a scene. |
| Slow Sync | This mode combines the flash with a slower shutter speed, allowing you to capture more natural-looking photos in low-light conditions. It is ideal for situations where you want to capture both the subject and the background. |
Using the Flash
To use the flash on your iPhone 6s Plus camera, follow these steps:
- Open the Camera app on your iPhone.
- Select the desired flash mode from the control panel at the top of the screen.
- Frame your shot and tap the shutter button to take a photo.
It’s important to note that using the flash excessively or inappropriately may result in washed-out or overexposed photos. Additionally, the flash range is limited, so it may not effectively illuminate subjects that are too far away.
Experimenting with different flash modes and adjusting the positioning of your subjects in relation to the flash can help you achieve better results and capture well-exposed photos in a variety of lighting conditions.
Step-by-step guide on using the flash
The flash feature on the iPhone 6s Plus camera allows you to take photos in low light or dark environments. By using the flash, you can ensure that your photos are well-lit and clear. Here’s a step-by-step guide on how to use the flash on your iPhone 6s Plus camera:
Step 1: Open the Camera App
On your iPhone 6s Plus, locate the Camera app on your home screen and tap on it to open it. This will launch the camera interface, allowing you to take photos.
Step 2: Activate the Flash
In the camera interface, you will see a lightning bolt icon located at the top left corner of the screen. Tap on this icon to activate the flash feature. A menu will appear with different flash options.
Step 3: Choose the Flash Mode
Tap on the Flash icon again to select the flash mode that suits your needs. You have several options to choose from:
| Flash Mode | Description |
|---|---|
| Auto | The flash will automatically activate when needed based on the lighting conditions. |
| On | The flash will always be active, regardless of the lighting conditions. |
| Off | The flash will not be active, even in low light or dark environments. |
Select the flash mode that suits your needs by tapping on it in the menu.
Step 4: Take a Photo
Once you have selected the desired flash mode, you can now take a photo. Frame your shot and tap on the shutter button located at the bottom center of the screen. The flash will activate to ensure a well-lit photo.
Remember to keep your subject within a reasonable distance from the camera to avoid overexposure or red-eye effects.
That’s it! You have successfully used the flash feature on your iPhone 6s Plus camera. Experiment with different flash modes to achieve the desired lighting effect in your photos.
Tips and tricks for better flash photography
Using the flash on your iPhone 6s Plus camera can greatly improve the quality of your photos, especially in low light situations. Here are some tips and tricks to help you get the most out of your flash:
1. Avoid using the flash directly at your subject: When possible, try to bounce the flash off a nearby wall or ceiling to create a more diffused and natural-looking light. This can help to eliminate harsh shadows and reduce red-eye in your photos.
2. Use the flash as a fill light: Instead of relying solely on the flash to illuminate your subject, consider using it as a fill light to balance the lighting in your shot. This can help to bring out more details and prevent overexposure.
3. Experiment with different flash settings: The iPhone 6s Plus camera offers different flash settings, such as auto, on, and off. Take the time to experiment with these settings to see which one works best for your specific situation. Auto mode generally works well for most scenarios, but you may find that manually turning the flash on or off produces better results in certain conditions.

4. Get closer to your subject: The flash on the iPhone 6s Plus camera has a limited range, so it’s important to get closer to your subject when using the flash. This will ensure that the flash reaches your subject and properly illuminates them.
5. Consider using third-party flash accessories: If you find that the built-in flash on your iPhone 6s Plus camera isn’t sufficient for your needs, you may want to invest in third-party flash accessories. These can provide a more powerful and adjustable light source, giving you more control over your flash photography.
By following these tips and tricks, you can elevate your flash photography skills and capture stunning photos with your iPhone 6s Plus camera.
Adjusting flash settings
The built-in flash on the iPhone 6s Plus camera is a useful feature that can enhance your photos, especially in low light conditions. However, it is important to know how to adjust the flash settings to get the desired result.
To adjust the flash settings on your iPhone 6s Plus camera, follow these steps:
| Step 1: | Open the Camera app on your iPhone 6s Plus. |
| Step 2: | Tap on the lightning bolt icon at the top of the screen. |
| Step 3: | A menu will appear with different flash settings. The options include: |
|
|
| Step 4: | Select the desired flash setting by tapping on it. |
| Step 5: | You can now start taking photos with the adjusted flash setting. |
Keep in mind that using the flash in certain situations may not always produce the best results. It is important to experiment with different flash settings to find the one that works best for each situation.
By adjusting the flash settings on your iPhone 6s Plus camera, you can improve the quality of your photos and capture better shots in various lighting conditions.
Using flash with different camera modes
When using the flash on your iPhone 6s Plus camera, you can take advantage of different camera modes to capture the best possible photos.
1. Auto mode: In this mode, the flash will automatically adjust its intensity based on the lighting conditions. This mode is great for capturing well-lit photos in various environments.
2. Fill mode: If you are shooting in a backlit or high-contrast scene, the fill mode can be useful. It helps to balance the lighting and reduce harsh shadows by using the flash to fill in the darker areas.
3. Slow Sync mode: This mode combines the use of both the flash and a slower shutter speed, allowing you to capture more ambient light while still illuminating the main subject with the flash. It is ideal for low-light situations where you want to capture both the subject and the background.
4. Red-Eye Reduction mode: When you enable this mode, the flash will emit a series of pre-flashes to minimize the occurrence of red-eye in your photos. It is particularly useful when taking portraits in dimly lit environments.
| Camera Mode | Description |
|---|---|
| Auto mode | The flash adjusts its intensity automatically based on the lighting conditions. |
| Fill mode | Helps balance the lighting in backlit or high-contrast scenes by filling in the darker areas with flash. |
| Slow Sync mode | Combines flash and slower shutter speed to capture both the subject and the background in low-light situations. |
| Red-Eye Reduction mode | Prevents red-eye in photos by emitting pre-flashes before the main flash. |
By understanding and utilizing these different camera modes, you can make the most out of the flash on your iPhone 6s Plus camera to capture stunning photos in various lighting conditions.
Common issues and troubleshooting
While using the flash on your iPhone 6s Plus camera, you may encounter some common issues. Here are some troubleshooting tips to help you resolve them:
1. Flash not working:

- Make sure the flash is enabled in your camera settings. Go to Settings > Camera > Preserve Settings and ensure that the “Flash” option is toggled on.
- Check if the flash is blocked by any obstructions or fingerprints. Clean the flash gently with a soft, lint-free cloth.
- Restart your iPhone to see if the issue persists. Press and hold the power button until you see the slider, then slide to power off. After a few seconds, turn on your iPhone again.
- If none of the above steps work, there may be a hardware issue with the flash. Consider contacting Apple Support or visiting an authorized service center for further assistance.
2. Flash too bright or too dim:
- Adjust the flash intensity manually. On the Camera app, tap the lightning bolt icon and choose the desired intensity (Auto, On, or Off).
- If the subject is too close, the flash may be too bright. Try moving a bit further away from the subject.
- In low-light conditions, the flash may not be sufficient. Consider using external lighting or shooting in well-lit areas.
3. Red-eye in photos:
- Avoid shooting directly into the light source as it increases the chances of red-eye. Try changing the angle or position of the subject.
- Enable the red-eye reduction feature in the Camera app. Tap the “eye” icon on the top left corner and toggle it on.
4. Flash not syncing with camera:
- Check if the flash is properly attached to the camera. Ensure that it is securely connected and aligned correctly.
- Make sure the flash is compatible with your iPhone model. Refer to the manufacturer’s instructions or contact their support for more information.
- Try disconnecting and reconnecting the flash. Restart your iPhone and camera to establish a proper connection.
It is important to note that some issues may require professional assistance or a software update from Apple. If the problem persists, reach out to Apple Support or consult the user manual for further guidance.
Flash alternatives for iPhone 6s Plus
While the iPhone 6s Plus does not come with a built-in flash for its camera, there are several alternatives that can help you capture well-lit photos in low-light conditions. Here are some options to consider:
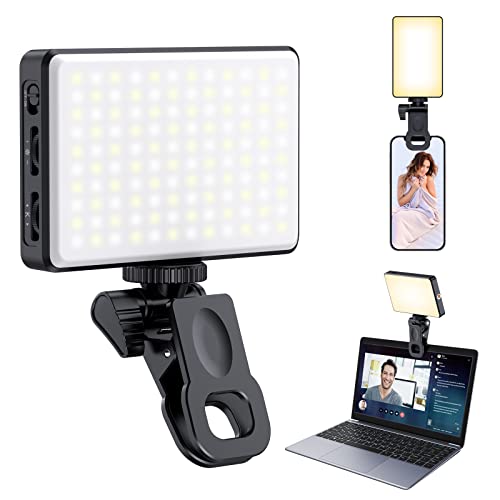
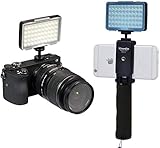
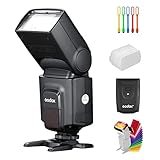
- External flash: You can purchase an external flash that attaches to your iPhone 6s Plus, providing an artificial light source to enhance your photos. There are various options available in the market, ranging from professional-grade to more affordable options.
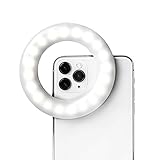
- LED lights: Another alternative is to use LED lights, specifically designed for photography, that can be attached to your iPhone 6s Plus. These lights are portable and can provide sufficient illumination in low-light settings.
- Reflectors: Reflectors are handy tools that bounce off existing light sources to create softer and more balanced lighting. By positioning a reflector strategically, you can enhance the lighting conditions for your subject.
- Night mode: Some third-party camera apps offer a “night mode” feature, which utilizes advanced software algorithms to optimize low-light photography. This mode can help you capture brighter and more detailed photos in challenging lighting conditions.
- Adjust exposure settings: Experimenting with your iPhone 6s Plus camera’s exposure settings can also help improve photography in low-light situations. You can manually increase the exposure to brighten the image or adjust the ISO to make the camera more sensitive to light.
While these alternatives may not provide the same results as a dedicated built-in flash, they can significantly enhance the quality of your low-light photos taken with an iPhone 6s Plus. It’s always worth exploring different options and techniques to improve your photography skills.
FAQ
Can I use flash on the iPhone 6s Plus camera?
Yes, you can use flash on the iPhone 6s Plus camera. The iPhone 6s Plus is equipped with a built-in LED flash that can be turned on and off while taking photos or recording videos. To use the flash, simply open the camera app and tap on the lightning bolt icon at the top left corner of the screen. This will enable the flash and allow you to capture well-lit photos even in low light conditions.
How do I turn on the flash on my iPhone 6s Plus camera?
To turn on the flash on your iPhone 6s Plus camera, open the camera app and locate the lightning bolt icon at the top left corner of the screen. Tap on the lightning bolt icon to enable the flash. You can choose between three different flash modes: Auto, On, and Off. Auto mode will automatically determine whether or not to use the flash based on the lighting conditions, On mode will always use the flash, and Off mode will never use the flash. Select the desired mode and start taking photos with the flash.


