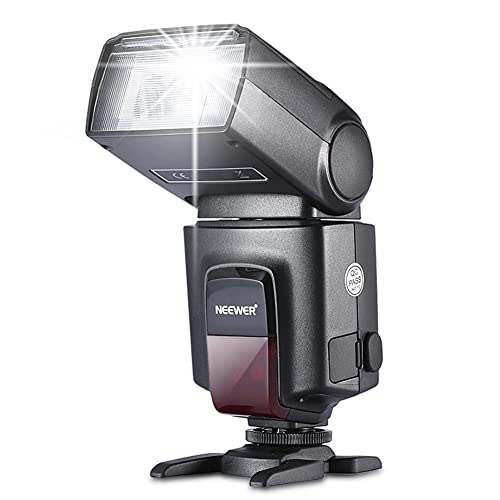
Using the flash on your Canon digital camera can greatly enhance your photography, especially in low-light situations. The flash can provide the necessary burst of light to illuminate your subjects and capture sharper, well-exposed images. In this article, we will guide you step-by-step on how to use the flash feature effectively on your Canon digital camera.
Step 1: Familiarize Yourself with the Flash Modes
Before using the flash feature, it’s essential to understand the different flash modes available on your Canon camera. The most common flash modes include automatic flash, red-eye reduction, slow sync, and rear curtain sync. Each mode serves a specific purpose, so take some time to read the camera’s manual and learn how to switch between these modes.
Pro Tip: Experiment with each flash mode to determine which one works best for various lighting conditions and subjects.
Step 2: Adjust Flash Settings
Once you are familiar with the flash modes, it’s time to adjust the flash settings according to your needs. You can access the flash settings through the camera’s menu or a dedicated flash button on the camera body. Depending on your camera model, you may be able to control the flash power, flash exposure compensation, and flash synchronization with other external flashes.
Pro Tip: Be mindful of the flash power to avoid overexposing your subjects. Adjust the flash exposure compensation if necessary.
Step 3: Master the Flash Techniques
Using the flash effectively involves mastering some essential techniques. Firstly, avoid pointing the flash directly at your subjects, as it can create harsh shadows. Instead, try bouncing the flash off walls or ceilings to achieve softer, more even lighting. Secondly, consider using external flash diffusers or light modifiers to further soften the flash output.
Pro Tip: Experiment with different flash angles and distances to achieve creative lighting effects and eliminate unwanted shadows.

By following these steps and practicing with your Canon digital camera’s flash feature, you will be able to capture well-lit and visually appealing photographs in various lighting conditions. Remember to keep experimenting and refining your skills to take your flash photography to the next level!
Understanding the basics
Before using the flash on your Canon digital camera, it is essential to understand some basics. The flash is a useful tool that can enhance the quality of your photographs in various lighting conditions. Here are a few key points to keep in mind:
| Flash Modes | Overview |
| Auto | When set to Auto, the camera will determine whether to use the flash based on the available light. It is a convenient mode for beginners. |
| Manual | Manual mode allows you to manually control the flash. This mode gives you more creative control over the lighting in your photographs. |
| Red-eye Reduction | Red-eye reduction mode helps reduce the appearance of red-eye in portraits by emitting a pre-flash before the actual exposure. |
| Slow Sync | Slow sync combines the flash with a slow shutter speed, allowing you to capture both the subject and the ambient light in low-light situations. |
| Rear-curtain Sync | Rear-curtain sync fires the flash at the end of the exposure, creating a trail effect behind moving objects. |
It’s important to note that using the flash excessively or inappropriately can result in harsh lighting, washed-out colors, and unwanted shadows. Experiment with different modes and flash settings to achieve the desired effect for your photographs.
Tips for using flash
Using the flash feature on your Canon digital camera can greatly improve the quality of your photos. Here are some tips to help you make the most of your camera’s flash:
1. Adjust the flash intensity
Depending on the lighting conditions and the subject, you may need to adjust the intensity of the flash. Some Canon cameras have a flash adjustment option that allows you to control the power of the flash. Experiment with different intensities to find the one that works best for your situation.

2. Avoid direct flash
Avoid pointing the flash directly at your subject, as it can result in harsh shadows and overexposure. Instead, try bouncing the flash off a nearby surface (such as a wall or ceiling) to create a softer, more diffused light. This can help to reduce harsh shadows and create a more pleasing lighting effect.
Remember to check your camera’s manual for specific instructions on how to enable the bounce flash feature, as it may vary depending on the model.
3. Use flash in low light conditions
If you’re shooting in low light conditions, it’s important to use the flash to illuminate your subject. This will help to prevent blurry or underexposed photos. However, be cautious not to use the flash in situations where it may be unnecessary or disruptive, such as during a performance or in a museum.
4. Use flash compensation
Flash compensation allows you to adjust the flash output based on your shooting preferences. If you find that your photos are consistently overexposed or underexposed with the flash on, try adjusting the flash compensation settings. This feature can help you achieve more balanced exposure in your photos.
Remember to practice and experiment with these tips to find the best flash settings for your Canon digital camera. With a little practice, you’ll be able to capture stunning photos in a variety of lighting conditions.

Choosing the right flash mode
When using a Canon digital camera, it’s important to understand the different flash modes available and choose the right one for your specific situation. The flash can greatly enhance your photographs by providing additional light in low-light conditions or adding a creative touch to your images. Here are some common flash modes and when to use them:
1. Auto Flash: This is the default flash mode on most Canon digital cameras. In auto mode, the camera’s built-in sensor detects the available light and decides whether or not to fire the flash. It’s ideal for quick snapshots or when you’re unsure about the lighting conditions.
2. Manual Flash: In this mode, you have full control over the flash output. You can manually adjust the flash power level, allowing you to create a specific lighting effect. Manual flash is useful when you have a clear vision of how you want your photo to look.
3. Red-Eye Reduction: This flash mode is designed to minimize or eliminate the red-eye effect that can occur when using the flash. The camera fires a series of pre-flashes to reduce the size of the subject’s pupils, reducing the likelihood of red-eye. It’s recommended to use this mode when photographing people or animals up close.
4. Slow Sync: This mode combines a slow shutter speed with a flash burst. It’s commonly used in low-light situations where you want to illuminate the subject with the flash while still capturing the ambient light. Slow sync flash can create a sense of motion or capture the background details in a night scene.

5. Rear Curtain Sync: This mode fires the flash at the end of the exposure, creating a trailing effect of light behind moving subjects. It’s often used in situations where you want to capture motion blur but still have a sharp, well-exposed subject.
Remember to experiment with different flash modes and adjust the flash intensity as needed to achieve the desired results. Understanding the various flash modes available on your Canon digital camera will allow you to take full advantage of its flash capabilities and improve the quality of your photographs.
Adjusting flash settings
Adjusting the flash settings on your Canon digital camera is essential for capturing the perfect shot in different lighting conditions. Here are the steps to adjust the flash settings:
- Turn on your Canon digital camera and navigate to the flash menu.
- Select the desired flash mode from the options available. The most common ones include:
- Auto flash: This mode automatically determines when to use the flash based on the lighting conditions.
- Fill flash: This mode helps to fill in shadows when capturing a backlit subject.
- Red-eye reduction: This mode emits a series of pre-flashes to reduce the occurrence of red eyes in your photos.
- Slow-sync flash: This mode combines the flash with a slower shutter speed, resulting in a well-exposed subject with a background that shows motion blur.
- Adjust the flash exposure compensation if necessary. This allows you to increase or decrease the intensity of the flash.
- Consider using an external flash if you require a more powerful and versatile lighting option. Connect the external flash to your camera and ensure it is properly mounted.
- Experiment with different flash settings in various shooting scenarios to understand the impact they have on your photos. Practice and experience will help you determine the optimal flash settings for different situations.
By adjusting the flash settings on your Canon digital camera, you can enhance your photography by effectively using the flash to capture well-lit and balanced images.
Using flash in different lighting conditions
When using a flash on a Canon digital camera, it’s important to understand how to adjust it for different lighting conditions. The flash can be a valuable tool for overcoming low-light situations, but it can also cause harsh lighting and unwanted shadows if not used correctly.
1. Using flash in low-light conditions:
In low-light situations, the flash can be a lifesaver, providing the necessary light to capture a well-exposed photo. To use the flash in low-light conditions:
- Make sure the flash is enabled on your camera. This can usually be done by pressing the flash button or accessing the flash settings in the camera menu.
- Position yourself within the flash range, which is typically indicated by the camera or flash manufacturer.
- Avoid using the flash directly on reflective surfaces, as it can cause harsh reflections and unwanted glare.
- Experiment with flash exposure compensation to find the right balance of ambient light and flash illumination.
2. Using flash in bright daylight:
Using flash in bright daylight can be a bit tricky, as it can wash out the subject and create unnatural lighting. However, there are situations where using fill flash can help balance out shadows and provide more even lighting. To use flash in bright daylight:
- Enable the flash and set it to fill flash or slow-sync mode. This will allow the flash to provide a subtle amount of light without overpowering the natural daylight.
- Avoid shooting directly at the subject, as this can create harsh shadows. Instead, try bouncing the flash off a nearby surface or using a diffuser to soften the light.
- Use flash exposure compensation to adjust the flash intensity and avoid overexposing the subject.
3. Using flash indoors:

When shooting indoors, the flash can be essential for illuminating the subjects properly. However, it’s important to be mindful of the surrounding environment and adjust the flash accordingly:
- Depending on the size of the room and the distance to the subject, consider adjusting the flash output to avoid overexposure.
- Experiment with bounce flash techniques, where the flash is directed towards a nearby wall or ceiling, creating softer and more diffused lighting.
- Avoid using the flash when shooting through glass or reflective surfaces, as it can cause unwanted reflections.
Remember, using flash is an art, and it takes practice to master. By experimenting with different flash settings and techniques in various lighting conditions, you can achieve well-lit and professional-looking photographs.
Using flash for creative effects
The flash on your Canon digital camera can be a valuable tool in creating unique and creative images. By learning how to effectively use the flash, you can enhance your photography skills and capture stunning photos in various lighting conditions.
1. Fill light: The flash can be used as a fill light to balance out the shadows in your images. This is especially useful when shooting in harsh sunlight or in backlit situations. By using the flash to fill in the shadows, you can achieve a more evenly lit image with better details.
2. Slow shutter speed: Experimenting with slow shutter speed and using the flash can create interesting effects such as blurred motion. This technique is often used in low-light situations or when capturing moving subjects. The flash can freeze the subject while the slow shutter speed captures the movement, resulting in a dynamic and artistic image.
3. Creative light patterns: Get creative with your flash by using various light modifiers. By attaching diffusers, bounce cards, or gels, you can manipulate the color, intensity, and direction of the flash. This allows you to experiment with different lighting effects and add a unique touch to your photographs.
4. Backlighting: Use the flash to create a captivating backlit effect. By positioning your subject in front of a bright light source and using the flash to fill in the front, you can create a dramatic and ethereal look. This technique works well for portraits and can add a sense of depth and dimension to your images.
5. Macro photography: When shooting close-up subjects, the flash can help illuminate the small details and textures. Use the flash to enhance the colors and bring out the intricate details of your macro subjects. Be mindful of the flash’s intensity and distance to avoid overexposing or casting harsh shadows.
Remember to experiment and practice: Each camera model and flash unit may have different settings and capabilities. Take the time to familiarize yourself with your equipment and try out different flash techniques in various shooting conditions. Through practice and experimentation, you can develop your own style and create stunning photographs with the help of your Canon digital camera’s flash.
Troubleshooting Flash Issues
If you are experiencing issues with the flash on your Canon digital camera, there are several troubleshooting steps you can try to resolve the problem.
1. Check the Flash Settings:
Make sure the flash is enabled in the camera settings. Navigate to the flash settings menu and ensure it is set to “Auto” or the desired flash mode.
2. Clean the Flash:
If the flash is not firing or producing inconsistent light, it may be dirty. Use a soft, lint-free cloth to gently clean the flash unit to remove any dirt or debris that may be obstructing the flash’s functionality.
3. Test with Different Flash Modes:
Try different flash modes such as “Fill Flash” or “Red-eye Reduction” to see if the issue persists. Sometimes certain flash modes can cause issues, so experimenting with different settings may help resolve the problem.
4. Use Manual Flash:
If the automatic flash is not working properly, try using the manual flash mode. This allows you to manually control the flash’s output and can be useful in situations where the automatic flash may not be effective.
5. Check Battery Level:
Low battery power can affect the flash’s performance. Ensure that the camera’s battery is fully charged or replace it with a fresh one to see if that resolves the issue.
6. Reset the Camera:
If none of the above steps work, try resetting the camera to its default settings. Refer to the camera’s user manual for instructions on how to initiate a reset.
If you have tried all the troubleshooting steps and the flash is still not working properly, it may be a hardware issue. In this case, it is recommended to contact Canon customer support or visit a professional camera repair service for further assistance.
Question-answer:
How do I enable flash on my red cannon digital camera?
To enable the flash on your red cannon digital camera, start by turning on your camera and accessing the menu. From there, navigate to the flash settings option and select “On” or “Auto” depending on your preference. This will enable the flash when capturing photos.
Why is the flash on my red cannon digital camera not working?
If the flash on your red cannon digital camera is not working, there could be multiple reasons. First, make sure that the flash is enabled in the camera settings. Additionally, check if the camera battery is fully charged, as a low battery can affect the flash functionality. If the issue persists, it is recommended to consult the camera’s user manual or contact the manufacturer for further assistance.


