
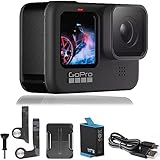
Are you looking to take your video conference calls or live streams to the next level? If you own a GoPro camera and a Mac, there’s good news for you – you can use your GoPro as a web camera! This means you’ll be able to capture high-quality video and audio with your GoPro while using popular video conferencing applications like Zoom, Skype, or Google Meet on your Mac.
Why would you want to use a GoPro as a web camera?
GoPro cameras are known for their excellent image and video quality, making them a popular choice for capturing action-packed adventures and breathtaking moments. By using your GoPro as a web camera, you can take advantage of its superior image quality and wide-angle lens to enhance your video conferences or livestreams. Whether you’re presenting, teaching, or simply connecting with friends and family, using a GoPro as a web camera can elevate the visual experience for both you and your audience.
Setting up your GoPro as a web camera on your Mac

Setting up your GoPro as a web camera on a Mac is a straightforward process. First, you’ll need to make sure you have the necessary equipment and software. You’ll need a compatible GoPro camera, a USB cable to connect it to your Mac, and the GoPro Webcam App, which can be downloaded and installed from the official GoPro website.
Note: As of now, the GoPro Webcam App is only supported for Mac machines running macOS 10.14 and later.
Once you have the necessary equipment and software, you’ll need to connect your GoPro to your Mac using the USB cable. Power on your GoPro and launch the GoPro Webcam App on your Mac. The app will recognize your GoPro camera and set it up as a web camera automatically. You can then select your GoPro as the video source in your preferred video conferencing or livestreaming application.
Guidelines for using your GoPro as a web camera
While using your GoPro as a web camera can be an exciting way to improve your video calls or livestreams, there are a few things to keep in mind:

- Ensure that your GoPro camera is fully charged or connected to a power source during longer video calls or livestreaming sessions.
- Position your GoPro in a stable location or use a mount to avoid shaky video footage.
- Adjust the camera settings on your GoPro, such as resolution and field of view, to suit your preferences and the requirements of your video conferencing or livestreaming application.
- Test the audio quality of your GoPro as a web camera and adjust the microphone settings if necessary.
- Make sure you have enough storage space on your GoPro’s memory card to accommodate longer video calls or livestreams.
By following these guidelines and exploring the features of your GoPro camera, you’ll be able to maximize the potential of using your GoPro as a web camera on your Mac. Say goodbye to mediocre video quality and hello to
Connect GoPro to Mac
If you’re wondering how to use your GoPro as a web camera on your Mac, you’re in luck! With a few simple steps, you can easily connect your GoPro to your Mac and use it as a webcam for video conferencing, live streaming, and more.
Step 1: Get the Right Hardware
The first step is to ensure you have the necessary hardware to connect your GoPro to your Mac. You will need a micro HDMI to HDMI cable and an HDMI to USB capture card. These can be easily found online or at electronics stores.
Step 2: Connect Your GoPro to the Capture Card
Once you have the hardware, connect your GoPro to the HDMI input of the capture card using the micro HDMI to HDMI cable. Then, connect the USB output of the capture card to an available USB port on your Mac. This will establish a connection between your GoPro and your Mac.
Step 3: Set Up Your GoPro
Next, turn on your GoPro and go to the settings menu. Navigate to the “USB Connection” option and select “MTP” or “PTP” mode. This will allow your Mac to recognize the GoPro as a webcam.

Note: Depending on your GoPro model, the steps to access the settings menu and enable webcam mode may vary. Please refer to your GoPro’s user manual or the GoPro website for specific instructions.
Step 4: Configure Your Video Conferencing Software
Now that your GoPro is connected to your Mac and set up as a webcam, you need to configure your video conferencing software to recognize and use it as the default camera. Each software has its own settings menu, but generally, you can find the camera settings under the audio and video settings section.
Tip: Make sure to select your GoPro as the default video input and adjust the resolution and frame rate settings to your preference.
Once you’ve completed these steps, your GoPro should be successfully connected to your Mac and ready to use as a webcam. Enjoy enhanced video quality and a wide-angle perspective for all your online meetings or livestreaming adventures!
Set GoPro to Webcam Mode
If you want to use your GoPro as a web camera on your Mac, you first need to set it to Webcam Mode. Here is a step-by-step guide on how to do it:

Step 1: Make sure your GoPro is fully charged or connected to a power source.
Step 2: Turn on your GoPro by pressing the power button.
Step 3: Swipe down on the GoPro screen to access the main menu.
Step 4: Tap on “Preferences” in the main menu.
Step 5: Scroll down and tap on “Connections” in the Preferences menu.

Step 6: Select “USB Connection” in the Connections menu.
Step 7: Tap on “Webcam” to enable Webcam Mode.
Step 8: Connect your GoPro to your Mac using a USB cable.
Step 9: Open your preferred video conferencing or streaming application on your Mac.
Step 10: In the application settings, select your GoPro as the video input device.

Once you have completed these steps, your GoPro will be set to Webcam Mode and you can use it as a web camera on your Mac. Enjoy capturing high-quality footage for your video calls or live streams!
Install GoPro Webcam Software for Mac
If you want to use your GoPro as a webcam on your Mac, you’ll need to install the GoPro Webcam Software. This software allows you to connect your GoPro to your Mac and use it as a high-quality webcam for video calls, streaming, and more.
Step 1: Download the GoPro Webcam Software
First, you’ll need to download the GoPro Webcam Software for Mac. You can find the software on the official GoPro website or through a trusted third-party source. Make sure to download the software that is compatible with your Mac operating system version.
Step 2: Install the Software
Once the software is downloaded, locate the installation file and double-click on it to start the installation process. Follow the on-screen instructions to install the GoPro Webcam Software on your Mac. Make sure to read and accept the terms and conditions if prompted.
Step 3: Connect your GoPro
After the software installation is complete, connect your GoPro to your Mac using a USB cable. Ensure that your GoPro is powered on and set to “USB Mode” or “MTP Mode” to establish the connection.

If your GoPro is not recognized by your Mac, check if you have the latest version of the software installed. You can also try using a different USB cable or port. If the issue persists, consult the GoPro website for further troubleshooting steps.
Step 4: Configure GoPro Webcam Settings
Once your GoPro is successfully connected to your Mac, launch the GoPro Webcam Software. In the software, you’ll find various settings to adjust the video quality, aspect ratio, audio input, and more. Configure these settings according to your preferences for the best webcam experience.
Step 5: Start Using GoPro as a Webcam
Now that everything is set up, you’re ready to use your GoPro as a webcam on your Mac. Open your preferred video calling or streaming application and select the GoPro as your default camera. Enjoy the high-quality video and audio that the GoPro offers for a professional-grade webcam experience.
| System Requirements |
|---|
| Mac computer with an Intel processor |
| macOS 10.15 or later |
| At least 4GB RAM |
| USB-C or USB-A port for GoPro connection |
Connect GoPro to Mac via USB
Connecting your GoPro to your Mac via USB is a simple process that allows you to use your GoPro as a web camera. Follow the steps below to get started:
- First, ensure that you have the latest version of the GoPro software installed on your Mac. You can download it from the official GoPro website.
- Next, power on your GoPro and connect it to your Mac using a USB cable. Make sure that the cable is properly inserted into both the GoPro and the USB port on your Mac.
- Once the GoPro is connected, your Mac should recognize it as a storage device. You should see the GoPro icon appear on your desktop or in the Finder sidebar.
- Open your preferred video conferencing or streaming application on your Mac. Examples include Zoom, Skype, or OBS Studio.
- Go to the settings or preferences section of the application and look for the option to select a camera. Choose the GoPro as your camera input.
- You should now be able to see the GoPro video feed in your chosen application. Adjust any additional settings or preferences as needed.
Note that some video conferencing or streaming applications may require you to select the GoPro as an external camera device rather than a standard webcam. Refer to the documentation or support resources for your specific application if you encounter any issues.

Select GoPro as Webcam on Mac
Using your GoPro as a webcam on your Mac allows you to capture high-quality video and audio for your online meetings, presentations, or live streaming. By following a few simple steps, you can easily connect and configure your GoPro as a webcam.
Step 1: Verify Compatibility
Before getting started, make sure your GoPro model is compatible with macOS. Some older models may not be compatible or may require additional software.
Step 2: Install Camera Drivers
Go to the official GoPro website and download and install the camera drivers for macOS. These drivers enable your computer to recognize the GoPro as a webcam.
Step 3: Connect Your GoPro
Using a USB cable, connect your GoPro to your Mac. Make sure your GoPro is turned on and set to the appropriate mode for the connection.
Step 4: Configure GoPro Settings
Launch the GoPro app on your Mac. In the app, go to the settings section and find the webcam option. Enable the webcam mode on your GoPro.
Step 5: Select GoPro as Webcam
Once you have installed the camera drivers and configured the GoPro settings, open your preferred video conferencing or streaming software on your Mac. Go to the settings or preferences section of the software and select your GoPro as the video input device.
You may need to restart the software or the computer for the changes to take effect. Once selected, your GoPro will function as a webcam, providing high-quality video and audio for your online activities.
Remember to disconnect your GoPro from your Mac when you’re done using it as a webcam to avoid draining its battery.
By following these steps, you can easily use your GoPro as a webcam on your Mac and improve the quality of your online interactions.
Adjust GoPro Webcam Settings on Mac
If you want to use your GoPro as a webcam on your Mac, it’s essential to adjust the settings correctly to ensure the best video quality and performance. Here’s a step-by-step guide on how to adjust the GoPro webcam settings on your Mac:
- Connect your GoPro to your Mac using a compatible USB cable.
- Open the GoPro Webcam software on your Mac. If you don’t have it installed, you can download it from the GoPro website.
- In the GoPro Webcam application, click on the settings icon located in the top-right corner of the screen.
- In the settings menu, you’ll find a list of options to adjust your webcam settings. These options may vary depending on your GoPro model, but typically include resolution, frame rate, field of view, white balance, exposure, and more.
- Choose the desired resolution and frame rate for your webcam footage. Higher resolutions and frame rates will result in better video quality but may require more processing power from your Mac.
- Select the appropriate field of view for your needs. Wide-angle fields of view can capture more of the scene, while narrower fields of view can focus on specific details.
- Adjust the white balance and exposure settings if needed. These settings can help you achieve accurate colors and brightness levels in your webcam footage.
- Once you’ve adjusted all the settings to your preference, close the settings menu and start using your GoPro as a webcam on your Mac.
- Remember to position your GoPro in an optimal location and angle for your webcam needs. Consider using mounts or accessories to achieve the desired positioning.
- When you’re done using your GoPro as a webcam, make sure to disconnect it properly from your Mac to avoid any potential data loss or damage.
By adjusting the GoPro webcam settings on your Mac, you can optimize the video quality and performance to enhance your video conferencing, live streaming, or content creation experience.
Use GoPro as Web Camera on Mac Applications
GoPro cameras are known for their high-quality video and photo capabilities, making them a popular choice for capturing adventures and action-packed moments. However, they can also be used as web cameras on Mac systems, allowing you to utilize their excellent image quality for video conferencing, live streaming, and other online activities.
Setting Up Your GoPro as a Web Camera
To use your GoPro as a web camera on your Mac, follow these steps:
- Update your GoPro firmware to the latest version to ensure compatibility with the GoPro Webcam software.
- Download and install the GoPro Webcam software from the official GoPro website onto your Mac.
- Connect your GoPro to your Mac using a USB cable.
- Open the GoPro Webcam software on your Mac.
- In the GoPro Webcam software, select your GoPro camera as the video source.
- Choose the desired resolution and frame rate for your video.
- Open the video conferencing or streaming application of your choice on your Mac.
- In the video settings of your application, select “GoPro” or “GoPro Webcam” as the camera source.
- You can now use your GoPro as a web camera on your Mac.
Applications That Support GoPro as a Web Camera
There are several popular video conferencing and streaming applications that are compatible with GoPro as a web camera on Mac, including:
- Zoom
- Microsoft Teams
- Skype
- Google Meet
- Webex
- YouTube Live
- Twitch
Make sure you have the latest version of these applications installed on your Mac to ensure compatibility with the GoPro Webcam software.
Note: The GoPro Webcam software is currently only available for Mac systems running macOS 10.15 or later. If your Mac is running an older version of macOS, you may not be able to use your GoPro as a web camera without additional third-party software or workarounds.
Using your GoPro as a web camera on your Mac opens up a world of possibilities for high-quality online communication and content creation. Whether you’re video conferencing with colleagues or streaming to a global audience, the impressive image quality of your GoPro will help you stand out.
Question-answer:
Can I use my GoPro as a webcam on my Mac?
Yes, you can use your GoPro as a webcam on your Mac. There are several software options available that allow you to connect your GoPro to your computer and use it as a webcam. One popular option is the software called Camo, which is specifically designed for using GoPros as webcams on Mac.
What do I need to use my GoPro as a webcam on my Mac?
To use your GoPro as a webcam on your Mac, you will need a few things. First, you will need a compatible GoPro model. Not all GoPro models support webcam functionality, so make sure to check if your model is compatible. Next, you will need a micro HDMI to HDMI cable to connect your GoPro to your Mac. Finally, you will need software that allows you to use your GoPro as a webcam, such as the Camo software mentioned earlier.


