
Welcome to this comprehensive guide on how to use the GoPro Hero Session camera. Whether you’re a beginner or an experienced user, this article will provide you with step-by-step instructions on how to make the most of your GoPro Hero Session camera’s features and capture amazing footage.
With its compact size and powerful capabilities, the GoPro Hero Session camera is a popular choice for adventurers, sports enthusiasts, and content creators. It offers stunning video quality, impressive image stabilization, and is designed to be durable and waterproof. Whether you’re planning to document an exciting underwater adventure, an adrenaline-filled mountain biking session, or simply capturing precious moments with family and friends, the GoPro Hero Session camera is a reliable companion.
Before diving into the details of using this camera, it’s important to familiarize yourself with its physical features. The GoPro Hero Session camera is a small cube-shaped device with a single button on the top and a microSD card slot on the bottom. It also has a USB port for charging and transferring files. The camera can be controlled via the GoPro app on your smartphone or through the use of its built-in buttons.
Getting Started with GoPro Hero Session Camera
The GoPro Hero Session Camera is a powerful and compact device that allows you to capture amazing footage in various conditions. Whether you’re an experienced videographer or just starting out, this guide will help you get started with your new GoPro Hero Session Camera.
Step 1: Unboxing and Charging the Camera
When you first receive your GoPro Hero Session Camera, start by unboxing the camera and removing all the accessories. Connect the camera to your computer or a wall charger using the provided USB cable to charge it fully. The charging indicator will light up when the camera is charging, and it will turn off once the battery is fully charged.

Step 2: Inserting a MicroSD Card
Before you can start capturing footage, you’ll need to insert a microSD card into your camera. Remove the side door of the camera, and insert the microSD card into the card slot. Make sure the card is properly inserted and secure the side door back in place.
Step 3: Powering On the Camera
To power on your GoPro Hero Session Camera, press and hold the Power/Mode button on the back of the camera until the camera turns on. You’ll see the GoPro logo appear on the front screen, indicating that the camera is ready to use.
Step 4: Choosing a Camera Mode
The GoPro Hero Session Camera offers various modes to suit your needs. Press the Power/Mode button repeatedly to cycle through the available modes. Some of the modes include Video, Photo, Burst, and Time Lapse. Choose the mode that best suits your shooting requirements by pressing the Shutter/Select button.
Step 5: Capturing Footage
Once you’ve selected the desired mode, you can start capturing footage by pressing the Shutter/Select button. You can also adjust settings such as resolution, frame rate, and field of view by navigating the camera’s menu using the Power/Mode and Shutter/Select buttons. Experiment with different settings to achieve the best results.
Remember to familiarize yourself with the camera’s buttons and features by referring to the user manual. Additionally, consider exploring the GoPro smartphone app, which allows you to control the camera remotely, view your footage, and customize settings.

With these steps, you’re now ready to start using your GoPro Hero Session Camera and capture incredible moments with ease and convenience.
Unboxing and Setting Up
When you first receive your GoPro Hero Session camera, you will need to unbox it and set it up before you can start using it to capture amazing moments. Follow these steps to get started:
Step 1: Unboxing
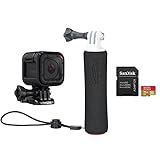
Open the package carefully and remove all the contents. You should find the GoPro Hero Session camera, a camera frame, a mounting buckle, and a USB cable. Make sure everything is included and in good condition.
Step 2: Charging
Before using your GoPro Hero Session camera, ensure that it is fully charged. Connect the camera to your computer or a USB charger using the provided USB cable. Allow it to charge until the battery indicator on the camera turns solid.
Step 3: Inserting the microSD card
Your GoPro Hero Session camera requires a microSD card to save your photos and videos. Locate the microSD card slot on the camera, usually on the side. Gently insert the microSD card into the slot until it clicks into place.
Step 4: Powering on
- Press and hold the power/mode button on the camera’s top until the LED turns on.
- Release the power/mode button to power on the camera.
Step 5: Pairing with your smartphone (optional)
If you want to control your GoPro Hero Session camera using your smartphone, you can pair them using the GoPro app. Download the GoPro app from the app store and follow the instructions to connect your camera and smartphone.
Now that you have unboxed and set up your GoPro Hero Session camera, you are ready to start capturing incredible adventures and moments in high-quality video and photos.
Charging the Battery
To charge the battery of your GoPro Hero Session camera, follow the steps below:
- Connect the USB-C cable to the USB-C port on the side of the camera.
- Plug the other end of the cable into a power source, such as a computer USB port or a wall charger.
- The camera will automatically power off when charging begins.
- Allow the battery to fully charge. This may take up to two hours.
- When the battery is fully charged, the camera’s LED indicator will turn solid green.
- Disconnect the USB-C cable from the camera and power source.
Note: It is recommended to use the GoPro Supercharger (sold separately) for faster charging.
Inserting a Memory Card
Before you can start using your GoPro Hero Session camera, you will need to insert a memory card to store your photos and videos. The memory card slot is located on the side of the camera.

To insert the memory card:
- Ensure that the camera is turned off.
- Open the memory card slot cover by sliding it towards the back of the camera.
- Insert the memory card into the slot, ensuring that the gold contacts are facing down and the label is facing towards you.
- Gently push the memory card into the slot until it clicks into place.
- Close the memory card slot cover by sliding it back into its original position.
Choosing a Memory Card
It is important to choose a memory card that is compatible with your GoPro Hero Session camera. The camera supports microSD, microSDHC, and microSDXC memory cards with a capacity of up to 128GB.
Formatting the Memory Card
Before using a new memory card or if you experience any issues with your current card, it is recommended to format the card using the camera’s built-in format function. This will ensure proper compatibility and optimize the card’s performance for use with the GoPro Hero Session camera.
Powering On and Off
Before using your GoPro Hero Session camera, it’s important to understand how to power it on and off.
To power on your camera, press and hold the Mode button on the back of the camera for about two seconds. You will see the red LED light turn on and the camera will vibrate slightly to indicate that it has powered on.

To power off your camera, press and hold the Mode button again for about two seconds. The red LED light will turn off and the camera will vibrate again to indicate that it has powered off. Make sure to always power off your camera properly to save battery life and protect your footage.
It’s also worth noting that your GoPro Hero Session camera has an auto power-off feature. If the camera is idle for a set period of time, it will automatically power off to save battery. This feature can be adjusted in the camera settings.
By mastering the power on and off process, you’ll be ready to capture all your adventures with ease using your GoPro Hero Session camera.
Capturing Photos
Using the GoPro Hero Session camera, taking photos is a breeze. Whether you are capturing epic landscapes or documenting your adventures, the camera’s features make it easy to get the perfect shot.
Here are some tips to help you capture amazing photos with your GoPro Hero Session:

- Make sure your camera is fully charged and the memory card has enough space for your photos.
- Choose the right mode for your desired photo. The GoPro Hero Session offers various modes such as Single Shot, Burst, and Time Lapse to capture different types of photos.
- Frame your shot by using the built-in LCD screen or by connecting your GoPro to the GoPro App on your phone.
- Experiment with different angles and perspectives to add creativity to your photos. You can try capturing from low angles, high angles, or even underwater shots with the camera’s waterproof housing.
- Use the camera’s Protune feature to adjust settings like white balance, ISO, and exposure for professional-quality photos.
- Take advantage of the wide range of accessories available for the GoPro Hero Session, such as mounts and tripods, to capture stable and unique shots.
- Remember to clean the lens of your camera before each use to ensure clear and sharp photos.
With these tips in mind, you’ll be able to capture stunning photos with your GoPro Hero Session camera and create lasting memories of your adventures.
Recording Videos
Recording videos with your GoPro Hero Session camera is easy and straightforward. Follow the steps below to start capturing stunning videos:
Step 1: Power On
Press and hold the small button on the back of the camera to power it on. The front LED will turn on, indicating that the camera is ready to use.
Step 2: Select Video Mode
Using the mode button on the back of the camera, navigate to the video mode. The video mode is indicated by a small video camera icon on the front screen. Press the mode button once to enter the video mode.
Step 3: Start and Stop Recording
To start recording, simply press the large button on the top of the camera. The front LED will start flashing to indicate that the camera is recording. To stop recording, press the same button once again. The LED will stop flashing, indicating that the recording has stopped.

Note: The camera will automatically split longer videos into multiple clips if the file size exceeds 4GB or the time limit of the video file format you are using.
Step 4: Playback and Review
To review your recorded videos, press the mode button to navigate to the playback mode. In this mode, you can use the large button to select and play your recorded videos. Use the mode button again to return to the video recording mode.
Step 5: Transfer and Edit Videos
Connect your GoPro Hero Session camera to your computer using the included USB cable or remove the microSD card and use a card reader. Transfer your recorded videos to your computer and use video editing software to edit and enhance them.
Make sure to fully charge your camera’s battery before recording videos to ensure uninterrupted recording.
Using the Voice Control Feature
The GoPro Hero Session camera comes equipped with a Voice Control feature that allows you to control the camera hands-free. This feature is especially useful when you are engaged in activities where you cannot physically interact with the camera.
Enabling Voice Control
To use the Voice Control feature, you first need to enable it on your GoPro Hero Session camera. Follow these steps:
- Power on the camera by pressing the top button.
- Press the side button repeatedly until you see the voice control icon on the camera display.
- Press the top button to select Voice Control.
- Follow the on-screen prompts to complete the setup process.
Using Voice Commands
Once you have enabled Voice Control, you can use a variety of voice commands to control your GoPro Hero Session camera. Here are some commonly used voice commands:
- “GoPro, start recording” – This command starts recording a video.
- “GoPro, stop recording” – This command stops the recording.
- “GoPro, take a photo” – This command captures a photo.
- “GoPro, turn off” – This command powers off the camera.
- “GoPro, take a burst” – This command activates the Burst mode for capturing multiple photos in quick succession.
Make sure to speak clearly and loudly when giving voice commands to ensure the camera recognizes them accurately. Remember, the voice control feature requires a good audio input to function effectively.
Note that the voice control commands may vary depending on the firmware version installed on your GoPro Hero Session camera. For the most up-to-date information on available voice commands, refer to the official GoPro website or the user manual.
Adjusting Camera Settings
To get the most out of your GoPro Hero Session camera, it is important to adjust the camera settings according to your preferences and shooting conditions. Here are the key camera settings that you can customize:
Resolution
You can choose the resolution at which you want to capture your videos and photos. The higher the resolution, the better the quality, but keep in mind that higher resolution files take up more storage space.
Frames Per Second (FPS)
The FPS setting determines how many individual frames are captured per second. Higher FPS settings result in smoother videos, while lower FPS settings can create a slow-motion effect. Choose the FPS setting based on the type of footage you are trying to capture.
Field of View (FOV)
The FOV setting determines the width of the frame that the camera captures. A larger FOV captures more of the scene, while a narrower FOV focuses on a smaller area. Choose the FOV setting based on the environment and subject you are shooting.
Exposure
The exposure setting controls the amount of light that enters the camera sensor. Adjusting the exposure can help you capture properly lit footage in different lighting conditions. Use the exposure settings to avoid overly dark or bright images.
White Balance
The white balance setting adjusts the color temperature of the footage to match the lighting conditions. You can choose from different presets such as Auto, Sunny, Cloudy, and more. Adjusting the white balance ensures accurate color reproduction in your videos and photos.
These are some of the basic camera settings you can adjust on your GoPro Hero Session camera. Experiment with different settings and find the combination that works best for your desired footage.
| Setting | Description |
|---|---|
| Resolution | Choose the desired resolution for your videos and photos. |
| Frames Per Second (FPS) | Adjust the number of frames captured per second. |
| Field of View (FOV) | Choose the width of the captured frame. |
| Exposure | Control the amount of light entering the camera. |
| White Balance | Adjust the color temperature of the footage. |
Transferring and Editing Media
Once you have captured some amazing footage with your GoPro Hero Session camera, the next step is to transfer and edit the media.
To transfer the media from your camera to your computer, you have a few options. The simplest way is to insert the microSD card from your camera into a card reader connected to your computer. You can then easily copy the files onto your computer’s hard drive.
If your computer doesn’t have a built-in card reader, you can use the USB cable that comes with your GoPro Hero Session. Connect one end of the cable to your camera and the other end to a USB port on your computer. Your computer should recognize the camera as an external storage device, allowing you to transfer the files.
Once the media is transferred to your computer, you can begin editing it. There are several software options available for editing GoPro footage, such as GoPro Studio, Adobe Premiere Pro, and Final Cut Pro. These programs allow you to trim and combine clips, adjust colors and exposure, add music and titles, and more.
When editing your GoPro footage, it’s important to keep a few things in mind. First, GoPro footage is typically recorded in a wide field of view, so you may need to adjust the aspect ratio or crop the footage to remove any distortion. Second, be aware of the resolution and frame rate of your footage, as this may affect the quality and smoothness of your final edit.
| Software | Key Features |
|---|---|
| GoPro Studio | Free software provided by GoPro. Basic editing features, templates, and music library. |
| Adobe Premiere Pro | Professional video editing software with advanced features and effects. |
| Final Cut Pro | Professional video editing software for Apple users. Intuitive interface and powerful editing features. |
Once you have finished editing your footage, you can save it in your desired format and resolution. You can then share your masterpiece with others by uploading it to social media platforms like YouTube or Vimeo, or by burning it onto a DVD or Blu-ray disc.
With these steps, you can easily transfer and edit the media captured with your GoPro Hero Session camera to create professional-looking videos that capture your adventures in stunning detail.
Troubleshooting and FAQs
If you encounter any issues or have questions while using your GoPro Hero Session camera, refer to the following troubleshooting tips and FAQs.
1. My camera is not turning on
If your camera is not turning on, make sure it is charged. Connect the camera to a power source using the included USB cable and wait for the battery icon on the camera’s display to indicate that it is charging. If the camera still does not turn on after charging, try resetting it by holding down the Mode button for 10 seconds.
2. The camera is not connecting to my mobile device
If you are having trouble connecting your camera to your mobile device, make sure both devices have Bluetooth and Wi-Fi turned on. Ensure that the camera is in pairing mode by pressing the Wi-Fi button on the camera and verifying that the Wi-Fi icon on the display is blinking. On your mobile device, go to the Wi-Fi settings and select your camera from the list of available networks. Follow the on-screen instructions to complete the pairing process.
3. My recorded videos are blurry
If your recorded videos appear blurry, first ensure that the lens of the camera is clean and free from any smudges or dirt. It is also important to stabilize the camera while recording to minimize shakiness. The GoPro Hero Session camera has built-in image stabilization, but excessive movement can still result in blurry footage. Try using a tripod or holding the camera firmly to reduce motion blur.
4. The camera is not responding to the buttons
If the camera is not responding when you press the buttons, try resetting it by holding down the Mode button for 10 seconds. This will force a restart of the camera’s software. If the issue persists, check if the buttons are physically stuck or damaged. Clean around the buttons using a soft cloth or brush to remove any debris that may be interfering with their operation.
5. I am unable to transfer my files to my computer
If you are having trouble transferring files from your camera to your computer, ensure that the camera is connected to the computer using the included USB cable. The camera should be powered on and in “USB Mode”. On the computer, open the file explorer or finder and locate the camera as a connected device. You can then browse the camera’s storage and copy the files to your computer. If the transfer is still not working, try using a different USB cable or connecting to a different USB port on your computer.
If you are still experiencing issues or have other questions about using your GoPro Hero Session camera, refer to the user manual or contact GoPro customer support for further assistance.
Question-answer:
What is GoPro Hero Session camera?
GoPro Hero Session camera is a compact and versatile action camera that is capable of capturing high-quality photos and videos in various environments. It is known for its small size and simplicity in design, making it easy to use for beginners and professionals alike.
How do I set up my GoPro Hero Session camera?
Setting up your GoPro Hero Session camera is a quick and simple process. First, insert a microSD card into the camera. Then, charge the camera using the included USB cable. Once the camera is charged, press the power button to turn it on. You can access the settings and modes by pressing the menu button on the side of the camera. Follow the on-screen instructions to customize your camera settings and you’re ready to start capturing amazing footage.
What are the different shooting modes available on the GoPro Hero Session camera?
The GoPro Hero Session camera offers several shooting modes to suit different needs and scenarios. These modes include video mode, photo mode, burst mode, and time-lapse mode. In video mode, you can record smooth and high-quality videos. Photo mode allows you to capture stunning still photos. Burst mode is perfect for capturing fast-moving subjects, as it takes multiple photos in quick succession. Time-lapse mode is great for capturing longer events or projects by taking photos at set intervals. You can easily switch between these modes using the mode button on the camera.
How do I transfer my footage from the GoPro Hero Session camera to my computer?
Transferring footage from your GoPro Hero Session camera to your computer is a straightforward process. First, make sure your camera is turned off. Then, connect the camera to your computer using the included USB cable. Your computer should recognize the camera as a storage device. Open the file explorer on your computer and navigate to the camera’s storage folder. From there, you can simply drag and drop the files onto your computer’s hard drive. Alternatively, you can use GoPro’s Quik app to transfer and edit your footage wirelessly.


