
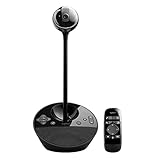
The iMac is not just a sleek and powerful computer, but it can also be used as a valuable tool for security purposes. With the right software and equipment, you can turn your iMac into a surveillance station to monitor and record footage from analog cameras. Whether you want to keep an eye on your home, office, or any other property, the iMac can help you enhance your security measures.
One of the benefits of using an iMac for security is its large and vibrant display. With a high-resolution screen, you can easily view multiple camera feeds simultaneously. This feature allows you to keep a close eye on different areas of your property, providing you with a comprehensive view of your surroundings. Additionally, the iMac’s powerful hardware ensures smooth and uninterrupted playback, allowing you to analyze the recorded footage with ease.
To use your iMac for security purposes, you will need to connect your analog cameras to a capture device. This device converts the analog signal from your cameras into a digital format that can be processed by your iMac. Once connected, you can use security software to manage and control the cameras. There are several software options available, ranging from basic monitoring applications to advanced systems with motion detection and remote viewing capabilities.
When setting up your iMac for security, it is important to consider the placement of your cameras and the storage capacity of your iMac. Strategically positioning your cameras will help you capture the best possible footage. Additionally, investing in an external hard drive or using cloud storage can ensure that you have enough space to store your recordings. Regularly backing up your footage is crucial to prevent data loss and ensure that you have access to past recordings if needed.
In conclusion, using an iMac for security DVD with analog cameras can greatly enhance your surveillance capabilities. With its powerful hardware and user-friendly software, the iMac provides a reliable and efficient solution for monitoring and recording footage. By taking advantage of its large display and advanced features, you can better protect your property and gain peace of mind.

Connecting iMac to Analog Cameras
If you have analog surveillance cameras and you want to connect them to your iMac for security purposes, there are a few steps you can follow to accomplish this task. Although iMac computers do not have built-in analog video inputs, you can still connect analog cameras to your iMac using an external capture device.
Here is how you can connect your iMac to analog cameras:
- Select an external capture device: Look for a capture device that supports analog video input and has compatible connections with your cameras. There are various options available, including USB and Thunderbolt capture devices.
- Connect the capture device to your iMac: Plug the capture device into an available USB or Thunderbolt port on your iMac. Make sure to follow the manufacturer’s instructions for connecting the device correctly.
- Connect your analog cameras to the capture device: Use the appropriate cables to connect your analog cameras to the capture device. Most analog cameras use composite or BNC connections, so ensure that your capture device has matching ports.
- Install the necessary software: Once you have connected the capture device to your iMac, you may need to install the software provided by the manufacturer. This software allows your iMac to recognize and work with the capture device.
- Configure the capture device: Follow the instructions provided by the manufacturer to configure the capture device settings. This may include selecting the video input source and adjusting other options according to your preferences.
- Launch a video surveillance software: To view and manage the video feed from your analog cameras, you will need to use a video surveillance software. There are various options available, both free and paid, that can be downloaded and installed on your iMac.
- Configure the video surveillance software: Once you have installed the software, follow the instructions provided to configure it. This typically involves adding your cameras, specifying their settings, and setting up motion detection, recording, and remote access options.
- Start monitoring your analog cameras: After completing the setup process, you should be able to monitor your analog cameras’ video feed on your iMac. Use the video surveillance software to view the live feed, playback recorded footage, and manage other security-related features.
By following these steps, you can successfully connect your iMac to analog cameras and use them for security purposes. Remember to regularly update your software and maintain proper security measures to ensure the safety of your surveillance system.
Setting Up iMac for Security DVD
If you own analog cameras for security purposes, you can use your iMac to view and record the footage onto a DVD. Setting up your iMac for this task is a simple process. Just follow the steps below to get started:
Step 1: Connect your analog cameras to a capture device

First, you need to connect your analog cameras to a capture device. This device converts the analog signals from your cameras into digital signals that can be processed by your iMac. Connect the cameras to the capture device using the appropriate cables.
Note: The specific cables you need will depend on the type of analog cameras you have and the type of capture device you are using. Make sure you have the correct cables on hand before proceeding.
Step 2: Connect the capture device to your iMac
Next, you need to connect the capture device to your iMac. Most capture devices connect to the iMac via USB or Thunderbolt. Plug in the appropriate cable into the capture device and connect it to an available USB or Thunderbolt port on your iMac.
Step 3: Install the necessary software

Once your capture device is connected, you need to install the necessary software on your iMac. This software allows your iMac to recognize the capture device and interact with it. Consult the documentation that came with your capture device for instructions on how to install the software.
Step 4: Configure the software
After installing the software, you need to configure it to work with your analog cameras. Launch the software and follow the on-screen instructions to set up the capture device and adjust any necessary settings, such as video resolution and frame rate.
Step 5: View and record the footage
Once everything is set up, you can now view and record the footage from your analog cameras using your iMac. Launch the software and navigate to the appropriate section or menu to access the live feed from your cameras. From there, you can choose to either view the footage in real-time or start recording it onto a DVD.

Note: Make sure you have a blank DVD ready if you plan to record the footage onto a DVD. Also, be aware that recording footage onto a DVD may require significant storage space, so make sure your iMac has enough available storage.
By following these steps, you can easily set up your iMac for security DVD with analog cameras. Enjoy the convenience of monitoring and recording your security footage using your iMac’s powerful capabilities.
Installing Necessary Software on iMac
Before you can start using your iMac for security DVD with analog cameras, you need to install some necessary software. Here are the steps to follow:
Step 1: Check for Updates
Make sure your iMac is running the latest version of macOS. To do this, click on the Apple menu in the top-left corner of the screen, then select “About This Mac.” If there are any updates available, click on the “Software Update” button and follow the instructions to install them.

Step 2: Install Surveillance Software
You will need to install surveillance software on your iMac to be able to view and manage the security footage from your analog cameras. There are several options available, such as SecuritySpy, iSpy, or Zoneminder. Choose the one that best suits your needs and follow the installation instructions provided by the software developer.
Step 3: Connect Cameras to iMac
Once you have installed the surveillance software, you can connect your analog cameras to your iMac. Depending on the type of cameras you have, you may need to connect them via USB, FireWire, or a capture card. Follow the instructions provided with your cameras to connect them properly.
Step 4: Configure Cameras in Software
Open the surveillance software on your iMac and follow the instructions provided to add and configure your cameras. This may involve entering the camera’s IP address, adjusting settings like resolution and frame rate, and setting up motion detection if desired. Consult the software’s documentation or help resources for detailed instructions on how to configure your cameras.
Step 5: Test and Adjust
Once you have connected and configured your cameras, take some time to test the system and make any necessary adjustments. Check the quality of the video feed, ensure that motion detection is working properly, and test any other features or settings that are important to you.
Note: Depending on the surveillance software you choose, there may be additional steps or settings to consider. Be sure to consult the software’s documentation or support resources for more information.
With the necessary software installed and your analog cameras connected, you can now use your iMac for security DVD purposes. Enjoy the peace of mind that comes with being able to monitor and record footage from your surveillance system!

Configuring iMac for Analog Camera Recording
Step 1: Connect the analog cameras to a video capture device compatible with iMac. This device will convert the analog video signals into a digital format that the iMac can process. Make sure the capture device is properly connected to the iMac via USB or Thunderbolt.
Step 2: Install the necessary software for the video capture device. The software typically comes with the device or can be downloaded from the manufacturer’s website. Follow the installation instructions provided by the manufacturer.
Step 3: Launch the video capture software on the iMac. The software should automatically recognize the connected analog cameras and display a live video feed from each camera.
Step 4: Create a recording schedule or enable continuous recording, depending on your needs. This can typically be done through the video capture software’s settings or preferences. Specify the desired duration for each recording session and the storage location for the recorded videos.
Step 5: Set up motion detection if desired. This feature allows the iMac to only record when there is movement detected in the camera’s field of view. Adjust the sensitivity level according to your preferences to avoid unnecessary recordings.
Step 6: Test the setup by performing a test recording. Make sure the recorded videos are being saved to the specified location and can be played back without any issues.
Step 7: Mount the iMac in a secure location where it can monitor the analog cameras effectively. Make sure the iMac is connected to a stable power source and has sufficient storage capacity to accommodate the recorded videos.
Note: This configuration guide assumes that you have already set up the analog cameras and have them properly installed in the desired locations.
Adjusting Camera Settings on iMac
When using your iMac for security DVD with analog cameras, it is important to properly adjust the camera settings in order to get the best possible video quality. Here are a few steps to help you adjust the camera settings on your iMac:
Step 1: Launch the Camera App
To begin, open the Camera app on your iMac. You can do this by locating the Camera app in your Applications folder or by searching for it using Spotlight search.
Step 2: Connect Your Analog Camera
Next, connect your analog camera to your iMac using the appropriate connections. Depending on the type of analog camera you are using, you may need to use an adapter or a capture device to connect it to your iMac.
Step 3: Select the Analog Camera
Once your analog camera is connected, you will need to select it as the video source in the Camera app. Click on the camera icon or the drop-down menu to reveal the available video sources, and then select your analog camera from the list.
Step 4: Adjust Camera Settings
Now that your analog camera is selected, you can start adjusting the camera settings to optimize the video quality. Depending on the Camera app you are using, you may have various options to adjust settings such as brightness, contrast, saturation, and sharpness. Experiment with these settings to find the best configuration for your specific needs.
Note: It is recommended to consult the user manual of your analog camera for guidance on the optimal settings.
Step 5: Test and Fine-tune
After adjusting the camera settings, it is essential to test the video quality to ensure it meets your expectations. Monitor the video feed on your iMac and make any necessary fine-tuning adjustments to enhance the clarity and visibility of the footage.
Remember: Regularly check and adjust the camera settings as per your requirements, as lighting conditions and other factors may change over time.
By following these steps and properly adjusting the camera settings on your iMac, you can maximize the video quality and ensure efficient security monitoring with your analog cameras.
Monitoring Analog Cameras on iMac
If you have analog security cameras and an iMac, you can easily monitor the camera feeds on your computer. By following a few simple steps, you can turn your iMac into a monitoring station for your analog cameras.
Step 1: Connect your Analog Cameras to iMac
First, you need to connect your analog cameras to your iMac using a video capture device. The video capture device will convert the analog signals from your cameras into digital signals that can be displayed on your iMac.
Step 2: Install Video Capture Software
Next, install a video capture software on your iMac. There are several options available, such as Camtasia, OBS Studio, or iMovie. Choose the software that best fits your needs and follow the installation instructions.
Step 3: Configure Video Capture Software
Once the video capture software is installed, open the program and configure it to recognize the video capture device connected to your analog cameras. This usually involves selecting the device from a list of available inputs in the software settings.
Step 4: View Camera Feeds on iMac
After configuring the video capture software, you should see a live feed from your analog cameras on your iMac screen. Depending on the software you are using, you may be able to view multiple camera feeds simultaneously or switch between feeds.
Now you can use your iMac as a monitoring station for your analog cameras. Keep in mind that you may need to adjust the settings on your cameras or video capture device for optimal performance. Additionally, make sure to secure your system by setting up passwords and taking other security measures to protect your camera feeds from unauthorized access.
Exporting Security DVD from iMac
If you are using analog cameras for security surveillance and have stored the footage on a DVD, you may want to export that footage to view or share it using your iMac. The process of exporting a security DVD from your iMac is relatively straightforward and can be done using a few simple steps.
Step 1: Insert the Security DVD
Begin by inserting the security DVD into the DVD drive of your iMac. Make sure the DVD is clean and free of any scratches or damages that may affect the export process.
Step 2: Open Disk Utility
Next, open the Disk Utility application on your iMac. You can find this application by navigating to the Applications folder, then the Utilities folder. Alternatively, you can use the Spotlight search feature to quickly access Disk Utility.
Step 3: Select the Security DVD
In Disk Utility, locate the security DVD under the “Devices” section on the left-hand side of the window. Click on the DVD to select it.
Step 4: Choose Export Options
After selecting the DVD, click on the “File” menu at the top of the screen and choose the “Export” option. This will open a window where you can choose the export options for the security DVD.
In the export options window, you can specify the destination folder where the exported files will be saved. You can also choose the desired format for the exported files, such as MPEG or QuickTime.
Additionally, you may have the option to select specific segments or chapters from the DVD to export. This can be useful if you only need to export certain portions of the security footage.
Step 5: Start the Export Process
Once you have selected the desired export options, click the “OK” or “Export” button to start the export process. The time it takes to export the security DVD will depend on the size of the DVD and the specifications of your iMac.
During the export process, you will see a progress bar indicating the status of the export. Once the export is complete, you will have the exported security footage saved in your chosen destination folder.
Step 6: Verify and Access the Exported Files
After the export is complete, navigate to the destination folder you specified earlier to verify and access the exported security footage. You can now view or share the exported files using your iMac or other devices.
| Tips: |
|---|
|
Protecting Security Footage on iMac
Using your iMac to store and access security footage from analog cameras is a convenient way to keep your property safe. However, it’s important to ensure that your security footage is protected to prevent unauthorized access and to preserve its integrity. Here are some steps you can take to protect your security footage on iMac:
- Set up a secure login: It’s crucial to set up a strong password for your iMac to prevent unauthorized access. Choose a complex password that includes a combination of uppercase and lowercase letters, numbers, and special characters. Avoid using easily guessable information like your name or birthdate.
- Enable automatic updates: Regularly updating your iMac’s operating system and security software will help to protect against potential vulnerabilities and ensure that you have the latest security features.
- Encrypt your security footage: Consider using encryption software to encrypt your security footage files. This will add an extra layer of protection and secure your footage from unauthorized access even if someone gains access to your iMac.
- Back up your security footage: It’s important to regularly back up your security footage to an external hard drive or a cloud storage service. This will help prevent data loss in the event of hardware failure or theft.
- Install antivirus software: Install reputable antivirus software on your iMac to protect against malware and other malicious software that could compromise your security footage.
- Monitor your iMac’s network activity: Use a network monitoring tool to keep an eye on the network activity of your iMac. This will help identify any suspicious or unauthorized access attempts.
By following these steps, you can ensure that your security footage remains secure and protected on your iMac, providing you with peace of mind and confidence in the safety of your property.
Troubleshooting Analog Camera Connection to iMac
If you are experiencing issues connecting your analog camera to your iMac, there are several troubleshooting steps you can take to resolve the problem.
1. Check the Camera Connections
Ensure that all cables are securely and correctly connected to the analog camera and your iMac. Check for any signs of damage or loose connections.
2. Verify Input Source Settings
Open the system preferences on your iMac and navigate to the “Displays” or “Monitor” settings. Check that the correct input source is selected for your analog camera. If it is not, choose the appropriate input source and test the connection again.
3. Update Software and Drivers
Make sure that both your iMac’s operating system and any accompanying software or drivers are up to date. Outdated software can sometimes cause compatibility issues with analog cameras.
4. Test a Different Camera or Cable
If possible, try connecting a different analog camera or using a different cable to see if the issue lies with your current camera or cable. This can help determine if the problem is specific to the camera or the connection itself.
5. Restart the iMac and Camera
Sometimes a simple restart can resolve connection issues. Restart both your iMac and the analog camera, and then try connecting again.
6. Seek Professional Assistance
If the above troubleshooting steps do not resolve the issue, it may be necessary to seek professional assistance. Contact the manufacturer of your analog camera or consult with a certified technician who can provide further guidance and support.
By following these troubleshooting steps, you should be able to resolve any issues you are experiencing when connecting your analog camera to your iMac. Remember to always refer to the user manuals or support documentation provided with your devices for specific instructions and guidance.
FAQ,
Can I use my iMac as a security system with analog cameras?
Yes, you can definitely use your iMac as a security system with analog cameras. All you need is a video capture card or a USB video capture device to connect your analog cameras to your iMac. Once connected, you can use security software like SecuritySpy or iSpy to monitor and record the video feed from your analog cameras.
What are the benefits of using an iMac for a security system?
Using an iMac for a security system offers several benefits. First, iMacs are powerful machines that can handle the processing requirements of security software and provide smooth video playback. Second, iMacs have large screens which make it easy to monitor multiple camera feeds simultaneously. Additionally, iMacs are known for their user-friendly interface and seamless integration with other Apple devices.
Do I need any additional equipment to use my iMac as a security system?
Yes, you will need some additional equipment to use your iMac as a security system with analog cameras. Apart from the analog cameras themselves, you will also need a video capture card or a USB video capture device to connect the cameras to your iMac. Additionally, you may want to invest in security software like SecuritySpy or iSpy to monitor and record the video feed from your analog cameras.


