Are you tired of the poor webcam quality on your Mac? Do you want to enhance the video experience during your online meetings, conferences, or presentations? If you own an iPhone and a Mac, then you’re in luck! By utilizing your iPhone’s superior camera, you can transform it into a high-quality webcam for your Mac.
Using your iPhone as a webcam for your Mac is a simple and cost-effective solution that can dramatically improve the visual experience. This method allows you to take advantage of your iPhone’s advanced camera technology and enjoy crystal-clear video output during your online interactions.
Wondering how to get started? Don’t worry, we’ve got you covered. In this article, we will guide you through the step-by-step process of using your iPhone camera as a webcam for your Mac. Whether you’re a tech-savvy individual or a beginner, you’ll be able to follow these easy instructions and get your iPhone camera up and running as a webcam in no time.
Connect Your iPhone to Your Mac
To use your iPhone as a webcam for your Mac, you need to connect it using a USB cable. Follow these steps:
Step 1: Make sure you have the latest version of iTunes installed on your Mac. If not, download and install the latest version from the Apple website.
Step 2: Connect your iPhone to your Mac using a compatible USB cable.
Step 3: On your iPhone, unlock it and trust your Mac by tapping “Trust” when prompted.
Step 4: On your Mac, open the QuickTime Player from the Applications folder.
Step 5: In the QuickTime Player menu, go to “File” and select “New Movie Recording”.
Step 6: In the new movie recording window, click the small arrow next to the record button.
Step 7: From the drop-down menu, select your iPhone as the camera and microphone source.
Step 8: You should now see the live video feed from your iPhone on your Mac.
Step 9: Adjust the settings in QuickTime Player as needed, such as video quality and audio source.
Step 10: Once you’re ready, you can start using your iPhone as a webcam for video calls, livestreaming, or recording videos on your Mac.
Install a Webcam App on Your iPhone
If you want to use your iPhone as a webcam for your Mac, you will need to install a webcam app on your iPhone. Fortunately, there are several great options available in the App Store that will allow you to use your iPhone camera as a webcam.

1. EpocCam
One popular webcam app for iPhone is EpocCam. It is available for free in the App Store and offers a variety of features for a seamless webcam experience. To install EpocCam, follow these steps:
- Open the App Store on your iPhone.
- Search for “EpocCam” in the search bar.
- Select the EpocCam app from the search results.
- Tap the “Get” button to download and install the app.
2. iVCam
Another popular option is iVCam. This app is also available for free in the App Store and offers similar functionality to EpocCam. To install iVCam, follow these steps:
- Open the App Store on your iPhone.
- Search for “iVCam” in the search bar.
- Select the iVCam app from the search results.
- Tap the “Get” button to download and install the app.
Once you have installed a webcam app on your iPhone, you will need to download and install the corresponding webcam software on your Mac. This software will allow your Mac to recognize your iPhone as a webcam. Make sure to follow the instructions provided by the webcam app to complete the setup process.
Download and Install the Mac Webcam Software
To use your iPhone camera as a webcam for your Mac, you will need to download and install a webcam software on your Mac. Here are the steps to do so:
Step 1: Choose a Webcam Software
There are several webcam software options available for Mac users. Some popular choices include EpocCam, iVCam, and NDI HX Camera. You can visit their respective websites to learn more about each software and decide which one suits your needs.

Step 2: Download the Webcam Software
- Go to the official website of the webcam software you have chosen.
- Navigate to the “Downloads” or “Get Started” section of the website.
- Click on the download link for the Mac version of the software.
- Wait for the software to download onto your Mac.
Step 3: Install the Webcam Software
- Locate the downloaded webcam software file on your Mac (usually in the “Downloads” folder).
- Double-click on the file to launch the installation process.
- Follow the on-screen instructions to install the software on your Mac.
- Once the installation is complete, you can proceed to the next steps to set up and use your iPhone camera as a webcam for your Mac.
It is important to note that some webcam software may require you to download a companion app on your iPhone as well. Make sure to follow the instructions provided by the software developer to complete the setup process.
Launch the Webcam App on Your iPhone
To use your iPhone camera as a webcam for your Mac, you’ll need to download a webcam app from the App Store. There are several apps available, such as EpocCam, iVCam, and NDI HX Camera, among others. Once you’ve chosen an app that suits your needs, follow these steps to launch it on your iPhone:
Step 1: Download the Webcam App
Open the App Store on your iPhone and search for the webcam app you want to use. Tap on the app’s icon to open its page, then tap the “Get” or “Download” button to install it on your iPhone. Wait for the app to finish downloading and installing before proceeding to the next step.
Step 2: Launch the Webcam App
Once the app is installed, locate its icon on your iPhone’s home screen and tap on it to launch it. The app may prompt you to grant certain permissions, such as access to your camera and microphone. Make sure to allow these permissions for the app to function properly as a webcam.
In most webcam apps, you’ll find additional settings and customization options that you can adjust according to your preferences. Take some time to explore these settings and configure the app to best suit your needs. Some apps may also offer additional features, such as the ability to use your iPhone’s flash or adjust exposure settings.

Once you have the webcam app up and running on your iPhone, you can proceed to the next steps to connect your iPhone to your Mac and use it as a webcam.
Configure the Webcam Settings on Your Mac
Configuring the webcam settings on your Mac is important to ensure optimal video quality and adjust any necessary preferences. Here’s a step-by-step guide to help you get started:
Step 1: Open the Webcam Settings
To access the webcam settings on your Mac, follow these steps:
1.1 Click on the Apple menu in the top-left corner of the screen.
1.2 Select “System Preferences” from the drop-down menu.

1.3 In the System Preferences window, click on the “Camera” icon.
Step 2: Adjust Webcam Preferences
Once you’ve opened the Webcam settings, you can make the following adjustments:
2.1 Select the camera you want to configure from the list of available cameras.
2.2 Use the “Facetime HD Camera” or “iSight” camera options if you’re using the built-in webcam on your Mac.
2.3 Adjust the camera’s brightness, contrast, saturation, and other image settings using the sliders provided.

2.4 Check the box next to “Enable Low Light Boost” to improve video quality in low-light conditions.
Step 3: Test the Webcam
After you’ve configured the webcam settings, it’s a good idea to test the changes you’ve made. To do this:
3.1 Open any application that uses the webcam, such as FaceTime or Photo Booth.
3.2 Verify that the webcam image appears correctly and that the adjustments you made are reflected in the video quality.
Following these steps will help you optimize your webcam settings on your Mac and ensure that video calls or recordings are of the highest quality possible. Keep in mind that some applications may have their own webcam settings, so you may need to adjust those individually as well.
Use Your iPhone Camera as a Webcam on Mac
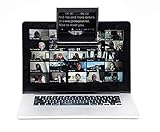
If you own an iPhone and a Mac, you have the perfect setup for using your iPhone camera as a webcam on your Mac. This can be especially useful if you need a high-quality webcam for video conferencing, live streaming, or recording videos.
To use your iPhone camera as a webcam on your Mac, you need to follow these steps:
- Install a webcam app on your iPhone. There are several apps available on the App Store that can turn your iPhone camera into a webcam. Choose a reputable app that suits your needs and follow the installation instructions.
- Connect your iPhone to your Mac using a lightning cable. Make sure your iPhone is unlocked and allow access to your device when prompted.
- Launch the webcam app on your iPhone and open the corresponding software on your Mac. Most webcam apps will provide you with instructions on how to connect your iPhone to your Mac.
- Configure the settings on the webcam app to ensure you are using the iPhone camera as the video source. You may also need to adjust other settings such as video resolution, frame rate, and audio input.
- Once everything is set up, you can start using your iPhone camera as a webcam on your Mac. Open your preferred video conferencing or streaming software and select the iPhone camera as the video input device.
Using your iPhone camera as a webcam on your Mac can provide you with a high-quality video feed and eliminate the need for an additional webcam. Just make sure that your iPhone is properly positioned and stable to get the best results.
If you encounter any issues during the setup or experience stability problems, make sure to check for updates for both the webcam app and your Mac’s operating system. Sometimes, keeping your software up to date can resolve compatibility issues.
Remember to disconnect your iPhone from your Mac once you’re done using it as a webcam to avoid any potential battery drain on your iPhone. With these steps, you can easily use your iPhone camera as a webcam on your Mac and enjoy high-quality video in your online activities.
Troubleshooting Tips and Tricks
If you’re experiencing any issues while trying to use your iPhone camera as a webcam for your Mac, don’t worry! Here are some troubleshooting tips and tricks to help you resolve common problems:
1. Ensure compatibility: Make sure your iPhone and Mac are both compatible with the software or app you’re using to utilize your iPhone camera as a webcam. Check the system requirements and ensure both devices meet them.
2. Update software: Keep your iPhone software and Mac operating system up to date. Outdated software can sometimes cause compatibility issues and prevent certain features from working correctly.
3. Check connections: Verify that your iPhone is properly connected to your Mac using a Lightning cable or Wi-Fi. Sometimes loose connections can cause problems, so it’s essential to ensure a secure connection.
4. Restart devices: Try restarting both your iPhone and Mac. This simple step can often resolve minor software glitches and refresh the connection between the two devices.
5. Check camera permissions: On your iPhone, go to “Settings” and navigate to “Privacy” and “Camera.” Make sure the app you’re using to enable your iPhone camera as a webcam has the necessary permission to access the camera.
6. Disable conflicting apps or settings: Some applications or settings on your Mac may interfere with the functionality of the iPhone camera as a webcam. Temporarily disable any other third-party camera apps or settings that could potentially conflict with the operation.
7. Reinstall the app: If you’re using a third-party app to enable your iPhone camera as a webcam, try uninstalling and reinstalling the app. This can help resolve any software-related issues or bugs.
8. Contact app support: If none of the above solutions work, reach out to the developer or support team of the app you’re using. They may have specific troubleshooting steps or updates available to help you resolve the problem.
By following these troubleshooting tips and tricks, you should be able to resolve most common issues when using your iPhone camera as a webcam for your Mac. Remember to always double-check the settings and permissions on both devices for seamless functionality.
FAQ
What is the benefit of using iPhone camera as a webcam for Mac?
The benefit of using an iPhone camera as a webcam for Mac is that it allows you to have a higher quality video and audio during video calls or online meetings. The iPhone cameras are usually of better quality than the built-in webcams on Macs.
Can I use any iPhone model as a webcam for a Mac?
Yes, you can use any iPhone model as a webcam for Mac as long as it is running iOS 9 or later. However, keep in mind that newer iPhone models generally have better camera quality.
What apps can I use to use my iPhone camera as a webcam for Mac?
There are several apps available that allow you to use your iPhone camera as a webcam for Mac. Some popular options include EpocCam, iVCam, and DroidCam. These apps usually require you to install a companion app on your Mac as well.
Are there any limitations or drawbacks to using an iPhone camera as a webcam for Mac?
While using an iPhone camera as a webcam for Mac has its benefits, there are also some limitations and drawbacks. One limitation is that you will need to keep your iPhone connected to your Mac during the video call, which may limit your mobility. Additionally, using the iPhone camera for an extended period of time can drain its battery quickly.