
Many iPhone users are unaware that their device’s camera can be used as a webcam via USB. This is especially useful for those who need to attend online meetings, webinars, or video conferences and want to have a higher quality video. Instead of relying on the built-in webcam on their computers, iPhone users can utilize the superior camera quality and features of their iPhones.
Using the iPhone camera as a webcam via USB requires a few steps and the right tools. First, users need to download and install a third-party app on their iPhone that enables it to function as a webcam. There are several apps available on the App Store that offer this functionality, such as EpocCam, iCam, and iVCam. These apps are typically free or have a small fee for premium features.
Once the app is installed on the iPhone, users need to connect their iPhone to their computer via USB. It’s important to use a reliable and high-quality USB cable to ensure a stable connection. After connecting the iPhone, users can open the app on their iPhone and follow the app’s instructions to set it up as a webcam.
After the setup is complete, users can open their preferred video conferencing software on their computer, such as Zoom, Skype, or Google Meet. In the video settings of the conferencing software, users can select the iPhone camera as the video source instead of the built-in webcam. This way, the higher quality camera of the iPhone will be used for video calls.
Using the iPhone camera as a webcam via USB not only provides better video quality but also allows users to take advantage of the advanced camera features of their iPhones, such as portrait mode and image stabilization. It’s a convenient solution for those who want to improve their video conferencing experience and have a professional-looking video.

In conclusion, with the help of third-party apps and a USB connection, iPhone users can utilize their device’s camera as a webcam for online meetings and video conferences. This provides better video quality and access to advanced camera features, enhancing the overall video conferencing experience.
Connect iPhone Camera to Computer
If you want to use your iPhone camera as a webcam on your computer, you can easily connect it via a USB cable. This will enable you to use the high-quality camera on your iPhone for video calls, live streaming, and other applications that require a webcam.
Step 1: Ensure iPhone Compatibility
Before connecting your iPhone camera to your computer, make sure that your iPhone is compatible with this feature. To use your iPhone as a webcam, you need to have an iPhone running on iOS 10 or later. Additionally, your computer should be running on a supported operating system such as Windows 10 or macOS.
Step 2: Install Required Software
In order to connect your iPhone camera to your computer, you need to install a third-party app or software that enables this functionality. There are several options available, such as EpocCam, iVCam, and Reincubate Camo. Visit the respective website of the software you choose and follow the instructions to download and install it on your computer.
Step 3: Connect iPhone Camera to Computer
Once you have installed the required software, connect your iPhone to your computer using a USB cable. Make sure to use a genuine Apple USB cable for a stable connection. When you connect your iPhone to your computer, open the software you installed and follow the on-screen instructions to establish the connection.
Step 4: Adjust Camera Settings
After successfully connecting your iPhone camera to your computer, you may need to adjust the camera settings to optimize the video quality. Depending on the software you are using, you can adjust settings such as resolution, frame rate, autofocus, and exposure. Experiment with these settings to achieve the desired video quality.
| Software | Supported Operating Systems |
|---|---|
| EpocCam | Windows 10, macOS |
| iVCam | Windows 10 |
| Reincubate Camo | Windows 10, macOS |
Using these steps, you can easily connect your iPhone camera to your computer and use it as a webcam. Enjoy the superior video quality of your iPhone camera for all your video communication needs.
Install Webcam App on iPhone
To use your iPhone camera as a webcam via USB, you will need to install a webcam app on your iPhone. These apps allow you to use your iPhone camera as a webcam and connect it to your computer using a USB cable for video calls, conferences, and live streaming.
Step 1: Search for Webcam Apps
Go to the App Store on your iPhone and search for webcam apps. There are several apps available, such as “EpocCam,” “iVCam,” and “Camo,” that can turn your iPhone camera into a high-quality webcam.
Step 2: Download and Install the App
Select the webcam app that best suits your needs, then tap the “Get” or “Download” button to download and install the app on your iPhone. Make sure to check the app requirements and compatibility with your iPhone model and version of iOS.

Once the app is installed, you may need to grant it access to your iPhone camera and microphone. Allow the app to access these permissions for it to function properly.
Note: Some webcam apps may require additional software to be installed on your computer. Follow the instructions provided by the app to download and install the necessary drivers or client software.
Install Webcam Software on Computer
The first step in using your iPhone camera as a webcam via USB is to install webcam software on your computer. This software will allow your computer to recognize your iPhone as a webcam device and enable you to use it for video conferencing or live streaming.
Step 1: Choose Webcam Software
There are several webcam software options available, both free and paid. Some popular choices include iVCam, EpocCam, and DroidCam. You can visit their official websites to download the software.
Step 2: Download and Install the Software
Once you have chosen the webcam software that suits your needs, download the installer file from the website. Locate the downloaded file on your computer and double-click it to start the installation process. Follow the instructions provided by the installer to complete the installation.

Note: Make sure to download the version of the software that is compatible with your computer’s operating system.
Step 3: Connect Your iPhone to Computer via USB
After the software is successfully installed on your computer, connect your iPhone to your computer using the USB cable that came with your device. Ensure that your iPhone is unlocked and on the home screen.
Step 4: Launch the Webcam Software
Open the webcam software on your computer. It should automatically detect your iPhone as a webcam device. If not, check the software’s settings to select your iPhone as the webcam device.
Note: Some webcam software may require you to grant permissions on your iPhone to access the camera. Follow the prompts on your iPhone screen to grant the necessary permissions.
Now that you have installed the webcam software on your computer, you can proceed to set up the necessary settings within the software to optimize your iPhone camera as a webcam via USB.

Connect iPhone to Computer via USB
In order to use your iPhone as a webcam for your computer, you will need to connect it via USB. Here are the steps to do so:
Step 1: Check for Compatibility
Make sure that your iPhone model is compatible with this method. You will need an iPhone 5 or later, running iOS 9 or later. Additionally, ensure that your computer is running the latest version of the operating system.
Step 2: Get a USB Lightning Cable
Obtain a USB Lightning cable, which is the cable that connects your iPhone to your computer. If you don’t have one, you can purchase it from an Apple Store or other electronics retailer.
Step 3: Connect iPhone to Computer
Plug one end of the USB Lightning cable into your computer’s USB port and the other end into the Lightning port on your iPhone. Ensure that the connection is secure.
Step 4: Trust Your Computer
On your iPhone, you may see a prompt asking if you trust the computer. Tap “Trust” to establish a connection. If you don’t see this prompt, make sure that your iPhone is unlocked and trust settings are enabled.

Step 5: Configure Webcam Software
Now that your iPhone is connected, you need to configure webcam software on your computer. There are various applications available for this purpose, such as EpocCam, iCam, or iVCam. Install the software of your choice and follow the instructions to set it up.
Once the software is configured, you should be able to select your iPhone as the webcam device within the application. Make sure to adjust any necessary settings, such as resolution or frame rate, to optimize the video quality.
With your iPhone connected via USB and webcam software configured, you can now use your iPhone as a webcam for video conferencing, live streaming, or any other application that requires a webcam.
Remember to disconnect your iPhone from the USB port when you are done using it as a webcam to preserve its battery life.
Set up iPhone Camera as Webcam
Using your iPhone camera as a webcam can be a convenient solution for video conferencing, live streaming, or virtual meetings. With the right software and a USB connection, you can easily turn your iPhone into a high-quality webcam.

Follow these steps to set up your iPhone camera as a webcam:
- Install a webcam app: Start by downloading and installing a webcam app on your iPhone. There are several apps available on the App Store that can turn your iPhone camera into a webcam. Some popular options include EpocCam, iVCam, and NDI HX Camera.
- Install the companion software: After installing the webcam app on your iPhone, you’ll also need to install the companion software on your computer. Most webcam apps have companion software available for Windows and Mac. Check the app’s website for the appropriate download link.
- Connect your iPhone to the computer: Use a USB cable to connect your iPhone to your computer. Make sure your iPhone is unlocked and the webcam app is open on your device.
- Launch the webcam app on your iPhone: Open the webcam app on your iPhone and make sure it’s connected to your computer. You may need to grant the app permission to access your camera and microphone.
- Configure the webcam settings: Once your iPhone is connected to your computer, you’ll need to configure the webcam settings in the companion software. Select your iPhone as the video source and adjust any other settings as necessary.
- Start using your iPhone camera as a webcam: Once everything is set up, you can start using your iPhone camera as a webcam. Open your preferred video conferencing or streaming software, and select your iPhone as the video input device.
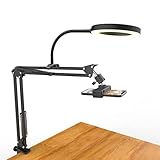
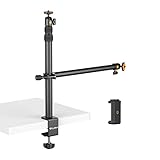
Remember to position your iPhone properly for the best video quality. Use a tripod or a stable stand to keep your iPhone steady and at the desired angle. Additionally, make sure your iPhone is fully charged or connected to a power source to avoid any interruptions during your video calls or streams.
Now you can enjoy the convenience of using your iPhone camera as a webcam and take advantage of its superior image quality for all your video communication needs.
Adjust Camera Settings
Before using your iPhone camera as a webcam via USB, it’s important to adjust some camera settings to ensure the best video quality.
1. Enable High-Quality Video Recording
To enable high-quality video recording on your iPhone, follow these steps:

- Open the Settings app on your iPhone.
- Scroll down and tap on “Camera”.
- Tap on “Record Video”.
- Select the highest video resolution available (e.g., 1080p at 60fps).
By selecting the highest video resolution, you’ll ensure that the video captured by your iPhone camera is of the highest possible quality.
2. Adjust Exposure and Focus
The exposure and focus settings on your iPhone camera can affect the video quality. Follow these steps to adjust these settings:
- Open the Camera app on your iPhone.
- Tap on the screen to set the focus point.
- Swipe up or down to adjust the exposure level.
- Tap and hold on the screen to lock the exposure and focus.
Adjusting the exposure and focus settings will ensure that your video is properly exposed and in focus, resulting in clearer and more professional-looking footage.
3. Use Proper Lighting
Good lighting is essential for high-quality video recordings. Try to record in a well-lit environment or use additional lighting sources if needed. Avoid backlighting situations, as they can result in dark and unflattering video footage.
4. Clean the Camera Lens
Make sure to clean the camera lens of your iPhone before using it as a webcam. Dust, fingerprints, or smudges can degrade the video quality. Use a soft microfiber cloth to gently wipe the lens and ensure a clear image.
By adjusting these camera settings, you’ll be able to use your iPhone camera as a webcam via USB and achieve high-quality video footage for your online meetings and video calls.
Test iPhone Camera as Webcam
To use your iPhone camera as a webcam via USB, you first need to ensure that you have the necessary software installed on your computer. There are several applications available that allow you to do this, such as EpocCam, iVCam, and NDI HX Camera.
Once you have installed the required software on your computer, you will also need to download the corresponding app on your iPhone. These apps are usually available on the App Store.
After downloading the app, make sure that your iPhone is connected to the same Wi-Fi network as your computer. Launch the app on your iPhone and open the corresponding program on your computer. You should then see your iPhone camera listed as an available video source.
To test the iPhone camera as a webcam, open a video conferencing or streaming software on your computer, such as Zoom, Skype, or OBS Studio. In the settings of the software, select your iPhone camera as the video input device.
You can then start a video call or live stream to check if the iPhone camera is working properly as a webcam. Make sure to adjust the camera settings and position it according to your preferences.
If you encounter any issues or the camera is not recognized, try disconnecting and reconnecting the USB cable, restarting the iPhone and computer, or updating the software and app to the latest versions.
Overall, testing your iPhone camera as a webcam is a straightforward process that can enhance your video calls, live streams, and online meetings by providing a higher quality image compared to the built-in webcam on your computer.
Troubleshooting iPhone Camera Connection
If you are experiencing trouble connecting your iPhone camera to your computer via USB, there are several common issues you may encounter. Here are some troubleshooting steps you can take to resolve the problem:
1. Check USB Connection
First, ensure that the USB cable you are using is properly connected to both your iPhone and your computer. Try disconnecting and reconnecting the cable to make sure it is securely attached.
2. Update iOS
Make sure that your iPhone is running the latest version of the iOS operating system. Go to the Settings app on your iPhone, then tap General and Software Update. If an update is available, follow the prompts to download and install it.
3. Allow Access
When you connect your iPhone to your computer, a prompt should appear on your iPhone asking for your permission to allow access to your camera. Make sure you tap “Allow” to grant access.
4. Restart Devices
Try restarting both your iPhone and your computer. Sometimes, a simple reboot can resolve connectivity issues.
5. Check Camera Settings
On your iPhone, go to the Settings app, then tap Camera. Ensure that the “Formats” option is set to “Most Compatible” rather than “High Efficiency”. This may improve compatibility with your computer.
6. Test with Another USB Cable
If you have access to another USB cable, try using it to connect your iPhone camera to your computer. A faulty cable can sometimes cause connection problems.
7. Update Camera Drivers
If you are using a Windows computer, it may be necessary to update the camera drivers. Visit the manufacturer’s website for your computer’s camera and download any available driver updates.
8. Contact Support
If none of the above steps resolve the issue, you may need to contact Apple Support or the manufacturer of your computer for further assistance. They can provide more specific troubleshooting steps based on your specific setup.
| Issue | Possible Solution |
|---|---|
| USB Connection is not recognized | Check cable connection and try a different USB port |
| Camera access prompt does not appear | Check camera settings and restart devices |
| iPhone camera not detected on computer | Update camera drivers or contact support |
Alternative Methods to Use iPhone Camera as Webcam
If you don’t have access to a USB connection or prefer not to use it, there are a few alternative methods you can try to use your iPhone camera as a webcam:
1. Wi-Fi Connection
The easiest way to use your iPhone camera as a webcam without a USB connection is by using a Wi-Fi connection. You can do this by downloading a third-party app that allows you to turn your iPhone camera into a webcam and then connecting your iPhone and computer to the same Wi-Fi network.
Once your iPhone and computer are connected to the same Wi-Fi network, follow the instructions provided by the app to establish a connection and start using your iPhone camera as a webcam wirelessly.
2. IP Webcam App
Another alternative method is to use the IP Webcam app. This app allows you to turn your iPhone camera into a webcam and connect to it via an IP address. Here are the steps to set it up:
- Download and install the IP Webcam app on your iPhone.
- Open the app and adjust the settings according to your preferences.
- Once the app is running, it will provide you with an IP address and port number.
- On your computer, open a web browser and enter the IP address provided by the app.
- You should now see a live video feed from your iPhone camera on your computer screen.
Note that both your iPhone and computer need to be connected to the same Wi-Fi network for this method to work.
Using either of these methods, you can easily use your iPhone camera as a webcam without the need for a USB connection. This can be particularly useful if you’re on the go or don’t have a USB cable available.
However, keep in mind that using your iPhone camera as a webcam wirelessly may not provide the same level of stability and quality as using a USB connection. It’s always a good idea to test different methods and see which one works best for your needs.
Remember to check the compatibility of the apps and software you use with your specific iPhone model and computer operating system.
FAQ
Can I use my iPhone camera as a webcam via USB?
Yes, you can use your iPhone camera as a webcam via USB. There are several apps available on the App Store that allow you to use your iPhone’s camera as a webcam when connected to your computer via USB.
What app do I need to use my iPhone camera as a webcam via USB?
There are several apps available on the App Store that can turn your iPhone camera into a webcam when connected via USB. Some popular apps include EpocCam, iCam, and iVCam.
How do I use my iPhone camera as a webcam via USB?
To use your iPhone camera as a webcam via USB, you will need to download and install a third-party app from the App Store, such as EpocCam, iCam, or iVCam. Once you have the app installed on your iPhone and the corresponding software installed on your computer, you can connect your iPhone to your computer using a USB cable and launch the app on both devices. Follow the on-screen instructions to set up the connection and start using your iPhone camera as a webcam.
Are there any free apps available to use my iPhone camera as a webcam via USB?
Yes, there are some free apps available on the App Store that allow you to use your iPhone camera as a webcam via USB. Some popular free options include EpocCam Lite, iVCam Webcam, and iCamSource Lite. However, these free apps may have limited features compared to their paid counterparts.
Can I use my iPhone camera as a webcam via USB on both Windows and Mac computers?
Yes, you can use your iPhone camera as a webcam via USB on both Windows and Mac computers. The apps available on the App Store for turning your iPhone camera into a webcam usually have versions for both Windows and macOS. Make sure to download and install the correct version of the app based on your computer’s operating system.


