The Nikon D40 DSLR camera is a powerful tool for capturing professional-quality photos. Whether you’re a beginner or an experienced photographer, learning how to use this camera can enhance your skills and take your photography to the next level. In this article, we’ll guide you through the basics of using the Nikon D40 DSLR camera, from setting up the camera to capturing stunning images.
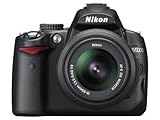
Firstly, it’s important to familiarize yourself with the various components of the Nikon D40 DSLR camera. The camera body features a sturdy design, with intuitive controls that are easy to navigate. The lens mount allows you to attach a variety of lenses, giving you the flexibility to capture different types of shots. Once you have a good understanding of the camera’s physical features, you can proceed to set up the camera for optimal performance.
One of the first steps in setting up your Nikon D40 DSLR camera is inserting the battery and memory card. Ensure that the camera is turned off before doing this. The battery compartment is located on the bottom of the camera body and can be accessed by sliding the latch. Insert the battery into the compartment, making sure it is securely in place. The memory card slot is located on the side of the camera body. Open the slot by sliding the latch and insert the memory card, ensuring it is properly aligned. Once the battery and memory card are in place, you can proceed to turn on the camera.
The Nikon D40 DSLR camera features a range of shooting modes, including Auto, Program, Aperture Priority, Shutter Priority, and Manual. For beginners, the Auto mode is a great place to start, as it automatically adjusts the camera settings to capture the best possible image. As you gain more experience, you can experiment with the other shooting modes to have more control over the exposure, depth of field, and other settings. Familiarize yourself with the different shooting modes and choose the one that best suits your needs.
Once you have set up your Nikon D40 DSLR camera and selected the appropriate shooting mode, you’re ready to start capturing stunning photos. Take the time to compose your shots, considering elements such as framing, lighting, and subject placement. Experiment with different focal lengths and apertures to achieve the desired effect. The Nikon D40 DSLR camera also offers various autofocus modes and metering options, allowing you to fine-tune your images for optimal sharpness and exposure.

In conclusion, the Nikon D40 DSLR camera is a versatile and powerful tool for photographers of all skill levels. By following the steps outlined in this article, you can learn how to use the camera’s features and take your photography to new heights. Remember to practice regularly and experiment with different settings to develop your own unique style. Happy shooting!
The Features of Nikon D40 DSLR Camera
The Nikon D40 DSLR Camera is a popular choice among photography enthusiasts due to its impressive features. Here are some of the key features that make the Nikon D40 stand out:
1. Image Quality: The Nikon D40 boasts a 6.1-megapixel DX-format CCD image sensor, which delivers excellent image quality with vibrant colors and sharp details. This sensor is capable of capturing stunning photos even in low-light conditions.
2. Compact and Lightweight: One of the advantages of the Nikon D40 is its compact and lightweight design. It is easy to handle and carry around, making it an ideal choice for photographers who are always on the go.
3. User-Friendly Interface: The Nikon D40 features an intuitive and user-friendly interface, making it suitable for beginners and experienced photographers alike. The camera’s settings and controls are easy to understand and operate, allowing users to capture the perfect shot effortlessly.
4. Fast Performance: The Nikon D40 offers a fast start-up time and quick shutter response, ensuring that you never miss a moment. It also has a continuous shooting mode that allows you to capture multiple images in quick succession.
5. Built-in Guide Mode: The Nikon D40 comes with a built-in Guide mode that provides on-screen instructions and tips for capturing different types of shots. This feature is especially useful for beginners who want to learn and improve their photography skills.
6. Versatile Lens Options: The Nikon D40 is compatible with a wide range of Nikon F-mount lenses, giving you the flexibility to choose the perfect lens for various shooting situations. From wide-angle to telephoto lenses, there are plenty of options available to meet your specific photography needs.
7. Long Battery Life: With its efficient power management system, the Nikon D40 can capture approximately 470 shots on a single battery charge. This allows you to shoot for extended periods without worrying about running out of power.
8. Connectivity Options: The Nikon D40 offers various connectivity options, including USB and AV ports, allowing you to transfer files and connect the camera to external devices easily.
In conclusion, the Nikon D40 DSLR Camera offers a range of impressive features that enhance your photography experience. Whether you are a beginner or an advanced photographer, this camera is sure to meet your expectations and help you capture stunning images.
Getting Started with Nikon D40
Welcome to the world of Nikon D40 DSLR camera! Whether you are a beginner or an experienced photographer, the Nikon D40 offers a range of features and capabilities to help you capture stunning images. This guide will help you get started with your Nikon D40, from setting up the camera to taking your first photos.
1. Insert the battery and memory card
Before you can start using your Nikon D40, you need to insert the battery and memory card. Open the battery compartment on the bottom of the camera and insert the battery. Make sure it is securely in place. Then, open the memory card slot on the side of the camera and insert the memory card. Push it in until you hear a click.
2. Attach the lens
The Nikon D40 uses interchangeable lenses to give you flexibility in your photography. To attach a lens, align the lens’ red dot with the red dot on the camera body. Twist the lens clockwise until it locks into place.
3. Turn on the camera
To turn on your Nikon D40, locate the power switch on the top of the camera and slide it to the “ON” position. The camera will power up and be ready to use.
4. Set the mode dial
The mode dial on the top of the camera allows you to select different shooting modes, such as “auto”, “manual”, or “portrait”. Choose the mode that best suits your needs by rotating the dial to the desired setting.

5. Adjust the settings
Once your camera is turned on and the shooting mode is selected, you can adjust various settings such as ISO, white balance, and exposure compensation. Press the “Menu” button to access the camera settings menu and use the arrow keys to navigate through the options. Press the “OK” button to select and change a setting.
6. Focus and compose your shot
With your Nikon D40 ready, you can now focus and compose your shot. Look through the viewfinder and use the autofocus system to focus on your subject. Use the camera’s grid lines to help you align your shot and create a pleasing composition.
7. Capture your photo

Once you have composed your shot, gently press the shutter release button halfway to lock the focus and exposure. Then, press the button fully to capture the photo. Listen for the shutter sound and check the image on the camera’s LCD screen to review your photo.
With these steps, you are now on your way to using your Nikon D40 DSLR camera. Experiment with different settings and techniques to capture stunning photos and explore the world of photography.
Settings and Modes of Nikon D40
Auto Mode: The Auto mode on the Nikon D40 is perfect for beginners or those who want the camera to do all the work. In this mode, the camera automatically adjusts the settings, such as shutter speed and aperture, to produce optimal results. It is a great mode to start with and get familiar with the camera’s capabilities.
Programmed Auto (P) Mode: The Programmed Auto mode is similar to the Auto mode but allows you to have more control over certain settings, such as flash, ISO, and white balance. It gives you the flexibility to adjust these settings while still letting the camera determine the optimal exposure.
Shutter Priority (S) Mode: In the Shutter Priority mode, you can select the desired shutter speed, and the camera will automatically adjust the aperture to produce the correct exposure. This mode is useful when capturing motion, such as freezing action with a fast shutter speed or creating motion blur with a slower shutter speed.
Aperture Priority (A) Mode: In the Aperture Priority mode, you can select the desired aperture, and the camera will automatically adjust the shutter speed to produce the correct exposure. This mode is great for controlling the depth of field, allowing you to create images with a blurred background (wide aperture) or everything in focus (small aperture).
Manual (M) Mode: The Manual mode gives you full control over all the camera settings. You need to manually select the aperture, shutter speed, ISO, and other settings. This mode is ideal for experienced photographers who want complete control over the image and are comfortable adjusting the settings manually.
Scene Modes: The Nikon D40 also offers various scene modes for specific shooting situations, such as portrait, landscape, sports, night portrait, and close-up. These modes automatically adjust the settings to optimize the results for the particular scene. They can be handy for beginners or when you want quick and easy settings for specific situations.
Custom Settings: The Nikon D40 allows you to customize certain settings to suit your shooting style and preferences. You can customize functions like AF (autofocus) area mode, metering, autofocus, and others to better suit your needs. Refer to the camera’s manual for more information on how to access and customize these settings.
Playback Menu: The Playback menu allows you to review and manage your captured images. You can choose to delete, protect, or crop images, as well as adjust settings like image quality, image size, and picture control. It’s a useful menu to have control over your captured images.
Menu and Shooting Settings: The Menu and Shooting settings in the Nikon D40 provide a wide range of options to personalize your shooting experience. You can adjust settings like image quality, ISO sensitivity, white balance, focus mode, shooting mode, and many more. Explore these settings to optimize the camera for your shooting needs.
Live View mode: The Nikon D40 does not have a live view feature, which means you cannot use the LCD screen to compose your shots. You will need to use the viewfinder for framing and focusing your images. This can be a limitation for those who prefer using the LCD screen for composing shots.
Conclusion: The Nikon D40 offers a range of settings and modes to cater to different shooting styles and preferences. From fully automatic modes to manual control, the camera provides flexibility and options for both beginners and more experienced photographers. Experiment with the different modes and settings to unleash the full potential of your Nikon D40 and capture stunning photographs.
Tips and Tricks for Using Nikon D40
If you own a Nikon D40 DSLR camera, you’re in for a treat! With its impressive features and easy-to-use interface, the D40 is perfect for both beginners and experienced photographers. Here are some tips and tricks to help you make the most out of your Nikon D40.
1. Understand the Camera Settings:
- Take the time to thoroughly read the camera manual to understand the various settings and modes available. This will help you use the camera effectively in different shooting situations.
- Experiment with different shooting modes such as Manual, Aperture Priority, and Shutter Priority to understand how they affect the exposure and depth of field.
2. Master the Exposure Triangle:
- Learn how to adjust the three elements of exposure: aperture, shutter speed, and ISO. Understanding how these settings interact with each other will allow you to take better control of your image’s exposure.
- Use the camera’s built-in light meter to ensure proper exposure. Aim for a balanced histogram that neither clips the highlights nor loses details in the shadows.
3. Utilize Auto ISO Function:
- In low light situations, don’t be afraid to use the Auto ISO function. This feature automatically adjusts the camera’s ISO setting to maintain a proper exposure.
- However, be cautious when using high ISO values as they can introduce digital noise to your images. Experiment to find the highest ISO value that still produces acceptable image quality.
4. Take Advantage of Active D-Lighting:
- Activate the Active D-Lighting feature to preserve details in both the highlights and shadows of high-contrast scenes. This will help you capture a well-balanced exposure, especially in challenging lighting conditions.
- Keep in mind that Active D-Lighting might slightly affect the camera’s burst shooting speed, so disable it when shooting fast-action subjects.
5. Use the Autofocus Points:
- Experiment with different autofocus modes and points to ensure your subject is sharply focused in your images.
- In more challenging shooting scenarios, such as low light or moving subjects, switch to single-point autofocus and manually select the focus point.
6. Get to Know the Lens Compatibility:
- The Nikon D40 is compatible with Nikon F-mount lenses. Take advantage of this compatibility to explore different lenses that suit your photography style and needs.
- Be sure to check if the lens you’re interested in is compatible with the D40 specifically, as some lenses may have limitations or require additional accessories.
Remember, practice is key when it comes to improving your photography skills. Take your Nikon D40 out regularly and experiment with its various features and settings. With time, patience, and creativity, you’ll be capturing stunning images in no time!
Question-answer:
What is a DSLR camera?
A DSLR camera is a type of digital camera that uses a digital imaging sensor, along with a mirror and prism system, to reflect light through the lens and capture images. It offers more advanced features and settings compared to a point-and-shoot camera.
How do I use a Nikon D40 DSLR camera?
To use a Nikon D40 DSLR camera, first, insert a fully charged battery and a memory card. Turn on the camera by rotating the power switch. Use the mode dial to select the desired shooting mode. You can adjust settings such as aperture, shutter speed, and ISO using the control buttons and the LCD screen. To take a photo, press the shutter-release button halfway to focus, and then fully to capture the image.