
With the advancement of technology, capturing stunning panoramic photos has become easier and more accessible than ever before. If you own an iPhone, you have a powerful tool in your hands that can capture breathtaking panoramic shots with just a few taps. In this article, we will guide you on how to use the panoramic camera feature on your iPhone and take your photography skills to the next level.
Step 1: Accessing the Panoramic Camera Mode
To begin, open the Camera app on your iPhone. Once the app is open, swipe left or right until you find the “Pano” option. Tap on it to enter the panoramic camera mode.
Step 2: Positioning your iPhone
Next, find a scene that you want to capture in a panoramic photo. It could be a picturesque landscape, a city skyline, or anything that catches your eye. Hold your iPhone vertically and make sure it is in a stable position.

Step 3: Start Capturing
To start capturing the panoramic photo, tap the shutter button once. You will see a yellow arrow or line appear on your screen. Slowly move your iPhone from left to right (or vice versa) while keeping the arrow or line aligned with the guiding pathway that appears on your screen.
Step 4: Finishing and Saving
When you have captured the desired scene, tap the shutter button again to stop the capturing process. Your iPhone will automatically stitch the images together to create a seamless panoramic photo. Once the process is complete, you can tap “Done” to save the panoramic photo to your Camera Roll.
And there you have it! You now know how to use the panoramic camera feature on your iPhone. Feel free to experiment with different scenes and angles to capture stunning panoramic shots. With a little practice, you’ll be amazed at the incredible photos you can create with your iPhone.

Mastering panoramic photography on iPhone
Unlock the full potential of your iPhone’s panoramic camera with these expert tips and techniques.
With the panoramic camera feature on your iPhone, you can capture stunning wide-angle photos that showcase the full beauty of a landscape or cityscape. However, to truly master panoramic photography, you need to understand the ins and outs of this powerful feature. Follow these tips and techniques to take your panoramic photos to the next level.
1. Find the perfect scene
To create an impressive panoramic photo, look for scenes with a wide perspective and interesting elements throughout the frame. This could be a beautiful natural landscape, a bustling city street, or even a crowded event. Be creative and experiment with different subjects and compositions.
2. Steady your iPhone

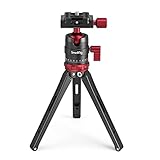
Keeping your iPhone steady is crucial for capturing a seamless and distortion-free panoramic photo. Use a tripod or stabilize your phone against a solid surface to minimize camera shake. This will help you achieve a smoother image without any unwanted distortions.
3. Start from left to right
When capturing a panoramic photo, start from the left side and pan slowly to the right. Keep the arrow or guideline centered on the screen and try to maintain a consistent speed. This will ensure that your photo stitches together seamlessly.
4. Overlap each shot
To ensure a smooth transition between each frame, make sure to overlap the previous shot by about 30%. This overlap will give the iPhone’s software enough information to stitch the images together accurately, resulting in a seamless panoramic photo.

5. Avoid moving subjects
Moving subjects can disrupt the panorama and create blur or ghosting effects. Try to find scenes where people or objects are relatively stationary, or wait for them to move out of the frame before taking each shot.
6. Experiment with exposure and focus
While the iPhone’s panoramic camera automatically adjusts exposure and focus, you can tap on different areas of the screen to adjust these settings manually. This can be particularly useful when shooting scenes with challenging lighting conditions.
By following these tips and techniques, you will be able to capture stunning panoramic photos with your iPhone and showcase your creativity as a photographer. Remember to practice and experiment to find your own unique style.

Choosing the right shooting location
When using the panoramic camera feature on your iPhone, it is crucial to choose the right shooting location to capture stunning panoramic photos. Here are some tips to help you find the perfect spot:
|
1. Wide-open spaces: Look for locations that offer expansive views and open spaces, such as a beach, field, or park. These environments will provide ample room for your panoramic photos and allow you to capture the full scale of the scene. |
2. Interesting subjects: Find locations that have interesting subjects or focal points that you can include in your panoramic photo. This could be a famous landmark, a unique building, or a picturesque landscape. These elements will add depth and visual interest to your image. |
|
3. Vantage points: Look for elevated vantage points that give you a higher perspective. This could be a hill, a rooftop, or a balcony. Shooting from a higher position will allow you to capture a wider range of the scene and create a more immersive panoramic photo. |
4. Natural light: Consider the lighting conditions in your chosen location. Natural light can greatly enhance the mood and atmosphere of your panoramic photos. Avoid shooting in harsh, midday sunlight, as it can cause overexposure and harsh shadows. Early mornings and late afternoons often offer the best lighting conditions. |

Remember to experiment with different locations to find the ones that best suit your desired aesthetic. Don’t be afraid to explore and try new shooting locations to capture unique and breathtaking panoramic photos with your iPhone.
Optimizing camera settings
To get the best results when using the panoramic camera feature on your iPhone, it’s important to optimize your camera settings. Here are some tips to help you do that:
| Setting | Description |
|---|---|
| Brightness | Adjust the brightness level to ensure that your panoramas are well-lit. You can do this by tapping on the screen to focus and then sliding your finger up or down to adjust the exposure level. |
| HDR | Consider enabling the HDR (High Dynamic Range) feature when capturing panoramas in high-contrast scenes. HDR combines multiple images with different exposure levels to create a more balanced and detailed final result. |
| Grid | Use the gridlines feature to help you align your shots more accurately. This can be especially useful when capturing panoramas with straight lines or architectural elements. |
| Stabilization | Keep your camera as steady as possible while capturing panoramas to avoid blurry images. You can use a tripod or simply hold your iPhone with both hands and make sure to move it smoothly and steadily. |
| Orientation | Make sure to hold your iPhone in landscape orientation when capturing panoramas to get a wider field of view. This will result in more expansive and immersive panoramic images. |
By optimizing these camera settings, you’ll be able to capture stunning and high-quality panoramas with your iPhone’s panoramic camera feature. Experiment with different settings and techniques to achieve the desired results.
Using the panoramic mode
The panoramic mode on your iPhone allows you to capture wide-angle photos that capture a larger scene than what a normal photo would. Here’s how you can use the panoramic mode:
Step 1: Open the Camera app
To use the panoramic mode, open the Camera app on your iPhone. You can find the Camera app on your home screen or in the app drawer.
Step 2: Select the Pano mode
Once the Camera app is open, swipe left or right on the screen until you see the “Pano” option. Tap on “Pano” to enter the panoramic mode.
Step 3: Choose the direction
When you’re in the panoramic mode, you’ll see an arrow on the screen indicating the direction in which you need to move your iPhone to capture the panoramic photo. The arrow will point either to the left or to the right. Make sure to follow the direction of the arrow to capture the photo correctly.
Step 4: Start capturing
To start capturing the panoramic photo, tap on the shutter button and slowly move your iPhone in the direction indicated by the arrow. The Camera app will automatically capture the photo as you move. Make sure to keep your hand steady and move slowly for the best results.
Step 5: Stop and save
When you’ve captured the entire scene, simply stop moving and tap on the shutter button again to stop the capture. The Camera app will process the photo and save it to your Camera Roll.
That’s it! You’ve successfully used the panoramic mode on your iPhone. Now you can enjoy capturing beautiful wide-angle photos of any scene you like.
Techniques for capturing stunning panoramas
Capturing stunning panoramas is easier than you think with the panoramic camera feature on your iPhone. Here are some techniques to help you get the most out of this feature:
1. Find a suitable location: Look for wide open spaces or locations with interesting landscapes or architecture. These types of environments are perfect for creating breathtaking panoramas.
2. Steady your iPhone: To avoid blurry panoramas, it’s important to keep your iPhone as steady as possible. Using a tripod or resting your iPhone on a stable surface can greatly improve the overall image quality.
3. Start from left to right: When capturing your panorama, start by aligning the left side of the frame with your subject, and then slowly pan to the right. This helps to ensure a smooth and seamless transition from one frame to the next.
4. Overlap each frame: Overlapping each frame by about 30% ensures that the stitching process will be more accurate. This means your final panorama will be seamless without any gaps or misalignments.
5. Use the gridlines: Enabling the gridlines on your iPhone camera will make it easier to align your shots and keep everything level. This is especially helpful when capturing panoramas with horizontal lines like horizons or architecture.
6. Avoid moving subjects: While capturing panoramas, it’s best to avoid including moving subjects in your frame. They can create inconsistencies when stitching the images together, resulting in a distorted final image.
7. Experiment with different angles: Don’t be afraid to try different shooting angles and perspectives. Changing your viewpoint can add depth and dynamism to your panoramas, making them even more visually appealing.
By following these simple techniques, you’ll be able to capture stunning panoramas that showcase the beauty of your surroundings. So grab your iPhone and start exploring the world of panoramic photography!
Post-processing and enhancing panoramas
Once you have captured a stunning panorama using your iPhone’s panoramic camera, you can take your photography to the next level by post-processing and enhancing the image. Here are some tips and techniques to help you make your panoramas even more impressive:
1. Straighten the Horizon
One common issue with panoramic photos is a tilted horizon. To fix this, you can use photo editing software or apps to rotate and straighten the image. Make sure the horizon is perfectly level to create a more visually appealing result.
2. Adjust Exposure and White Balance
Depending on the lighting conditions when you captured the panorama, you might need to make adjustments to the exposure and white balance. Use editing tools to enhance the brightness, contrast, and color temperature to achieve the desired look.
3. Remove Unwanted Objects
During the panoramic capture, it is possible that unwanted objects or people might have accidentally been included in the image. Use cloning or content-aware fill tools to seamlessly remove these distractions and make the scene more clean and focused.
4. Crop and Straighten
Cropping the panorama can help eliminate any unnecessary elements and improve overall composition. You can also straighten the image further if needed, using the cropping tool or rotation features in your chosen editing software.
5. Enhance Details with Sharpening
Apply selective sharpening techniques to bring out the fine details in your panorama. Be careful not to overdo it, as excessive sharpening can create an unnatural effect.
6. Increase Saturation and Vibrance
To make the colors in your panorama pop, you can increase the saturation and vibrance. Experiment with these adjustments to find the right balance and enhance the visual impact of your image.
7. Create a Panorama Composite
If you have multiple panoramas taken from different angles or perspectives, you can merge them together to create a panoramic composite. This can result in a wider field of view and a more immersive final image.
| Software | Features |
|---|---|
| Adobe Photoshop | Advanced editing capabilities, perspective correction, automated stitching |
| Lightroom | Robust editing tools, panorama merging, lens correction |
| Snapseed | Easy-to-use interface, selective adjustments, panoramic cropping |
By following these post-processing and enhancement techniques, you can make your iPhone panoramic photos truly stand out and showcase your creativity as a photographer.
Sharing and showcasing your panoramic photos
Once you’ve taken stunning panoramic photos with your iPhone’s built-in panoramic camera, you’ll want to share and showcase them with others. Here are some ways to do just that.
1. Share on social media
One of the easiest ways to share your panoramic photos is through social media platforms like Facebook, Instagram, and Twitter. Simply upload your photo to your preferred social media platform and include a catchy caption to engage your audience. You can also use popular hashtags like #panorama or #panoramic to increase the visibility of your photo.
2. Create a panoramic photo album
If you have multiple panoramic photos, you may want to consider creating a photo album dedicated to your stunning shots. You can do this directly on your iPhone using the Photos app. Simply select all the panoramic photos you want to include in your album, tap on the “Add to” button, and choose “New Album”. Give your album a name and you’re all set. You can even share this album with others by selecting the “Share” option.
If you want to take it a step further, you can also consider using third-party photo album apps like Google Photos or Flickr. These platforms offer more customization options and allow you to share your albums with a larger audience.
Another option is to create a dedicated album on your iCloud Photo Sharing. This way, you can invite specific people to view your album, and they can even leave comments on your photos.
3. Print and frame your panoramic photos
If you’re particularly proud of your panoramic photos, you can also consider printing and framing them. This way, you can display your stunning shots at home or even gift them to friends and family. There are numerous online printing services that allow you to upload your photos and choose from a variety of framing options.
By sharing and showcasing your panoramic photos, you can inspire others with your creativity and capture memories in a unique and immersive way. So, don’t hesitate to get out there and start capturing breathtaking panoramas with your iPhone’s panoramic camera!
FAQ
What is a panoramic camera on iPhone and how does it work?
A panoramic camera on iPhone is a feature that allows you to capture wide-angle, panoramic photos. It works by stitching together multiple images as you move your iPhone in a sweeping motion. This feature is especially useful for capturing landscapes or large group shots.
How do I access the panoramic camera mode on my iPhone?
To access the panoramic camera mode on your iPhone, open the camera app and swipe left until you reach the “Pano” option. Tap on it to enter the panoramic mode.
Can I edit the panoramic photos taken on my iPhone?
Yes, you can edit the panoramic photos taken on your iPhone using various photo editing apps. These apps allow you to adjust the exposure, contrast, saturation, and other aspects of your panoramic photo. You can also crop and straighten the photo, apply filters, and make other artistic enhancements.
Is there a way to share panoramic photos with others?
Yes, there are several ways to share panoramic photos taken on your iPhone with others. You can use messaging apps like iMessage or WhatsApp to directly send the panoramic photo to friends and family. You can also share it on social media platforms like Instagram, Facebook, or Twitter. Additionally, you can use cloud storage platforms like iCloud or Google Drive to share a link to the panoramic photo.


