
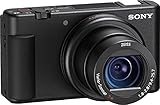
Sony digital cameras have long been known for their powerful lenses and high-resolution image sensors, making them a go-to choice for photography enthusiasts.
If you own a Sony digital camera and want to take your video-conferencing or live streaming game to the next level, you can actually use your camera as a web camera through a USB connection. This means you can enjoy the superior image quality of your Sony camera during video calls, live streams, and online meetings.
In this article, we will guide you step-by-step on how to set up your Sony digital camera as a web camera through a USB connection, so you can impress your friends, colleagues, and audience with stunningly clear and detailed visuals.
Before we begin, it’s important to note that not all Sony digital cameras support this feature. However, if your camera does support it, you can make the most out of its capabilities and elevate your online presence.
Now, let’s dive into the process of using your Sony digital camera as a web camera via USB.
Connect Sony Digital Camera to Computer via USB
If you have a Sony digital camera and want to use it as a webcam for your computer, you can easily connect it via USB. This allows you to have better video quality and control over the camera settings compared to using a built-in webcam.
Step 1: Check camera compatibility
Before connecting your Sony digital camera to your computer, make sure it supports being used as a webcam. Check the user manual or visit the Sony website to see if your specific camera model has this capability.
Step 2: Install necessary software
Some Sony digital cameras require you to install specific software in order to use them as webcams. Check Sony’s website for any available software downloads for your camera model and follow the instructions to install it on your computer.
Step 3: Connect the camera to the computer
Once you have verified compatibility and installed any necessary software, connect your Sony digital camera to your computer using a USB cable. Make sure the camera is powered on.
Step 4: Configure camera settings
After connecting the camera, you may need to adjust its settings to be recognized as a webcam by your computer. Refer to the camera’s user manual or the software you installed for instructions on how to do this. Usually, there will be a setting to switch the camera mode to “Webcam” or something similar.
Step 5: Use the camera as a webcam
Once the camera is connected and recognized as a webcam by your computer, you can use it with any video conferencing or streaming application that supports external webcams. Open the application you want to use, go to the settings, and select your Sony digital camera as the video source.
| Pros | Cons |
|---|---|
| Improved video quality compared to built-in webcams | May require specific software installation |
| More control over camera settings | Some camera models may not support webcam functionality |
| Can be used with various video conferencing and streaming applications | Requires a USB cable for connection |
Check Compatibility of Sony Digital Camera
Before using your Sony digital camera as a web camera through USB, it is important to ensure that your camera model is compatible with this functionality. Not all Sony digital cameras have the capability to be used as a web camera.
To check the compatibility of your Sony digital camera, follow these steps:
| Step 1: | Turn on your Sony digital camera and navigate to the menu settings. |
| Step 2: | Look for the “USB Connection” or “Connect to PC” option in the menu. |
| Step 3: | Select the USB connection mode and see if there is an option for using the camera as a web camera. This option may have different names depending on the camera model, such as “USB Streaming”, “Streaming Mode”, or “PC Remote”. |
| Step 4: | If you find the option to use the camera as a web camera, make sure it is enabled. |
If your Sony digital camera does not have the option to be used as a web camera, it may not be compatible or may require additional software or firmware updates. Refer to the camera’s manual or contact Sony support for further assistance.
Install Necessary Software on Computer
Before using your Sony digital camera as a USB webcam, you will need to install the necessary software on your computer. Follow these steps to install the software:

- Check if your camera model is compatible with the software needed to use it as a webcam. Visit the official Sony website and search for your camera model to find out if it supports this functionality.
- If your camera model is compatible, download and install the Sony Digital Camera Webcam Software from the official Sony website. Make sure to choose the correct software version for your operating system.
- Once the software is downloaded, locate the file and double-click on it to start the installation process.
- Follow the on-screen instructions to complete the installation. Make sure to read and accept the license agreement, and choose the desired installation location if prompted.
- Once the installation is complete, restart your computer to ensure that the software is properly installed and ready to use.
After following these steps, you will have the necessary software installed on your computer to use your Sony digital camera as a USB webcam. You can now proceed to connect your camera to your computer and configure it as a webcam for video conferencing, streaming, or any other applications that require a webcam.
Configure Sony Digital Camera Settings
Before using your Sony digital camera as a web camera via USB, you may need to configure some settings on the camera itself. Here are the steps to do so:
- Power on your Sony digital camera and ensure that it is in the appropriate mode for using as a web camera. Refer to the camera’s user manual for instructions on selecting the web camera mode.
- Connect the camera to your computer using a USB cable. Make sure that the USB cable is securely plugged into both the camera and the computer.
- On your camera’s LCD display, navigate through the menu options to find the “Settings” or “Setup” menu.
- In the “Settings” or “Setup” menu, look for an option related to USB connectivity. This option may be named something like “USB Connection Type” or “USB Mode.”
- Select the appropriate USB connection type for using the camera as a web camera. Options may include “PC Remote,” “Mass Storage,” or “PTP (Picture Transfer Protocol).”
- Once you have selected the desired USB connection type, save the changes and exit the menu.
By configuring these settings on your Sony digital camera, you can ensure that it is ready to be used as a web camera via USB. Remember to consult your camera’s user manual for specific instructions and terminology, as it may vary depending on the model of your Sony digital camera.
Set Sony Digital Camera as Default Web Camera
If you have a Sony digital camera and want to use it as a web camera via USB, you can easily set it as your default webcam. This allows you to have high-quality video calls, live streaming, and online meetings using your Sony camera.
Step 1: Check Compatibility
Before proceeding, make sure that your Sony digital camera supports the webcam functionality. Check the camera’s manual or visit the Sony website to verify that your specific model has this feature.

Step 2: Install Camera Driver
Ensure that you have the necessary camera driver installed on your computer. Most Sony cameras come with a CD or DVD containing the required software. Insert the disc into your computer and follow the on-screen instructions to install the driver.
Step 3: Connect the Camera
Connect your Sony digital camera to your computer using a USB cable. Make sure the camera is turned on and set to the appropriate mode according to the instructions in the manual.
Step 4: Configure Camera Settings
Once the camera is connected, go to your computer’s “Settings” or “Control Panel” and open the “Devices” or “Hardware” section. Look for your Sony camera in the list of connected devices and select it.
In the camera settings, you may need to choose the webcam mode or select the option to use your camera as a web camera. Consult your camera’s manual or online resources for specific instructions on accessing and configuring these settings.
Step 5: Set as Default Webcam
After configuring the camera settings, right-click on the camera device and click “Set as Default” or “Set as Default Webcam” option from the context menu. This will set your Sony digital camera as the default webcam for your computer.

Now whenever you use an application or software that requires a webcam, your Sony camera will be recognized as the default choice.
Please note that the steps may vary slightly depending on your specific Sony camera model and your computer’s operating system. It is recommended to refer to the camera’s manual or Sony’s official website for detailed instructions tailored to your device.
Test Sony Digital Camera as Web Camera
Before using your Sony digital camera as a web camera, it is a good idea to test it first to ensure that it is working properly. Follow the steps below to test your Sony digital camera as a web camera:
- Charge your digital camera fully or connect it to a power source to ensure uninterrupted usage.
- Connect your digital camera to your computer using a USB cable. Make sure that the connection is secure.
- Turn on your digital camera and set it to the appropriate mode for using it as a web camera. Refer to your camera’s user manual for specific instructions on how to do this.
- Open a web conferencing or video chat application on your computer. Examples include Zoom, Skype, or Google Meet.
- Open the settings or preferences of the web conferencing or video chat application and navigate to the audio and video settings. Look for an option to select the camera source.
- Choose your Sony digital camera as the camera source. It may be listed as a separate device or as the brand name of your camera.
- Adjust the video settings, such as resolution and frame rate, according to your preference or as recommended by the web conferencing or video chat application.
- Check if your digital camera’s video is displayed properly in the video preview window of the web conferencing or video chat application. You should be able to see yourself through the camera’s lens.
- If the video preview is working correctly, you have successfully tested your Sony digital camera as a web camera. If there are any issues, consult your camera’s user manual or contact Sony support for further assistance.
Once you have completed the test and confirmed that your Sony digital camera is working as a web camera, you can proceed to use it for online meetings, video conferencing, or live streaming. Remember to adjust the camera settings and optimize the lighting conditions to obtain the best video quality.
Troubleshooting: Common Issues and Solutions
If you are experiencing difficulties using your Sony digital camera as a web camera via a USB connection, there are several common issues that could be causing the problem. Below, we have outlined some of these issues and provided potential solutions to help you troubleshoot the problem.

Issue 1: Camera not recognized
One common problem is when your computer does not recognize the camera when it is connected via USB. To resolve this issue, try the following:
- Ensure that the camera is properly connected to your computer using a suitable USB cable.
- Check if the camera is properly powered on and in the appropriate mode for USB connectivity.
- Try connecting the camera to a different USB port on your computer.
- Make sure that the correct camera drivers are installed on your computer. You can usually find and download the latest drivers from the Sony support website.
Issue 2: Poor video quality
If you are experiencing poor video quality when using your Sony digital camera as a web camera, try the following solutions:
- Make sure that the camera lens is clean and free from any smudges or dirt.
- Check the camera settings to ensure that the video resolution is set to the highest available option.
- Ensure that you have sufficient lighting in your environment as poor lighting conditions can affect video quality.
- If possible, try using the camera in a different location to see if the video quality improves.
Issue 3: Audio not working
If you are having trouble with the audio when using your Sony digital camera as a web camera, consider the following solutions:
- Make sure that the camera’s microphone is not muted or disabled in the camera settings.
- Check your computer’s sound settings to ensure that the camera’s audio is selected as the input device.
- If you are using any external microphones or audio devices, ensure that they are properly connected and configured.
- Try restarting your computer and reconnecting the camera to see if that resolves the audio issue.
If none of the above solutions resolve your problem, you may want to consult the user manual or contact Sony support for further assistance.
Question-answer:
Can I use my Sony digital camera as a web camera via USB?
Yes, you can use your Sony digital camera as a web camera by connecting it to your computer via USB. However, not all Sony cameras have this feature, so you’ll need to check if your specific model supports it.

How do I connect my Sony digital camera to my computer as a web camera?
To use your Sony digital camera as a web camera via USB, you’ll first need to install the necessary software on your computer. You can usually find this software on the Sony support website. Once installed, connect your camera to your computer using a USB cable, and then open the software. Follow the instructions in the software to select your camera as the video source and start using it as a web camera.


