
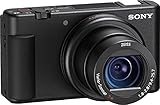
If you own a Sony digital camera and want to enhance the quality of your video calls or live streams, using it as a webcam can be a great solution. Sony cameras are known for their high-quality sensors and lenses, which can significantly enhance the visual experience of your video content.
While many laptops and webcams provide decent video quality, using a Sony digital camera as a webcam can take your video streaming to the next level. With a simple connection through a USB cable, you can leverage the power of your Sony camera and improve the clarity, color accuracy, and overall image quality of your video calls.
Using a Sony digital camera as a webcam not only gives you better image quality, but it also allows you to take advantage of the various features and settings that come with Sony cameras. You can adjust the exposure, white balance, focus, and other camera settings to get the perfect picture for your video calls or live streams. Plus, with the wide range of Sony camera lenses available, you can achieve different perspectives and focal lengths to make your videos more engaging and professional-looking.
Using Sony Digital Camera as Webcam via USB: A Step-by-Step Guide
With the increasing popularity of video conferencing and streaming, many people are looking for ways to improve the image and video quality of their video calls and recordings. One way to achieve this is by using a Sony digital camera as a webcam via a USB connection. This guide will walk you through the process step by step.
Step 1: Check Compatibility and Requirements
First, make sure that your Sony digital camera is compatible with the USB webcam feature. Not all Sony cameras support this functionality, so it’s essential to check your camera’s manual or do some online research. Also, ensure that you have the necessary cables and software installed on your computer.
Step 2: Connect Your Camera to Your Computer
Once you’ve confirmed that your camera supports the USB webcam feature, connect it to your computer using the appropriate USB cable. Be sure to use a high-quality cable to ensure a stable connection. If prompted, install any drivers or software that may be required for your camera to function as a webcam.
Step 3: Configure Camera Settings
After connecting your camera to your computer, you’ll need to configure its settings to function as a webcam. On your camera’s screen, navigate to the settings menu and look for a “USB Connection” option. Select the “Webcam” or “PC Remote” mode from the available options. This will enable the camera to send the video feed directly to your computer.
Step 4: Select the Camera in Your Video Conferencing Software
Now that your camera is set up, open your preferred video conferencing software (e.g., Zoom, Microsoft Teams) or streaming application. In the video settings or preferences section, choose your Sony camera as the video source. Ensure that the camera is selected and that the video feed is being displayed correctly.
Step 5: Test Your Camera
Before jumping into a live video call or streaming session, it’s crucial to test your camera setup. Open a video conferencing software or any application that uses the camera and check if the video feed is working correctly. Adjust any necessary settings, such as resolution or autofocus, to optimize the image quality.
Note: Some video conferencing software may require additional configurations or settings. Refer to the application’s user manual or online resources to modify the settings accordingly.

By following these steps, you can utilize your Sony digital camera’s superior image quality and features to enhance your video conferencing and streaming experiences. Enjoy clearer and more professional-looking video calls and recordings with this simple setup.
Checking Camera Compatibility
Before using your Sony digital camera as a webcam via USB, it is important to check the camera’s compatibility. Not all Sony digital cameras support this functionality, so it is crucial to ensure that your camera can be used in this manner.
1. Check the camera’s specifications
Start by referring to the camera’s user manual or visiting the Sony website to check the camera’s specifications. Look for any mention of USB connectivity or webcam functionality. If your camera’s model is not listed as having webcam capabilities, it is likely that it does not support this feature.
2. Check for firmware updates
Sony often releases firmware updates for their cameras, which can sometimes unlock new features or functionalities. Visit the Sony support website and search for your camera’s model number to see if any firmware updates are available. If there are any updates specifically related to webcam usage or USB connectivity, it may indicate that your camera can be used as a webcam.
Once you have confirmed that your Sony digital camera is compatible with webcam usage, you can proceed to the next steps of setting it up as a webcam.

Installing Camera Software and Drivers
Before using your Sony digital camera as a USB webcam, you need to install the necessary software and drivers on your computer. Follow these steps to install the camera software:
Step 1: Begin by connecting your Sony digital camera to your computer using a USB cable. Make sure that the camera is turned on.
Step 2: Visit the official Sony website and navigate to the support section. Look for the downloads or drivers section for your specific camera model.
Step 3: Locate and download the appropriate camera software and drivers for your operating system. It is important to download the correct software and drivers to ensure compatibility and proper functionality.
Step 4: Once the download is complete, locate the downloaded file on your computer and double-click to start the installation process.

Step 5: Follow the instructions provided by the installation wizard to install the camera software and drivers. Make sure to read and accept any terms and conditions as necessary.
Step 6: After the installation is complete, restart your computer to ensure that the software and drivers are properly loaded.
Step 7: Once your computer has restarted, connect your Sony digital camera to your computer using the USB cable. Your computer should detect the camera and the necessary driver should be installed automatically.
Note: If the driver installation does not happen automatically, you may need to manually install the driver. Refer to the installation instructions provided with the downloaded software and drivers for assistance.
Step 8: Finally, open the software that you installed and configure the camera settings according to your preferences. You should now be able to use your Sony digital camera as a USB webcam on your computer.

By following these steps, you can successfully install the necessary camera software and drivers to use your Sony digital camera as a USB webcam.
Connecting Camera to Computer via USB
Connecting your Sony digital camera to your computer via USB is a simple and straightforward process that allows you to use the camera as a webcam. Follow these steps to set it up:
- Make sure your computer and camera are turned off before connecting them.
- Locate the USB cable that came with your camera. It will have a miniature USB connector on one end and a standard USB connector on the other.
- Connect the miniature USB connector to the corresponding port on your camera.
- Connect the standard USB connector to an available USB port on your computer.
- Turn on your camera. It should automatically be recognized by your computer as a webcam.
- If your computer does not automatically install the necessary drivers, you may need to visit the Sony support website and download them manually.
- Once the drivers are installed, you can start using your Sony digital camera as a webcam for video conferencing, live streaming, or recording videos.
- To ensure a stable connection, make sure the USB cable is securely plugged in at both ends and avoid disconnecting or moving the camera during use.
Using your Sony digital camera as a webcam can enhance your online communication and bring a higher quality video experience. Enjoy exploring the possibilities!
Configuring Camera Settings
Before using your Sony digital camera as a webcam through USB, you will need to configure certain settings to ensure optimal performance. Follow the steps below to configure the camera settings:
Step 1: Connect the USB Cable
Connect one end of the USB cable to your Sony digital camera and the other end to your computer’s USB port. Make sure the camera is powered on.

Step 2: Accessing Camera Settings
Once the camera is connected, open the camera’s settings menu. This can usually be done by pressing the “Menu” button on the camera or navigating to the settings icon.
Step 3: Configuring USB Connection Settings
Within the camera settings menu, navigate to the “USB Connection” or “Connect to PC” option. This option may be located under the “Setup” or “Connection” tab.
Once you have found the USB connection option, select it to access the USB connection settings.
Step 4: Selecting USB Webcam Mode
Within the USB connection settings, you should see various options such as “Mass Storage”, “PTP”, or “MTP”. Select the option that corresponds to using the camera as a webcam. This option is usually labeled as “Webcam” or “PC Remote”.
Once selected, exit the camera settings menu. Your Sony digital camera is now configured to be used as a webcam through USB.

Selecting Camera as Webcam in Applications
To use your Sony digital camera as a webcam, you need to select it as the video input device in the application you want to use for video calls or live streaming. Here are the general steps to follow:
- Open the application you want to use, such as Zoom, Skype, or OBS Studio.
- Go to the settings or preferences menu within the application.
- Select the “Video” or “Camera” settings.
- Look for the option to choose the video input device.
- Select your Sony digital camera from the list of available devices.
- Adjust any other video settings, such as resolution or frame rate, if necessary.
- Close the settings or preferences menu and start using your Sony digital camera as a webcam in the selected application.
Keep in mind that the specific steps may vary depending on the application you are using. Some applications may have the camera selection option directly in the video settings, while others may have it in a separate menu.
Make sure your Sony digital camera is connected to your computer via USB, and check that it is powered on and in the appropriate mode for webcam usage. Refer to your camera’s manual for more information on how to set it up as a webcam.
Adjusting Webcam Settings
When using your Sony digital camera as a webcam through a USB connection, you may need to adjust the camera settings to optimize your video quality and overall webcam experience. Here are some steps to help you adjust the webcam settings:
Step 1: Connect the Camera to your Computer
Start by connecting your Sony digital camera to your computer using a USB cable. Make sure the camera is turned on and set to the appropriate USB mode for webcam usage.
Step 2: Access Camera Settings
Open the software or application you are using for video conferencing or live streaming. Go to the settings or preferences menu to access the camera settings.
Step 3: Adjust Video Quality
Within the camera settings, locate the video quality or resolution options. Adjust these settings according to your preferences and the requirements of your streaming platform. Higher video quality may require more bandwidth and processing power, so consider your internet connection and computer capabilities.
Step 4: Configure Exposure and Focus
Next, locate the exposure and focus settings in the camera settings menu. These options allow you to manually adjust the brightness, contrast, and sharpness of the camera’s output. Experiment with different settings to achieve the desired image quality.
Step 5: Enable Webcam Output
In the camera settings, ensure that the webcam output is enabled. This option may be called “live view,” “webcam mode,” or something similar. Enabling this option allows your computer to recognize the camera as a webcam.
Step 6: Test and Fine-tune
After adjusting the camera settings, conduct a test call or stream to see how the changes impact the video quality. If necessary, fine-tune the settings further until you achieve the desired results.
By following these steps and adjusting the webcam settings on your Sony digital camera, you can enhance your video conferencing, live streaming, or online chatting experience.
Troubleshooting Common Issues
If you are experiencing issues with using your Sony digital camera as a webcam via USB, refer to the following troubleshooting guide to help resolve common problems:
1. Camera not recognized by the computer
If your camera is not being recognized by your computer, try the following:
| • | Ensure that you have installed the necessary drivers for your camera. Visit the Sony support website and download the latest drivers for your specific camera model. |
| • | Try connecting the camera to a different USB port on your computer. The current port may be malfunctioning. |
| • | Restart your computer and try connecting the camera again. |
2. Poor video quality or no video feed
If you are experiencing issues with the video quality or no video feed, try the following:
| • | Ensure that your camera is set to the correct video mode. Check the camera’s settings and select the appropriate video mode for webcam usage. |
| • | Make sure that the camera is properly connected to your computer via USB. Use a different USB cable if necessary. |
| • | Check if any other applications or software are using the camera. Close any unnecessary programs and try again. |
3. Camera getting disconnected frequently
If your camera keeps getting disconnected while being used as a webcam, try the following:
| • | Use a shorter and high-quality USB cable to connect the camera to your computer. Longer cables or low-quality cables can cause connectivity issues. |
| • | Make sure that your camera and computer are both plugged into a stable power source. Unstable power supply can lead to disconnections. |
| • | Check if there are any other USB devices connected to your computer that may be interfering with the camera’s connection. Disconnect any unnecessary USB devices. |
If none of these troubleshooting steps resolve your issue, consult the user manual of your Sony digital camera or contact Sony customer support for further assistance.
Tips for Better Webcam Experience
Using your Sony digital camera as a webcam can greatly enhance your video calling and streaming experience. Here are some tips to help you get the best results:
1. Lighting
Make sure you have adequate lighting in your room. Poor lighting can result in grainy or dark video quality. Natural light or a well-lit room can greatly improve the clarity of your video feed.
2. Positioning
Position your camera in a stable place where it can capture you well. Make sure the camera is at eye level or slightly higher to avoid unflattering angles. Adjust the tilt and zoom settings of your camera to frame yourself properly on the video call.
3. Background
Pay attention to the background behind you. Choose a clean and clutter-free background or use a virtual background if available. This helps in maintaining a professional appearance and prevents any distractions during the call.
4. Internet Connection
Ensure you have a stable internet connection to avoid lag or interruptions during the video call. Close any unnecessary applications or downloads that might consume bandwidth and affect the video quality.
5. Audio Quality
Although the camera primarily takes care of the video, it’s important to have good audio quality as well. Use a separate microphone or ensure your camera’s microphone is positioned close to you to capture your voice clearly.
6. Test before the Call
Before initiating an important video call or live stream, test your camera setup. Join a test call or use software that allows you to preview your webcam feed. This will help you make any necessary adjustments to ensure you look and sound your best.
By following these tips, you can maximize the quality and effectiveness of your webcam experience when using your Sony digital camera. Enjoy crisp video and audio during your video calls and streams!
Question-answer:
Can I use my Sony digital camera as a webcam using USB?
Yes, it is possible to use a Sony digital camera as a webcam by connecting it to your computer using a USB cable.
What software do I need to use my Sony digital camera as a webcam?
You may need to install Sony’s Imaging Edge Webcam software, which allows compatible Sony cameras to be used as webcams. You can download it from Sony’s official website.
Is it necessary to install drivers for my Sony digital camera to use it as a webcam?
Yes, you need to install the appropriate drivers for your Sony digital camera to use it as a webcam. These drivers can usually be found on Sony’s official website.
What are the steps to use a Sony digital camera as a USB webcam?
The steps to use a Sony digital camera as a USB webcam may vary depending on the camera model and your computer’s operating system. Generally, you will need to install the necessary drivers and software, connect your camera to your computer using a USB cable, and configure your video conferencing or streaming application to recognize your camera as a webcam. It is recommended to consult the user manual or the manufacturer’s website for detailed instructions specific to your camera model.


