When it comes to capturing high-quality videos with your DSLR camera, good audio is just as important as good visuals. However, the built-in microphone on most DSLR cameras often falls short in terms of audio quality. To overcome this limitation and enhance the overall audio experience, it is crucial to use sound equipment with your DSLR camera.
The first step in using sound equipment with your DSLR camera is choosing the right microphone. There are several types of microphones available, such as shotgun, lavalier, and condenser. Each type has its own advantages and is suitable for different shooting scenarios. It is important to select the microphone that best suits your needs and ensures excellent sound quality.
Once you have chosen the microphone, the next step is to connect it to your DSLR camera. Most DSLR cameras have a microphone input port where you can plug in the external microphone. Ensure that the microphone is securely connected to the camera to avoid any sound interruptions or loose connections.
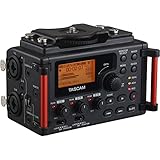
In addition to a microphone, using other sound equipment can further improve the audio quality. One such equipment is a portable audio recorder. This device allows you to record high-quality audio separately from your camera and sync it later in the post-processing stage. This ensures cleaner audio and eliminates any unwanted sounds picked up by the camera’s internal microphone.
When using sound equipment with your DSLR camera, it is important to monitor the audio levels to make sure they are not too low or too high. Most DSLR cameras provide audio level meters that can be accessed through the menu settings. Keeping an eye on these meters will help you maintain optimal audio levels and prevent any distortion or clipping.
In conclusion, using sound equipment with your DSLR camera is essential for capturing professional-quality videos. By choosing the right microphone, connecting it properly, and using additional sound equipment if needed, you can significantly enhance the audio experience and create videos that are both visually stunning and sonically impressive.
Why sound equipment is important for DSLR camera
When it comes to capturing high-quality video footage, having good sound is just as important as having clear visuals. This is where sound equipment becomes crucial for a DSLR camera setup. While DSLR cameras are known for their excellent image quality and versatility, their built-in microphones usually fall short in terms of capturing professional-grade audio.
Enhancing audio quality
The built-in microphones on most DSLR cameras are designed to pick up sound from a wide range of sources, which can result in capturing unwanted environmental noise. Investing in external sound equipment, such as a shotgun microphone or a lavalier microphone, allows you to direct the microphone’s focus towards your subject and minimize background noise. This ultimately improves the audio quality of your recordings and ensures that the main audio source is clear and distinct.
Expanding audio options
By using additional sound equipment, you open up a world of creative possibilities for capturing audio in different situations. For example, a shotgun microphone can be used for recording interviews or capturing audio from a distance, while a lavalier microphone is perfect for capturing hands-free audio in situations like vlogging or presentations. Having access to a range of sound equipment options enables you to adapt to various shooting scenarios and deliver professional-level audio.
Quality sound makes a difference:

Adding sound equipment to your DSLR camera setup can significantly enhance the overall production value of your videos. People often underestimate the importance of good sound, but it is a crucial element that can make or break a viewer’s experience. Clear and crisp audio helps to immerse the audience in your content, improving their understanding and enjoyment.
In conclusion, sound equipment is essential for any DSLR camera setup. It helps to improve the audio quality of your recordings, expands your audio options, and ultimately enhances the overall viewing experience. Whether you’re a professional videographer or an aspiring content creator, investing in sound equipment is a wise choice that will take your video production to the next level.
Choosing the right microphone for DSLR videography
When it comes to DSLR videography, having good audio is just as important as having great video quality. While the built-in microphone on your DSLR camera might be sufficient for casual use, it often falls short when it comes to professional-level recording. That’s where an external microphone comes in.
Directional microphones: One popular type of microphone for DSLR videography is the directional microphone. This type of microphone is designed to capture audio coming from a specific direction and reject unwanted sounds from other angles. It’s a great choice if you want to focus on capturing audio from a particular source, such as an interviewee or a speaker.
Lavalier microphones: Lavalier microphones, also known as lapel microphones, are another popular option for DSLR videography. These small, clip-on microphones can be attached to your subject’s clothing, capturing clear and consistent audio directly from their voice. Lavalier microphones are commonly used in situations where the subject needs to move around or if you want to achieve a more natural audio recording.
Shotgun microphones: If you’re looking to capture high-quality audio in a variety of situations, a shotgun microphone might be the best choice for you. Shotgun microphones are highly directional, often using a long, narrow pickup pattern to focus on sound sources directly in front of the camera while minimizing background noise. These microphones are great for capturing audio in outdoor environments or for filming in crowded areas.
Wireless microphones: Wireless microphones offer a convenient solution for DSLR videography, allowing you to capture audio without the constraints of cables. These microphones consist of a lavalier or shotgun microphone that wirelessly transmits audio to a receiver attached to your camera. This setup provides flexibility and freedom of movement, making it ideal for interviews, documentary-style filming, or live events.
Consider your needs: When choosing a microphone for your DSLR camera, it’s important to consider your specific needs and the type of content you’ll be filming. Think about the environment you’ll be recording in and the type of audio you want to capture. Additionally, make sure the microphone you choose is compatible with your DSLR camera and its audio input options.
Investing in a high-quality microphone will greatly improve the audio quality of your DSLR videography. So, take the time to research and find the microphone that best suits your needs and budget. Your audience will appreciate the improved audio experience, and your videos will have a more professional touch.
Connecting sound equipment to your DSLR camera
When it comes to recording videos with a DSLR camera, having good sound quality is essential. To achieve this, you will need to connect sound equipment to your camera. Here are a few steps to guide you through the process:

-
Choose the right microphone: There are different types of microphones available, such as shotgun microphones, lavalier microphones, and handheld microphones. Select the one that suits your recording needs.
-
Check the audio input on your camera: Locate the audio input on your DSLR camera. It is usually a 3.5mm jack labeled “Mic” or “Audio In.”
-
Connect the microphone: Plug the microphone cable into the audio input of your camera. Make sure it is securely connected.
-
Adjust the audio settings: Access the audio menu on your camera and adjust the settings to optimize the sound quality. You may need to enable manual audio control or adjust the input levels.
-
Test the audio: Before you start recording, test the sound to ensure everything is working correctly. Play back your test footage and listen for any unwanted noise or distortions.
-
Consider using an external audio recorder: If the built-in audio capabilities of your DSLR camera are not sufficient, you can connect an external audio recorder for better sound quality. Connect the audio output of the recorder to the camera’s audio input using the appropriate cable.
-
Use headphones: To monitor the audio while recording, plug a pair of headphones into the headphone jack of your camera or external audio recorder. This will allow you to listen for any issues and make adjustments if needed.
By following these steps, you can connect sound equipment to your DSLR camera and ensure high-quality audio recordings for your videos. Remember to practice and experiment with different microphone placements to find the best sound for your specific recording needs.
Adjusting sound levels on your DSLR camera
When using sound equipment with your DSLR camera, it is crucial to adjust the sound levels properly to ensure high-quality audio recording. Here are some tips on how to adjust sound levels on your DSLR camera:
1. Access the audio settings: Go to the menu of your DSLR camera and find the audio or sound settings. This is usually located under the settings or preferences section.
2. Choose the input source: Select the appropriate input source for capturing sound. This can be the built-in microphone or an external microphone connected to the camera.
3. Set the audio recording levels: Once you’ve selected the input source, adjust the audio recording levels. Most DSLR cameras have an audio level meter that you can use to monitor the sound levels.

4. Use headphones for monitoring: To ensure accurate sound recording, it is recommended to use headphones while adjusting the sound levels. This allows you to hear any noise or distortion and make necessary adjustments.
5. Test the sound levels: Before starting your actual recording, test the sound levels by speaking or making some noise. Make sure the audio levels are not too low or too high and adjust them accordingly.
6. Fine-tune during recording: While recording, keep an eye on the audio level meter and make adjustments if needed. Sudden changes in the sound source or environment may require you to change the audio levels to maintain consistent sound quality.
7. Use an audio recorder as a backup: If you are concerned about the audio quality of your DSLR camera, consider using an external audio recorder as a backup. This can provide higher quality audio and give you more control over the sound levels.
Remember, adjusting sound levels on your DSLR camera is essential for capturing clear and professional audio. Take the time to properly set up the sound equipment and monitor the levels during recording to ensure the best audio quality for your videos.
Tips for capturing high-quality audio with your DSLR camera
When using sound equipment with your DSLR camera, it’s important to pay close attention to capturing high-quality audio. Here are some tips to help you achieve this:
1. Use an external microphone
An external microphone is a crucial tool for capturing clear and professional audio. The built-in microphone on your DSLR camera may not provide the same level of quality as an external one, so consider investing in a good microphone that suits your needs.
2. Position the microphone correctly
The placement of your microphone can greatly affect the quality of the audio. It’s recommended to position the microphone as close to the sound source as possible to minimize unwanted background noise. Experiment with different angles and distances to find the best placement for your specific recording situation.
3. Use a windscreen or deadcat
When filming outdoors, wind noise can be a problem. To reduce the impact of wind on your audio, consider using a windscreen or deadcat. These accessories help to minimize wind noise and improve the clarity of your recordings.
4. Monitor audio levels
Keep a close eye on the audio levels while recording. Ensure that the sound is neither too loud nor too quiet, as extreme levels can lead to distortion or background noise. Many DSLR cameras have built-in audio level meters that can assist you in monitoring the levels.
5. Use manual audio settings
While DSLR cameras offer automatic audio settings, using manual settings gives you more control over the quality of your audio. Adjust the microphone sensitivity and recording levels manually to achieve optimal results.
6. Consider using an audio recorder
If you require the highest quality audio, consider using a separate audio recorder alongside your DSLR camera. This allows you to capture audio separately and sync it with the video during post-production, resulting in better overall audio quality.
By following these tips, you can greatly enhance the audio quality when using sound equipment with your DSLR camera. Experiment with different techniques and settings to find the setup that works best for your specific needs.
Common Mistakes to Avoid When Using Sound Equipment with DSLR Camera
When it comes to using sound equipment with a DSLR camera, there are some common mistakes that people often make. These mistakes can result in poor audio quality and a frustrating filming experience. To ensure that you capture clear and professional sound, it’s important to avoid these common mistakes:
1. Using the camera’s built-in microphone: While DSLR cameras usually have a built-in microphone, it is typically of low quality and can pick up unwanted noise. Invest in an external microphone for better sound recording.
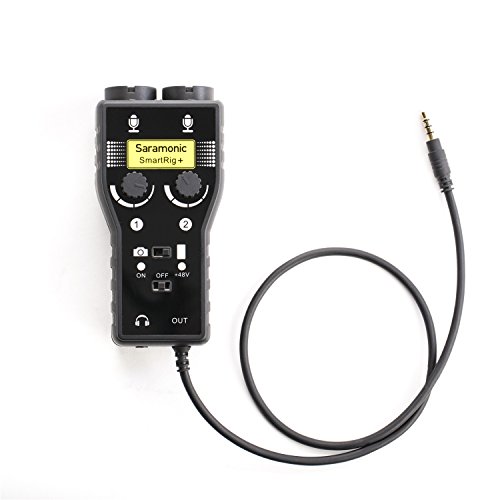
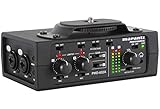
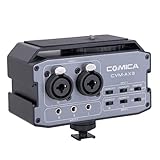
2. Not using an audio adapter: DSLR cameras often have a 3.5mm audio input, but their preamps may not be sufficient for professional audio recording. Use an audio adapter to connect higher quality microphones or consider using a separate audio recorder.
3. Not monitoring audio levels: It’s essential to monitor audio levels while recording to avoid clipping or recording audio that is too low. Use headphones or an external audio monitor to ensure that the sound is clear and at an appropriate level.
4. Positioning the microphone incorrectly: The placement of the microphone is crucial for capturing high-quality sound. Avoid positioning the microphone too far away, as it will result in weak audio. Also, be mindful of the microphone’s directionality and adjust it accordingly for optimal sound capture.
5. Not using proper wind protection: When filming outdoors, wind noise can easily ruin your audio. Invest in a windscreen or a foam cover for your microphone to prevent unwanted wind noise from being recorded.
6. Not testing audio equipment beforehand: Always make sure to test your sound equipment before starting a shoot. Check your connections, audio levels, and ensure that everything is functioning properly.
By avoiding these common mistakes, you can greatly improve the audio quality of your DSLR camera footage and enhance the overall production value of your videos.
Question-answer:
What sound equipment can be used with a DSLR camera?
There are several sound equipment options that can be used with a DSLR camera. These include external microphones, lavalier microphones, boom microphones, and audio recorders.
How can I connect an external microphone to my DSLR camera?
To connect an external microphone to your DSLR camera, you will need to use a microphone cable that is compatible with the camera’s audio input. Most DSLR cameras have a 3.5mm audio input jack, so you will need a microphone with a matching connector. Simply plug the microphone into the audio input jack on your camera, and make sure to adjust the audio settings to enable the external microphone.
What are the advantages of using an audio recorder with a DSLR camera?
Using an audio recorder with a DSLR camera has several advantages. Firstly, it allows you to capture high-quality audio separately from the camera, which means you can have more control over the sound recording process. Additionally, audio recorders often have built-in features such as adjustable gain, which can help you achieve better audio levels. Furthermore, using an audio recorder can minimize the risk of picking up unwanted camera noise, as the microphone can be placed farther away from the camera.


