
If you own a MacBook and want to enhance your home security without breaking the bank, turning your webcam into a security camera could be a practical solution. With just a few simple steps, you can transform your MacBook’s built-in camera into a reliable surveillance system.
Step 1: Choose the Right Software
To start, you’ll need to find software that can turn your webcam into a security camera. There are numerous options available online, so it’s important to do your research and select a trusted and reputable software that suits your needs. Look for features such as motion detection, remote viewing, and video recording capabilities to ensure comprehensive surveillance.
Step 2: Install and Configure the Software
Once you’ve chosen the software, download and install it on your MacBook. Follow the provided instructions to set up the software and configure the camera settings according to your preferences. This may include adjusting the sensitivity of the motion detection feature, setting up alerts, or choosing the recording resolution.

Step 3: Position Your MacBook
Decide on the best location for your MacBook to act as a security camera. Ideally, you’ll want a spot that provides a wide and clear view of the area you want to monitor. Remember to consider factors such as lighting conditions and potential obstructions that may affect the camera’s performance.
Step 4: Connect to Power
Since you’ll be using your MacBook as a security camera, it’s essential to make sure it remains powered on at all times. Plug in your MacBook to a power source to ensure it doesn’t run out of battery during surveillance. Additionally, consider adjusting your MacBook’s power settings so that it doesn’t go into sleep mode.
Step 5: Start Monitoring

Once everything is set up, you can start monitoring your chosen area. Use the software’s interface to view the live feed from your MacBook’s camera, receive motion detection alerts, and access recorded footage. Feel secure knowing that you have a cost-effective surveillance system right at your fingertips.
Remember to check your local laws and regulations regarding the use of surveillance cameras to ensure that you comply with all legal requirements. Using your webcam as a security camera can be an effective way to protect your home and valuables, and with the right software and setup, you can have peace of mind knowing that your MacBook has got your back.
Why Use Webcam as Security Camera
Using your webcam as a security camera on a Macbook can provide numerous benefits and enhance the security of your home or office. Here are a few reasons why using your webcam as a security camera is a smart choice:
1. Cost-Effective Solution
Using a webcam as a security camera is a cost-effective solution compared to purchasing a dedicated security camera. Since most Macbooks come with built-in webcams, you can utilize the existing hardware without the need for additional purchases.
2. Easy Setup and Monitoring
Setting up a webcam as a security camera on your Macbook is a simple process. There are various software applications available that allow you to easily configure the camera and monitor your premises remotely. You can access the live feed from your Macbook or even from your mobile device, providing you with peace of mind and convenience.
Additionally, these software applications offer various features such as motion detection, alerts, and even the ability to save recordings, helping you keep a close eye on any suspicious activity in your surroundings.
By using your Macbook’s webcam as a security camera, you can transform it into a powerful surveillance tool that can help protect your property and loved ones.
Benefits of Using Webcam as Security Camera on Macbook
Using your webcam as a security camera on your Macbook can provide various benefits. Whether you want to keep an eye on your home or monitor your office space, repurposing your webcam can be a cost-effective solution. Here are some advantages of using your webcam as a security camera:
1. Cost-effective Solution
Using your existing webcam as a security camera eliminates the need to purchase a separate surveillance system. This can save you money, especially if you have a limited budget. Instead of investing in expensive cameras, you can simply repurpose your Macbook’s built-in webcam.
2. Easy Setup
Setting up your webcam as a security camera on your Macbook is a straightforward process. Most Macbook models come with pre-installed software, such as Photo Booth or FaceTime, that allow you to access and record footage from your webcam. Additionally, there are various third-party applications available that provide additional features, such as motion detection and remote access.
With a few simple steps, you can configure your webcam to monitor specific areas and start recording whenever motion is detected. The easy setup process makes it convenient for anyone to transform their Macbook into a security surveillance system.
3. Monitoring Flexibility
Using your webcam as a security camera gives you the flexibility to monitor your desired areas. Whether you want to keep an eye on your home, office, or any other space, you can position your Macbook in a way that captures the necessary footage. This allows you to have greater control over your security monitoring, as you can adjust the angle and placement of the webcam as needed.
4. Remote Access
Many third-party webcam software applications provide remote access features, allowing you to view the live video feed from your Macbook webcam on any device with an internet connection. This means you can monitor your security camera footage from your smartphone, tablet, or computer, no matter where you are.
This remote access feature is particularly useful for individuals who need to travel frequently or have multiple properties to monitor. It provides peace of mind, as you can keep an eye on your home or office even when you’re not physically present.
| Benefits: |
|---|
| Cost-effective solution |
| Easy setup |
| Monitoring flexibility |
| Remote access |
Setting Up Your Macbook as Security Camera
If you own a Macbook and want to use its webcam as a security camera, you’re in luck. With a few simple steps, you can turn your Macbook into a reliable surveillance system. Here’s how:

Step 1: Install Security Camera Software
Start by installing security camera software on your Macbook. There are several options available, such as iSpy, SecuritySpy, and Periscope Pro. Choose a software that suits your needs and follow the installation instructions provided by the developer.
Step 2: Connect Your Webcam
Once the software is installed, connect your webcam to your Macbook. Most webcams simply plug into a USB port, so the process should be straightforward. Make sure your webcam is securely connected and recognized by your computer.
Step 3: Configure the Software

Launch the security camera software on your Macbook and follow the on-screen instructions to configure it. This usually involves specifying the webcam you want to use, setting up motion detection, and choosing recording options.
Step 4: Position Your Macbook
Decide where you want to position your Macbook as a security camera. Ideally, place it in a central location that covers the area you want to monitor. Ensure that the webcam has a clear line of sight and is not obstructed by any objects.
Step 5: Start Monitoring
Once you have positioned your Macbook, start the security camera software and begin monitoring. You can view the live feed on your Macbook’s screen or access it remotely from another device using the software’s web interface or mobile app. Experiment with the settings until you achieve the desired level of surveillance.

| Pros | Cons |
|---|---|
| Cost-effective solution compared to buying a dedicated security camera | Depends on your Macbook’s availability and performance |
| Easy to set up and configure | May require additional storage space for video recordings |
| Can access the live feed remotely | Relies on power and internet connection |
| Compatible with various security camera software options | Webcam resolution and image quality may not be as high as dedicated security cameras |
By following these steps, you can effectively use your Macbook as a security camera and enhance the safety of your surroundings. Whether you’re monitoring your home, office, or any other space, this cost-effective solution provides peace of mind and added security.
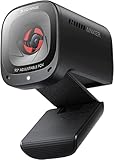
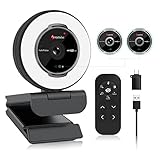
Choosing the Right Webcam
When it comes to using your MacBook’s webcam as a security camera, having the right webcam is crucial. While many webcams will work with your MacBook, there are certain features you should consider to ensure you get the best results.
Compatibility: Make sure the webcam you choose is compatible with your MacBook model and operating system. Check the manufacturer’s website for compatibility information before making a purchase.
Resolution: The resolution of the webcam determines the quality of the video it captures. Look for a webcam with a high resolution to ensure clear and detailed images. A resolution of 1080p or higher is recommended for security camera purposes.
Frame Rate: The frame rate refers to the number of frames per second the webcam can capture. A higher frame rate results in smoother and more fluid video footage. Look for a webcam with a frame rate of at least 30 FPS for optimal security camera performance.
Field of View: The field of view determines how much of the surrounding area the webcam can capture. For security purposes, a wide field of view is desirable to cover as much area as possible. Look for webcams with a wide-angle lens or a field of view of at least 90 degrees.
Night Vision: If you plan to use your webcam as a security camera in low-light conditions, consider a webcam with night vision capabilities. This feature allows the webcam to capture clear footage even in the dark, ensuring round-the-clock surveillance.
Connectivity: Ensure that the webcam you choose can connect to your MacBook easily. USB webcams are the most common and easy to set up. Some webcams may also offer wireless connectivity options.
Additional Features: Consider any additional features that might enhance your security camera setup. This could include motion detection, two-way audio, or the ability to pan and tilt the camera remotely.
| Important Features to Consider |
|---|
| Compatibility |
| Resolution |
| Frame Rate |
| Field of View |
| Night Vision |
| Connectivity |
| Additional Features |
Installing Webcam Software
Before you can use your webcam as a security camera on your Macbook, you’ll need to install webcam software. This software will allow you to access and control your webcam, as well as provide additional features and functionality.
There are several webcam software options available for Macbook users. Here are a few popular choices:
1. iGlasses: iGlasses is a powerful software that enhances your webcam’s video quality and provides advanced control options. It allows you to adjust settings like brightness, contrast, and sharpness, as well as add special effects and filters to your video feed.
2. ManyCam: ManyCam is a versatile webcam software that not only enables you to use your webcam as a security camera, but also offers features like screen recording, virtual backgrounds, and video effects. It supports multiple webcam sources and allows you to switch between them effortlessly.
3. EvoCam: EvoCam is a feature-rich webcam software that offers motion detection and alerts for added security. It allows you to schedule recording sessions, adjust video quality settings, and remotely access your webcam’s feed from anywhere.
To install webcam software on your Macbook, simply visit the official website of the software you choose and download the installation file. Once the file is downloaded, double-click on it to start the installation process. Follow the on-screen prompts to complete the installation.
After the installation is complete, launch the webcam software and grant it permission to access your webcam. You may need to adjust some settings and configure the software according to your preferences.
Once the webcam software is installed and configured, you can start using your webcam as a security camera on your Macbook. Keep in mind that specific features and functionalities may vary depending on the software you chose.
Configuring Webcam Settings
Configuring the settings for your webcam is an important step in using it as a security camera on your MacBook. By adjusting the settings, you can ensure that the camera captures the necessary footage and operates effectively. Follow the below steps to configure your webcam settings:
-
Open Camera Preferences
Click on the Apple menu at the top left corner of your screen and select “System Preferences”. Then, click on the “Camera” icon to open the Camera preferences.
-
Select the Webcam
If you have multiple webcams connected to your MacBook, make sure to select the correct one. Click on the drop-down menu next to “Camera” and choose the webcam you want to configure.
-
Adjust Video Settings
Click on the “Video” tab to access the video settings for your webcam. Here, you can adjust options such as brightness, contrast, saturation, and sharpness to optimize the video quality. Experiment with these settings to find the right balance for your security needs.
-
Configure Audio Settings
If your webcam has a built-in microphone, click on the “Audio” tab to access the audio settings. You can adjust the microphone volume and test the audio input to ensure clear sound recording for your security footage.
-
Enable Auto-Tracking (Optional)
Some webcams offer auto-tracking features, which allow the camera to follow any motion within its field of view. If your webcam supports this feature, you can enable it in the settings to enhance the security monitoring capabilities.
Once you have configured the settings according to your requirements, you can start using your webcam as a security camera on your MacBook. Regularly check the settings to ensure they are optimized for your security needs and make adjustments as necessary.
Monitoring Your Space with Webcam
If you are looking for a cost-effective way to monitor your space, using your MacBook’s webcam as a security camera is a great option. With the right software and setup, you can turn your MacBook into a surveillance system that allows you to keep an eye on your property at all times.
Here are the steps to set up and use your webcam as a security camera:
- Choose the right software: There are several software options available that can turn your MacBook’s webcam into a security camera. Some popular choices include VLC Media Player, iSpy, and SecuritySpy. Do some research to find the software that best fits your needs and download it onto your MacBook.
- Set up the software: Once you have downloaded the software, follow the installation instructions to set it up on your MacBook. Make sure to grant the necessary permissions for the software to access your webcam.
- Configure the settings: After the software is installed, open the application and navigate to the settings menu. Here, you can customize the camera settings, such as motion detection sensitivity, recording length, and storage options.
- Position your MacBook: Find an ideal location for your MacBook where it can capture the desired area. Make sure the webcam’s view is not obstructed and that it has a clear line of sight to the space you want to monitor.
- Start monitoring: Once you have positioned your MacBook, start the software and begin monitoring your space. You can view the live feed from your webcam directly on your MacBook’s screen.
- Access the camera remotely: Many webcam surveillance software options allow you to access the camera remotely using your smartphone or another device. This can be useful if you want to check on your space while you’re away.
- Review footage: If an incident occurs or you need to review footage, you can easily access the recorded videos or images through the software. Most applications allow you to search for specific dates or times to find the desired footage.
By following these steps, you can utilize your MacBook’s webcam as a security camera to monitor your space effectively. Remember to regularly check for software updates and ensure that your MacBook is connected to a reliable power source to maintain uninterrupted surveillance.
FAQ,
Can I use the webcam on my MacBook as a security camera?
Yes, you can use the webcam on your MacBook as a security camera. There are various software applications available that allow you to turn your webcam into a surveillance system. These applications offer features like motion detection, video recording, and remote access to the camera feed.
What software can I use to turn my MacBook’s webcam into a security camera?
There are several software options that you can use to turn your MacBook’s webcam into a security camera. Some popular choices include SecuritySpy, iSpy, and Webcam Monitor. These applications typically offer features like motion detection, video recording, and remote access to the camera feed.


