If you have a webcam lying around and you’re looking to boost the security of your home or office, then we have some great news for you. You can repurpose your webcam as a security camera! With just a few steps, you can transform your regular webcam into a powerful surveillance tool.
Webcams are often found gathering dust in a drawer or sitting idly on top of a computer screen. But with the right software and setup, you can turn your webcam into a motion-activated security camera that will keep a watchful eye on your space.
So, why spend a fortune on expensive security cameras when you can make the most of what you already have? In this guide, we’ll take you through the process of setting up your webcam as a security camera, ensuring you stay safe and protected without breaking the bank.
Setting Up Your Webcam
Before you can start using your webcam as a security camera, you’ll need to set it up properly. Follow these steps to get started:
Step 1: Choose a Suitable Location
Select a location for your webcam that provides a good view of the area you want to monitor. Make sure it is within the range of your Wi-Fi network if you plan on using wireless connectivity.
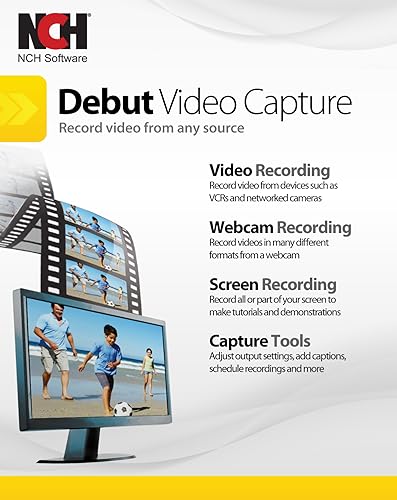
![Debut Video Capture Software to Record from a Webcam, Computer Screen or Device [Download]](https://m.media-amazon.com/images/I/91wYZySob4L._SL160_.jpg)
Step 2: Connect Your Webcam
Connect your webcam to your computer using the supplied USB cable or any other suitable cable. Make sure the connection is secure.
Step 3: Install Webcam Software
Install any necessary webcam software that came with your camera. This software will allow you to configure settings and access the camera’s features.
Step 4: Configure Webcam Settings
Open the webcam software and configure the settings according to your preferences. You may want to adjust the resolution, frame rate, and other settings to optimize the camera’s performance.
Step 5: Set Up Security Measures
If you plan to use your webcam as a security camera, consider enabling security features such as motion detection and email alerts. This will help you receive notifications when any movement is detected in the monitored area.
Step 6: Test Your Webcam
Once you have completed the setup, test your webcam to ensure it is functioning correctly. Check if the video feed is clear and if the camera is capturing the desired area effectively.
![CyberLink YouCam | Webcam Software [PC Online Code]](https://m.media-amazon.com/images/I/51sYnZRRfrL._SL160_.jpg)
By following these steps, you will be able to set up your webcam properly and begin using it as a security camera. Remember to regularly check and maintain the camera to ensure it continues to function as intended.
Choosing the Right Webcam
When it comes to using a webcam as a security camera, choosing the right one is crucial. Here are a few factors to consider:
- Resolution: Look for webcams with high resolution to ensure clear and detailed footage. A minimum of 720p is recommended.
- Frame Rate: The frame rate determines the smoothness of the video. Aim for a webcam with at least 30 frames per second for optimal live streaming.
- Field of View: Consider the field of view offered by the webcam. A wide-angle lens can capture a larger area, making it ideal for monitoring larger spaces.
- Low-Light Performance: If you plan to use the webcam in low-light conditions, look for models with good low-light performance or even infrared capabilities.
- Connectivity: Ensure that the webcam is compatible with your existing hardware and software. USB webcams are the most common and convenient choice.
- Mounting Options: Check if the webcam comes with mounting options or tripod compatibility, allowing you to easily position it for optimal surveillance.
- Audio: If audio monitoring is important to you, look for webcams with built-in microphones or external audio input options.
Considering these factors will help you choose a webcam that suits your security camera needs and ensures reliable surveillance.
Installing the Webcam Software
When using your webcam as a security camera, it is important to have the necessary software installed to fully utilize its capabilities. Here is a step-by-step guide on how to install the webcam software:
Step 1: Check for Software Compatibility
Before proceeding with the installation, make sure to check the compatibility of the webcam software with your operating system. This information is usually provided by the manufacturer on their website or in the software documentation.

Step 2: Download the Webcam Software
Visit the manufacturer’s website and navigate to the support or downloads section. Locate the software specifically designed for your webcam model and click on the download link. Ensure that you download the software from a trusted source to avoid malware or other security risks.
Step 3: Run the Installer
Once the software is downloaded, locate the installer file in your computer’s downloads folder or the folder specified during the download process. Double-click on the installer file to run it.
Step 4: Follow the Installation Wizard
After running the installer, an installation wizard will guide you through the installation process. Follow the on-screen instructions to proceed with the installation. You may be prompted to agree to the software’s terms and conditions, select the installation location, or choose additional components to install. Make sure to read each step carefully and make the appropriate selections.
Step 5: Complete the Installation
Once you have followed all the steps in the installation wizard, the software will be installed on your computer. Depending on the software and your system settings, you may be prompted to restart your computer to complete the installation. If prompted, save any work you have open and select the option to restart your computer.
Once the installation is complete, you can proceed with configuring the webcam software according to your security camera needs.
Note: If you encounter any issues during the installation process, consult the webcam software documentation or contact the manufacturer’s customer support for assistance.
With the webcam software successfully installed, you are now ready to use your webcam as a security camera and ensure enhanced safety and monitoring in your home or office.
Configuring the Webcam Settings
When using your webcam as a security camera, it’s important to configure the settings to ensure optimal performance. The following steps will guide you through configuring your webcam settings:
- Open the webcam software on your computer. This software may have been included with your webcam or can be downloaded from the manufacturer’s website.
- Locate the settings option in the software interface. It may be represented by a gear or wrench icon.
- Click on the settings icon to access the webcam settings.
- Adjust the resolution settings. Higher resolutions will provide a clearer image, but may require more bandwidth and storage space. Find a balance between image quality and performance based on your specific needs.
- Configure the frame rate. This determines how many frames per second your webcam captures. Higher frame rates result in smoother video, but may require more resources. Again, find a balance based on your requirements.
- Explore the additional settings available in the software. These may include options such as brightness, contrast, and sharpness. Adjust these settings to improve the image quality.
- Check the audio settings if your webcam has a microphone. Adjust the volume and ensure that the audio is being captured properly.
- Test the settings by capturing a sample video. Make any necessary adjustments based on the results.
By configuring your webcam settings, you can ensure that it is optimized for its role as a security camera. Remember to regularly check and adjust these settings as needed to maintain optimal performance.
Adjusting the Camera Angle
When setting up your webcam as a security camera, it is important to consider the camera angle. The right angle can make a significant difference in the effectiveness of your surveillance system. Here are some tips for adjusting the camera angle:

1. Position the Camera Correctly
Make sure the camera is positioned in the area you want to monitor. It should have a clear view of the entire space and cover any potential blind spots. Adjust the camera height and tilt to capture the desired area effectively.
2. Avoid Obstructions
Ensure that there are no objects or obstructions blocking the camera’s view. These can include plants, curtains, furniture, or any other items that might interfere with the camera’s line of sight. Clearing the area around the camera will help maximize its coverage.
3. Test the Angle
After positioning the camera, it’s important to test the angle to ensure that it captures the desired area effectively. Take the time to review the camera’s feed and adjust its angle if necessary. This can help avoid blind spots and ensure that the camera captures the necessary details.
By taking the time to properly adjust the camera angle, you can increase the overall effectiveness of your webcam as a security camera. It will provide better coverage, minimize blind spots, and help you monitor the desired areas effectively.
Enabling Motion Detection
Motion detection is an essential feature that allows your webcam to capture video only when there is movement in the frame. This helps to conserve storage space and makes it easier to review footage. To enable motion detection on your webcam for use as a security camera, follow these steps:
Step 1: Install Webcam Software
First, install the software provided with your webcam. This software will typically include the necessary drivers and functionality to enable motion detection.
Step 2: Configure Motion Detection Settings
Open the webcam software and locate the settings or options menu. Look for a section specifically dedicated to motion detection. In this section, you can configure various settings such as sensitivity and the area to monitor for motion.
Adjust the sensitivity level according to your needs. Higher levels may capture even small movements, while lower levels may only trigger recording for more significant motion.
Furthermore, you can select the area of the frame where motion should be detected. This can be important if you want to exclude certain areas from triggering motion detection, such as a busy road outside your window.
Step 3: Enable Motion Detection
Once you have configured the desired motion detection settings, enable the feature. This may involve ticking a box or toggling a switch labeled “motion detection” or similar.
After enabling motion detection, the webcam will start monitoring for movement and only record video when motion is detected. This helps you capture important events and saves storage space by not recording when nothing is happening.
Make sure to test the motion detection feature to ensure it is functioning correctly. Walk in front of the webcam and check if it starts capturing video. If not, double-check the settings and consult the webcam’s documentation or support resources for further assistance.
With motion detection enabled, your webcam can now function as a security camera, recording video whenever there is movement in its field of view.
Monitoring the Webcam Feed
Once you have set up your webcam as a security camera, you will want to monitor the feed to keep an eye on any activity happening in the area. There are several ways to do this:
- Using a web browser: Most IP cameras come with a web-based interface that allows you to access the live feed directly in your browser. Simply enter the IP address of the camera into the address bar and login with the appropriate credentials. From there, you should be able to view the live video stream.
- Using dedicated software: Many IP cameras also come with dedicated software that you can install on your computer or mobile device. This software usually provides more advanced features, such as motion detection, recording, and remote access. Simply download the software from the camera manufacturer’s website and follow the installation instructions.
- Using third-party apps: There are also a variety of third-party apps available that can connect to your webcam and provide live video streaming. These apps are often available for both computers and mobile devices, making it easy to monitor your webcam feed from anywhere. Some popular apps include iSpy, WebcamXP, and ManyCam.
Regardless of the method you choose, it’s important to ensure that the feed is only accessible to authorized individuals. Set up strong passwords and enable encryption to protect the privacy of your camera feed.
By monitoring the webcam feed, you can keep a watchful eye on your home or office and take necessary action if any unusual activity is detected. Remember to regularly check the feed and adjust your camera settings as needed to ensure optimal security.
Accessing the Feed Remotely
To access the webcam feed remotely, you will need to follow a few steps:
- Make sure the webcam is connected to a computer that is turned on and connected to the internet.
- Install webcam software or application that allows remote access. There are many options available, such as iSpy, Yawcam, or ZoneMinder.
- Configure the software by entering the necessary information, such as the IP address of the computer and the port number for accessing the webcam feed.
- Once the software is set up, you can access the webcam feed remotely from any device with internet access.
- Open a web browser on your remote device and enter the IP address and port number in the address bar (e.g., http://192.168.1.100:8080).
- You will be prompted to enter the login credentials for the webcam software. Enter the username and password you set up during the software configuration.
- After logging in, you should be able to see the live webcam feed on your remote device.
Keep in mind that accessing the webcam feed remotely may require some additional setup, such as port forwarding on your router or configuring firewall settings. Consult the documentation or support resources for your specific webcam software for detailed instructions.
Recording and Saving Footage
Once you have set up your webcam as a security camera, you will want to ensure that the recorded footage is properly saved and organized. Here are some steps to follow:
- Create a designated folder on your computer where you will save all the recorded footage.
- Open the software or application you are using to set up your webcam as a security camera.
- Go to the settings or preferences section of the software.
- Look for the “Recording” or “Save” options in the settings menu.
- Select the designated folder you created earlier as the destination for the recorded footage.
- Choose the video format in which you want the footage to be saved (e.g., AVI, MP4).
- Set the desired video quality and resolution for the recordings.
- Adjust any other recording settings according to your preference.
- Save the settings and exit the software.
By following these steps, you are ensuring that the webcam security camera records and saves the footage in a location of your choice. This will make it easier for you to access and review the recorded videos whenever necessary.
FAQ,
Can I use my webcam as a security camera?
Yes, you can use your webcam as a security camera. There are several software options available that can help you turn your webcam into a home security system.
What software do I need to use my webcam as a security camera?
There are many software options available that can turn your webcam into a security camera. Some popular choices include iSpy, ContaCam, and Yawcam. These software programs allow you to monitor your webcam feed, record footage, and even receive alerts for any suspicious activity.
How can I set up my webcam as a security camera?
Setting up your webcam as a security camera is a straightforward process. First, you need to choose a software program that suits your needs. Then, install the software and connect your webcam to your computer. Once the software is installed, you can customize the settings according to your preferences and start monitoring your webcam feed.
Can I access my webcam feed remotely?
Yes, most webcam security software programs allow you to access your webcam feed remotely. You can usually view the feed through a web browser or a dedicated mobile app. This feature is convenient if you want to keep an eye on your home or office while you are away.
What other features can I expect from webcam security software?
Webcam security software often comes with a variety of useful features. Some common features include motion detection, scheduled recording, and the ability to set up multiple cameras for comprehensive surveillance. Additionally, some software programs offer cloud storage options for storing your recorded footage.