Are you a proud owner of a Canon DSLR camera? Are you excited to learn how to make the most out of this powerful photography tool? Using a DSLR camera can be intimidating for beginners, but fear not! In this guide, we will provide you with step-by-step instructions on how to use your Canon DSLR camera like a pro.
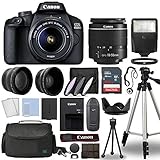
First things first, familiarize yourself with the basic components of your Canon DSLR camera. Whether you have the latest model or an older version, understanding the key elements of your camera is essential. Take a close look at the lens, the viewfinder, the LCD screen, and the various buttons and dials. Each of these features plays a crucial role in capturing stunning images.
Next, master the camera’s shooting modes. Canon DSLR cameras offer a range of shooting modes that cater to different scenarios. The most commonly used modes include Auto, Program, Aperture Priority, Shutter Priority, and Manual. Experiment with each of these modes to understand how they affect the exposure and focus of your images. With time and practice, you will develop a better understanding of when and how to use each mode effectively.
Now, let’s dive into the world of photography settings. Your Canon DSLR camera allows you to adjust various settings such as ISO, aperture, and shutter speed. ISO determines the camera’s sensitivity to light, while aperture controls the depth of field. Shutter speed, on the other hand, determines how long the camera’s shutter remains open. Understanding these settings and how they interact with each other will enable you to capture perfectly exposed and focused images.

Last but not least, don’t forget about post-processing. Once you have captured your images, it’s time to unleash your creativity through post-processing. Canon DSLR cameras often come with software that allows you to edit and enhance your photos. Take advantage of these tools to fine-tune your images and bring out the best in your photographic masterpieces.
Now that you have the basic knowledge, it’s time to start exploring the world of photography with your Canon DSLR camera! Remember, practice makes perfect, so don’t be afraid to experiment and learn from your mistakes. With time and dedication, you’ll be capturing breathtaking shots in no time.
Tips for Using Your Canon DSLR Camera
Using a Canon DSLR camera allows you to capture high-quality photos and videos with precision and control. Here are some tips to help you get the most out of your Canon DSLR camera:
- Familiarize yourself with the camera’s settings: Take the time to read the camera’s manual and understand the different settings available to you, such as aperture, shutter speed, and ISO. This will allow you to have more control over your photos and adapt to different shooting conditions.
- Experiment with different shooting modes: Canon DSLR cameras offer a variety of shooting modes, such as manual, aperture priority, shutter priority, and automatic. Take the time to experiment with these modes to understand how they affect the outcome of your photos.
- Use manual focus for more precision: While autofocus can be convenient, using manual focus gives you more control over what you want to focus on. This is especially useful in situations where autofocus may struggle, such as low light or when shooting through glass.
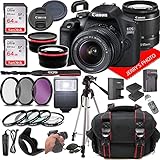
- Invest in good lenses: Canon DSLR cameras allow you to interchange lenses, so invest in high-quality lenses that suit your photography needs. Different lenses can give you different perspectives and allow you to capture specific types of shots, such as wide-angle or telephoto.
- Make use of the camera’s built-in features: Canon DSLR cameras often come with built-in features such as image stabilization, multiple exposure mode, and HDR. Take the time to explore and experiment with these features to enhance your photography skills.
- Shoot in RAW format: Shooting in RAW format allows you to retain more details in your photos and gives you greater editing flexibility. While RAW files take up more storage space, they provide better quality and allow you to make more adjustments during post-processing.
- Practice composition techniques: Composition is key to creating visually appealing photos. Remember to consider elements such as the rule of thirds, leading lines, and framing when composing your shots. Experiment with different angles and perspectives to add interest to your photos.
- Take advantage of natural light: Natural light can add depth and dimension to your photos. When shooting outdoors, try to shoot during the golden hour (an hour after sunrise or before sunset) for the softest and most flattering light. If shooting indoors, position your subject near a window to make use of natural light.
By familiarizing yourself with your Canon DSLR camera and practicing these tips, you’ll be able to capture amazing photos and make the most out of your photography experience.
Understanding Camera Settings
As a Canon DSLR camera owner, understanding the various camera settings is crucial in order to make the most out of your device. With an array of settings and options available, it is important to have a clear understanding of what each setting does and how it impacts your photos.

1. Exposure Settings
The exposure settings on your Canon DSLR camera allow you to control the amount of light that enters the camera and affects your photos. The three main exposure settings are aperture, shutter speed, and ISO.
- Aperture: This setting determines the size of the opening through which light enters the camera. A lower aperture number (e.g. f/1.8) gives you a larger opening and a shallower depth of field, while a higher aperture number (e.g. f/16) gives you a smaller opening and a larger depth of field.
- Shutter Speed: This setting determines how long the camera’s shutter stays open to capture the image. A faster shutter speed (e.g. 1/1000) freezes motion, while a slower shutter speed (e.g. 1/30) creates motion blur.
- ISO: This setting controls the camera’s sensitivity to light. A lower ISO number (e.g. ISO 100) is less sensitive but produces less noise, while a higher ISO number (e.g. ISO 1600) is more sensitive but may result in more noise.
2. White Balance
The white balance setting on your Canon DSLR camera helps adjust the color temperature of your photos, ensuring that whites appear white under different lighting conditions. By setting the white balance correctly, you can avoid images with a blue or orange tint.
3. Focus Settings
The focus settings on your Canon DSLR camera allow you to control the sharpness of your images. You can choose between automatic and manual focus modes, as well as select focus points to ensure the desired area is in focus.
4. Shooting Modes
Canon DSLR cameras offer various shooting modes, each designed for different scenarios. These modes include Automatic, Aperture Priority, Shutter Priority, Manual, and more. Understanding the shooting modes allows you to have greater control over your camera settings and achieve the desired results in different shooting conditions.
By familiarizing yourself with these fundamental camera settings, you can harness the full potential of your Canon DSLR camera and take your photography to the next level.

Taking Clear and Sharp Photos
When it comes to capturing amazing moments with your Canon DSLR camera, taking clear and sharp photos is essential. Follow these tips to achieve sharp and professional-looking images.
| Tip | Description |
|---|---|
| 1. | Use a tripod |
| 2. | Adjust your camera settings |
| 3. | Focus carefully |
| 4. | Optimize your aperture |
| 5. | Pay attention to shutter speed |
1. Use a tripod: To minimize camera shake and ensure sharp images, use a tripod whenever possible. This will help stabilize your camera and eliminate any blurriness caused by hand movement.
2. Adjust your camera settings: Experiment with different settings, such as ISO, white balance, and shooting mode, to find the optimal combination. Higher ISO values may introduce noise, so try to find a balance that produces clear and sharp results.
3. Focus carefully: Pay close attention to your camera’s autofocus system. Use the center focus point for precision and control. Take your time to ensure that your subject is in sharp focus before capturing the image.
4. Optimize your aperture: Choose the right aperture setting to control depth of field and sharpen your images. A smaller aperture (higher f-number) will increase the depth of field and ensure that more of the subject is in focus.

5. Pay attention to shutter speed: Use a fast shutter speed to freeze motion and reduce the risk of blur caused by subject movement. If shooting in low light conditions, consider using a tripod or increasing your ISO to maintain a sharp image.
By following these tips and practicing regularly, you will improve your skills in taking clear and sharp photos with your Canon DSLR camera. Remember to experiment and have fun while capturing beautiful moments!
Using Manual Mode for Creative Control
One of the most powerful options on your Canon DSLR camera is the Manual Mode, which gives you full control over all of the camera settings. By using Manual Mode, you can have complete creative control over your photographs, allowing you to experiment with different exposures, focus points, and aperture settings to achieve the desired effect.
To use Manual Mode on your Canon DSLR camera, follow these steps:
| Step 1: | Turn your camera on and select Manual Mode by turning the mode dial to “M”. |
| Step 2: | Use the main dial to adjust the shutter speed, which controls the amount of time the camera’s sensor is exposed to light. A faster shutter speed will freeze motion, while a slower shutter speed will create motion blur. |
| Step 3: | Use the secondary dial to adjust the aperture, which controls the size of the camera’s lens opening. A larger aperture (smaller f-number) will create a shallow depth of field, blurring the background and isolating your subject. A smaller aperture (larger f-number) will create a larger depth of field, keeping more of the scene in focus. |
| Step 4: | Use the ISO button to adjust the camera’s sensitivity to light. A lower ISO will produce cleaner, less noisy images, but may require a slower shutter speed or larger aperture. A higher ISO will make the camera more sensitive to light, allowing for faster shutter speeds or smaller apertures, but may introduce more noise into the image. |
| Step 5: | Compose your shot and press the shutter button to take the photo. |
By using Manual Mode, you can have precise control over your camera settings and create stunning images that fully express your artistic vision. Don’t be afraid to experiment and push the boundaries of what your Canon DSLR camera can do!
Exploring Different Shooting Modes
One of the advantages of using a Canon DSLR camera is the availability of different shooting modes. These modes allow you to customize your camera settings according to the type of shot you want to achieve. Let’s take a closer look at some of the most commonly used shooting modes:
- Auto Mode: This mode is perfect for beginners or when you want to capture a quick shot without worrying about the settings. The camera automatically adjusts the exposure, focus, and other settings to produce the best results.
- Program Mode: In this mode, you have control over certain settings like ISO, white balance, and exposure compensation while the camera takes care of the rest. It’s a great mode for beginners who want to have more control over their shots.
- Aperture Priority Mode: This mode allows you to control the aperture setting, while the camera adjusts the other settings accordingly to maintain proper exposure. It’s ideal for situations where you want to control the depth of field, such as portrait or landscape photography.
- Shutter Priority Mode: Here, you can set the desired shutter speed, and the camera adjusts the other settings to maintain proper exposure. This mode is useful for capturing fast-moving subjects, such as sports or wildlife photography.
- Manual Mode: In this mode, you have full control over all camera settings, including aperture, shutter speed, ISO, white balance, and more. It’s the best mode for experienced photographers who want complete control over their shots.
Experiment with different shooting modes to understand their effects and to better capture your desired shots. Each mode has its own advantages and use cases, so take the time to explore and find the one that works best for your specific photography needs.
Mastering Composition Techniques
Mastering composition techniques is key to capturing stunning photographs with your Canon DSLR camera. Composition refers to the arrangement and placement of elements within a frame, and it plays a crucial role in determining the overall impact of a photograph.
Here are some composition techniques to help you take your photography skills to the next level:
| Rule of Thirds | Divide your frame into a grid of nine equal sections with two horizontal and two vertical lines. Place your subject at the intersection points or along the lines for a more balanced and visually appealing composition. |
| Leading Lines | Utilize lines in your composition that lead the viewer’s eye towards the main subject. This can be a road, a path, or simply architectural lines. |
| Frame within a Frame | Look for natural or man-made elements that can act as a frame around your subject, such as windows, doorways, or tree branches. This technique adds depth and interest to your photo. |
| Foreground Interest | Add an interesting element in the foreground to create a sense of depth and draw the viewer’s attention into the scene. |
| Symmetry | Align elements in a symmetrical pattern to create a sense of balance and harmony in your composition. |
Remember, these techniques are not strict rules, but rather guidelines to enhance your composition skills. Experiment with different techniques and learn to trust your creative instincts. With practice, you’ll become more confident in your ability to compose captivating photographs with your Canon DSLR camera.

Editing and Post-Processing Your Photos
Once you have captured stunning images with your Canon DSLR camera, it’s time to give them the final touch by editing and post-processing. Here are some tips to help you get started:
1. Transfer and Organize
The first step is to transfer your photos from the camera to your computer. You can do this by connecting your camera to the computer with a USB cable or by using a memory card reader. Once your photos are transferred, create a folder and organize them by date or by the event they were taken at. This will make it easier to find and work with the specific images you want to edit.
2. Choose the Right Software
There are various software options available for editing and post-processing your photos. Adobe Photoshop and Lightroom are popular choices among photographers, but there are also free alternatives like GIMP and Pixlr. Choose a software that suits your needs and budget, and explore its features and capabilities.
3. Adjust Exposure and Colors
One of the first things you can do when editing your photos is to adjust the exposure and colors. Use the software’s tools to brighten or darken the image, adjust the contrast, saturation, and white balance. Experiment with these settings until you achieve the desired look and feel of the image.
4. Crop and Straighten
Cropping and straightening your photos can help improve the composition and remove any distractions. Use the crop tool to remove unwanted elements from the frame and to create a more balanced composition. Additionally, use the straighten tool if your horizon is not level to create a more pleasing image.
5. Enhance Details and Sharpness
To make your photos stand out, enhance the details and sharpness. Use the software’s tools to apply sharpening techniques and to bring out the fine details in your photos. Be careful not to overdo it, as excessive sharpening can lead to a grainy or unnatural look.
6. Apply Filters and Effects
Experiment with applying filters and effects to add a creative touch to your photos. You can apply black and white or sepia filters, add vignettes, adjust the temperature or apply artistic effects. Play around with the different options and have fun exploring the creative possibilities.
Remember, editing and post-processing is an art form, and there are no right or wrong ways to do it. The key is to experiment, learn, and develop your own unique style. Happy editing!
Question-answer:
What are the basic settings I need to know to use my Canon DSLR camera?
When using a Canon DSLR camera, there are a few basic settings you need to be familiar with. First, learn how to adjust the ISO, which controls the camera’s sensitivity to light. Next, understand the aperture, which determines the depth of field in your photos. Finally, master the shutter speed, which controls how long the camera’s sensor is exposed to light. These three settings together will give you the control you need to capture great photos with your Canon DSLR camera.
Is there a specific lens I should use with my Canon DSLR camera?
There are many different lenses available for Canon DSLR cameras, each with its own purpose. The type of lens you should use depends on what you want to photograph. For general use, a versatile zoom lens like a 18-55mm or 24-105mm lens is a good choice. If you’re interested in portrait photography, a prime lens with a wide aperture, like a 50mm f/1.8 lens, is ideal. For wildlife or sports photography, a telephoto lens with a long focal length like a 70-200mm lens will allow you to get close to the action. It’s always a good idea to research and choose a lens that suits your specific needs and interests.