If you have Xfinity Home Security, you may be wondering how to view the live feed from your IP camera. With the increasing popularity of IP cameras for home security, it’s essential to know how to access and view the camera’s video feed.
Fortunately, Xfinity has made it easy for users to view their IP cameras through their home security system. By following a few simple steps, you can monitor your home’s security from anywhere, using your smartphone, tablet, or computer.
Step 1: Set Up the IP Camera
To view your IP camera on Xfinity Home Security, you must first set up the camera. Follow the manufacturer’s instructions to connect the camera to your home network. Make sure the camera is properly positioned and focused on the area you want to monitor.
Step 2: Install the Xfinity Home Security App

Next, you’ll need to download and install the Xfinity Home Security app on your device. The app is available for both iOS and Android devices and can be found in the App Store or Google Play Store.
Step 3: Log In to Your Xfinity Account
Once the app is installed, open it and log in with your Xfinity account credentials. If you don’t have an account, you’ll need to create one on the Xfinity website.
Step 4: Add the IP Camera to Your Xfinity Home Security
After logging in, navigate to the settings or devices section of the app. Look for the option to add a device and select IP camera. Follow the on-screen instructions to add the camera to your Xfinity Home Security system.

Step 5: View the IP Camera Feed
Once the camera is added, you can easily view the live feed by selecting the camera from the app’s main screen. You’ll be able to see the camera’s video feed in real-time and access any additional features or settings the camera offers.
By following these simple steps, you can easily view an IP camera on your Xfinity Home Security system. Stay connected and keep an eye on your home’s security no matter where you are.
Understanding IP cameras and their benefits
An IP camera, also known as an Internet Protocol camera, is a digital video camera that can send and receive data via an internet connection. Unlike traditional analog cameras, IP cameras convert video footage into digital format, making it easier to store, transmit, and view remotely.
IP cameras offer several benefits over traditional cameras:

| High-Quality Video | IP cameras provide high-resolution video, allowing for clearer and more detailed images. This is particularly important for security purposes, as it enables users to closely monitor an area and recognize important details. |
| Remote Access | One of the major advantages of IP cameras is the ability to access the live video feed from anywhere with an internet connection. This means that users can view the camera footage on their smartphones, tablets, or computers, providing convenient and flexible monitoring options. |
| Scalability | IP cameras are highly scalable, which means that additional cameras can be easily added to an existing system without the need for complex wiring. This allows for greater flexibility in expanding an existing security network. |
| Advanced Functions | IP cameras often come equipped with advanced features such as motion detection, night vision, and two-way audio. These functions enhance the overall security capabilities of the camera, making it more effective in detecting and deterring intruders. |
| Cost-Effective | While the initial cost of IP cameras may be higher compared to analog cameras, they offer long-term cost savings. IP cameras utilize existing network infrastructure, eliminating the need for additional cabling and reducing installation costs. Additionally, IP cameras can be easily integrated with other security systems, reducing the need for separate monitoring equipment. |
Overall, IP cameras provide superior video quality, remote accessibility, scalability, advanced features, and cost-effective solutions for home security. Understanding the benefits of IP cameras can help users make an informed decision when it comes to choosing a surveillance system for their Xfinity home security.
Setting up your IP camera with Xfinity Home Security
Viewing your IP camera on Xfinity Home Security is a straightforward process that requires a few simple steps. Follow the guide below to set up your IP camera with Xfinity Home Security.
- First, make sure you have a compatible IP camera that is supported by Xfinity Home Security. Check the list of supported cameras on the Xfinity website, or contact customer support for assistance.
- Next, connect your IP camera to your home network. This usually involves plugging the camera into a power source and connecting it to your router using an Ethernet cable.
- Once your IP camera is connected to the network, open the Xfinity Home Security app on your smartphone or tablet.
- In the app, navigate to the camera settings or devices section. Here you should find an option to add a new camera.
- Select the option to add a new camera and follow the on-screen instructions to complete the setup process.
- You may be prompted to enter the IP address or scan a QR code from your camera to automatically configure it with Xfinity Home Security. Follow the instructions provided.
- Once your IP camera is successfully added to Xfinity Home Security, you should be able to view the live feed from your camera in the app.
- Additionally, you may have the option to configure motion detection, recording schedules, and other camera settings through the Xfinity Home Security app.
That’s it! You have now successfully set up your IP camera with Xfinity Home Security. Enjoy monitoring your camera’s feed and keeping your home secure.
Accessing your IP camera remotely
If you have an IP camera connected to your Xfinity home security system, you can access it remotely using a computer or mobile device. Here are the steps to view your IP camera remotely:
- Ensure that your IP camera is properly connected and configured on your Xfinity home security system.
- Check that your IP camera has an assigned IP address. You can usually find this information in the camera’s settings or user manual.
- Open a web browser on your computer or mobile device and enter the IP address of your camera in the address bar. Make sure to include the necessary port number if required.
- You may be prompted to enter a username and password to access the camera’s interface. Provide the correct credentials to proceed.
- Once you have successfully logged in, you should be able to see a live feed from your IP camera. Depending on the camera model and software, you may have additional options for recording, adjusting settings, and viewing past footage.
Keep in mind that accessing your IP camera remotely may require additional setup, such as port forwarding or using a dynamic DNS service, depending on your network configuration. It is recommended to consult the camera’s user manual or contact Xfinity support for further assistance.

Troubleshooting common issues with IP cameras on Xfinity Home Security
If you are having trouble viewing your IP camera on Xfinity Home Security, there are a few common issues that you can troubleshoot to get it working properly. Here are some steps you can follow:
- Check the camera power and connection: Ensure that your camera is properly powered and connected to the network. Make sure the power cable is securely plugged in and that the Ethernet cable is connected to your router.
- Verify network connectivity: Ensure that your camera is properly connected to your home network. You can do this by checking if the camera’s IP address is correctly assigned and if it can communicate with other devices on the network.
- Check the camera settings: Make sure that the camera settings, such as the IP address, subnet mask, and gateway, are configured correctly. These settings should match the network settings of your Xfinity Home Security system.
- Restart your camera and Xfinity Home Security system: Sometimes, a simple restart can solve connectivity issues. Try restarting both your camera and the Xfinity Home Security system to see if it resolves the problem.
- Update camera firmware: Check if there are any firmware updates available for your camera. Updating the firmware can fix bugs and improve performance, which might help resolve any issues.
- Check your Xfinity Home Security app: Ensure that you have the latest version of the Xfinity Home Security app installed on your mobile device. Sometimes, outdated apps can cause compatibility issues with IP cameras.
- Verify firewall and port forwarding settings: If you have a firewall or port forwarding enabled on your router, make sure that the necessary ports for your IP camera are open. Consult your router’s manual or contact your internet service provider for specific instructions.
- Contact Xfinity Home Security support: If you have tried all the above steps and are still experiencing issues, it’s recommended to reach out to Xfinity Home Security support for further assistance. They can provide specialized troubleshooting steps or determine if there might be an issue with your equipment.
By following these troubleshooting steps, you should be able to resolve common issues and view your IP camera on your Xfinity Home Security system.
Integrating your IP camera with other smart home devices
If you have an IP camera as part of your Xfinity Home Security system, integrating it with other smart home devices can enhance the overall functionality and convenience of your setup. By connecting your IP camera to other devices, you can create a seamless and interconnected smart home experience. Here are a few ways to integrate your IP camera with other smart home devices:
1. Connect your IP camera to a smart display
One way to integrate your IP camera with other smart home devices is by connecting it to a smart display such as Amazon Echo Show or Google Nest Hub. By doing so, you can easily view the live feed from your IP camera directly on the display without the need for a separate device. This allows you to keep an eye on your surroundings with just a voice command.
2. Integrate your IP camera with smart home security systems
Another option is to integrate your IP camera with a smart home security system. This allows you to incorporate the camera’s live feed into your existing security setup, giving you a comprehensive view of your home’s security at all times. With this integration, you can receive notifications, set up motion detection alerts, and even control your camera through the security system’s app.

Overall, integrating your IP camera with other smart home devices can provide you with added functionality and convenience. Whether it’s connecting it to a smart display or integrating it with a smart home security system, the possibilities are endless. Take advantage of these options to create a truly interconnected and cohesive smart home ecosystem.
Enhancing the security of your IP camera on Xfinity Home Security
When it comes to securing your IP camera on Xfinity Home Security, there are a few steps you can take to enhance its security and protect your privacy. By following these guidelines, you can ensure that only authorized individuals have access to your camera feed and minimize the risk of unauthorized access or hacking.
- Change the default username and password: One of the most important steps to secure your IP camera is to change the default username and password. Many cameras come with default login credentials that are easily accessible to anyone. By changing the login information to something unique and hard to guess, you significantly decrease the chances of unauthorized access.
- Keep your camera firmware up to date: Manufacturers often release firmware updates for IP cameras to address security vulnerabilities and improve performance. Keeping your camera’s firmware up to date ensures that you have the latest security patches and safeguards against potential exploits.
- Create a strong Wi-Fi password: The security of your IP camera is directly linked to the security of your Wi-Fi network. Be sure to set a strong and unique Wi-Fi password that is not easily guessable. Avoid using common passwords or personal information that can be easily obtained.
- Enable encryption: Encryption is an essential feature that helps protect the privacy of your camera feed. Most IP cameras support encryption protocols such as WPA2-PSK that provide a secure connection between your camera and the Xfinity Home Security system.
- Restrict access to the camera: Take advantage of the access control features provided by the camera and the Xfinity Home Security system. Only grant access to trusted individuals or devices, and regularly review and update the list of authorized users.
- Disable unnecessary features: Some IP cameras come with additional features that may not be essential for your security needs but can introduce potential security risks. Disable any unnecessary features or services to minimize the attack surface of your camera.
- Regularly monitor and review camera activity: Stay vigilant and regularly monitor the activity of your IP camera. Check for any suspicious behavior or unauthorized access attempts. If you notice anything out of the ordinary, take immediate action to secure your camera and investigate the incident further.
By implementing these security measures, you can greatly enhance the security of your IP camera on Xfinity Home Security and have peace of mind knowing that your camera feed is protected.
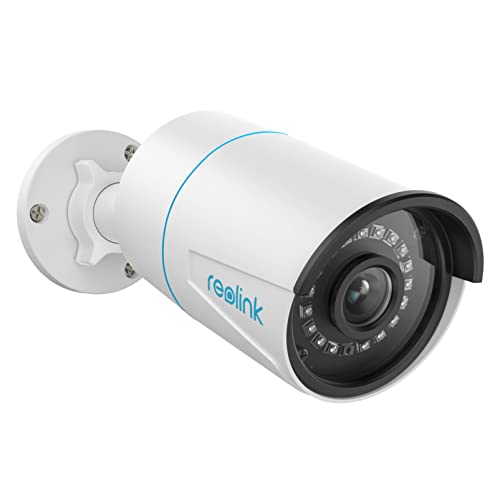
Recommended IP camera models for Xfinity Home Security
When it comes to setting up your Xfinity Home Security, having the right IP camera is crucial. With the right camera, you can monitor your property and keep an eye on your loved ones from anywhere, anytime. Here are some recommended IP camera models that are compatible with Xfinity Home Security:
1. Amcrest ProHD Indoor Camera:
The Amcrest ProHD Indoor Camera offers high-definition video streaming and recording, allowing you to capture every detail with clarity. With its sleek design and easy installation, it’s a popular choice among Xfinity Home Security users. The camera also comes with two-way audio, night vision, and motion detection capabilities.

2. Arlo Pro Wireless Camera System:
The Arlo Pro Wireless Camera System is a versatile option for Xfinity Home Security. It offers wireless connectivity, making it easy to install in any location. The camera features rechargeable batteries, two-way audio, and advanced motion detection technology. It also has a weather-resistant design, making it perfect for outdoor use.
3. Nest Cam Indoor Security Camera:
The Nest Cam Indoor Security Camera is a highly rated option that provides high-quality video streaming and recording. It offers a wide-angle lens, two-way audio, and night vision capabilities. With its sleek design, the camera seamlessly blends into any home decor.
4. Ring Stick Up Cam:
The Ring Stick Up Cam is another popular choice for Xfinity Home Security. It offers versatile mounting options, allowing you to place it anywhere inside or outside your property. The camera features two-way audio, motion detection, and night vision. It also integrates with other Ring devices for a comprehensive security system.
These are just a few recommended IP camera models that are compatible with Xfinity Home Security. Before making a purchase, it’s important to check the compatibility with the Xfinity Home Security system and ensure that it meets your specific requirements.
FAQ,
Can I view multiple IP cameras on Xfinity Home Security?
Yes, you can view multiple IP cameras on Xfinity Home Security. The exact number of cameras you can view will depend on the subscription plan you have with Xfinity Home Security. However, even with the basic plan, you should be able to view and monitor multiple IP cameras simultaneously.


