
The natural phenomenon of a solar or lunar eclipse is a breathtaking sight that many photographers strive to capture. With the advancement of digital camera technology, it has become easier than ever to document the celestial wonder with stunning clarity and precision. In this article, we will explore the steps to successfully view and photograph an eclipse using a digital camera.
Step 1: Proper Equipment
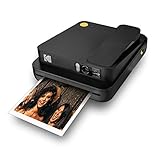
Before setting out to view an eclipse with your digital camera, it is crucial to have the right equipment. Make sure you have a camera with manual settings, as automatic cameras may struggle to capture the unique lighting conditions of an eclipse. Additionally, invest in a sturdy tripod to ensure stability during longer exposure times.
Pro Tip: A telephoto lens will allow you to capture close-up shots of the eclipse, highlighting the intricate details and adding a wow factor to your photographs.
Step 2: Research and Preparation
Prior to the eclipse event, conduct thorough research on its timing and location. Find a spot with a clear view of the sky and minimal light pollution. It is advisable to scout the location beforehand to familiarize yourself with the surroundings and plan the best vantage points for photography.
Pro Tip: Use smartphone apps or online resources to determine the exact duration and path of the eclipse, enabling you to plan your shots accordingly.
Step 3: Camera Settings
Set your camera to manual mode and adjust the ISO, shutter speed, and aperture settings. Start with an ISO of 100 or 200 to minimize noise, and choose a relatively fast shutter speed to prevent overexposure. Experiment with different aperture settings to achieve the desired depth of field and sharpness.
Pro Tip: Consider bracketing your shots, capturing multiple exposures at various settings to ensure you capture the perfect shot.

By following these steps and experimenting with different techniques, you will be well on your way to capturing breathtaking photos of a solar or lunar eclipse with your digital camera. Remember to practice patience and enjoy the magical experience that only such a celestial event can offer.
Preparing for the Eclipse
Viewing a solar eclipse can be an exciting and unforgettable experience. However, it is essential to take proper precautions to protect your eyes and your camera equipment. Here are some important steps to follow before the eclipse:
1. Research the Eclipse: Find out the exact time and location of the eclipse in your area. Knowing this information will help you plan your viewing strategy and determine the best camera settings.
2. Purchase a Solar Filter: Invest in a solar filter for your camera lens. This filter will protect your eyes and your camera sensor from the harmful effects of direct sunlight during the eclipse. Make sure the filter is suitable for your camera model and lens size.
3. Test your Equipment: Check your camera and lenses to ensure they are in good working condition. Practice using your camera’s manual controls and experiment with different exposure settings. Familiarize yourself with the camera’s timer and bracketing functions if available.
4. Find a Suitable Location: Look for an unobstructed location that offers a clear view of the sky. Avoid areas with tall buildings, trees, or other obstructions that may interfere with your view of the eclipse. Consider finding a spot with an interesting foreground element to add depth to your photos.
5. Prepare for the Weather: Check the weather forecast for the day of the eclipse. Dress appropriately for the conditions and bring any necessary accessories such as sunscreen, a hat, and water. Be ready to adjust your camera settings based on the lighting conditions during the eclipse.
6. Charge your Batteries: Make sure your camera batteries are fully charged. It’s a good idea to carry spare batteries as well. The eclipse can last for several minutes, and you don’t want to run out of power at a crucial moment.
7. Practice Patience: The eclipse is a rare event, so take your time and enjoy the experience. Don’t rush through capturing photos or viewing the phenomenon. Take breaks to relax and appreciate the unique beauty of the eclipse.
By following these steps, you can ensure that you are well-prepared to view and capture the eclipse with your digital camera. Remember to never look directly at the sun without proper eye protection, and enjoy this awe-inspiring celestial event!

Choosing the Right Camera
When it comes to viewing an eclipse with a digital camera, it’s important to choose the right camera for the job. Here are some factors to consider:
Megapixel Count
The megapixel count of a camera determines the resolution and image quality. For capturing the details of an eclipse, it’s recommended to use a camera with a higher megapixel count to ensure clear and crisp images.
Optical Zoom
Having a camera with a good optical zoom is essential for getting a closer view of the eclipse. Look for cameras with a higher optical zoom capability, as this will allow you to capture the eclipse in greater detail.
ISO Sensitivity
The ISO sensitivity of a camera determines its ability to capture images in low-light conditions. Since the eclipse may occur during a partially darkened sky, it’s important to choose a camera with a high ISO sensitivity to ensure proper exposure and clear images.
Shutter Speed
The shutter speed of a camera affects how long the camera’s sensor is exposed to light. To capture the movements and transitions of an eclipse, it’s recommended to select a camera with adjustable shutter speed settings. This will allow you to experiment and find the perfect shutter speed for capturing the eclipse’s unique moments.
By considering these factors, you can choose the right camera for viewing an eclipse and capture stunning images that will preserve the awe-inspiring beauty of this natural phenomenon.
Setting up Your Camera
Before viewing the eclipse with your digital camera, it is important to properly set up your camera to ensure the best possible results. Here are some steps to follow:
1. Research and prepare
Before the eclipse, do some research to understand the timing and path of the eclipse. Find a suitable location with a clear view of the sun and ensure you have the necessary protective eyewear to safely view the eclipse.

2. Use a tripod
Using a tripod is highly recommended, as it helps stabilize your camera and reduces the risk of blurry photos. Mount your camera securely on the tripod and ensure it is level and secured tightly.
3. Adjust the settings
Take the time to adjust the settings on your camera. Although each camera is different, here are some general guidelines:
- Set the ISO to a low value, such as 100 or 200, to reduce image noise.
- Switch to manual mode to have full control over the exposure settings.
- Set the aperture to a small value, such as f/8 or f/11, to ensure a larger depth of field.
- Adjust the shutter speed based on the lighting conditions. During the eclipse, you may need to experiment with longer exposures.
4. Use a solar filter
Never look directly at the sun through your camera’s viewfinder. Attach a solar filter over your camera lens to protect your eyes and camera sensor from the intense light. Make sure the filter is specifically designed for solar viewing to ensure proper protection.
5. Practice and test
Before the eclipse, practice taking photos of the sun to familiarize yourself with your camera settings and achieve the desired results. Take test shots to ensure proper exposure and framing.
By following these steps and preparing your camera ahead of time, you will be ready to capture stunning images of the eclipse with your digital camera.

Using Filters for Safety
During a solar eclipse, it is crucial to protect your eyes and your camera’s sensor from the harmful rays of the sun. One way to do this is by using filters specifically designed for eclipse viewing.
- Ensure that the filter you choose is made for solar observation. Regular camera filters or sunglasses are not sufficient for this purpose.
- Choose a filter with a high Optical Density (OD). A minimum of OD 5 is generally recommended for safe viewing.
- Make sure the filter is undamaged and free from scratches or defects. Even a small imperfection can result in serious damage to your eyes or camera.
- Always place the filter over the camera lens or viewfinder when looking at the sun. Never attempt to view the eclipse directly through the camera without the proper filter.
Remember to follow the manufacturer’s instructions when using the filter, as different filters may have specific usage guidelines.
By using appropriate filters for safety, you can enjoy viewing and capturing the beauty of a solar eclipse without risking harm to yourself or your camera’s sensor.
Understanding Exposure Settings
When viewing an eclipse with a digital camera, it is important to understand how exposure settings work in order to capture the event correctly. Exposure settings control the amount of light that enters the camera and can greatly impact the quality of the images you take.
1. Shutter Speed
The shutter speed determines the length of time the camera’s sensor is exposed to light. When shooting an eclipse, it is important to use a fast shutter speed to avoid overexposure. Start with a shutter speed of around 1/1000s and adjust as necessary based on the brightness of the eclipse and your desired exposure.
2. Aperture
The aperture refers to the size of the camera’s lens opening. A wider aperture lets in more light, while a smaller aperture lets in less. When photographing an eclipse, use a narrow aperture (a higher f-number) to prevent overexposure and to capture crisp details. Experiment with different aperture settings to find the right balance between brightness and detail.
3. ISO
ISO determines the camera’s sensitivity to light. A higher ISO setting allows you to shoot in low-light conditions, but it can also introduce noise or graininess to the image. When shooting an eclipse, use a low ISO setting (around ISO 100 or lower) to minimize noise and maintain image quality.
It is also important to note that when photographing an eclipse, you should never look directly at the sun through your camera’s viewfinder. This can damage your eyes. Instead, use the camera’s live view or an LCD screen to frame and focus your shots.
Positioning Yourself for the Eclipse
Positioning yourself in the right place during a solar eclipse is essential to capture the event with your digital camera. Here are some important factors to consider:
- Research the Path: Find out the exact path of the eclipse and where it will be visible. This will help you determine the best location to position yourself.
- Check the Weather: Check the weather forecast for the day of the eclipse. Clear skies will provide the best viewing conditions for photography.
- Choose an Open Space: Find an open space with a clear view of the sky. Avoid areas with tall buildings or trees that may obstruct your view.
- Avoid Light Pollution: Light pollution can affect the quality of your photos. Look for a location away from city lights or other sources of light pollution.
- Consider Safety: Ensure that you choose a safe location to view the eclipse. Avoid standing on unstable surfaces or places with potential hazards.
- Arrive Early: Arrive at your chosen location well before the start of the eclipse in order to set up your camera equipment and get yourself ready.
By considering these factors and positioning yourself in the right place, you will be able to capture the eclipse beautifully with your digital camera.
Capturing the Eclipse
To capture the beauty of a solar eclipse with a digital camera, there are a few important factors to consider:
1. Safety first: Before attempting to photograph an eclipse, it is crucial to protect your eyes and camera equipment. Use solar eclipse glasses to avoid damaging your eyes, and use a solar filter on your camera lens to protect it.
2. Equipment: To capture the eclipse, you will need a digital camera with manual settings. Make sure your camera is fully charged and that you have enough memory card space to store your photos.
3. Planning: Research the exact time and location of the eclipse to determine the best vantage point. Scout the location beforehand to find a spot with a clear view of the sky.
4. Settings: Set your camera to manual mode to have full control over the exposure settings. Start with a low ISO setting (around 100) to reduce noise, and adjust the aperture and shutter speed accordingly. Experiment with different settings to achieve the desired effect.
5. Composition: Consider incorporating interesting elements in your composition, such as buildings, landscapes, or people, to add depth and perspective to your eclipse photos.
6. Focus: Focus your camera manually on a distant object before the eclipse begins. Once the eclipse starts, switch your camera to manual focus mode and do not adjust it throughout the process.
7. Timing: Start taking photos a few minutes before the total eclipse to capture the gradual changes in lighting. During the total eclipse phase, capture a variety of shots, including wide-angle views, close-ups of the sun’s corona, and any interesting phenomena that may occur.
8. Experiment: Don’t be afraid to experiment with different techniques and settings to achieve unique and creative shots. Try using a tripod or remote shutter release for added stability and sharpness.
9. Post-processing: After the eclipse, import your photos to a computer and review them carefully. Make adjustments to exposure, contrast, and color if necessary. Crop or edit the photos to enhance the overall effect.
10. Enjoy the experience: Remember to take a moment to appreciate the rarity and beauty of a solar eclipse. While capturing amazing photos is rewarding, don’t forget to simply enjoy the awe-inspiring event.
Reviewing and Editing Your Photos
After capturing photos during an eclipse with your digital camera, it’s important to review and edit them to ensure they are of the highest quality. Follow these steps to make the most out of your eclipse photography:
1. Transfer the photos: Connect your camera to your computer using a USB cable or remove the memory card and insert it into a card reader. Transfer the photos to your computer for easier viewing and editing.
2. Organize the photos: Create a dedicated folder on your computer to store all your eclipse photos. This will make it easier to locate and manage your files.
3. Review the photos: Open your preferred photo viewing software and browse through the photos taken during the eclipse. Look for images that are properly exposed, sharp, and capture the desired moments. Delete any photos that are blurry, overexposed, or poorly composed.
4. Enhance the photos: If you feel that certain photos require adjustment, consider using photo editing software to enhance them. You can adjust the brightness, contrast, saturation, and sharpness of the photos to bring out the best in them. Be cautious not to overdo the editing, as it can result in unrealistic-looking photos.
5. Crop and resize: Use the cropping tool to remove any distracting elements from the photos and improve their composition. Additionally, you can resize the photos to a smaller resolution if you plan on sharing them online or printing them in smaller formats.
6. Save your edited photos: Once you are satisfied with the changes made to your photos, save them in a separate folder or overwrite the original files. This will ensure that you have a copy of the edited versions.
By following these steps, you can review and edit your eclipse photos to create stunning and memorable images of this extraordinary celestial event.
Sharing Your Eclipse Photos
Capturing stunning photos of a solar eclipse with your digital camera is an incredible achievement. Now, it’s time to share those breathtaking moments with your friends, family, and the online community. Here are a few ways you can share your eclipse photos:
1. Social Media Platforms
The easiest way to share your eclipse photos is through popular social media platforms such as Facebook, Instagram, and Twitter. Simply upload your photos to your profile and add relevant hashtags, such as #eclipse2021 or #solareclipse, to reach a wider audience. You can also join eclipse-focused communities and groups to connect with fellow enthusiasts.
2. Online Photography Communities
Showcase your eclipse photos on dedicated online photography communities like 500px, Flickr, or Pixoto. These platforms allow you to create your profile, upload high-quality images, and engage with a community of photographers. Don’t forget to add descriptive captions and tags to make your photos more discoverable.
3. Personal Blog or Website
If you’re passionate about photography and have your own blog or website, consider creating a dedicated post or gallery to display your eclipse photos. This allows you to have complete control over how your images are presented and provides a space for you to share your personal experience and thoughts alongside the photos.
4. Photo Contests and Exhibitions
Look out for local or online photo contests and exhibitions that specifically focus on celestial events or nature photography. Participating in these competitions can not only give you a chance to win prizes but also provide exposure for your eclipse photos. Check the guidelines and submission requirements carefully before entering.
5. Print and Share
If you prefer the traditional way of sharing photos, consider printing your eclipse photos and displaying them at home or in your office. You can also create personalized photo albums or cards to gift to your loved ones, allowing them to share in the beauty of the eclipse.
Remember to always respect copyright laws and give proper credit when sharing your eclipse photos publicly. It’s also a good idea to back up your digital files to ensure their preservation for years to come.
Tips and Tricks for Better Results
When it comes to viewing an eclipse with a digital camera, there are a few tips and tricks that can help you capture better results. Whether you are a professional photographer or a beginner, these tips will come in handy:
1. Use a Solar Filter
Before attempting to photograph an eclipse, it is important to protect your camera and lens from the intense sunlight by using a solar filter. This will prevent any damage to your camera and allow you to capture clear and detailed images of the eclipse.
2. Use Manual Mode
Using manual mode on your camera will give you more control over the settings and allow you to adjust them according to the lighting conditions during the eclipse. It is recommended to set your aperture between f/8 and f/16, your ISO to the lowest setting, and your shutter speed to a fast setting to freeze any movement.
3. Use a Tripod
Using a tripod will help keep your camera steady and prevent any blur in your images. This is especially important during an eclipse, as the exposure times may be longer than normal. Make sure to use a sturdy tripod and secure your camera properly.
4. Practice Beforehand
Before the actual eclipse, it is a good idea to practice taking photos of the sun to familiarize yourself with the settings and equipment. This will help you find the right exposure and focus settings, and ensure that you are ready when the eclipse happens.
5. Experiment with Different Compositions
Eclipses offer a unique opportunity to capture stunning and creative shots. Don’t be afraid to experiment with different compositions and angles to capture the beauty of the eclipse. Try including elements like landscapes or silhouettes to add interest to your photos.
By following these tips and tricks, you will be able to capture incredible images of the eclipse with your digital camera. Remember to always prioritize safety and protect your eyes and camera when viewing or photographing an eclipse.
Question-answer:
What equipment do I need to view an eclipse with a digital camera?
To view an eclipse with a digital camera, you will need a digital camera with manual settings, a tripod, and a solar filter. The solar filter is important as it will protect your camera sensor from the sun’s intense light.
How do I protect my camera when photographing an eclipse?
To protect your camera when photographing an eclipse, you should use a solar filter to block the sun’s intense light from reaching your camera sensor. This will prevent any potential damage to your camera. Additionally, it is recommended to use a tripod to keep your camera stable during the long exposure times that are typically needed for capturing an eclipse.
What camera settings should I use to photograph an eclipse?
When photographing an eclipse, it is best to set your camera to manual mode so you have full control over the settings. Use a low ISO setting to reduce noise, a small aperture to increase depth of field, and a faster shutter speed to prevent overexposure. You can also experiment with different settings to achieve the desired effect, but be sure to use a solar filter to protect your camera from the sun’s intense light.


