
Having a home security camera system is essential for keeping your property and loved ones safe. But what good is the system if you can’t view the camera feed from your iPhone? Fortunately, with the advancement of technology, it is now easier than ever to monitor your home security cameras using your iPhone.
Whether you’re at work, running errands, or on vacation, you can always keep an eye on what’s happening at home. There are several methods to view your home security camera on your iPhone, and in this article, we will guide you through the process.
One of the simplest ways to view your home security camera on your iPhone is by downloading the corresponding app provided by the camera manufacturer. Most manufacturers have their own dedicated apps that allow you to connect and view your cameras remotely. These apps are usually available for free on the App Store and can be easily downloaded and installed on your iPhone.
Once you have downloaded the app, you will need to connect it to your home security camera system. This can typically be done by entering the IP address or scanning a QR code that is provided with the camera. Once connected, you should be able to view the camera feed on your iPhone, as well as control any other features or settings that the app offers.
Step-by-step guide to view home security camera on iPhone
Keeping an eye on your home security camera is now easier than ever with the power of your iPhone. Follow these simple steps to view your home security camera on your iPhone:
Step 1: Install the camera app
Search for your specific home security camera brand in the App Store and install the camera app on your iPhone. Make sure to download the app that matches your camera model.
Step 2: Connect your camera to your Wi-Fi network
Follow the instructions provided with your camera to connect it to your Wi-Fi network. Make sure you have a strong and stable Wi-Fi connection to ensure smooth viewing on your iPhone.
Step 3: Launch the camera app

Once your camera is connected to the Wi-Fi network, open the camera app on your iPhone. You may need to create an account and log in using your camera’s credentials.
Step 4: Add your camera to the app
Tap on the “Add Camera” or similar option in the app and follow the instructions to set up your camera within the app. This typically involves scanning a QR code or manually entering the camera’s unique identifier.
Step 5: View your camera
After successfully adding your camera to the app, you should see a live feed from your camera on your iPhone’s screen. You can now view and control your home security camera from anywhere, as long as you have an internet connection on your iPhone.

Note: Some camera apps may offer additional features such as motion detection, two-way audio, and recording capabilities. Make sure to explore the app settings and features for a fully optimized home security camera experience on your iPhone.
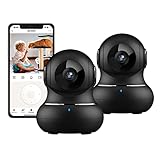
Choose a compatible security camera
When it comes to viewing home security camera footage on your iPhone, it’s important to choose a camera that is compatible with iOS devices. This ensures that you can easily access the footage on your smartphone and monitor your home’s security while you’re on the go. Here are a few factors to consider when selecting a compatible security camera:
1. iOS compatibility:
Make sure the security camera you choose is specifically designed to work with iOS devices. This means it should have a dedicated iOS app that you can download from the App Store. Check the camera’s specifications or the manufacturer’s website to ensure that it supports iOS devices.
2. App functionality:
Check the features and functionality offered by the camera’s dedicated iOS app. The app should allow you to easily view live video feeds and recorded footage from your security camera. Look for features like push notifications for motion detection, two-way audio communication, and the ability to remotely control camera settings.
Additionally, the app should have a user-friendly interface that is easy to navigate, making it simple for you to access the camera’s feed and adjust settings as needed.

3. Camera resolution and features:
Consider the resolution and features offered by the security camera itself. Look for a camera with a high-definition resolution, such as 1080p or higher, to ensure clear and detailed video footage. Additionally, features like night vision, motion detection, and pan-tilt-zoom (PTZ) capabilities can enhance the camera’s effectiveness.
If you’re planning to install the camera outdoors, make sure it is weatherproof and designed to withstand outdoor conditions. Some cameras may also offer additional features like built-in sirens or two-factor authentication for added security.
By choosing a security camera that is compatible with your iPhone, you can easily view your home’s footage and stay connected to your home’s security system wherever you are. Keep these factors in mind when making your purchase to ensure that you select the best camera for your needs.
Install the security camera app
To view your home security camera on your iPhone, you will need to install the corresponding security camera app. The app allows you to connect and monitor your security camera system remotely from your iPhone.
To install the security camera app, follow these steps:

- Open the App Store on your iPhone.
- Tap on the Search tab and enter the name of the security camera app.
- From the search results, select the correct app and tap on the Get or Install button.
- If prompted, enter your Apple ID and password to download and install the app.
- Once the app is installed, you can find it on your home screen. Tap on the app to open it.
- Follow the app’s on-screen instructions to set up and connect your security camera system to your iPhone.
- After you have successfully connected your security cameras to the app, you will be able to view the live video feed and access other features and settings.
It is important to note that each security camera system may have its own dedicated app, so make sure to install the app that is compatible with your specific camera system.
Connect the security camera to your home Wi-Fi network
Once you have installed your home security camera, the next step is to connect it to your home Wi-Fi network. Follow these steps to ensure a successful connection:
Step 1: Access your camera’s settings
Open the security camera’s app on your iPhone and navigate to the settings menu. Look for an option related to network settings or Wi-Fi configuration.
Step 2: Connect to your Wi-Fi network
In the settings menu, select the option to connect the camera to your Wi-Fi network. You will likely be prompted to enter your Wi-Fi network name (SSID) and password. Make sure to enter the correct information to establish a connection.
Step 3: Confirm the connection
After entering the Wi-Fi network details, the camera will attempt to connect to your network. Wait for a confirmation message or indicator that the connection has been successful. This may take a few moments.

Step 4: Test the connection
To ensure the camera is connected to your home Wi-Fi network, you can test the connection by checking the live video feed on your iPhone. Open the app and navigate to the live view section to confirm that the camera is transmitting video footage.
It’s important to note that some security cameras may have slightly different setup processes. Refer to the camera’s user manual or the manufacturer’s website for specific instructions if needed.
| Step | Description |
|---|---|
| Step 1 | Access your camera’s settings |
| Step 2 | Connect to your Wi-Fi network |
| Step 3 | Confirm the connection |
| Step 4 | Test the connection |
Add the security camera to the app
If you want to view the home security camera on your iPhone, you need to add the camera to the app that you have installed on your device. Follow these steps to successfully add the camera:
1. Launch the app: Open the security camera app on your iPhone. If you haven’t installed one yet, go to the App Store and download a compatible app.
2. Access camera settings: Look for the settings option within the app. It is usually represented by a gear or wrench icon. Tap on this icon to access the camera settings.

3. Add a new camera: Inside the settings menu, you should find an option to add a new camera. This option might be labeled differently depending on the app you are using. Look for terms like “Add camera” or “Add device” and tap on it.
4. Configure camera details: Once you have selected the option to add a new camera, you will be asked to provide some details. This includes the camera’s name, model, IP address, and login credentials. Make sure to enter the correct information to establish a successful connection.
5. Connect to the camera: After entering the camera details, tap on the “Connect” or “Save” button to establish a connection between your iPhone and the security camera. The app will try to connect to the camera using the provided information.
6. View the camera feed: Once the connection is established, you should be able to view the live feed from your home security camera on your iPhone. You can usually access the camera feed by tapping on the camera’s name or thumbnail within the app.
By following these steps, you can easily add the security camera to the app on your iPhone and start monitoring your home from anywhere with ease.
Set up remote viewing on your iPhone
If you want to be able to view your home security camera footage on your iPhone, you’ll need to set up remote viewing. Remote viewing allows you to access the camera feed from anywhere, as long as you have an internet connection. Here’s how you can set up remote viewing on your iPhone:
| Step 1: | Download the app |
| Step 2: | Open the app and create an account (if required) |
| Step 3: | Add your camera to the app |
| Step 4: | Connect your camera to the internet |
| Step 5: | Enable remote viewing on your camera |
| Step 6: | Set up port forwarding on your router |
| Step 7: | Configure the app to connect to your camera remotely |
| Step 8: | Test the remote viewing feature |
Once you’ve completed these steps, you should be able to view your home security camera on your iPhone from anywhere at any time. Just open the app and connect to your camera remotely.
Access and view your security camera on your iPhone
If you have security cameras installed in your home, it is important to be able to access and view the camera feeds, even when you are away from home. With an iPhone, you can easily view your security camera from anywhere using a few simple steps.
1. Install the security camera app on your iPhone. There are many different apps available in the App Store that are compatible with various security camera systems. Choose an app that is compatible with your specific brand and model of camera.
2. Open the app and log in to your camera system. You will need to enter your username and password to access your camera feeds. If you have multiple cameras, you will be able to view all of them through the app.
3. Once you are logged in, you will see a list of all your cameras. Tap on the camera you want to view to open its live feed.
4. You may need to adjust the camera settings to optimize the view. Most camera apps will allow you to pan, tilt, and zoom the camera to get a better view of the area you want to monitor.
5. To view your security camera remotely, ensure that your iPhone is connected to the internet. This can be done through Wi-Fi or cellular data. Without an internet connection, you will not be able to access your camera feeds from your iPhone.
6. Once your iPhone is connected to the internet, you can view your security camera feeds by simply opening the app and logging in.
By following these steps, you can easily access and view your security camera on your iPhone from anywhere, providing you with peace of mind and allowing you to monitor your home even when you are away.
FAQ
How can I view my home security camera on my iPhone?
You can view your home security camera on your iPhone by downloading the app provided by the camera manufacturer and connecting it to your camera’s system via Wi-Fi or a mobile network. Once connected, you can access the live feed and control the camera’s settings through the app.
Do I need to have an internet connection to view my home security camera on my iPhone?
Yes, you need to have an internet connection to view your home security camera on your iPhone. You can connect to either Wi-Fi or a mobile network to access the camera’s live feed and settings through the camera’s app.
Can I view multiple home security cameras on my iPhone?
Yes, you can view multiple home security cameras on your iPhone. Most camera apps allow you to add and manage multiple cameras within the same app. You can switch between cameras to view their respective live feeds and control their settings.
Is it possible to view my home security camera on my iPhone remotely?
Yes, it is possible to view your home security camera on your iPhone remotely. As long as both your camera and iPhone have an internet connection, you can access the camera’s live feed and settings from anywhere in the world using the camera’s app. This allows you to keep an eye on your home even when you are away.


