
Apple TV is a popular media streaming device that allows you to access various entertainment content on your television. But did you know that you can also use it to view your security cameras?
With the increasing need for home security, being able to monitor your security cameras on your Apple TV can provide you with peace of mind and added convenience. Whether you want to keep an eye on your home or monitor your business, accessing your security cameras on Apple TV is a simple and effective solution.
There are different ways to view security cameras on Apple TV, depending on the type of security camera system you have. Some models require a specific app to be installed on your Apple TV, while others offer built-in support for Apple TV. In either case, the process is straightforward and can be done in just a few steps.
In this article, we will guide you through the process of setting up and accessing your security cameras on Apple TV. Whether you have a wired or wireless security camera system, we will provide you with the necessary information to view your cameras on the big screen using Apple TV.
Steps to Connect Security Cameras to Apple TV
Connecting your security cameras to your Apple TV allows you to monitor your surveillance footage on a larger screen and have a better view of your surroundings. Here are the steps to connect your security cameras to Apple TV:
Step 1: Ensure Compatibility
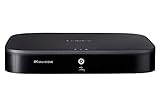
Before connecting your security cameras to Apple TV, make sure that the cameras are compatible with the device. Check the camera’s specifications or consult the manufacturer’s documentation to confirm compatibility.
Step 2: Install the Camera App
Install the compatible camera app on your Apple TV. You can download the app from the App Store directly on the device. Make sure to sign in to the Apple TV with your Apple ID for a seamless installation process.
Step 3: Connect the Cameras
Connect the security cameras to your Apple TV using the provided cables or wireless connection. Follow the manufacturer’s instructions to establish a secure and stable connection.
Step 4: Set Up the Camera App
Open the installed camera app on your Apple TV. Follow the setup wizard to configure the app and connect it to your security cameras. You may need to enter the camera’s IP address or scan a QR code to establish the connection. Make sure to follow the on-screen instructions carefully.
Step 5: Access the Cameras on Apple TV
Once the setup is complete, you can now access and view your security cameras on your Apple TV. Use the remote control or voice commands to navigate through the camera app and select the desired camera feed. Enjoy monitoring your surveillance footage on a larger screen!

By following these steps, you can easily connect your security cameras to Apple TV and enhance your surveillance experience. Stay vigilant and keep an eye on your property with the convenience of Apple TV.
Configure Your Security Cameras
Before you can view your security cameras on your Apple TV, you need to configure them properly. Follow these steps to get started:
1. Connect your security cameras to a network
Make sure your security cameras are connected to the same network as your Apple TV. This can usually be done by connecting the cameras to your router using an Ethernet cable or by connecting them to a Wi-Fi network.
2. Install the compatible security camera app on your Apple TV
Search for and install a security camera app from the App Store on your Apple TV. Make sure to choose an app that is compatible with your specific security camera brand and model.
3. Launch the security camera app on your Apple TV
Once the app is installed, launch it on your Apple TV. You may need to sign in or create an account depending on the app you are using.
4. Add your security cameras to the app
Follow the on-screen instructions provided by the app to add your security cameras to the app. This usually involves scanning a QR code or entering the camera’s serial number and login credentials.
5. Configure camera settings
After adding your cameras, you may need to configure some settings such as video quality, motion detection sensitivity, and recording options. Refer to the app’s user manual or help section for instructions on how to customize these settings.
Once you have completed these steps, you should be able to view your security camera feeds on your Apple TV. Simply select the app from the Apple TV home screen and navigate through the camera feeds using the app’s interface.
It’s important to note that the specific steps and options may vary depending on the brand and model of your security cameras as well as the app you are using. Refer to the user manual or support documentation provided by the camera manufacturer and app developer for detailed instructions.
Now you can enjoy the convenience of monitoring your security cameras directly from your Apple TV! Remember to regularly check for software updates for both your cameras and the app to ensure optimal performance and security.

Connect Your Security Cameras to a Network
Connecting your security cameras to a network is an essential step in being able to view them on your Apple TV. By connecting your cameras to a network, you can access their live feed and recorded footage from your Apple TV, providing you with peace of mind and enhanced security.
Step 1: Choose a Network
The first step in connecting your security cameras to a network is to choose a network to connect them to. This can be your home Wi-Fi network or a dedicated network specifically for your security cameras. Make sure that the network you choose has a stable internet connection to ensure smooth and uninterrupted video streaming.
Step 2: Connect Cameras to the Network
Once you have chosen a network, you need to connect your security cameras to it. Most modern security cameras support Wi-Fi connectivity, allowing you to easily connect them to your network. Follow the instructions provided by the camera manufacturer to connect each camera to your chosen network.
Step 3: Configure IP Addresses
After connecting your security cameras to the network, you may need to configure their IP addresses. Each camera should have a unique IP address to ensure proper identification and communication within the network. Consult the camera’s user manual or manufacturer’s website for instructions on how to configure IP addresses for your specific model.
Step 4: Set Up Port Forwarding
In order to view your security cameras on your Apple TV, you will need to set up port forwarding on your router. Port forwarding allows external devices, such as your Apple TV, to access your cameras over the internet. Refer to your router’s user manual or contact your internet service provider for assistance with setting up port forwarding.

Step 5: Install the Viewing App on Apple TV
Before you can view your security cameras on your Apple TV, you need to install the appropriate viewing app. Check the App Store on your Apple TV for security camera viewing apps that are compatible with your camera brand. Download and install the app, then follow the on-screen instructions to set up the connection between the app and your cameras.
| Tip |
|---|
| Ensure that your security camera system is compatible with Apple TV before proceeding with the steps outlined above. Some older camera models may not have the necessary technology to connect to and stream on an Apple TV. |
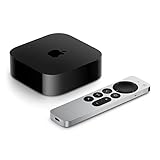
Set Up Apple TV
Setting up your Apple TV is quick and easy. Just follow these steps:
Step 1: Connect Your Apple TV to Your Television
Using an HDMI cable, connect one end to the HDMI port on your Apple TV and the other end to an available HDMI port on your television.
Step 2: Connect Your Apple TV to Power
Plug the power cord into the power port on your Apple TV and connect it to a power source.
Step 3: Set Up Wi-Fi
Using the Apple TV remote, navigate to the settings menu and select “Network.” Choose your Wi-Fi network from the list and enter the password if prompted.
Step 4: Sign In with Your Apple ID
Follow the on-screen instructions to sign in with your Apple ID. If you don’t have an Apple ID, you can create one at this stage.
Step 5: Set Up Siri and HomeKit
If you want to use Siri on your Apple TV and integrate it with your HomeKit devices, follow the prompts to set up Siri and HomeKit.
Step 6: Customize Your Settings
Personalize your Apple TV experience by customizing settings such as display and audio preferences, screen savers, and more.
Step 7: Install Apps
Visit the App Store on your Apple TV and install any apps you want to use, such as security camera viewing apps.
Step 8: Connect Your Security Cameras
Once you have installed the appropriate app for your security cameras, follow the app’s instructions to connect and view your cameras on your Apple TV.
That’s it! You’re now ready to view your security cameras on your Apple TV.
Install Security Camera App on Apple TV
To view your security cameras on your Apple TV, you will need to install a security camera app specifically designed for Apple TV. Follow these steps to install the app:
Step 1: Turn on your Apple TV and navigate to the App Store on the home screen.
Step 2: In the App Store, search for a security camera app that is compatible with Apple TV.
Step 3: Select the app that meets your requirements and click on the Get button to start the installation process.
Step 4: Wait for the app to finish downloading and installing on your Apple TV.
Step 5: Once the installation is complete, navigate back to the home screen and locate the newly installed app.
Step 6: Launch the security camera app on your Apple TV.
Step 7: Follow the on-screen instructions to connect your security cameras to the app. This may involve entering the IP address or unique credentials for each camera.
Step 8: After successfully connecting your security cameras, you should be able to view the live feed and access the various features provided by the app on your Apple TV.
By installing a security camera app on your Apple TV, you can conveniently monitor your cameras and ensure the security of your property right from your TV screen.
Add Cameras to the App
To view security cameras on your Apple TV, you need to add them to the corresponding app. Here are the steps to add cameras to the app:
| Step | Description |
|---|---|
| Step 1 | Launch the security camera app on your Apple TV. |
| Step 2 | Look for the option to add cameras and select it. |
| Step 3 | Enter the required information for each camera, such as the camera name and IP address. |
| Step 4 | If necessary, enter the username and password for the camera. |
| Step 5 | Save the camera settings and repeat the process for each camera you want to add. |
| Step 6 | Once all cameras are added, you should see a list of available cameras in the app. |
| Step 7 | Select a camera from the list to view its live feed on your Apple TV. |
By following these steps, you can easily add your security cameras to the app on your Apple TV and have access to the live feeds right from your TV screen. Ensure that you have the necessary details for each camera to complete the setup process smoothly.
View Security Cameras on Apple TV
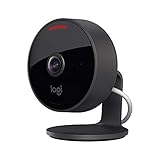
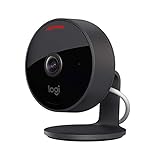
Apple TV is a great device for streaming movies, TV shows, and even for viewing your security cameras. If you have security cameras installed in your home or office, you can easily access their live feed on your Apple TV. This allows you to keep an eye on your property and ensure its safety, all from the comfort of your couch.
To view your security cameras on Apple TV, you will need to have a compatible security camera system and a few simple setup steps. Here’s how:
1. Check Compatibility
Before you can view your security cameras on Apple TV, make sure that your security camera system is compatible with Apple TV. Most modern security camera systems offer apps that are specifically designed for Apple TV. Check your security camera system’s documentation or website to see if they have an Apple TV app available.
2. Install the App
If your security camera system is compatible, install the app on your Apple TV. The specific installation process may vary depending on the app and your security camera system. Typically, you can find the app in the App Store on your Apple TV. Search for the name of your security camera system or browse the “Video” category to find the app.
3. Connect to Your Cameras
Once the app is installed, open it on your Apple TV. Follow the on-screen instructions to connect your security cameras to the app. This usually involves entering the IP address or scanning a QR code from your security camera system. Make sure your security cameras are properly connected to your network and powered on.
4. View the Live Feed
After you have successfully connected your security cameras to the app, you should be able to view the live feed on your Apple TV. Use the remote or controller for your Apple TV to navigate the app and access the different camera views. You may be able to switch between cameras, zoom in or out, or adjust other settings depending on the features of your security camera system.
5. Additional Features
Some security camera apps for Apple TV offer additional features and functionality. For example, you may be able to view recorded footage, set up motion detection alerts, or even control your security camera system through the app. Explore the app’s settings and options to make the most out of your security camera system.
By following these steps, you can easily view your security cameras on your Apple TV and enjoy the convenience of monitoring your property from your TV screen. Whether you are at home or away, you can have peace of mind knowing that your security cameras are accessible at your fingertips.
Troubleshooting Tips
If you are having trouble viewing security cameras on your Apple TV, try these troubleshooting tips to resolve the issue:
1. Check your internet connection: Ensure that your Apple TV is connected to a stable internet connection. If the connection is weak or intermittent, it may cause issues with accessing your security cameras.
2. Verify camera compatibility: Make sure that your security cameras are compatible with Apple TV. Check the specifications and requirements of your cameras to ensure that they are supported.
3. Update software: Ensure that both your Apple TV and security camera software are up to date. Outdated software can sometimes cause compatibility issues and prevent the cameras from being viewed on your TV.
4. Restart devices: Try restarting both your Apple TV and security cameras. Sometimes, a simple restart can resolve any temporary glitches or conflicts that may be impacting the camera viewing.
5. Reinstall the app: If you are using a specific app to view your security cameras on Apple TV, try uninstalling and reinstalling the app. This can help resolve any software-related issues that may be interfering with the camera viewing.
6. Reset settings: As a last resort, you can try resetting your Apple TV to its factory settings. Keep in mind that this will erase all your data and settings, so make sure to backup any important information before proceeding.
If you have tried all these troubleshooting tips and are still unable to view your security cameras on Apple TV, it may be necessary to reach out to the manufacturer or support team for further assistance.
FAQ,
Can I view security cameras on my Apple TV?
Yes, you can view security cameras on your Apple TV using various methods. One way is to install a dedicated security camera app on your Apple TV and connect it to your security camera system. Another option is to use a streaming device or a smart TV that supports security camera apps.
What apps can I use to view security cameras on Apple TV?
There are several apps available on the App Store that allow you to view security cameras on your Apple TV. Some popular options include “HomeCam” and “iCamViewer”. These apps offer different features and compatibility with different security camera systems, so it’s important to choose one that matches your specific needs.
How do I connect my security cameras to my Apple TV?
The process of connecting your security cameras to your Apple TV will depend on the specific security camera system you have. In general, you’ll need to connect your security cameras to your home network and configure them to be accessible through remote viewing. Once the cameras are set up, you can use a compatible security camera app on your Apple TV to connect to them and view the live video feeds.
Can I view multiple security cameras at the same time on Apple TV?
Yes, you can view multiple security cameras at the same time on your Apple TV if your security camera app supports it. Some apps allow you to create a custom grid view or split-screen view that displays multiple camera feeds simultaneously. This can be useful if you have multiple cameras installed in different areas of your property and want to keep an eye on them all at once.
Is it possible to control my security cameras using Apple TV?
Yes, it is possible to control some security cameras using your Apple TV. However, this capability will depend on the specific security camera system you have and the features supported by the app you are using. Some apps allow you to pan, tilt, and zoom the cameras directly from your Apple TV interface, while others may only provide basic viewing functionality. It’s important to check the app’s description or contact the manufacturer to determine the level of control you can have.


