
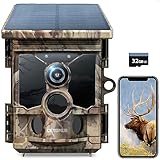
Trail cameras are a great way to capture wildlife in their natural habitat. Whether you’re a hunter, a nature lover, or a wildlife researcher, trail cameras can provide valuable insights into the behavior and movement patterns of animals. But once you’ve set up your trail camera and taken some incredible photos, how do you view them on your iPhone?
Fortunately, there are several ways to view trail camera photos on your iPhone. One option is to use a microSD card reader that connects directly to your iPhone’s Lightning port. Simply remove the microSD card from your trail camera, insert it into the card reader, and plug it into your iPhone. From there, you can use the built-in Photos app to view and organize your trail camera photos.
If you don’t have a microSD card reader, another option is to use a trail camera app that allows you to wirelessly transfer and view your photos. Some trail cameras come with their own dedicated app, while others can be paired with third-party apps. These apps typically use Bluetooth or Wi-Fi to connect your iPhone to the trail camera, allowing you to download and view your photos directly on your device.
When viewing your trail camera photos on your iPhone, it’s important to have a good image viewing app that can handle large files and display high-resolution images. The built-in Photos app on your iPhone is a good option, but there are also many third-party apps available for download from the App Store that offer additional features and editing capabilities.
With the ability to view trail camera photos on your iPhone, you can easily share your amazing wildlife captures with friends, family, and colleagues. So whether you’re a professional photographer or simply enjoy observing nature, using your iPhone to view trail camera photos is a convenient and efficient way to enjoy and document your outdoor adventures.

Connect trail camera to iPhone
To view trail camera photos on your iPhone, you will need to connect your iPhone to the trail camera using an appropriate cable or adapter. Here is a step-by-step guide on how to do it:
- Check if your trail camera and iPhone are compatible. Make sure your trail camera has a USB port or supports wireless connection.
- If your trail camera has a USB port, you can use a USB-to-Lightning cable or a USB-to-USB-C cable to connect it to your iPhone, depending on the type of charging port your iPhone has.
- If your trail camera supports wireless connection, you will need to enable the Wi-Fi or Bluetooth feature on both the trail camera and your iPhone. Follow the instructions in your trail camera’s user manual to set up the wireless connection.
- Once the connection is established, open the default photos app on your iPhone. You should see a notification or prompt asking you to import the photos from the trail camera.
- Follow the on-screen instructions to import the photos. You may be able to select specific photos or import them all at once.
- Wait for the import process to complete. This may take some time depending on the number and size of the photos.
- Once the import is finished, you should be able to view the trail camera photos in your iPhone’s photos app. You can organize, edit, and share the photos as you would with any other photos on your iPhone.
By following these steps, you can easily connect your trail camera to your iPhone and view the photos captured by the trail camera directly on your iPhone. This allows for convenient and immediate access to your trail camera photos without the need for a separate computer or device.
Download trail camera app
To view trail camera photos on your iPhone, you need to download a trail camera app. These apps are specifically designed to help you access and manage your trail camera photos directly on your mobile device. Here are some popular trail camera apps that you can download from the App Store:
| App Name | Description | Rating |
|---|---|---|
| Trail Camera Viewer | This app allows you to view, organize, and share your trail camera photos. It supports various file formats and offers features like zoom, slideshow, and file management. | 4.5 |
| CamBuddy Pro | CamBuddy Pro offers wireless photo transfer from your trail camera to your iPhone. It also provides advanced camera control features and a built-in photo editor. | 4.3 |
| Stealth Cam Remote | This app allows you to remotely control your Stealth trail camera and view photos in real-time. You can adjust camera settings, download photos, and even receive push notifications for motion detection. | 4.2 |
Once you choose the trail camera app that suits your needs, simply search for it in the App Store and click on the “Download” button. After the app is installed, you can open it, connect your iPhone to your trail camera, and start viewing and managing your trail camera photos on your iPhone with ease!
Open trail camera app
Once you have installed the trail camera app on your iPhone, you can easily open it by following these simple steps:

- Locate the app icon on your home screen. It usually has a unique logo to help you identify it easily.
- Tap on the app icon to launch it. The app will start loading and initializing.
- Depending on the app, you may be required to log in to your account. If so, enter your username and password and tap on the login button.
- Once you have successfully logged in, you will be taken to the main interface of the app.
- From the main interface, you can explore various features and options offered by the trail camera app.
Now that the app is open, you can access your trail camera photos and videos, customize settings, view live feeds, and perform other actions depending on the functionality provided by the app.
Select photos to view
Once you have transferred the trail camera photos to your iPhone, you can select the photos you want to view. This allows you to easily browse through your images and choose the ones you are most interested in.
To select photos to view on your iPhone:
- Open the photo viewing app on your iPhone. This could be the default Photos app or a third-party app that you have installed.
- Navigate to the folder or album where the trail camera photos are stored.
- Scroll through the photos and tap on the ones you want to view. You can tap on multiple photos to select them.
- Once you have selected the photos you want to view, you can tap on a “View” or “Open” button to open them in full screen mode. Alternatively, you may be able to simply swipe left or right to view the selected photos.
- While viewing the selected photos, you can zoom in or out by pinching or spreading your fingers on the screen. You can also swipe left or right to move between photos.
- If you want to deselect a photo, simply tap on it again to remove the selection.
By following these steps, you can easily select and view the trail camera photos on your iPhone, allowing you to enjoy and share your wildlife captures. Don’t forget to save or share your favorite photos for future reference!
Zoom in and out
When viewing trail camera photos on your iPhone, you can zoom in and out to get a closer look at the details or to see the bigger picture. Here’s how to do it:

- Open the photo you want to view on your iPhone.
- Place your thumb and index finger on the screen.
- Pinch your fingers together to zoom out or spread them apart to zoom in.
- Continue adjusting the zoom level until you are satisfied with the view.
- To reset the zoom level, double-tap on the screen.
Zooming in and out can be especially useful when you want to examine the details of a specific animal or object in the photo, or when you want to see the entire scene captured by the trail camera. Experiment with different zoom levels to find the one that best suits your viewing preferences.
Share trail camera photos
Once you have successfully viewed your trail camera photos on your iPhone, you may want to share them with others. Sharing trail camera photos is a great way to showcase the wildlife you have captured and enhance the overall experience of your outdoor adventures. Here are a few methods you can use to easily share your trail camera photos:
1. Social media platforms
Social media platforms such as Facebook, Instagram, and Twitter provide an easy and convenient way to share your trail camera photos. Simply select the photo you want to share, open the corresponding social media app on your iPhone, and follow the app’s instructions for uploading and posting the photo. You can add captions, tags, and hashtags to make your photos more discoverable by others who share your interest in wildlife photography. This way, you can connect with fellow outdoor enthusiasts and receive feedback and appreciation for your captured moments.
2. Messaging apps
If you want to share your trail camera photos with a specific individual or group, you can use messaging apps like WhatsApp, Messenger, or iMessage. These apps allow you to send the photo directly to the desired recipient, who will be able to view and download it. This is a great way to share a memorable wildlife encounter with friends, family, or fellow photographers who may appreciate the unique moments you have captured.
Note: Remember to respect the privacy of others and obtain their consent before sharing any photos that include identifiable individuals.

By utilizing these methods, you can easily share your trail camera photos with others and spread the joy and excitement of your wildlife adventures. Whether you choose to share them on social media platforms or through messaging apps, don’t forget to enjoy the interactions, conversations, and connections that stem from your shared trail camera photos.
Delete unwanted photos
If you have a lot of trail camera photos on your iPhone, you may find that it’s starting to take up valuable space. To free up some storage and keep your photo gallery organized, you can delete any unwanted photos from your device. Here are the steps to delete unwanted photos:
- Open the “Photos” app on your iPhone.
- Navigate to the album that contains the trail camera photos you want to delete.
- Tap on the “Select” option in the top-right corner of the screen.
- Select the photos that you want to delete by tapping on them. You can select multiple photos at once by tapping on each one.
- Once you’ve selected all the photos you want to delete, tap on the trash bin icon located at the bottom-right corner of the screen.
- A confirmation message will appear, asking if you want to delete the selected photos. Tap on “Delete Photo(s)” to confirm.
- The selected photos will be deleted from your iPhone, freeing up storage space.
By following these steps, you can easily delete any unwanted trail camera photos from your iPhone and make room for new ones. Remember to double-check your selection before deleting the photos, as deleted photos cannot be recovered.
Adjust photo settings
When viewing trail camera photos on your iPhone, it’s important to make sure that the photo settings are adjusted properly to ensure the best viewing experience. Here are some tips to help you adjust the photo settings:
- Brightness: Adjust the brightness level of your iPhone to ensure that the photos are easy to see. You can do this by going to the Settings app on your iPhone and selecting Display & Brightness.
- Zoom: If you want to zoom in on a specific part of a photo, you can use the pinch-to-zoom gesture on your iPhone. This will allow you to get a closer look at any details that may be important.
- Orientation: Make sure that the orientation of your iPhone is correct when viewing trail camera photos. You can lock the orientation by swiping up from the bottom of the screen to open the Control Center, and then tapping the lock icon.
- Contrast: Adjust the contrast level of your iPhone to enhance the visibility of the photos. This can be done through various photo editing apps available on the App Store.
By adjusting these photo settings, you can ensure that you have the best viewing experience when looking at trail camera photos on your iPhone.
Troubleshooting tips
If you are experiencing issues while trying to view trail camera photos on your iPhone, here are some troubleshooting tips that may help:
1. Check the camera’s compatibility:
Make sure that your trail camera is compatible with the iPhone. Some trail cameras may require specific apps or software in order to view the photos on your iPhone.
2. Ensure a stable connection:
Make sure that your iPhone is connected to a stable internet connection. Slow or unstable internet connections can cause issues when trying to view photos from a trail camera.

3. Update your iPhone:
Ensure that your iPhone’s operating system is up to date. Updates often include bug fixes and improvements that can help resolve any compatibility issues.
4. Reset the trail camera:
If you are still unable to view the photos, try resetting your trail camera. This can often resolve any technical issues and reset the camera’s settings to default.
5. Contact customer support:

If none of the above steps work, it may be helpful to contact the customer support of the trail camera manufacturer. They may be able to provide you with specific troubleshooting tips or offer solutions to your issue.
By following these troubleshooting tips, you can hopefully resolve any issues you may be experiencing and successfully view trail camera photos on your iPhone.
FAQ
Can I view trail camera photos on my iPhone?
Yes, you can view trail camera photos on your iPhone. There are several methods you can use to transfer the photos from the trail camera to your iPhone.
How do I transfer trail camera photos to my iPhone?
To transfer trail camera photos to your iPhone, you can use a USB cable or a memory card reader. Connect the trail camera to your computer using the USB cable or insert the memory card into the reader. Then, transfer the photos to your computer and sync them to your iPhone using iTunes or iCloud.
Is there an app for viewing trail camera photos on iPhone?
Yes, there are several apps available on the App Store that allow you to view and manage trail camera photos on your iPhone. Some popular apps include Bushnell Trophy Cam and Stealth Cam Remote.

Can I view and edit trail camera photos on my iPhone?
Yes, you can not only view but also edit trail camera photos on your iPhone. There are many photo editing apps available on the App Store that offer a wide range of editing features, such as cropping, adjusting brightness and contrast, applying filters, and more.
Do I need an internet connection to view trail camera photos on my iPhone?
No, you do not need an internet connection to view trail camera photos on your iPhone. Once the photos are transferred to your iPhone, you can view them offline.


