
With the advance in technology, it is now easier than ever to keep tabs on your home or office security, no matter where you are. If you have a security camera system installed, you can conveniently view live footage directly from your iPhone. Whether you want to check on your property while you’re away, keep an eye on your baby, or monitor your employees, accessing your security camera remotely has become a breeze.
Thanks to the wide range of mobile applications available, you can easily connect your security camera system to your iPhone. These apps allow you to access your camera’s feed with just a few taps on your phone. You can view live videos, watch playback footage, adjust camera settings, and even receive real-time alerts and notifications.
Setting up your security camera on your iPhone is a straightforward process. First, you will need to download the mobile app provided by your camera system manufacturer. Once installed, open the app and follow the on-screen instructions to connect your camera system to your iPhone. Make sure your camera system and iPhone are connected to the same Wi-Fi network for a seamless connection.
Once your camera system is successfully paired with your iPhone, you can start using the app to view your security camera’s feed. Take advantage of the various features available in the app, such as zooming in on specific areas, adjusting camera angles, or recording videos directly to your phone. With just a few simple steps, you can ensure peace of mind by having access to your security camera system directly from your iPhone.
How to Set Up Security Camera on iPhone
If you want to set up a security camera on your iPhone, you can follow these simple steps:
- Choose a security camera that is compatible with your iPhone. Make sure to check the specifications and requirements before making a purchase.
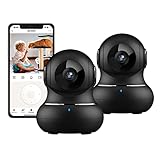
- Download and install the security camera app on your iPhone from the App Store. There are numerous apps available, such as Arlo, Ring, and Wyze, which offer easy setup and access to your security camera.
- Connect the security camera to your home Wi-Fi network using the provided instructions. Generally, you will need to plug the camera into a power source and use the app to connect it to your network.
- Launch the security camera app on your iPhone and sign in or create a new account.
- Follow the app’s instructions to add your security camera to the app. This usually involves scanning a QR code or entering the camera’s unique identifier.
- Once your camera is added, you can customize its settings and preferences through the app. This includes enabling motion detection, adjusting video quality, and setting up notifications.
- To view your security camera on your iPhone, simply open the app and select the camera you want to view. You will be able to see the live feed from your camera, playback recorded footage, and perform other actions depending on the features of your specific app and camera.
Setting up a security camera on your iPhone is a straightforward process that allows you to monitor your home or business remotely. By following these steps and using a compatible camera and app, you can have peace of mind knowing that you can view your security camera feed whenever and wherever you need to ensure your safety and security.
Choosing the Right Security Camera
When it comes to selecting a security camera for your home or business, it’s important to consider a few key factors. With so many options available on the market, choosing the right camera can make a significant difference in the effectiveness of your security system.
One of the first things to consider is your specific security needs. Are you looking for an indoor or outdoor camera? Do you need a camera with night vision capabilities? Will you be monitoring a large area or just a small space? Understanding your requirements will help you narrow down the options and find a camera that meets your specific needs.
Another important factor to consider is the resolution of the camera. The resolution determines the quality of the video footage, so it’s essential to choose a camera with a resolution that will provide clear and detailed images. HD cameras are becoming increasingly popular, as they offer high-quality video that makes it easier to identify suspects or objects.
In addition to resolution, it’s crucial to consider the camera’s field of view. The field of view refers to the area that the camera can cover. If you need to monitor a large area, a camera with a wide field of view is necessary. On the other hand, if you want to focus on a specific area, a camera with a narrow field of view may be more suitable.

Furthermore, consider the camera’s connectivity options. Many security cameras now offer wireless connectivity, allowing you to view live video footage on your iPhone or other mobile devices. This wireless connection provides flexibility and convenience, as you can monitor your camera from anywhere with an internet connection.
Lastly, don’t forget to consider the camera’s storage options. Some cameras come with built-in storage, while others require you to use a separate device or cloud storage. Think about your preferences and how much storage capacity you require before making a decision.
In conclusion, choosing the right security camera involves considering various factors such as your specific needs, resolution, field of view, connectivity options, and storage. By taking these factors into account, you can select a camera that will provide you with the best level of security and peace of mind.
Installing the Security Camera
Before you can view your security camera on your iPhone, you need to ensure that the camera is properly installed and connected to your home network. Follow these steps to install your security camera:
1. Choose the Right Location
Start by selecting a strategic location for your security camera. Consider areas where potential intruders are likely to pass by, such as entrances, driveways, or backyards. Ensure that the camera is mounted at a height that provides a clear view of the area you want to monitor.

2. Mount the Camera
Once you have chosen the location, mount the camera securely using the appropriate mounting bracket or screws. Make sure the camera is positioned correctly, facing the desired area.
3. Connect to Power
Next, connect the camera to a power source using the included power adapter or cable. Ensure that the power source is reliable and readily accessible.
4. Connect to Your Home Network
The next step is to connect the security camera to your home network. Depending on the camera model, you may need to use an Ethernet cable or connect wirelessly using Wi-Fi. Follow the manufacturer’s instructions to establish a connection.
5. Set Up the Camera
After connecting to your home network, you’ll need to set up the camera using the manufacturer’s app or software. This typically involves creating an account, naming the camera, and setting preferences such as motion detection or notifications.
Once your security camera is properly installed and set up, you can now proceed to view the camera feed on your iPhone using the recommended app or software.

Connecting the Camera to Wi-Fi
Once you have installed your security camera and have it set up in the desired location, the next step is to connect it to the Wi-Fi network. Follow these steps to connect your camera to Wi-Fi:
- Locate the camera’s Wi-Fi setup option: Each camera has a different way to connect to Wi-Fi, so refer to the user manual or manufacturer’s website for specific instructions. In most cases, you will need to access the camera’s settings through a mobile app or a web browser.
- Access the camera’s settings: Open the mobile app or enter the camera’s IP address in a web browser to access the settings.
- Find the Wi-Fi setup option: Look for an option that allows you to connect the camera to Wi-Fi. This option may be called “Network Setup,” “Wi-Fi Settings,” or something similar.
- Select your Wi-Fi network: Once you have accessed the Wi-Fi setup option, you will see a list of available Wi-Fi networks. Select your network from the list.
- Enter your Wi-Fi password: After selecting your network, you will be prompted to enter your Wi-Fi password. Make sure to enter the correct password to establish a successful connection.
- Wait for the connection: After entering the password, the camera will attempt to connect to your Wi-Fi network. It may take a few moments for the camera to establish a connection.
- Confirm the connection: Once the camera is successfully connected to Wi-Fi, it will display a confirmation message or indicator. Check the camera’s settings or user manual to ensure the connection was successful.
After connecting your security camera to Wi-Fi, you will be able to remotely monitor the camera’s feed on your iPhone using the designated mobile app or software. Make sure to keep your Wi-Fi network password secure to prevent unauthorized access to your camera feed.
Downloading the Security Camera App
To view your security camera on your iPhone, you’ll first need to download a compatible security camera app from the App Store. Follow these steps to get started:
Step 1: Open the App Store
On your iPhone, locate and tap the App Store icon on your home screen. The App Store icon is represented by a blue ‘A’ symbol on a white background.
Step 2: Search for the App
In the App Store, tap the search icon at the bottom right corner of the screen. This will bring up the search bar.

Type in the name of your security camera app in the search bar and tap the ‘Search’ button on the keyboard. Make sure to enter the correct app name to ensure you find the right one.
Step 3: Select and Download the App
Review the search results and select the security camera app you want to download. Look for the app with the best ratings and reviews.
Tap the ‘Get’ button next to the app’s name. The button will change to ‘Install’. Tap ‘Install’ and wait for the app to download and install on your iPhone. You may be prompted to enter your Apple ID password or use Touch ID/Face ID for verification.
Once the app has finished downloading, its icon will appear on your home screen. You can now proceed to the next steps to set up your security camera app and connect it to your camera.
Note: It’s important to ensure that the security camera app you choose is compatible with your specific brand and model of security camera. Check the app’s requirements and compatibility information before downloading to avoid any compatibility issues.

Creating an Account
In order to view your security camera on your iPhone, you will need to create an account with the camera’s manufacturer or the app you are using. Here are the steps to create an account:
- Open the app on your iPhone and navigate to the account creation page.
- Tap on the “Sign Up” or “Create an Account” button.
- Enter your email address and create a strong password.
- Follow any additional prompts to verify your email address.
- Once your account is created, log in using your email and password.
It’s important to choose a strong password that includes a combination of uppercase and lowercase letters, numbers, and special characters to ensure the security of your account. Additionally, make sure to verify your email address to activate your account.
Once you have created your account and logged in, you can start adding your security cameras to the app. This typically involves scanning a QR code on the camera or entering the camera’s unique identifier.
By creating an account, you will have access to your security camera’s live feed, as well as any recorded footage, on your iPhone anytime and anywhere.
Adding the Camera to the App
Once you have downloaded and installed the security camera app on your iPhone, you can begin the process of adding your camera to the app for viewing. Follow the steps below to add your camera:

1. Open the security camera app on your iPhone.
2. Navigate to the settings section of the app.
3. Look for an option that says “Add Camera” or “Add Device”. This option may be located in a different place depending on the app you are using, so you may need to explore the settings menu to find it.
4. Tap on the “Add Camera” or “Add Device” option.
5. The app will prompt you to enter the necessary information for adding your camera. This may include the camera’s IP address, username, and password.
6. Enter the required information and tap on the “Add” or “Save” button.
7. The app will attempt to connect to your camera and add it to your list of devices. This process may take a few moments.
8. Once the camera has been successfully added, it will appear in the app’s device list. You can tap on the camera’s name to view its live feed.
If you have multiple cameras, repeat the above steps for each camera you want to add to the app. After adding all your cameras, you will be able to easily view the live feeds from your security cameras on your iPhone.
Configuring Camera Settings
Before viewing your security camera on your iPhone, it is important to configure the camera settings to ensure optimal performance and security. Here are some steps to help you get started:
| Step | Description |
|---|---|
| 1 | Connect your security camera to a power source and make sure it is properly connected to your network. |
| 2 | Access the camera’s settings interface. This can typically be done by entering the camera’s IP address in a web browser. |
| 3 | Set up a username and password for the camera. This will help secure your camera and prevent unauthorized access. |
| 4 | Configure the camera’s network settings. Make sure it is connected to your local Wi-Fi network or Ethernet. You may need to enter the network name (SSID) and password. |
| 5 | Adjust the camera’s video resolution, frame rate, and other settings according to your preferences. Higher resolution and frame rates may provide better quality footage, but they may also require more bandwidth and storage space. |
| 6 | Enable motion detection or other relevant features if desired. This can help conserve storage space and send notifications to your iPhone when motion is detected. |
| 7 | Finally, save the settings and exit the camera’s interface. |
After configuring the camera settings, you should be ready to view your security camera on your iPhone using the appropriate app or web interface. Make sure to follow the instructions provided by the camera manufacturer or app developer for the specific steps to view your camera’s live feed on your iPhone.
Viewing the Security Camera on Your iPhone
With the advancement of technology, it has become easier than ever to monitor your security cameras on your iPhone. Whether you want to keep an eye on your home, office, or any other property, accessing your security camera feed on your iPhone can provide you with peace of mind.
Here are the steps to view your security camera on your iPhone:
Step 1: Install the App
To begin, you need to install the corresponding security camera app on your iPhone. Check the instructions provided by the camera manufacturer to find the correct app for your specific model. Download and install the app from the App Store.
Step 2: Connect to the Camera
Once the app is installed, open it and follow the on-screen instructions to connect your iPhone to the security camera. This usually involves connecting your iPhone to the same Wi-Fi network as the camera and entering the camera’s unique credentials.
Step 3: Access the Camera Feed
Once connected, you should be able to access the camera feed on your iPhone. This can usually be done by tapping on the camera icon or selecting the camera from a list of available devices in the app. Depending on the app and camera model, you may be able to view multiple camera feeds at once.
It is important to note that some security camera apps offer additional features such as motion detection, two-way audio, and the ability to view recorded footage. Explore the app’s settings and features to make the most out of your security camera experience.
Now, you can conveniently monitor your security cameras on your iPhone from anywhere with an internet connection. Whether you are at home, work, or on-the-go, stay connected and ensure the safety of your property with the help of your iPhone and security camera app.
FAQ
How can I view my security camera footage on my iPhone?
To view your security camera footage on your iPhone, you will need to download a compatible security camera app from the App Store. Once you have installed the app, you can connect your security camera to your iPhone using the app’s instructions. This usually involves scanning a QR code or entering the camera’s IP address. Once connected, you will be able to view the live feed from your security camera on your iPhone.
Is it possible to view multiple security cameras on my iPhone?
Yes, it is possible to view multiple security cameras on your iPhone. Most security camera apps allow you to add and view multiple cameras within the same app. You can usually switch between cameras with a simple tap on the app’s interface. Some apps may have limitations on the number of cameras that can be added, so it’s important to check the app’s specifications before purchasing or installing an app.
Can I view my security camera footage remotely on my iPhone?
Yes, you can view your security camera footage remotely on your iPhone. Many security camera systems offer remote access features, allowing you to view your cameras from anywhere with an internet connection. To set up remote viewing, you will need to configure your security camera system to connect to the internet and install the corresponding app on your iPhone. Once set up, you will be able to access and view your security camera footage from your iPhone, no matter where you are.


