
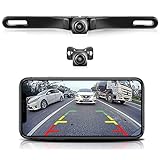
In today’s fast-paced world, security is of utmost importance. With the increasing popularity of wireless cameras, it has become easier than ever to monitor your surroundings from anywhere. Whether you want to keep an eye on your home or office while you are away, or simply want to ensure the safety of your loved ones, being able to watch wireless cameras on your iPhone can provide you with peace of mind.
Watching wireless cameras on your iPhone is a straightforward process that can be accomplished with just a few steps. Firstly, you need to ensure that your wireless camera is compatible with your iPhone. Most wireless cameras come with their dedicated mobile apps, which can be downloaded from the App Store. These apps allow you to connect your camera to your iPhone and access its live feed.
To get started, you will need to install the app for your specific wireless camera. Once the app is installed, open it on your iPhone and follow the on-screen instructions to set up your camera. This usually involves connecting your camera to your home Wi-Fi network and creating an account. Once your camera is set up, you can access its live feed by launching the app on your iPhone.
When accessing the live feed of your wireless camera on your iPhone, you may have additional features at your disposal. Depending on the app, you may be able to control the camera’s movement, zoom in and out, and even enable two-way audio. These features can further enhance your ability to monitor your surroundings and interact with your camera remotely.
Overall, being able to watch wireless cameras on your iPhone provides you with the flexibility and convenience of monitoring your surroundings anytime, anywhere. Whether you are concerned about the security of your home, office, or loved ones, having this capability at your fingertips can help you stay connected and informed. So, grab your iPhone, set up your wireless camera, and enjoy the peace of mind that comes with knowing you can always keep an eye on what matters most to you.

Setting up a wireless camera system
Setting up a wireless camera system can provide you with added security and peace of mind. Whether you want to monitor your home, office, or any other location, a wireless camera system allows you to keep an eye on things remotely using your iPhone. Here are the steps to set up a wireless camera system:
1. Choose the right wireless camera: Start by selecting a wireless camera that meets your needs. Consider factors such as resolution, field of view, night vision capabilities, and connectivity options.
2. Install the wireless camera: Follow the manufacturer’s instructions to install the wireless camera in the desired location. Ensure that it is securely mounted and has a clear view of the area you want to monitor.
3. Connect the camera to a power source: Most wireless cameras require a power source. Make sure to connect the camera to a nearby electrical outlet or use a battery-powered option if available.
4. Connect the camera to your Wi-Fi network: Use the camera’s companion app or follow the instructions provided to connect the camera to your Wi-Fi network. This allows the camera to send live footage and alerts to your iPhone.
5. Download and set up the camera app: Search for the companion app for your camera in the App Store and download it onto your iPhone. Follow the app’s instructions to create an account and add the camera to your app.
6. Access the camera on your iPhone: Launch the camera app on your iPhone and sign in to your account. You should now be able to view the live feed from your wireless camera, control its settings, and receive alerts if motion is detected.
7. Customize your camera settings: Explore the app to customize your camera settings according to your preferences. You can adjust features such as motion sensitivity, recording schedules, and notifications.
8. Position additional cameras: If you have multiple cameras, repeat the steps above to set up and connect them to your iPhone. This allows you to monitor different areas simultaneously.
9. Test and troubleshoot: Once everything is set up, test the cameras to ensure they are working correctly. If you encounter any issues, consult the camera’s manual or contact customer support for assistance.
By following these steps, you can successfully set up a wireless camera system and watch the live feed on your iPhone for added security and convenience.
Connecting the wireless camera to your iPhone
Watching the live feed from your wireless camera on your iPhone is an easy process that requires just a few simple steps. Here’s how you can connect your wireless camera to your iPhone:
Step 1: Download the camera’s mobile app
Start by downloading the mobile app for your wireless camera onto your iPhone from the App Store. Make sure you search for the specific app related to your camera brand and model.
Step 2: Ensure your camera is connected to Wi-Fi
Next, make sure that your wireless camera is connected to Wi-Fi. You can do this by going into the settings on your camera and choosing the Wi-Fi network you want to connect to. Follow the instructions provided by the camera’s user manual to complete the connection.
Step 3: Launch the camera app on your iPhone
Once your camera is connected to Wi-Fi, launch the camera app on your iPhone. You should see an option to add a camera or connect to a camera in the app. Tap on this option.

Step 4: Add your camera to the app
Follow the on-screen prompts to add your camera to the app. This typically involves scanning a QR code or entering a specific code provided by the app. Make sure you have your camera’s details ready, such as its ID or IP address.
Step 5: View your camera’s live feed
Once your camera is successfully added to the app, you should be able to view its live feed on your iPhone. Simply tap on the camera’s name or thumbnail in the app to access the live video stream.
Now you can conveniently monitor your wireless camera from your iPhone, allowing you to keep an eye on your home or other important areas easily.
Installing the camera viewing app on your iPhone
To watch a wireless camera on your iPhone, you will need to install a dedicated app that is compatible with your camera model. Follow these steps to install the camera viewing app:
1. Open the App Store on your iPhone.

2. Tap on the search icon at the bottom of the screen.
3. Type the name of the camera viewing app in the search bar and tap “Search”.
4. Browse through the search results and select the app that matches your camera model.
5. Tap the “GET” button next to the app to start the installation process.
6. If prompted, enter your Apple ID password or use Face ID/Touch ID to confirm the installation.

7. Wait for the app to download and install on your iPhone. The progress will be indicated by a loading circle on the app icon.
8. Once the app is installed, you can launch it by tapping on its icon on the home screen.
9. Follow the on-screen instructions to set up the app and connect it to your wireless camera.
10. Once the camera and app are successfully connected, you will be able to view the camera’s live feed on your iPhone.
By installing the camera viewing app on your iPhone, you can easily monitor and access your wireless camera’s feed from anywhere at any time.

Pairing the wireless camera with your iPhone
Pairing your wireless camera with your iPhone allows you to monitor and view live footage from the camera directly on your phone. To connect your wireless camera to your iPhone, follow these simple steps:
Step 1: Install the camera app
First, you need to install the camera app on your iPhone. Visit the App Store and search for the app specific to your wireless camera model. Download and install the app on your iPhone.
Step 2: Connect the camera to your Wi-Fi network
Next, you need to connect your wireless camera to your Wi-Fi network. To do this, open the camera app on your iPhone and navigate to the settings menu. Locate the option to connect the camera to Wi-Fi and follow the on-screen instructions to enter your Wi-Fi network credentials. Once connected, your camera will have internet access.
Step 3: Pair the camera with your iPhone
Now that your camera is connected to your Wi-Fi network, you can pair it with your iPhone. Open the camera app on your phone and navigate to the device pairing or camera pairing section. Select the option to pair a new device and follow the on-screen instructions to establish a connection with your wireless camera.
During the pairing process, you may be prompted to enter a unique code or scan a QR code provided by the camera. Follow the instructions carefully to complete the pairing process.

Step 4: View live footage
Once the camera is successfully paired with your iPhone, you can start viewing live footage from the camera on your phone. Open the camera app and navigate to the live view section. You should now see a real-time video feed from your wireless camera.
From the camera app, you can also access additional features and settings, such as adjusting the camera angle, enabling motion detection, or capturing screenshots.
Note: Make sure your wireless camera and iPhone are connected to the same Wi-Fi network for seamless pairing and viewing of the camera feed.
Configuring camera settings on your iPhone
Once you have successfully connected your wireless camera to your iPhone, you may want to configure some settings to enhance your viewing experience. Here’s how you can do it:
| Step | Action |
|---|---|
| 1 | Open the camera app on your iPhone. |
| 2 | Tap on the “Settings” icon located in the bottom-right corner of the screen. |
| 3 | Scroll through the settings options and tap on “Camera”. |
| 4 | Here, you will find various camera settings that you can customize according to your preferences. |
| 5 | You can enable or disable features like HDR, Live Photos, grid, and location services. |
| 6 | Additionally, you can choose the preferred video recording resolution and frame rate. |
| 7 | Once you have made the desired changes, simply exit the settings menu. |
By configuring these camera settings on your iPhone, you can tailor your wireless camera experience to suit your needs and capture high-quality photos and videos in a way that best showcases your surroundings.
Monitoring the wireless camera feed on your iPhone
If you have a wireless camera installed in your home or office, you can easily monitor its feed directly on your iPhone. This can be particularly useful for ensuring the security of your premises or keeping an eye on your loved ones.
Step 1: Install the camera app
The first step is to download and install the camera app on your iPhone. There are various camera apps available on the App Store, so make sure to choose one that is compatible with your wireless camera model.
Step 2: Connect the camera to your iPhone
Once you have installed the camera app, you will need to connect your wireless camera to your iPhone. Most camera apps provide detailed instructions on how to do this. Generally, the process involves connecting the camera to your Wi-Fi network and pairing it with your iPhone using a unique code or QR scan.
Make sure that your camera and iPhone are connected to the same Wi-Fi network. This will ensure a stable and seamless connection between the devices.
Step 3: Access the camera feed
Once the camera is successfully connected to your iPhone, you can access its live feed through the camera app. Simply launch the app and navigate to the camera feed option. You should be able to see a live view from your wireless camera on your iPhone screen.

Some camera apps also offer additional features such as two-way audio, motion detection, and cloud storage for recorded footage. Explore the app’s settings to discover and customize these features according to your preferences.
Step 4: Monitor the camera remotely
One of the great advantages of monitoring a wireless camera feed on your iPhone is the ability to do it remotely. Even if you are away from home or your office, you can still access the camera feed as long as you have an internet connection on your iPhone.
Simply launch the camera app and log in using your credentials. You should be able to see the live feed from your wireless camera and stay updated with what’s happening in the monitored area.
Remember to keep your camera app and iPhone updated to the latest versions to ensure the best performance and security. Regularly check for firmware updates for your wireless camera as well to take advantage of any new features or bug fixes.
By following these steps, you can easily monitor the feed from your wireless camera directly on your iPhone, providing you with peace of mind and enhanced security.
Accessing the camera remotely on your iPhone
If you have a wireless camera, you may want to access its live feed remotely on your iPhone. This can be useful for monitoring your home, office, or any other location from wherever you are. Here are the steps you can follow to access the camera remotely on your iPhone:
Step 1: Install the camera’s app
First, you need to install the app that is associated with your wireless camera on your iPhone. This app will allow you to connect to and access the camera’s live feed remotely.
Step 2: Create an account
Once the app is installed, open it and create an account. This account will be used to log in and access the camera’s feed remotely. Make sure to choose a strong and unique password to protect your account.
Step 3: Connect the camera to your Wi-Fi network
Next, you need to connect the wireless camera to your Wi-Fi network. Follow the manufacturer’s instructions to do this. Once connected, the camera will be able to transmit its live feed over the internet.
Step 4: Log in to the app
Open the app on your iPhone and log in using the account credentials you created in Step 2. Once logged in, you should see a list of available cameras or a live feed from the camera you want to access.
Step 5: Access the camera remotely
To access the camera remotely, select the camera you want to view from the list or tap on the live feed. The app will establish a connection with the camera over the internet and display the live feed on your iPhone.
Now you can monitor the camera remotely on your iPhone anytime and from anywhere with an internet connection. Keep in mind that the quality and speed of the live feed may vary depending on your internet connection.
Troubleshooting wireless camera connection issues on your iPhone
If you are facing difficulties while trying to watch a wireless camera on your iPhone, there are a few troubleshooting steps you can follow to resolve the issue:
1. Check your internet connection:
Make sure that your iPhone is connected to a stable and high-speed Wi-Fi network. A weak or intermittent internet connection can cause issues with streaming the camera feed.
2. Verify the camera settings:
Ensure that the wireless camera is properly set up and configured. Check if the camera is connected to the same Wi-Fi network as your iPhone. Make sure that the camera is powered on and functioning correctly.
3. Restart the camera and iPhone:
Try restarting both the wireless camera and your iPhone. This can help refresh the network connection and resolve any temporary glitches or conflicts.
4. Update the camera firmware:
Check if there are any firmware updates available for your wireless camera. Keeping the camera’s firmware up-to-date can improve its performance and compatibility with your iPhone.
5. Restart your Wi-Fi router:
If other devices on the same Wi-Fi network are working fine but you still cannot connect to the wireless camera, try restarting your Wi-Fi router. This can clear any network issues that might be affecting the camera connection.
6. Reset network settings on your iPhone:
If none of the above steps work, you may need to reset the network settings on your iPhone. This will remove any saved Wi-Fi passwords and network preferences, so make sure you have the necessary information to reconnect to your Wi-Fi network afterward.
7. Contact customer support:
If you have tried all the troubleshooting steps and are still unable to watch the wireless camera on your iPhone, it is recommended to reach out to the camera manufacturer’s customer support for further assistance. They may be able to provide specific solutions or identify any hardware issues with the camera.
By following these troubleshooting steps, you should be able to resolve most wireless camera connection issues on your iPhone.
FAQ
Can I watch a wireless camera on my iPhone?
Yes, you can watch a wireless camera on your iPhone. There are various apps available on the App Store that allow you to connect and view the feed from your wireless camera on your iPhone.
What do I need to watch a wireless camera on my iPhone?
To watch a wireless camera on your iPhone, you will need a wireless camera that supports mobile viewing, an iPhone, and a compatible app. Make sure the wireless camera and your iPhone are connected to the same Wi-Fi network, and follow the instructions provided by the app to set up the connection.
Which app should I use to watch a wireless camera on my iPhone?
There are several apps available on the App Store that can be used to watch a wireless camera on your iPhone. Some popular options include “IP Webcam”, “V380”, and “Yi Home”. You can read the reviews and features of these apps to determine which one best suits your needs.
Is it possible to watch a wireless camera on my iPhone remotely?
Yes, it is possible to watch a wireless camera on your iPhone remotely. Many wireless cameras come with a feature that allows you to access the camera feed from anywhere using the internet. You will need to set up the camera and the app accordingly, following the instructions provided by the manufacturer.


