Setting up a Lorex security camera system can provide you with peace of mind knowing that your property is protected. However, it’s essential to ensure that the cameras are wired correctly to ensure proper functionality. In this guide, we will walk you through the process of properly wiring a Lorex security camera.
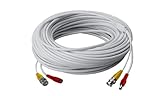
Before you begin, gather all the necessary tools and materials. You will need a Lorex security camera, a power adapter, a coaxial cable, a BNC connector, a power drill, and a Phillips head screwdriver. It’s also a good idea to have a ladder or step stool on hand, depending on the camera’s installation height.
To start, choose the location where you want to install the camera. Ensure that it has a clear view of the area you want to monitor. Once you’ve selected the location, use the power drill and screwdriver to mount the camera securely. Make sure it is positioned at the desired angle.
Next, locate the video and power ports on the camera. Connect one end of the coaxial cable to the video port and the other end to the BNC connector. Then, connect the BNC connector to the corresponding input on the back of the DVR or monitor. Ensure that it is securely connected.
Finally, connect the power adapter to the power port on the camera. Plug the power adapter into a nearby power outlet. Once all the connections are made, power on the camera and check the monitor or DVR to ensure that the camera is functioning correctly.

Wiring a Lorex security camera may seem daunting at first, but with the right tools and instructions, it can be a straightforward process. By following the steps outlined in this guide, you can easily wire your Lorex security camera and enjoy peace of mind knowing that your property is under surveillance.
Tips for Wiring a Lorex Security Camera
Properly wiring your Lorex security camera is crucial for ensuring optimal performance and functionality. Here are some helpful tips to guide you through the process:
1. Plan the Camera Placement
Before starting the wiring process, carefully plan where you want to install your Lorex security camera. Consider the areas you want to monitor and make sure the camera has a clear line of sight to capture the desired footage.
2. Choose the Right Wiring Method
Lorex security cameras can be wired using various methods, including Ethernet, coaxial, or power over Ethernet (PoE). Choose the wiring method that best suits your needs and ensure that you have the necessary cables and connectors.
3. Use High-Quality Cables
Invest in high-quality cables to minimize signal loss and interference. Use cables that are specifically designed for security camera installations and are suitable for outdoor use if the camera will be placed outside.

4. Follow the Wiring Diagram
Refer to the Lorex security camera’s instruction manual or wiring diagram to properly connect the cables. Make sure to match the corresponding colors and connectors according to the diagram to avoid any wiring errors.
5. Use Cable Management Accessories
To keep your wiring neat and organized, use cable management accessories such as conduit, cable clips, or wire channels. These accessories will help protect the cables from damage and make troubleshooting easier in the future, if needed.
6. Test the Connection
After completing the wiring process, test the connection between the camera and the recording device. Ensure that the camera is receiving power and that the video feed is displaying correctly. Make any necessary adjustments if the connection is not working properly.
| Wire Color | Function |
|---|---|
| Red | Power (+) |
| Black | Power (-) |
| Yellow | Video |
| White | Audio (if applicable) |
By following these tips and paying attention to the details, you can ensure a professional and reliable wiring installation for your Lorex security camera system.
Gather Necessary Tools
Before you start wiring your Lorex security camera, it is important to gather all the necessary tools and equipment. Having everything ready beforehand will ensure a smooth and efficient installation process. Here are the essential tools and equipment you will need:

- Power cord or power adapter
- Coaxial cable
- BNC connectors
- Screwdriver
- Drill
- Measuring tape
- Wire stripping tool
- Power drill
- Fish tape
- Wire connectors
- Mounting brackets
- Power supply
- Camera housing
- Ethernet cable (if applicable)
- Monitor or TV (to test the camera feed)
Make sure to gather all the necessary tools and have them readily available before starting the wiring process. This will help you avoid interruptions and ensure that you have everything you need to complete the installation successfully.
Choose the Right Location
When it comes to wiring a Lorex security camera, one of the most important factors to consider is choosing the right location for installation. The location you choose will determine the effectiveness and coverage of your camera’s surveillance area. Here are some tips to help you choose the right location:
1. Determine the area you want to monitor: Before installing a Lorex security camera, you need to determine the specific areas that you want to monitor. This will help you identify the best locations for camera installation.
2. Consider the camera’s field of view: Each Lorex security camera has a specific field of view, which determines the area it can cover. Take into account the camera’s field of view and ensure that the location you choose provides optimal coverage of the desired area.
3. Assess the lighting conditions: Proper lighting is essential for surveillance camera footage. Consider the lighting conditions in the location you choose and make sure there is adequate lighting for clear and accurate video capture.

4. Check for obstructions: Look for any obstructions such as trees, buildings, or other objects that may obstruct the camera’s view. Clear any obstructions to ensure an uninterrupted surveillance area.
5. Secure the camera: Make sure the location you choose provides a secure mounting surface for the camera. The camera should be mounted at a height that prevents tampering or vandalism.
6. Consider accessibility: If necessary, choose a location that allows easy access for maintenance and camera adjustments.
By considering these factors and choosing the right location for your Lorex security camera, you can ensure optimal surveillance coverage and peace of mind.
Plan the Cable Routes
Before you start wiring your Lorex security camera, it is important to plan the cable routes to ensure proper installation and functionality. Here are some key points to consider:

1. Determine camera locations: Identify the areas where you want to install your security cameras. This could include entrances, hallways, or any other high-risk areas. Consider the field of view and the required coverage for each camera.
2. Consider power source: Determine how you will power your cameras. Lorex security cameras can be either powered by a power adapter or by using Power over Ethernet (PoE) technology. If using a power adapter, make sure you have access to electrical outlets near each camera location.
3. Plan cable routing: Decide on the best cable routing paths from the cameras to the recording device or monitor. Avoid obstructions and consider concealing the cables for a clean and professional installation. Use cable conduits or wire moldings if necessary.
4. Measure cable lengths: Measure the distances from each camera location to the recording device or monitor. This will help you determine the appropriate length of cables needed for each camera.
5. Consider cable type: Choose the right cables for your installation. Lorex security cameras typically use coaxial or Ethernet cables. Coaxial cables are suitable for analog cameras, while Ethernet cables are used for IP cameras and PoE installations.

6. Test camera and cable functionality: Before finalizing the cable routes, ensure that all cameras and cables are in good working condition. Test each camera with a temporary cable connection to the recording device to verify video and audio signals.
Remember: Properly planning the cable routes will help you avoid installation issues and ensure that your Lorex security camera system operates efficiently and effectively.
Disclaimer: Always consult the instruction manual provided by Lorex for specific guidance on wiring your security cameras.
Prepare the Camera Mount
1. Start by selecting a suitable location for your Lorex security camera. Make sure the area provides a clear view of the area you want to monitor and is within reach of a power outlet.
2. Once you have chosen the location, use a pencil to mark the spots where you will be mounting the camera. Ensure that the mounting surface is sturdy and capable of supporting the weight of the camera.
3. Next, gather the necessary tools for installing the camera mount. You may need a ladder, drill, drill bits, screws, and a screwdriver.
4. Using the drill and the appropriate drill bit, carefully make holes in the marked spots on the mounting surface. Make sure to drill the holes at the right depth and angle to ensure a secure mounting.
5. Once the holes are drilled, align the camera mount with the holes and use the screws to attach it securely to the mounting surface. Tighten the screws with a screwdriver to ensure a firm connection.
6. After the camera mount is securely attached, you can proceed to mount the Lorex security camera onto the mount. Follow the manufacturer’s instructions for correctly attaching the camera.
7. Finally, check the camera’s position and adjust it if necessary. Ensure that the camera is level and pointing in the desired direction.
8. Congratulations! You have now successfully prepared the camera mount for your Lorex security camera. The next step is to connect the camera’s wiring to power and a recording device.
Connect the Power Supply
Before you start wiring the Lorex security camera, make sure you have the power supply ready. The power supply usually comes with the camera and should be included in the package. It is essential to connect the camera to a stable power source to ensure consistent operation.
Here are the steps to connect the power supply:
Step 1: Locate the Power Input
First, locate the power input on the camera. It is usually a round connector that is labeled “DC power” or “Power In.”
Step 2: Insert the Power Connector
Next, insert the power connector from the power supply into the power input on the camera. Make sure the connector is properly aligned and securely inserted.
Step 3: Connect the Power Supply
Now, connect the other end of the power supply to a power outlet or a compatible power source. Ensure the power supply is plugged into a stable and reliable power source.
Once you have connected the power supply, the Lorex security camera should start receiving power and be ready for use. It is important to follow the manufacturer’s instructions and guidelines when connecting the power supply to ensure a safe and proper installation.
Some Lorex security cameras may also come with additional power options, such as POE (Power over Ethernet). If you have a POE-compatible camera, you may be able to power it directly through the Ethernet cable, eliminating the need for a separate power supply.
| Step | Description |
|---|---|
| Step 1 | Locate the Power Input |
| Step 2 | Insert the Power Connector |
| Step 3 | Connect the Power Supply |
Run Cables through Attic or Walls
If you want to achieve a cleaner installation and hide the cables, running them through the attic or walls is a great option. It requires some extra effort, but the end result is worth it.
Here are the steps to run cables through the attic or walls:

- Plan your route: Decide where you want to mount your Lorex security camera and determine the best path for the cables to reach that location. Make sure to clear any obstacles or obstructions along the way.
- Choose the right cables: Select the appropriate cables for your Lorex security camera system. Consider the length needed and ensure they are compatible with your camera and DVR/NVR.
- Prepare the attic or walls: If running cables through the attic, make sure the attic space is accessible and safe to work in. If running cables through the walls, locate the studs and use a stud finder to avoid damaging any electrical wiring.
- Drill holes: Use a drill and a long drill bit to create holes in the attic or walls. Make sure the holes are of appropriate size to accommodate the cables.
- Feed the cables: Starting from the camera location, feed the cables through the holes, carefully guiding them to the desired destination. It’s helpful to have a partner on the other end to catch the cables and pull them through.
- Secure the cables: Use cable clips or staples to secure the cables along the path, making sure they are not too tight or loose. Avoid placing them near electrical wires to prevent interference.
- Connect the cables: Once the cables are in place, connect them to the appropriate ports on your Lorex security camera and DVR/NVR. Follow the manufacturer’s instructions for proper installation.
- Test the connections: After everything is connected, test the camera and make sure it’s transmitting video properly. Adjust the position if needed to get the desired field of view.
Running cables through the attic or walls may require some additional skills, such as drilling and working with tools. If you are not comfortable doing it yourself, consider hiring a professional installer to ensure a flawless installation.
Connect the Camera to the Mount
Once you have decided on the location for your Lorex security camera, it’s time to connect the camera to the mount. Follow these steps:
- Start by removing the camera from its packaging. Be sure to handle it carefully to avoid any damage.
- Locate the mounting bracket that came with the camera. This bracket will allow you to securely attach the camera to a wall or ceiling.
- Hold the mounting bracket up to the desired location and mark the spots where you will need to drill holes. Make sure the bracket is level for proper installation.
- Use a drill and the appropriate size bit to create holes in the marked spots. Be cautious of any electrical wiring or plumbing that may be behind the mounting location.
- Insert wall anchors into the drilled holes to provide added support for the mounting bracket.
- Align the holes on the mounting bracket with the wall anchors and use screws to secure the bracket in place.
- Remove the protective cover from the camera’s mounting plate and line up the camera with the mounting bracket.
- Slide the camera onto the mounting bracket, making sure it locks into place.
- Tighten any screws or mounting mechanisms on the camera to ensure a secure fit.
- Adjust the camera’s angle as needed to capture the desired view. Many Lorex security cameras offer adjustable mounting angles for flexibility.
- Finally, double-check that all connections are secure and the camera is properly mounted before proceeding with any further setup or installation.
By following these steps, you will be able to successfully connect your Lorex security camera to the mount. Remember to refer to the camera’s user manual for any specific instructions or troubleshooting tips.
Secure the Cables
Once you have properly run the cables and connected them to your Lorex security camera, it is essential to secure them to ensure a stable and reliable connection. Follow these steps to securely fasten the cables:
- Start by using cable clips or staples to secure the cables to the walls or ceilings. This will help prevent them from hanging loose or getting tangled.
- Make sure to use clips or staples that are specifically designed for securing cables. This will minimize the risk of damaging the cables or causing interference with the camera’s signal.
- Avoid bending or twisting the cables excessively, as this can cause damage to the wires inside and affect the camera’s performance.
- If the cables need to be extended to reach the desired location, use couplers or connectors specifically designed for the type of cables you are using. This will ensure a secure and reliable connection.
- If you are running the cables outdoors, use outdoor-rated cable clips or staples to protect them from weather conditions and prevent damage.
- For added protection against tampering or vandalism, consider concealing the cables within a conduit or raceway. This will make it more difficult for intruders to cut or disconnect the cables.
By securing the cables properly, you can help ensure that your Lorex security camera system functions optimally and provides reliable surveillance. Take the time to secure the cables correctly to avoid any potential issues in the future.
Test the Camera and Video Feed
Once you have successfully wired your Lorex security camera, it is essential to test the camera and video feed to ensure everything is working correctly. Follow the steps below to perform a camera test:
Step 1: Power on the Camera
Make sure the camera is receiving power by connecting it to a power source. The camera should display a red light indicating that it is receiving power.
Step 2: Check the Video Feed
Connect the camera to a monitor or DVR to check the video feed. Depending on the model, you may need to connect the camera to a monitor using a VGA or HDMI cable or connect it to a DVR using a BNC cable.
Once connected, turn on the monitor or DVR and navigate to the camera’s input channel. You should be able to see the live video feed from the camera on the screen. It is advisable to test the camera in various lighting conditions to ensure optimal performance.
Step 3: Adjust Camera Settings (if necessary)
If the camera feed appears distorted or unclear, you may need to adjust the camera’s settings. Access the camera’s configuration menu through the monitor or DVR and make necessary adjustments such as brightness, contrast, or resolution to optimize the video feed.
Note: Consult the camera’s user manual for specific instructions on adjusting settings as the process may vary depending on the model.
By following these steps, you can ensure that your Lorex security camera is properly wired and that the video feed is functioning correctly. This test will help guarantee the camera’s effectiveness in monitoring your desired area.
Regular Maintenance and Troubleshooting
Regular maintenance and troubleshooting can help ensure your Lorex security camera system functions optimally and detects any potential issues. Here are some tips to follow:
- Inspect and clean the camera: Regularly inspect and clean the camera lens to ensure clear footage. Use a soft, lint-free cloth to gently wipe away any dirt or smudges.
- Check the cables and connections: Periodically inspect the cables and connections to ensure they are secure and undamaged. If you notice any loose or frayed cables, tighten or replace them as necessary.
- Clear obstructions: Make sure the camera’s field of view is not obstructed by objects such as branches or debris. Trim any overgrown vegetation and remove any obstructions that may interfere with the camera’s line of sight.
- Review footage: Regularly review the camera footage to ensure the system is capturing the desired areas and detecting any security threats. If you notice any blind spots or areas with poor image quality, consider adjusting the camera angle or upgrading the system.
- Update firmware: Check for firmware updates provided by Lorex and update your system accordingly. Keeping the firmware up to date can help resolve any software bugs and improve overall system performance.
- Power cycle the system: If you encounter any issues with your Lorex security camera system, try power cycling the system by unplugging the power adapter for a few seconds and then plugging it back in. This can help resolve minor software or connectivity issues.
- Contact customer support: If you experience persistent issues or need assistance with troubleshooting, reach out to Lorex customer support for further guidance. They can provide specific troubleshooting steps or arrange for repairs if necessary.
By following these maintenance and troubleshooting tips, you can ensure the longevity and optimal performance of your Lorex security camera system.
FAQ,
What tools do I need to wire a Lorex security camera?
To wire a Lorex security camera, you will need the following tools: a power drill, a screwdriver, a wrench, a cable stripper, a power cable, a BNC connector, and a monitor or DVR.
Can I wire a Lorex security camera without using a power cable?
No, a power cable is necessary to provide electricity to the Lorex security camera. The camera requires power to function properly.