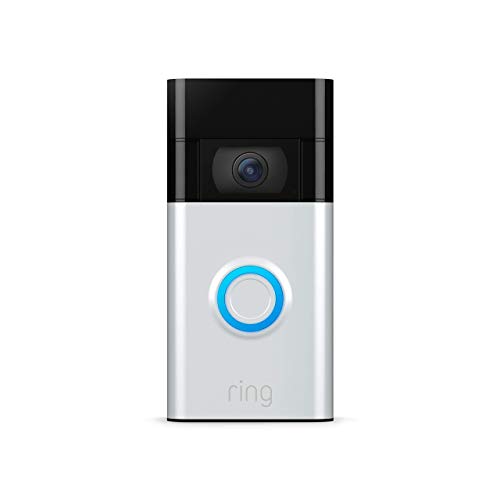
Ring security cameras have become increasingly popular for homeowners and businesses alike. With features like HD video recording, two-way audio communication, and motion detection, these cameras provide an extra level of security and peace of mind.
Installing and wiring Ring security cameras may seem like a daunting task for some, but it doesn’t have to be. In this guide, we will walk you through the process step by step, ensuring that you can set up your camera properly and effectively.
Before we begin, it’s important to note that Ring security cameras can be wired or wireless. If you have chosen a wired camera, this guide is for you.
Step 1: Gather the Necessary Tools
Before you start wiring your Ring security camera, make sure you have all the necessary tools on hand. You will likely need a drill, drill bits, a screwdriver, wire cutters, and a voltage tester. Additionally, you will need the proper wiring, such as Ethernet cables or coaxial cables, depending on your camera model.

Step 2: Determine Placement
Next, determine the ideal placement for your Ring security camera. Consider factors such as the camera’s field of view, potential obstructions, and range of motion detection. Once you have chosen the perfect location, make sure it is within reach of a power source and has a strong Wi-Fi signal.
Essential Tools for Wiring
When it comes to wiring your Ring security camera, having the right tools on hand can make the task much easier and ensure a professional-looking installation. Here are some essential tools you will need:
1. Screwdriver: Make sure you have a screwdriver with the appropriate size and type of screw head to remove any covers or plates you may encounter during the wiring process.
2. Wire cutters/strippers: These tools are essential for cutting and stripping the wires to the correct length, allowing for easy connection to the camera and other components.
3. Voltage tester: Before working with any electrical connections, it is crucial to ensure that the power is turned off. A voltage tester will help you confirm that the wires are not live, preventing any potential accidents.
4. Fish tape/electrician’s snake: If you need to run wires through walls or other hard-to-reach areas, a fish tape or electrician’s snake will be extremely useful. These tools allow you to navigate the wires through tight spaces without damaging the walls or existing wiring.
5. Wire connectors: Wire connectors, also known as wire nuts or terminal blocks, are used to secure and join wires together. These connectors ensure a secure and reliable connection, preventing any loose or exposed wires.
6. Cable clips or wire staples: To keep your wiring neatly organized and safely secured, cable clips or wire staples can be used to attach the wires to the wall or other surfaces.
By having these essential tools at your disposal, you will be well-prepared to wire your Ring security camera effectively and efficiently. Remember to always follow the manufacturer’s instructions and take necessary safety precautions when working with electrical wiring.

Choose the Right Location
When it comes to wiring your Ring security camera, choosing the right location is crucial for optimum performance and effectiveness. Here are some important factors to consider:
Visibility: Select a spot where the camera has a clear line of sight to the area you want to monitor. Avoid obstructions such as bushes or walls that may obstruct the camera’s view.
Height: Mount the camera at an appropriate height to capture the desired field of view. Too low, and the camera may not be able to capture important details. Too high, and it may be difficult to discern faces or other important features.
Power Source: Ensure that the chosen location has easy access to a power outlet or an appropriate power source. This reduces the need for additional wiring or the use of extension cords, which can be unsightly and potentially hazardous.
Weather Resistance: If you plan to install the camera outdoors, make sure it is designed to withstand the elements. Look for cameras with an appropriate weather resistance rating to ensure they can withstand rain, snow, or extreme temperatures.
Wi-Fi Signal: Check the Wi-Fi signal strength in the intended location. A weak signal may result in poor video quality or frequent disconnections. Consider using a Wi-Fi range extender or deploying a mesh network to improve signal strength, if needed.
By carefully selecting the right location for your Ring security camera, you can ensure optimal performance and enhance the security of your property.
Measure and Plan the Wiring
Before you start wiring your Ring security camera, it is important to measure and plan the wiring to ensure a neat and efficient installation. Follow these steps to properly measure and plan the wiring:
- Decide on the ideal location for your Ring security camera. Consider factors such as the camera’s field of view, angle of coverage, and proximity to power sources.
- Measure the distance between the camera’s location and the nearest power outlet. This will help you determine the length of the wiring needed.
- Take note of any potential obstacles that may interfere with the wiring, such as walls, furniture, or other appliances. Consider how you can route the wiring to avoid these obstacles.
- Plan the path for the wiring. Choose the most discreet and efficient route, such as along walls or behind furniture, to maintain a clean and professional appearance.
- If necessary, use a stud finder to locate wall studs or ceiling joists to mount the camera securely. This will help you determine the best route for the wiring.
- Consider whether you need to drill any holes to conceal the wiring. If so, plan the location and size of the holes, taking into account any necessary precautions, such as avoiding electrical wires or plumbing pipes.
By measuring and planning the wiring before installation, you can ensure a smooth and organized process, resulting in a professional-looking installation for your Ring security camera.
Turn Off Power
Before starting the installation process for your Ring security camera, it is crucial to ensure safety by turning off the power to the area where you will be working.

Follow these steps to turn off the power:
- Identify the correct circuit breaker: Locate the breaker box or electrical panel in your home. It is usually found in a basement, garage, or utility room. Look for a circuit breaker that controls the power to the area where you will be installing the camera.
- Switch off the breaker: Once you have identified the correct breaker, switch it off by flipping the switch to the “off” position. This will temporarily cut off power to the area and ensure your safety during the installation process.
It is important to turn off the power before proceeding with any electrical work to minimize the risk of electric shock or injury. If you are unsure about which circuit breaker controls the area, it is recommended to consult a licensed electrician.
Run Wires Through Walls or Ceilings
If you want to install a Ring security camera and hide the wires, running them through walls or ceilings is a great solution. This method allows you to have a clean and professional-looking installation. Here are the steps to do it:
1. Plan the Route
Before starting, you need to plan the route for the wires. Identify the starting and ending points for the cables and determine the best path to run them through. Consider the structural layout of your walls or ceilings to avoid any obstacles or hazards.
2. Gather the Tools and Materials
Make sure you have the necessary tools and materials for the job. You’ll need a drill, wire fishing tools, measuring tape, wire cutters, a stud finder, and drywall saw. In addition, make sure to have the appropriate cables and connectors required for your Ring security camera.

3. Turn off Power
If you’re running wires through walls, it’s important to turn off the power to the area where you’ll be working. This will prevent any accidents or electrical hazards. Locate the circuit breaker that controls the area and switch it off.
4. Find the Studs
Use a stud finder to locate the studs in the walls or ceiling where you’ll be running the wires. This will give you a reference point to determine where to drill the holes for the cables. Avoid drilling into the studs to prevent any damage.
5. Drill Holes
Mark the locations where you’ll be drilling the holes for the wires. Use a drill with an appropriate-sized drill bit to create the holes. Be careful to drill straight and avoid damaging any existing wiring or pipes.
6. Fish the Wires
Use wire fishing tools to guide the wires through the drilled holes. Start from one end and carefully push the wires through the walls or ceilings until they reach the desired endpoint. This process may require some patience and finesse.
7. Connect the Cables
Once the wires are in place, connect them to the appropriate connectors for your Ring security camera. Follow the manufacturer’s instructions for proper installation. Ensure that the connections are secure and tight.

8. Test the Installation
After completing the wiring, turn on the power and test the installation. Make sure the Ring security camera receives power and is functioning correctly. Also, check for any signal or connectivity issues.
By running the wires through the walls or ceilings, you can achieve a neat and professional installation for your Ring security camera. It may take some time and effort, but the end result will be worth it.
Connect the Camera’s Power Supply
Connecting the power supply is a crucial step in wiring your Ring security camera. The camera requires a stable power source to function properly.
Here are the steps to connect the camera’s power supply:
- Locate the power cable that came with your Ring security camera. Make sure it is undamaged and in good condition.
- Identify the power adapter that came with your camera. It should have a DC output with the appropriate voltage and amperage for your camera model. Verify this information before proceeding.
- Plug the power adapter into a nearby electrical outlet. Ensure that the outlet is working correctly.
- Connect the other end of the power adapter to the camera’s power input port. This is typically located on the back or bottom of the camera.
- Ensure the connection is secure by pushing the plug firmly into the port. It should fit snugly.
- Once the power supply is connected, you should see a LED light up on the camera, indicating that it is receiving power.
- If the LED does not light up, double-check the power connections and ensure the outlet is providing power. If the issue persists, contact Ring customer support for assistance.
By following these steps, you will successfully connect the power supply to your Ring security camera, enabling it to function and provide you with peace of mind.
Connect the Camera to a DVR or Monitor
After successfully mounting your Ring security camera, the next step is to connect it to a DVR (Digital Video Recorder) or monitor for viewing and recording purposes. Follow the steps below to complete the wiring process:
1. Check the Compatibility
Before proceeding, ensure that your camera and DVR or monitor are compatible with each other. Check the product manuals or contact the manufacturers to verify the compatibility. This step is crucial for ensuring a proper connection and optimal performance.
2. Gather the Necessary Cables and Connectors
To connect your camera to a DVR or monitor, gather the necessary cables and connectors. You may need BNC (Bayonet Neill–Concelman) cables, power cables, and adapters. Make sure you have the correct types and lengths of cables to ensure a secure and tidy wiring setup.
3. Locate the Camera’s BNC and Power Ports
Identify the BNC and power ports on your Ring security camera. The BNC port is typically used for video transmission, while the power port is used for supplying power to the camera. These ports are usually located on the back or bottom of the camera.
4. Connect the BNC Cable
Take one end of the BNC cable and connect it to the BNC port on the camera. Ensure a proper and secure connection by twisting the connector clockwise until snug. Avoid over-tightening, as it may damage the ports.
5. Connect the Power Cable
Next, take the power cable and plug it into the power port of the camera. Then, connect the other end of the power cable to an available power outlet or use a power adapter if necessary. Ensure that the power source is reliable and meets the camera’s power requirements.
6. Connect the Other End of the Cables
Take the other end of the BNC cable and connect it to the BNC input on the DVR or monitor. Again, make sure the connection is secure. Then, connect the power cable to the corresponding input on the DVR or monitor, ensuring a proper power supply for the camera.
7. Test the Connection
Once all the cables are securely connected, power on the DVR or monitor, and ensure that the camera is receiving power. Check the video feed on the screen to verify that the camera is successfully transmitting the live footage. Make any necessary adjustments to the camera or connections if the video feed is not displaying correctly.
Note: Some DVR systems may require additional setup steps, such as configuring the camera channels and recording settings. Consult the DVR’s user manual for detailed instructions on these additional steps.
By following these steps, you can properly wire your Ring security camera to a DVR or monitor, allowing you to monitor and record the camera’s footage conveniently.
Test the Camera and Wiring
After wiring the Ring security camera, it is crucial to test both the camera and wiring to ensure proper functionality. This step is vital before proceeding with the installation process.
To test the camera and wiring, follow these steps:
1. Power on the Camera:
Connect the camera to a power source and turn it on. Check if the camera powers up and any indicator lights turn on.
2. Connect to Wi-Fi:
Ensure that the camera is successfully connected to your Wi-Fi network. This can usually be done through the camera’s companion app or by following the manufacturer’s instructions.
3. Adjust Camera Position and Settings:
Using the camera’s companion app, adjust the camera to the desired position and make any necessary settings, such as motion detection sensitivity or video quality.
4. Test Live View and Recording:
Access the camera’s live view through the app and verify if the video feed is displayed properly. Additionally, test the camera’s recording capabilities by manually triggering a recording or enabling motion detection.
5. Inspect Wiring Connections:
Check all the wiring connections to ensure they are secure and properly connected. Inspect for any loose or damaged wires that may affect the camera’s performance.
Note: If any issues are encountered during the testing process, refer to the camera’s instruction manual or contact the manufacturer’s support for troubleshooting assistance.
By thoroughly testing the camera and wiring, you can address any potential problems before completing the installation process. This helps to ensure the reliability and effectiveness of your Ring security camera.
Conceal and Secure the Wiring
Once you have identified the ideal locations for your Ring security cameras, it is crucial to conceal and secure the wiring to ensure a clean installation. Here are some tips to help you with this process:
- Plan the routing: Before you start running the wires, plan the routing to ensure a neater and tidier installation. Consider the shortest and most discreet path for the cables.
- Use cable clips: Cable clips are an excellent way to secure the wiring along walls or ceilings. They can be easily mounted with screws or adhesive strips, providing a professional-looking setup.
- Disguise the wires: You can use various methods to disguise the wires and make them less noticeable. For example, paint the cables to match the wall color, place them behind furniture or curtains, or route them through baseboards or crown molding.
- Use cable channels or conduits: Cable channels or conduits are ideal for concealing longer stretches of wiring. These protective covers can be mounted on walls or ceilings and provide a clean and organized appearance.
- Consider wireless options: If hiding and securing the wiring seems challenging, you may opt for wireless security cameras. They eliminate the need for wiring altogether, providing a simpler installation process.
- Consult a professional: If you are uncertain about concealing and securing the wiring yourself, it is advisable to consult a professional installer. They have the expertise and tools to handle the job efficiently and effectively.
By following these steps, you can successfully conceal and secure the wiring for your Ring security cameras, ensuring a clean and professional-looking installation.
Reconnect Power and Monitor Camera
After completing the wiring process, it’s time to reconnect the power and monitor your Ring security camera. This step is crucial to ensure that the camera is functioning properly and capturing video footage.
First, locate the power source for your Ring camera. This may be an electrical outlet or a power adapter that needs to be plugged into a power outlet. Insert the power adapter into the appropriate socket.
Next, connect the other end of the power adapter to the camera’s power input port. Make sure the connection is secure, and double-check that the power cord is not damaged.
Once the power is connected, you can now monitor your Ring camera. This can be done through various methods, depending on the camera model and Ring app version.
Using the Ring App
If you have the Ring app installed on your smartphone or tablet, open the app and log in to your Ring account. From the dashboard, select the camera you want to monitor. You should now see the live video feed from your camera, allowing you to keep an eye on your property.
Using a Computer
If you prefer to use a computer to monitor your Ring camera, open a web browser and visit the Ring website. Log in to your Ring account and navigate to the camera section. Select the camera you want to monitor, and you should be able to view the live video feed on your computer screen.
It’s important to regularly check the video feed to ensure that your camera is functioning correctly and capturing any potential incidents. If you notice any issues, such as a disrupted video feed or poor video quality, you may need to troubleshoot the camera or contact Ring customer support for assistance.
FAQ,
What tools do I need to wire a Ring security camera?
To wire a Ring security camera, you will need a drill, a screwdriver, wire strippers, a voltage tester, and a ladder or step stool.
How do I choose the best location to install a Ring security camera?
When choosing the best location for your Ring security camera, consider the areas you want to monitor, such as entrances or outdoor pathways. Look for a spot that provides a clear view and is within reach of a power outlet or the existing wiring.
Can I wire my Ring security camera to an existing power source?
Yes, you can wire your Ring security camera to an existing power source, such as an outdoor electrical outlet or an existing doorbell wiring. Make sure to follow the manufacturer’s instructions and consult a professional if you are unsure about the wiring process.


