
Installing a security camera in your home or business is a smart way to protect yourself and your property. However, one challenge that many people face is figuring out how to wire the camera without having unsightly cables running through their walls. One solution to this problem is to wire the camera through the attic.
Wiring a security camera through the attic has several advantages. First, it allows you to hide the cables out of sight, creating a cleaner and more professional look. Second, it can protect the cables from damage caused by weather or intruders. Additionally, running the cables through the attic can make the installation process easier and more convenient.
Before you begin the installation process, it is important to plan out your camera placement and determine the best route for wiring through the attic. Start by selecting the ideal location for your camera, taking into consideration the area you want to monitor and the camera’s field of view. Once you have determined the location, measure the distance between the camera and your recording device to ensure that your cables are long enough.
Once you have your plan in place, it’s time to start the wiring process. Begin by accessing your attic and identifying the path you will take to run the cables. Use a flashlight and be careful when navigating the attic to avoid any potential hazards.
Next, use cable clips or similar fasteners to secure the cables to the walls or ceiling beams in the attic. This will help prevent the cables from hanging loosely and minimize any potential damage. Make sure to leave a bit of slack in the cables to allow for any adjustments that may be needed during the installation process.

Finally, carefully guide the cables from the attic down to the desired location for your recording device. This can be done by drilling a small hole in the ceiling or wall. Be sure to seal the hole securely to prevent any drafts or moisture from entering your home.
Overall, wiring a security camera through the attic is a great solution for those looking to hide their cables and create a more professional-looking installation. By carefully planning out your camera placement, securing the cables in the attic, and properly guiding them down to your recording device, you can achieve a clean and effective setup that will help keep your property safe.
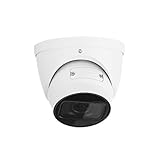
Determine the Camera Position
Before wiring the security camera through the attic, it is important to determine the optimal position for the camera. This will ensure that the camera captures the desired area and provides the best surveillance coverage. Here are some steps to help you determine the camera position:
- Identify the area you wish to monitor: Start by identifying the specific area you want the security camera to cover. This could be the front door, back patio, driveway, or any other area of concern.
- Consider the camera’s field of view: Understand the camera’s field of view and its coverage area. This will depend on the camera’s lens and focal length. Ensure that the camera is positioned in a way that covers the entire area you wish to monitor.
- Avoid obstructions: Take note of any potential obstructions that may block the camera’s view. This could include trees, walls, or other objects that may interfere with surveillance.
- Ensure proper lighting: Consider the lighting conditions in the area you wish to monitor. If the area is poorly lit, you may need to install additional lighting to ensure clear footage.
- Consider camera placement: Determine whether you want the camera to be visible or hidden. A visible camera can act as a deterrent, while a hidden camera may be preferred for discreet surveillance.
- Take into account wiring limitations: Keep in mind any wiring limitations when determining the camera position. Ensure that there is a feasible pathway from the attic to the desired camera location.
By carefully considering these factors, you will be able to determine the optimal camera position for effective surveillance coverage. Once you have determined the camera position, you can proceed with wiring the security camera through the attic.
Check the Wiring Path
Before you start running the wiring through the attic, it’s important to plan out the path and check for any potential obstacles or hazards. Here are the steps to follow:

1. Begin by identifying the location of your security camera and determine the best route to run the wiring. Consider the shortest and most direct path to minimize the length of the cable and reduce the risk of interference.
2. Inspect your attic to locate any potential obstacles such as beams, pipes, or insulation that may obstruct the wiring path. Take note of these obstacles and plan an alternative path if necessary.
3. Ensure that there is enough space in the attic to comfortably maneuver and work with the wiring. Clear any clutter or debris that could hinder your progress.
4. Take safety precautions by wearing protective clothing, gloves, and goggles. Attics can be dusty and cramped, so it’s important to prioritize your safety.
5. Use a stud finder or a similar tool to identify the locations of the wall studs or beams. This will help you determine where to drill holes for the wiring.

6. Carefully measure and mark the drilling points on the walls or ceiling, ensuring that they align with the planned wiring path.
7. Consider using conduit or cable management systems to protect and organize the wiring. This will prevent the wires from getting tangled or damaged during installation.
8. Test the wiring path by running a string or fish tape along the planned route. This will help you identify any obstructions or difficulties you may encounter before you start running the actual cable.
By thoroughly checking the wiring path before installation, you can ensure a smooth and efficient process. It’s better to identify any potential issues beforehand, as it can save you time and effort in the long run.
Prepare the Tools and Materials
Before you begin wiring the security camera through the attic, you will need to gather some essential tools and materials. Having everything prepared in advance will make the process smoother and more efficient.

Here are the tools and materials you will need:
- Security camera system kit – This includes the cameras, DVR/NVR, cables, and power adapters.
- Power drill – You will need this to create holes for the cable and camera mounts.
- Fish tape or wire snake – This tool will help you navigate the cable through the attic space.
- Cable clips – These will be used to secure the cables along the walls or ceiling.
- Cat5e or RG59 cables – These are commonly used for security camera installations.
- Camera mounting brackets – These brackets will hold the cameras in place.
- Screwdriver – You will need this to attach the cameras to the mounting brackets.
- Cable connectors and tools – These will be necessary for connecting and terminating the cables.
- Power extension cords – In case you need to extend the reach of the power adapters.
- Ladder – You will need a secure ladder to access the attic safely.
- Protective gear – Wear gloves, safety glasses, and a dust mask to protect yourself from hazards in the attic.
By having all these tools and materials ready, you can ensure that you have everything you need to successfully wire your security camera through the attic.
Turn Off Power Supply
Before beginning the process of wiring your security camera through the attic, it is crucial to turn off the power supply to ensure your safety. This step is vital as you will be dealing with electrical wiring, and any misstep can result in injury or damage to your property.
To turn off the power supply, locate your main electrical panel, which is usually found in the basement or garage. Open the panel door and look for the breaker that controls the power to the area where you plan to install the security camera. The breaker should be labeled, indicating its purpose.
Once you have identified the correct breaker, switch it to the “off” position. This action will cut off the power supply to the designated area. It is essential to verify that the power is indeed switched off by testing the outlets or light switches in the area. If all the electrical devices in the area are non-operational, you have successfully turned off the power supply.
Additionally, it is always a good idea to use a voltage tester to double-check that there is no electricity flowing to the wires you will be working with. The voltage tester should be inserted into an outlet or against the wires to ensure that there is no electric current. If the tester indicates no voltage, proceed with caution.
Remember that safety should always be your top priority when working with electrical wiring. By following these steps to turn off the power supply, you can ensure a safe and hassle-free wiring process for your security camera.
Run the Camera Cable
Once you have identified the path for the cable in the attic, it’s time to actually run the camera cable through it. Here’s a step-by-step guide to help you:
1. Measure and cut the cable:
Measure the distance from the camera location to the area where you plan to mount the DVR or monitor. Add a few extra feet to the measurement for any twists, turns, or slack. Once you have the correct length, cut the cable.
2. Attach the cable to the camera:
If your security camera has a detachable cable, attach the cable to the camera before running it through the attic. Make sure the connection is secure to avoid any signal loss later on.

3. Route the cable through the attic:
Using your predetermined path, carefully guide the camera cable through the attic. Be cautious of any obstacles or sharp edges that could damage the cable. If necessary, secure the cable to beams or joists using cable clips or zip ties to keep it in place.
4. Keep the cable away from electrical lines:
Ensure that the camera cable is separated and not running parallel to any electrical lines. This helps prevent interference and ensures a clear signal from the camera to the DVR or monitor.
5. Create access holes if needed:
If there are walls or barriers that obstruct the cable’s path, you may need to create access holes to pass the cable through. Use a drill or other appropriate tools to make the holes, ensuring they are large enough for the cable to pass through comfortably.
Follow these steps carefully to run the camera cable through the attic efficiently and securely.
Connect the Camera Cable
After running the camera cable through the attic, the next step is to connect it properly. Follow these steps to ensure a correct and secure connection:

-
Locate the Camera’s Power Source
Find the power source for the security camera. This can be an electrical outlet or a power adapter connected to a power supply. Make sure that the power source is easily accessible and close to where you want to install the camera.
-
Connect the Camera’s Power Cable
Take the power cable from the security camera and plug it into the power source you located in the previous step. Ensure that the connection is secure and tight so that it doesn’t come loose later on.
-
Connect the Camera’s Video Cable
Connect the video cable from the security camera to the corresponding port on the recording device or monitor. This can be a BNC connector or an RCA connector. Make sure to match the colors correctly, usually yellow for video and red or white for audio (if applicable).
-
Secure the Connections
Once all the connections are made, use cable ties or electrical tape to secure the cables and prevent them from getting tangled or accidentally disconnected. It’s important to keep the cables organized and free from obstructions.
Following these steps will ensure a properly connected security camera that can provide reliable surveillance for your property.
Mount the Camera
Once you have determined the best location for your security camera, it’s time to mount it. Follow these steps to ensure that your camera is securely and correctly installed:
1. Gather the necessary tools
Before starting the installation process, gather all the tools you will need. This may include a ladder, a drill, screws, and a screwdriver.
2. Position the camera mount
Using a ladder, carefully position the camera mount in the desired location. Ensure that it is securely attached and will be able to support the weight of the camera.
3. Attach the camera
Once the mount is in place, carefully attach the security camera to the mount. Make sure that it is snugly and securely fastened to prevent it from becoming loose or falling.
Note: It’s important to follow the manufacturer’s instructions for your specific camera model when attaching it to the mount.
4. Adjust the camera angle
Once the camera is attached, adjust the angle to ensure that you have the desired view. It’s recommended to test the camera’s field of view before finalizing the installation to ensure that it captures the desired area.
TIP: Use a level to ensure that the camera is straight and not tilted to one side.
5. Secure the camera wiring
After mounting the camera, carefully secure the camera wiring to prevent it from being damaged or becoming a safety hazard. Use cable clips or other appropriate methods to keep the wiring neat and organized.
By following these steps, you will be able to mount your security camera securely and ensure that it is positioned correctly to capture the areas you want to monitor.
Test the Camera
Once you have successfully installed the security camera in your attic, it is important to test it to ensure it is working properly. Follow these steps to test your camera:
- Connect the camera to a power source, either through a power adapter or via a PoE (Power over Ethernet) connection.
- Ensure that the camera is properly connected to your network. Check the network cables and make sure they are securely plugged in.
- Access the camera’s interface using its IP address. You can find the IP address in the camera’s user manual or by accessing your router’s settings.
- Once you have accessed the camera’s interface, you should see a live video feed. Make sure the image is clear and there are no issues with the camera’s field of view.
- Test additional camera features, such as pan, tilt, zoom, and night vision. Make sure all these features are working properly.
- Check the camera’s motion detection capabilities by walking in front of it and verifying that it detects movement and triggers notifications or recordings as expected.
- Test the camera’s recording functionality by manually starting a recording and verifying that it is saved to the designated storage device.
- If your camera supports audio, test the microphone and speaker to ensure two-way communication is functioning correctly.
- Check the camera’s remote accessibility by accessing its interface from a different device and location, such as your smartphone or a computer connected to a different network.
If you encounter any issues during the testing process, refer to the camera’s user manual for troubleshooting steps or contact the manufacturer for further assistance.
Restore the Power Supply
Once the security camera has been successfully wired through the attic, you will need to restore the power supply to ensure that the camera is operational. Follow these steps to restore the power supply:
1. Check the Power Source
First, make sure that the power source for the security camera is turned on. This may involve checking the power switch or breaker box to ensure that the power is flowing to the camera.
2. Test the Power Connection
Next, test the power connection for the camera by using a multimeter. Connect the leads of the multimeter to the power wires of the camera and check for the presence of voltage. If there is no voltage, check the wiring connections to ensure they are secure and properly connected.
3. Replace or Repair Any Damaged Components
If you find any damaged components during the testing phase, such as a faulty power adapter or a damaged power cable, replace or repair them as necessary. It is crucial to have all the power components in proper working condition for the camera to function effectively.
4. Reset the Camera
If the power supply has been restored and all components are in working order, but the camera is still not functioning, try resetting the camera. This can be done by disconnecting the power supply for a few seconds and then reconnecting it. Allow the camera to power up and initialize before checking its functionality.
5. Test the Camera
Finally, test the camera to ensure that it is functioning properly. Use the camera’s monitoring software or app to view the camera feed and check for any issues or abnormalities. Make any necessary adjustments to the camera settings or positioning to optimize its performance.
| Step | Action |
|---|---|
| 1 | Check the Power Source |
| 2 | Test the Power Connection |
| 3 | Replace or Repair Damaged Components |
| 4 | Reset the Camera |
| 5 | Test the Camera |
FAQ,
Is it possible to wire a security camera through the attic?
Yes, it is possible to wire a security camera through the attic. The attic provides a convenient and hidden route for running cables, allowing you to connect the camera to a power source and recording device without visible wires.
What are the advantages of wiring a security camera through the attic?
Wiring a security camera through the attic has several advantages. First, it eliminates the need for visible wires, which can be unsightly and potentially vulnerable to tampering. Second, it allows for a hidden installation, making it more difficult for intruders to detect and disable the camera. Finally, it provides a convenient and easily accessible route for running cables, simplifying the installation process.


