Outdoor security cameras are an essential part of keeping your property safe and secure. They provide a visible deterrent to potential intruders and can capture important evidence in case of a break-in. But how do you connect these cameras to your computer monitor so that you can easily monitor the footage?
Wiring up an outdoor security camera to a computer monitor may seem like a complicated process, but with the right knowledge and equipment, it can be relatively simple. In this article, we will guide you through the steps necessary to connect your outdoor security camera to your computer monitor.
First, you will need to gather the necessary equipment. This includes an outdoor security camera with video output, a power supply for the camera, a BNC cable, and a BNC to VGA converter. The BNC to VGA converter is essential as it will allow you to connect the camera to your computer monitor.
Once you have all the equipment ready, the next step is to connect the camera to the power supply and the BNC cable. The power supply will ensure that the camera has a constant source of power, while the BNC cable will transmit the video signal from the camera to the BNC to VGA converter. Make sure to secure the connections properly to avoid any loose wires.
How to Connect Outdoor Security Camera to Computer Monitor
If you have an outdoor security camera and want to view its feed on your computer monitor, you can easily connect the two devices using a few simple steps. By doing so, you can monitor your property and keep an eye on any suspicious activity from the comfort of your home or office. Here is a step-by-step guide to help you connect your outdoor security camera to your computer monitor:

|
Step 1: Determine the type of connections your camera and monitor support. Most outdoor security cameras use either a BNC or RCA connector, while computer monitors typically have VGA, DVI, or HDMI ports. Make sure your camera and monitor have compatible connection options. |
|
Step 2: Obtain the necessary cables or adapters to connect your camera to the computer monitor. If your camera uses a BNC connector and your monitor has a VGA port, you will need a BNC to VGA adapter cable. If your camera and monitor both have HDMI ports, a simple HDMI cable should suffice. |
|
Step 3: Turn off both your camera and computer monitor before making any connections. This will prevent any potential damage to the devices. |
|
Step 4: Connect one end of the cable or adapter to the video output port on your camera. If your camera has multiple video output options, choose the one that matches the connector on your cable or adapter. |
|
Step 5: Connect the other end of the cable or adapter to the corresponding input port on your computer monitor. |
|
Step 6: Once you have made the connections, turn on your camera and computer monitor. |
|
Step 7: Access the settings menu on your computer monitor and select the input source corresponding to the port you connected your camera to. |
|
Step 8: You should now see the live feed from your outdoor security camera on your computer monitor. Adjust the camera’s positioning and angle as needed to get the desired view. |

By following these steps, you can easily connect your outdoor security camera to your computer monitor and enjoy the benefits of real-time surveillance. Remember to check the compatibility of your camera and monitor connections and ensure that both devices are turned off before making any connections.
Choosing the Right Camera
When it comes to selecting an outdoor security camera for your computer monitor, there are several factors to consider. Here are some key points to keep in mind:
Resolution:
The resolution of the camera determines the quality of the video footage. Higher resolution cameras will capture more detailed images, allowing you to see finer details such as facial features or license plate numbers. For the best results, consider a camera with at least 1080p resolution.
Field of View:
The field of view (FOV) refers to the area that the camera can capture. It’s important to choose a camera with a wide enough FOV to cover the desired area. For larger areas, consider a camera with a wide-angle lens or the ability to pan and tilt.
Additionally, consider whether you need a camera with a fixed lens or a varifocal lens. Fixed lenses are set at a specific focal length and provide a fixed field of view, while varifocal lenses allow you to adjust the focal length and therefore the field of view.
Weather Resistance:
Since the camera will be used outdoors, it’s crucial to choose a weather-resistant model. Look for cameras with an IP rating of at least IP65, indicating resistance to dust and water. This will ensure that the camera can withstand various weather conditions.
If you live in an area with extreme temperatures or high humidity, consider opting for a camera with extended temperature range and humidity protection.
Furthermore, it’s important to ensure that the camera housing is durable and can resist vandalism or tampering attempts.
Night Vision:
If you need the camera to monitor your property at night, make sure to choose a camera with infrared (IR) night vision capabilities. IR LEDs will provide illumination in low light conditions, allowing the camera to capture clear footage even in the dark.

Consider the range of the night vision and whether it’s sufficient for your needs. Some cameras also come with advanced features like smart IR, which automatically adjusts the intensity of the infrared LEDs based on the distance of objects.
Overall, selecting the right camera for your outdoor security system is crucial to ensure reliable and high-quality surveillance footage. Take into account the resolution, field of view, weather resistance, and night vision capabilities to make an informed decision.
Understanding the Camera’s Output
Before wiring up your outdoor security camera to a computer monitor, it is important to understand the camera’s output and the equipment you will need to make the connection. A security camera typically has one or more video outputs, such as HDMI or VGA, that allow you to connect it to a display device like a computer monitor.
The video output of the camera will depend on the model and type of camera you have. Some cameras have multiple output options, while others have a single output. It is important to check the specifications of your camera to determine what type of output it has.
If your camera has multiple output options, you can choose the one that is most convenient for you. HDMI is a popular choice as it provides high-definition video and audio in a single cable. VGA, on the other hand, is an older standard that provides video only. Depending on the output of your camera, you will need to ensure that your computer monitor has the corresponding input.

Once you have identified the camera’s output and the computer monitor’s input, you will need the necessary cables to connect the two. HDMI cables are common and readily available, while VGA cables may require an adapter if your computer monitor only supports HDMI. Make sure to purchase the appropriate cables and adapters to ensure a secure and reliable connection.
It is also worth noting that some cameras may have additional output options, such as BNC or RCA connectors. These connectors are commonly found in older analog cameras. If your camera has these connectors, you will need additional equipment, such as a BNC to HDMI converter, to connect it to a computer monitor.
Understanding the camera’s output and the required equipment will help you successfully wire up your outdoor security camera to a computer monitor. Make sure to carefully read the camera’s specifications and choose the appropriate cables and adapters for a seamless connection.
Gathering the Necessary Equipment
Before you can start wiring up your outdoor security camera to your computer monitor, you will need to gather some essential equipment:
- Outdoor security camera: Choose a camera that is suitable for outdoor installation and has the features you desire, such as night vision, motion detection, and high-resolution video recording.
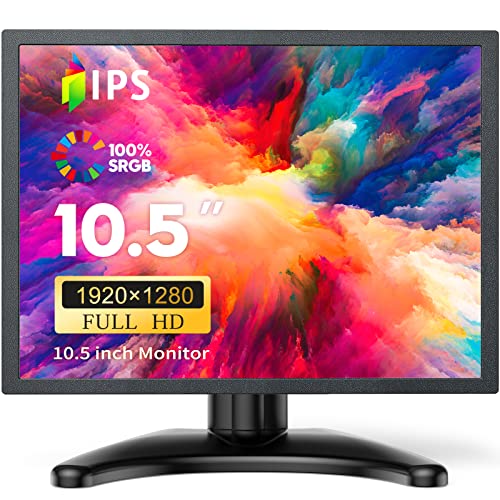
- Computer monitor: Ensure that you have a computer monitor with the necessary input ports, such as HDMI or VGA, to connect the camera.
- Video cable: Depending on the camera and monitor ports, you will need an appropriate video cable to connect the two devices. This could be an HDMI cable, VGA cable, or an adapter if the ports are different.
- Power supply: Most outdoor security cameras require a power source, so make sure you have a power supply nearby or consider investing in a camera that is powered by batteries or solar panels.
- Mounting brackets and screws: Depending on your camera’s design, you may need mounting brackets and screws to properly secure it in your desired location.
- Network cables (optional): If your camera supports network connectivity, you may need Ethernet cables to enable a wired connection between your camera and your computer, allowing you to access the camera’s footage remotely.
- Router (optional): If you want to access your camera’s footage remotely, you will need a router to connect your camera to the internet. Make sure you have a router with available Ethernet ports.
Once you have gathered all the necessary equipment, you will be ready to proceed with the wiring process.
Connecting the Camera to the Computer
Once you have installed your outdoor security camera, the next step is to connect it to your computer monitor. Follow these steps to ensure a successful connection:
Step 1: Determine the Connection Type
First, you need to determine the type of connection your camera supports. Most outdoor security cameras have multiple connection options, such as Ethernet, Wi-Fi, or coaxial cable. Refer to the user manual of your camera to find out which connection method is appropriate for your setup.
Step 2: Connect the Camera to the Computer
After determining the connection type, proceed with the appropriate connection method:
| Connection Type | Steps |
|---|---|
| Ethernet |
|
| Wi-Fi |
|
| Coaxial Cable |
|
After connecting the camera to your computer, make sure to power on both devices. Your computer should detect the camera automatically. If not, refer to the camera’s user manual for troubleshooting steps.
Configuring the Camera Software
Once you have wired up your outdoor security camera to your computer monitor, you will need to configure the camera software for proper functionality. Here are the steps to do so:
Step 1: Install the Camera Software
Insert the software CD that came with your outdoor security camera into your computer’s CD/DVD drive. Run the installation executable file and follow the on-screen instructions to install the camera software.
Step 2: Launch the Camera Software
Once the installation is complete, locate the camera software shortcut icon on your desktop or in the Start menu. Double-click on the icon to launch the camera software.
Step 3: Connect to the Camera
After launching the camera software, you will need to establish a connection between the software and your outdoor security camera. This can usually be done by clicking on a “Connect” or “Add Camera” button within the software interface.
Step 4: Configure Camera Settings
Once the camera is successfully connected, you can start configuring the camera settings according to your preferences. Common camera settings include resolution, frame rate, motion detection sensitivity, and recording options. These settings are typically adjustable within the camera software’s interface.
Step 5: Save and Apply Settings
After configuring the camera settings, make sure to save and apply the changes so that they take effect. Look for a “Save” or “Apply” button within the camera software interface to do so.
By following these steps, you should be able to configure the camera software for your wired outdoor security camera and ensure its proper functionality on your computer monitor.
Adjusting the Camera Settings
After wiring up your outdoor security camera to your computer monitor, it’s important to adjust the camera settings to ensure optimal surveillance. Here are a few key settings to consider:
1. Image Quality: Adjust the image quality settings to determine the clarity and resolution of the camera feed. Higher image quality may result in larger file sizes, so finding a balance between quality and storage space is important.
2. Brightness and Contrast: The brightness and contrast settings can help enhance the visibility of your camera feed, especially in varying lighting conditions. Adjust these settings to ensure a clear and well-lit image.
3. Motion Detection: Many outdoor security cameras come with motion detection capabilities. Configure the motion detection settings according to your preferences. You can adjust the sensitivity, detection zone, and notifications for motion events.
4. Recording Options: Determine how the camera records footage. You can choose continuous recording or set specific time frames for recording. Additionally, some cameras allow for scheduled recording or only recording when motion is detected.
5. Network and Connectivity: Confirm that the camera is properly connected to your computer monitor via the appropriate cables. Ensure that the network settings, such as IP address and port forwarding, are correctly configured for remote access and monitoring.
By adjusting these camera settings, you can optimize your outdoor security camera system to meet your specific monitoring needs. Regularly check and fine-tune the settings to ensure consistent and reliable surveillance.
Testing the Camera and Monitor Connection
Once you have successfully connected your outdoor security camera to your computer monitor, it is important to test the connection to ensure everything is working properly. Follow these steps to test the camera and monitor connection:
- Turn on the power to your outdoor security camera and make sure the cables are properly connected to both the camera and the computer monitor.
- Open the software or application that came with your camera on your computer. If you don’t have one, you can usually access the camera’s live feed through a web browser.
- Wait for the application or browser to load the live feed from the camera. This may take a few moments depending on your camera and computer’s processing speed.
- Once the live feed is loaded, check the monitor to ensure that you can see a clear and steady image from the camera. If the image is blurry or distorted, you may need to adjust the camera’s focus or positioning. Refer to the camera’s user manual for instructions on how to do this.
- Test the camera’s motion detection feature by moving in front of the camera’s field of view. The live feed should show the motion and capture it in real-time. If the camera does not detect motion or if the motion capture is delayed, you may need to adjust the camera’s sensitivity settings.
- Check the audio function of the camera by making a noise or speaking into the camera’s built-in microphone. The audio should be clear and audible through the monitor’s speakers. If the audio quality is poor or if there is no audio at all, check the camera’s audio settings and connections.
- If everything is working properly, congratulations! Your outdoor security camera is successfully connected to your computer monitor. You can now use your monitor to monitor and record any activity captured by the camera.
Remember to regularly test your camera and monitor connection to ensure they continue to function properly and provide you with the security you need.
Final Thoughts and Additional Tips
Setting up an outdoor security camera to your computer monitor can greatly enhance your home security system. Here are a few final thoughts and additional tips to consider:
1. Make sure your computer monitor has the necessary inputs to connect the security camera. Common input options include HDMI and VGA ports.
2. Consider the placement of your security camera. It should be strategically positioned to capture the intended area and minimize blind spots.
3. Ensure that your outdoor security camera is weatherproof and designed for outdoor use. This will help protect it from rain, snow, and extreme temperatures.
4. Keep in mind that outdoor security cameras typically require a power source. Plan the camera placement accordingly and make sure to have a nearby power outlet or use a weatherproof power cable.
5. Consider adding additional security measures such as motion-activated lights or an alarm system to enhance the effectiveness of your outdoor security camera.
6. Regularly check and clean your outdoor security camera to ensure optimal performance. Dust and debris can affect the image quality and functionality of the camera.
7. Familiarize yourself with the software or app that comes with your outdoor security camera. This will allow you to access the camera’s live feed, adjust settings, and view recordings from your computer monitor.
8. Always be mindful of privacy concerns when using outdoor security cameras. Make sure to inform anyone who may be captured on camera about its presence and seek legal advice if necessary.
With these final thoughts and additional tips in mind, you can confidently set up and connect your outdoor security camera to your computer monitor for enhanced home security.
FAQ,
How can I connect an outdoor security camera to my computer monitor?
To connect an outdoor security camera to your computer monitor, you will need an Ethernet cable. First, connect one end of the Ethernet cable to the network port on your computer monitor. Then, connect the other end of the Ethernet cable to the LAN port on the security camera. Make sure both the monitor and the camera are powered on. Your computer monitor should automatically detect the camera and display its video feed.
What do I need to connect an outdoor security camera to my computer monitor?
To connect an outdoor security camera to your computer monitor, you will need an Ethernet cable and a power source for the camera. You may also need an adapter to convert the camera’s video signal to a format compatible with your computer monitor. Additionally, make sure your computer monitor has a network port and supports the resolution and video format of the camera’s output. Consult the camera’s user manual or contact the manufacturer for specific instructions.


