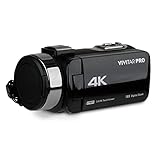
Vivitar is a well-known brand that offers a range of digital cameras for both amateur and professional photographers. These cameras are known for their user-friendly features and high-quality images. If you have recently purchased a Vivitar digital camera and are wondering how to get started, this article will guide you through the basic functions and operations of your camera.
The first step in working a Vivitar digital camera is to familiarize yourself with its buttons and controls. On the top or back of the camera, you will find buttons for power, shutter release, menu navigation, and zoom in/out. Take some time to read the camera’s manual and understand the function of each button.
Next, you will need to insert a memory card into your Vivitar digital camera. Memory cards are small storage devices that are used to store photos and videos. Most cameras use SD cards, so make sure you have a compatible one. To insert the memory card, locate the card slot, usually found on the side or bottom of the camera, and gently push the card in until it clicks into place.
Once the memory card is inserted, you can turn on your Vivitar digital camera by pressing the power button. The camera will take a few seconds to start up and then you will be ready to start capturing photos. Use the menu button and navigation buttons to navigate through the camera’s settings and options. You can adjust the image size, quality, white balance, and other settings according to your preferences.
To take a photo, aim your Vivitar digital camera at the subject and press the shutter release button halfway down to focus. Once the subject is focused, press the shutter release button all the way down to capture the photo. You can review the photo on the camera’s LCD screen and delete or save it as needed.
Finally, you can connect your Vivitar digital camera to a computer to transfer the photos. Most cameras come with a USB cable that allows you to connect the camera to your computer. Once connected, the camera will be recognized as a storage device, and you can copy the photos from the camera to your computer for editing, printing, or sharing.
In conclusion, working a Vivitar digital camera is a simple and enjoyable process. By familiarizing yourself with the camera’s buttons and controls, inserting a memory card, and understanding the basic operations, you can start capturing high-quality photos in no time. Remember to read the manual for more advanced features and techniques, and don’t forget to have fun exploring the world of photography with your Vivitar digital camera!
Understanding Vivitar Digital Cameras
When it comes to using a Vivitar digital camera, it is important to have a good understanding of its features and functions. Whether you are a beginner or an experienced photographer, knowing how to work with your Vivitar camera can greatly enhance your photography skills. In this article, we will explore the key elements and features of Vivitar digital cameras.
| Camera Modes | Image Quality | Exposure Settings |
|---|---|---|
| Vivitar digital cameras offer various camera modes to capture different types of photographs. These modes include auto, manual, scene, and more. The auto mode is suitable for beginners, as the camera decides the best settings to capture the photo. The manual mode allows you to have full control over the camera settings, giving you the freedom to adjust aperture, shutter speed, and ISO. | The image quality of a Vivitar digital camera depends on several factors, including resolution, sensor size, and lens quality. Higher resolution cameras tend to produce sharper and more detailed images. Understanding the image quality settings on your camera will help you choose the best option for your needs, whether you are shooting for print or web. | Exposure settings such as aperture, shutter speed, and ISO determine the amount of light that enters the camera’s sensor. Learning how to adjust these settings will allow you to control the exposure of your photographs and achieve the desired look. Vivitar digital cameras offer different exposure modes, including aperture priority, shutter priority, and full manual mode. |
Understanding the different features and functions of Vivitar digital cameras is essential for taking high-quality photos. Take the time to familiarize yourself with your camera’s settings and experiment with different modes and exposure settings to expand your photography skills. With practice and a good understanding of your Vivitar digital camera, you will be able to capture stunning images in no time.
Getting Started with Your Vivitar Camera
Welcome to the world of Vivitar digital cameras!

Before you can start capturing amazing photos and videos, there are a few things you need to do to set up your camera and get familiar with its features.
1. Charge the Battery: Connect the camera to a power source using the provided USB cable. Allow the battery to charge fully before using it for the first time.
2. Insert the Memory Card: Locate the memory card slot on your camera and insert a compatible memory card. Make sure the gold contacts on the card are facing down and slide the card gently into the slot until it clicks into place.
3. Power On the Camera: Press and hold the power button until the camera turns on. You may need to set the date and time for your camera during the initial setup.
4. Familiarize Yourself with the Buttons: Take some time to explore the different buttons and dials on your camera. Pay attention to features such as the shutter button, zoom controls, and playback buttons. Familiarizing yourself with these controls will make it easier to use your camera effectively.

5. Set the Mode: Your camera may have different shooting modes to choose from, such as auto, manual, or scene modes. You can usually select the mode by using the mode dial or menu button. Experiment with different modes to see which one suits your needs best.
6. Adjust the Settings: Dive into the camera’s menu system to explore and adjust various settings, including image quality, ISO, white balance, and resolution. Adjusting these settings will allow you to customize your photos according to the lighting conditions and your preferences.
7. Capture Your First Shot: Now that you have set up your camera and familiarized yourself with its functions, it’s time to start capturing photos. Aim your camera at the subject, press the shutter button halfway to focus, and fully press the button to take the shot.
8. Review and Share: After capturing your photos and videos, you can review them on the camera’s LCD screen. You can also transfer them to your computer or share them directly from your camera using the provided USB cable.
Remember: The best way to become proficient with your Vivitar camera is to practice regularly. Experiment with different settings and shooting techniques to develop your photography skills.

Enjoy your new Vivitar camera and have fun capturing your favorite moments!
Choosing the Right Settings for Your Photos
When using a Vivitar digital camera, it’s important to understand how to adjust the settings to capture the best possible photos. Here are some tips for choosing the right settings:
1. Resolution
One of the first settings you’ll want to consider is the resolution. This determines the size and quality of the photos you’ll take. Higher resolution settings produce larger and more detailed images, but they also take up more storage space on your memory card. Consider the purpose of your photos and how you plan to use them when selecting the resolution.
2. White Balance
White balance is another setting you’ll want to pay attention to. It helps to ensure that the colors in your photos are accurate. Different lighting conditions can affect how your camera perceives color. For example, fluorescent lighting may make your photos appear more blue. Experiment with different white balance settings to achieve the desired color accuracy in your photos.
In addition to resolution and white balance, there are other settings you can adjust, such as ISO, shutter speed, and aperture. These settings directly impact the exposure and clarity of your photos. It’s important to familiarize yourself with these settings and understand how they work together to achieve the desired effect.

Remember, practice makes perfect. Take the time to experiment with different settings and techniques to find what works best for you and the specific situation. Read the camera’s manual for more detailed instructions on adjusting settings and capturing great photos with your Vivitar digital camera.
Taking Photos with Your Vivitar Camera
Once you have familiarized yourself with the basic functions of your Vivitar digital camera, you are ready to start taking photos. Follow these simple steps to capture high-quality images:
-
Turn on your Vivitar camera by pressing the power button located on the top or back of the device.
-
Set the camera mode to “Photo” by using the mode dial. This mode is usually represented by an icon that looks like a camera.
-
Use the zoom control button or dial to adjust the zoom level. This allows you to get closer to or further away from your subject. Be careful not to overzoom, as it may result in a pixelated image.
-
Frame your shot by looking through the viewfinder or using the LCD screen on the back of the camera. Move the camera around until you have the desired composition.
-
Focus on your subject by half-pressing the shutter button. Wait for the camera to focus before fully pressing the button to take the photo. Some Vivitar cameras have a continuous autofocus feature, which helps keep moving subjects in focus.
-
Press the shutter button completely to take the photo. You may hear a sound or see a flash, depending on your camera settings.
-
Review your photo on the camera’s LCD screen to ensure it captured the image as desired. If you are not satisfied, you can delete the photo and try again.
-
If you are happy with the photo, you can transfer it to your computer or share it directly from the camera. Most Vivitar cameras have a USB port for data transfer.
-
Keep in mind that practice makes perfect when it comes to photography. Experiment with different settings, lighting conditions, and subjects to enhance your skills and capture stunning photos.
Remember to refer to your Vivitar camera’s user manual for specific instructions and features. Enjoy the process of capturing memories with your Vivitar camera!
Exploring Advanced Features of Vivitar Cameras
Vivitar cameras offer a range of advanced features that can help take your photography to the next level. Whether you’re a beginner or an experienced photographer, understanding these features will allow you to unlock the full potential of your Vivitar camera.
1. Manual Mode: One of the most powerful features of a Vivitar camera is the ability to switch to manual mode. This allows you to have complete control over settings such as aperture, shutter speed, and ISO. Manual mode is perfect for experimenting with different exposure settings and achieving the desired effect in your photos.

2. RAW Format: Vivitar cameras also offer the option to shoot in RAW format. Unlike JPEG, which is a compressed format, RAW files store all the data captured by the camera sensor. This allows for more flexibility when it comes to editing your photos in post-processing, giving you greater control over factors such as exposure, white balance, and color adjustments.
3. Multiple Exposure: Some Vivitar camera models have a multiple exposure feature. This feature allows you to merge two or more images into a single photo. With this creative tool, you can experiment with double exposures and create unique and captivating images.
4. Time-Lapse Photography: Another advanced feature offered by Vivitar cameras is the ability to capture time-lapse sequences. This feature allows you to record a series of images at set intervals and then play them back as a video. Time-lapse photography is great for capturing the passing of time, such as the movement of clouds or the blooming of flowers.
5. Wi-Fi Connectivity: Many Vivitar camera models are equipped with built-in Wi-Fi connectivity. This allows you to transfer photos directly from your camera to your smartphone or computer wirelessly. You can also control your camera remotely using a smartphone or tablet, making it easier to capture group shots or self-portraits without needing to be behind the camera.
Remember, these are just a few examples of the advanced features available on Vivitar cameras. Every model may have slightly different capabilities, so it’s important to consult your camera’s manual to fully understand and take advantage of all the features your specific model offers.

Transferring and Managing Your Photos
Once you have taken amazing photos with your Vivitar digital camera, it’s time to transfer and manage them. Follow these simple steps to ensure your photos are organized and easily accessible:
| Step | Description |
|---|---|
| 1 | Connect your Vivitar digital camera to your computer using the provided USB cable. |
| 2 | On your computer, open the file explorer or photo management software. |
| 3 | Navigate to the folder or location where you want to save your photos. |
| 4 | Locate the connected Vivitar camera in the file explorer or software and open it to view the contents. |
| 5 | Select the photos you want to transfer by clicking on them or using the select all option. |
| 6 | Drag and drop the selected photos to the desired folder or location on your computer. |
| 7 | Wait for the transfer to complete, and then safely disconnect your Vivitar camera from your computer. |
Once your photos are transferred to your computer, you can easily manage them by creating folders, renaming files, and organizing them into albums or categories. This will make it easier to find specific photos in the future.
Additionally, you can use photo editing software to enhance your photos, crop them, adjust the brightness and contrast, or apply filters to give them a unique look.
Remember to regularly back up your photos to an external hard drive or cloud storage to prevent any potential loss or damage to your precious memories.
By following these steps and implementing good photo management practices, you can enjoy your Vivitar digital camera to its fullest potential and effortlessly preserve your cherished moments.
Troubleshooting Common Issues with Vivitar Cameras
While Vivitar cameras are known for their user-friendly design and reliable performance, occasional issues may arise that require troubleshooting. Here are some common problems and their possible solutions:
1. Camera not turning on
If your Vivitar camera is not turning on, the first thing to check is the battery. Ensure it is properly inserted and charged. If the battery is old or damaged, replace it with a new one. Additionally, check if the battery compartment is clean and free from debris. If the issue persists, try connecting the camera to a power source using the provided USB cable.
2. Blurry images
If your images appear blurry, it is likely due to improper focus. Make sure the camera is set to autofocus mode. If you are shooting in low light conditions, use the camera’s flash or a tripod to stabilize the camera. Additionally, cleaning the lens with a soft, lint-free cloth can help improve image quality.
3. Memory card errors
If your Vivitar camera is displaying memory card errors, ensure the memory card is properly inserted. Try removing and reinserting the card. If the error persists, try using a different memory card. It is also recommended to format the memory card in the camera settings to clear any potential issues.
4. Camera freezing or not responding
If your Vivitar camera freezes or becomes unresponsive, try turning it off and on again. If that does not work, remove the battery and memory card for a few minutes, then reinsert them and power on the camera. Updating the camera’s firmware to the latest version may also resolve any software-related issues.
5. Flash not working
If the flash on your Vivitar camera is not working, ensure it is enabled in the camera settings. Check if the flash mode is set to auto or manual as desired. Make sure the batteries are properly inserted and charged. If the issue persists, try resetting the camera to its factory settings.
If you encounter any other issues with your Vivitar camera that cannot be resolved through troubleshooting, it is recommended to contact Vivitar’s customer support for further assistance.
Final Thoughts on Using Vivitar Digital Cameras
Using a Vivitar digital camera can be a rewarding experience for both beginners and experienced photographers. With their affordable prices and easy-to-use features, Vivitar cameras offer a great option for capturing memories and exploring the world of photography.
Here are some final tips and considerations when working with Vivitar digital cameras:
- Read the user manual: Before starting to use your Vivitar camera, make sure to carefully read the user manual. This will provide you with important information about the camera’s features, settings, and controls.
- Experiment with different shooting modes: Vivitar cameras often come with various shooting modes, such as auto, program, portrait, and landscape. Try experimenting with these modes to find the one that best suits your shooting needs.
- Pay attention to lighting conditions: Lighting plays a crucial role in photography, so pay attention to the lighting conditions when taking photos with your Vivitar camera. Adjust the camera’s settings accordingly and consider using external lighting sources if needed.
- Practice framing and composition: Framing and composition can greatly impact the overall quality of your photos. Take your time to practice framing your subjects and experimenting with different compositions to create visually appealing images.
- Backup your photos regularly: To avoid losing your precious photos, make sure to regularly back them up. Transfer your images to a computer or external storage device to ensure they are safely stored.
Remember, like any new skill, becoming proficient with using a Vivitar digital camera takes practice and patience. Don’t be discouraged if your initial photos don’t meet your expectations. Keep exploring and experimenting to improve your photography skills and capture stunning images with your Vivitar camera.
Question-answer:
How do I turn on my Vivitar digital camera?
To turn on your Vivitar digital camera, press and hold the power button located on the top or back of the camera. It may take a few seconds for the camera to power on. Once it is turned on, you will see the camera’s display screen light up.
How do I take a photo with my Vivitar digital camera?
To take a photo with your Vivitar digital camera, first make sure the camera is turned on. Then, use the viewfinder or the display screen to frame your shot. Once you have your subject in focus, press the shutter button. You will usually hear a click sound, indicating that the photo has been captured.
How do I transfer photos from my Vivitar digital camera to my computer?
To transfer photos from your Vivitar digital camera to your computer, you will need to connect the camera to your computer using a USB cable. Once connected, your computer should recognize the camera as a removable storage device. You can then open the folder that contains your camera’s photos and copy them to your computer’s hard drive. Alternatively, you can use the software that came with your camera to transfer the photos.