
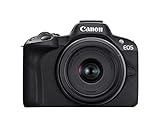
If you own a DSLR camera and have noticed that your pictures are consistently blurry, you might be wondering what could be causing this frustrating issue. Blurry photos can be a result of various factors, including camera settings, lens issues, and user error. Understanding the possible causes can help you troubleshoot and improve your photography skills.
One common cause of blurry pictures is incorrect focusing. DSLR cameras offer a variety of focusing modes, such as auto-focus and manual focus. Using the wrong mode or failing to properly focus on your subject can lead to blurry images. Additionally, if you are shooting in low light conditions, your camera may struggle to find focus, resulting in blurry photos.
Another factor that can contribute to blurry images is camera shake. When you press the shutter button, any movement or shake can cause blurriness. This is especially true when shooting with a slow shutter speed or without a tripod. To minimize camera shake, try using a faster shutter speed, reducing the amount of movement you make while taking the photo, or consider investing in a tripod.
Lastly, lens issues can also play a role in producing blurry pictures. Dust or smudges on the lens can affect the clarity of your images. It’s important to regularly clean your lens using a soft cloth or lens cleaning solution. Additionally, if your lens is not properly attached to the camera or if it is damaged, it can result in poor image quality. Double-check that your lens is securely attached and in good condition.
By understanding these potential causes of blurry pictures and taking appropriate steps to address them, you can improve the quality of your DSLR photography and capture sharper images. Experiment with different settings, practice proper focusing techniques, and keep your equipment clean and well-maintained to ensure optimal image quality.

Why are my DSLR camera photos blurry?
Taking blurry photos with a DSLR camera can be frustrating, especially when you’re trying to capture important moments or create stunning images. Several factors can contribute to the blurriness of your photos, and understanding these factors can help you troubleshoot and improve the sharpness of your images.
1. Focus Issues
One of the most common reasons for blurry photos is incorrect focus. DSLR cameras offer various focus modes, such as autofocus (AF) and manual focus (MF). If you’re using autofocus, make sure your camera is set to the appropriate AF mode (single or continuous) and that it has properly locked focus on your subject. It’s also important to select the correct autofocus points to ensure sharpness where you want it.
If you’re using manual focus, double-check your focus through the viewfinder or by using the camera’s live view. It’s crucial to have precise focus, especially when shooting with a wide aperture or in low light conditions.
2. Shutter Speed
Another factor that can cause blur is a slow shutter speed. When shooting handheld, it’s important to use a fast enough shutter speed to freeze motion and prevent camera shake. As a general rule, your shutter speed should be at least equivalent to the focal length of your lens. For example, if you’re using a 50mm lens, your shutter speed should be around 1/50th of a second or faster. If your shutter speed is too slow, consider using a tripod or increasing the ISO to get a faster shutter speed.
3. Camera Shake
Camera shake is a common cause of blurriness, especially when shooting handheld with slow shutter speeds. To minimize camera shake, maintain a steady grip on your camera and use proper handholding techniques. If possible, lean against a stable surface or use image stabilization (IS) or vibration reduction (VR) if your lens has those features. Using a tripod or a monopod can also help eliminate camera shake.
Additional Tips:
• Check your lens for smudges, dust, or fingerprints that can impact image quality.
• Use a smaller aperture (higher f-stop number) to increase the depth of field and improve overall sharpness.
• Avoid shooting at maximum zoom, as image quality may decrease at the extreme ends of the lens.
• Be aware of the minimum focusing distance of your lens, as getting too close to your subject can result in blurry photos.

If you’ve tried troubleshooting and still experience consistent blurriness in your photos, it may be worth getting your camera and lenses checked by a professional. They can help determine if there are any hardware issues affecting image quality.
Understanding the basics of DSLR photography
DSLR photography stands for Digital Single-Lens Reflex photography. It is a popular form of photography that allows photographers to capture high-quality images using advanced technology. To take clear and sharp pictures with your DSLR camera, it is essential to understand some basic concepts. Here are a few key aspects to consider:
- Aperture: The aperture refers to the opening in the lens through which light passes. It affects the depth of field in an image, meaning how much of the photo is in focus. A wide aperture (small f-number) creates a shallow depth of field with a blurred background, while a narrow aperture (large f-number) produces a large depth of field with more of the image in focus.
- Shutter speed: Shutter speed controls the amount of time the camera’s shutter remains open, allowing light to enter the camera sensor. A faster shutter speed freezes motion and is ideal for capturing fast-moving subjects, while a slower shutter speed creates motion blur, which can be used creatively for certain types of photography.
- ISO: ISO refers to the sensitivity of the camera sensor to light. A higher ISO setting makes the sensor more sensitive and is useful in low-light conditions, but it can also introduce noise or graininess in the image. Adjust the ISO based on the lighting conditions you are shooting in to get the best results.
- Focusing: Proper focusing is crucial for achieving sharp images. Most DSLR cameras have autofocus systems that allow you to automatically focus on your subject. However, you can also use manual focus to have full control over what you want to be in focus.
- Stability: Keeping your camera stable while taking a photo is vital to avoid blurriness. Use a tripod or stabilize the camera against a steady surface to reduce camera shake. Additionally, using the camera’s image stabilization feature if available can also help reduce blur caused by shaky hands.
By understanding and mastering these basic concepts, you can greatly improve the clarity and sharpness of your DSLR photographs. Experiment with different settings and techniques to enhance your skills and capture stunning images with your DSLR camera.
Common causes of blurry photos
When your DSLR camera is taking blurry pictures, there can be several common causes leading to this issue. Understanding these causes can help you troubleshoot and fix the problem:
| Cause | Description |
|---|---|
| Camera movement | Shaky hands or camera movement during the exposure can result in blurry photos. Make sure to hold the camera steady or use a tripod. |
| Focus issues | If the camera is not focusing correctly on the subject, the resulting image may appear blurry. Check your focus settings and make adjustments accordingly. |
| Low light conditions | In low light environments, the camera may struggle to capture sharp images. Consider using a higher ISO setting or using additional lighting techniques. |
| Incorrect shutter speed | Using a slow shutter speed can result in motion blur if the subject or camera is moving. Adjust the shutter speed to freeze motion or use a faster lens. |
| Dirty lens | Dust or smudges on the lens can affect image sharpness. Clean the lens properly using a microfiber cloth or lens cleaning solution. |
| Incorrect aperture settings | Using a wide open aperture (low f-stop number) can result in a shallow depth of field, causing parts of the image to be out of focus. Adjust the aperture to ensure proper depth of field. |
| Slow autofocus | If the autofocus is slow or inaccurate, it can lead to blurry photos. Try using manual focus or updating the firmware of your camera. |
| Subject movement | If your subject is moving, it can result in motion blur. Use a faster shutter speed or try panning techniques to capture a sharp image. |
| Poor lens quality | A low-quality lens can impact the sharpness of your photos. Consider investing in a better lens for improved image quality. |
By identifying the probable cause of your blurry photos, you can take appropriate steps to address the issue and capture sharp and crisp images with your DSLR camera.

The Importance of Proper Focusing Techniques
When it comes to photography, one of the most crucial elements of capturing a clear and sharp image is ensuring that your camera is properly focused. Whether you are using a DSLR camera or any other type of camera, understanding and utilizing proper focusing techniques can make a significant difference in the overall quality of your photos.
What is Focusing?
Focusing is the process of adjusting the camera lens to achieve optimal sharpness and clarity in the subject of your photo. It involves aligning the lens elements to redirect incoming light and ensure that it properly converges onto the camera sensor or film. A well-focused photo will have crisp details and a clear distinction between the subject and the background.
Manual vs. Autofocus
Most modern DSLR cameras offer both manual and autofocus capabilities. While autofocus can be convenient and efficient in many situations, it is not foolproof and may sometimes fail to accurately identify the intended subject or properly adjust the focus. This is especially true in low-light conditions or when shooting subjects with little contrast.
Manual focusing, on the other hand, allows you to have complete control over the focus point and ensure that it is precisely aligned with your desired subject. It requires practice and patience but can produce sharper and more accurate results, especially in challenging shooting scenarios.
Tips for Proper Focusing
- Take advantage of your camera’s autofocus modes and select the appropriate setting for your shooting scenario (e.g., single point autofocus, continuous autofocus).
- Consider using back-button focusing, where you assign a separate button on your camera to activate the autofocus, allowing you to separate focusing from shutter release.
- Avoid relying solely on autofocus and use the manual focus override if necessary to fine-tune the focus.
- Pay attention to your camera’s focus points and ensure that the desired subject is aligned with the active focus point.
- Use a tripod or stabilize your camera to minimize hand shake and ensure better focus accuracy.
- Experiment with focus stacking techniques for capturing images with extensive depth of field.
By mastering proper focusing techniques, you can significantly enhance the quality of your photos and avoid the frustration of blurry images. Take the time to understand your camera’s focusing capabilities, practice manual focusing, and experiment with different techniques to achieve the desired sharpness and clarity in your photography.

Lens issues and their impact on image sharpness
One of the main factors that can contribute to blurry pictures taken with a DSLR camera is a problem with the lens. A lens may have various issues that can affect the overall sharpness of an image. Understanding these lens issues can help you diagnose and potentially resolve the problem.
| Lens Issue | Impact on Image Sharpness |
|---|---|
| Dust or dirt on the lens | If there is dust or dirt on the lens, it can interfere with the incoming light and result in loss of sharpness. Regular cleaning of the lens is essential to maintain optimal image quality. |
| Fungus growth | Fungus can grow on lenses when they are kept in humid environments. This growth can cause hazy spots and affect the overall sharpness of the image. Professional cleaning may be required to remove the fungus and restore image quality. |
| Scratches or damage | If the lens is scratched or damaged, it can significantly impact image quality. Light can scatter when passing through scratches or damaged areas, resulting in reduced sharpness and clarity. Repairing or replacing the lens may be necessary in such cases. |
| Misalignment or calibration issues | If the lens elements are not aligned or calibrated correctly, it can lead to focusing problems and decrease image sharpness. This issue can often be resolved by adjusting or calibrating the lens, but professional assistance may be required. |
| Zoom or focus ring issues | If the zoom or focus ring on the lens is loose, it can cause problems with accurate focusing and result in blurry images. Tightening or repairing the ring can help resolve this issue. |
If you suspect that your DSLR camera is taking blurry pictures, checking the condition of your lens should be one of the first steps in troubleshooting the problem. By addressing any lens issues, you can improve the sharpness and overall image quality of your photographs.
The role of camera shake in producing blurry images
One of the most common causes of blurry images in DSLR cameras is camera shake. When you take a photo, the camera needs to remain steady in order to capture a sharp image. However, even the slightest movement can result in blurriness.
Camera shake occurs when there is unintentional movement of the camera during the exposure. This can happen when you press the shutter button, causing the camera to shake slightly. It can also happen if you are holding the camera in your hands and not using a tripod or other stabilizing device.
When the camera shakes, the image captured by the sensor is no longer in focus. Instead, it appears blurred or fuzzy. This can be especially noticeable when using a long lens or shooting in low light conditions, as even the smallest movement can be magnified in the final image.

To minimize camera shake and ensure sharp images, there are a few techniques you can try:
1. Use a tripod: Using a tripod can help stabilize the camera and prevent any movement during the exposure. This is particularly important when shooting in low light or using a telephoto lens.
2. Use image stabilization: Many DSLR cameras and lenses come with built-in image stabilization technology. This helps to compensate for any camera shake and can greatly improve the sharpness of your images.
3. Practice good handholding technique: If you’re shooting handheld, be sure to hold the camera steady and use proper grip technique. Keep your elbows tucked in, brace yourself against a stable object if possible, and use your other hand to support the lens.
4. Increase shutter speed: Another way to reduce the impact of camera shake is to increase your shutter speed. A faster shutter speed will freeze any motion and help to eliminate blur caused by camera movement.
By understanding the role of camera shake and implementing these techniques, you can greatly improve the sharpness of your DSLR images and capture clear, crisp photos.
Exploring the effects of shutter speed and aperture settings
When it comes to capturing sharp and clear images with your DSLR camera, understanding the effects of shutter speed and aperture settings is crucial. These two factors play a significant role in determining the image’s sharpness, clarity, and overall quality.
Shutter speed refers to the amount of time the camera’s shutter remains open when taking a photo. A fast shutter speed, such as 1/1000th of a second, freezes the motion and helps to eliminate any blur caused by the movement of the subject or camera shake. On the other hand, a slow shutter speed, like 1/30th of a second, allows more light to enter the camera and can create a sense of motion blur.
Aperture, on the other hand, refers to the size of the opening in the lens through which light passes. It is measured in f-stops, where a smaller f-stop (e.g., f/2.8) means a wider aperture and more light entering the camera. A wider aperture allows for a shallow depth of field, with the subject in focus and the background blurred. On the contrary, a narrow aperture (e.g., f/16) gives a greater depth of field, with more of the image in focus from the foreground to the background.
When working with a DSLR camera, experimenting with different combinations of shutter speed and aperture settings can give you a better understanding of how they impact image sharpness and clarity. For example, if you want to freeze fast-moving action, using a fast shutter speed (e.g., 1/1000th of a second) and a wider aperture (e.g., f/2.8) can help you achieve crisp and sharp results.
However, it’s essential to note that the choice of shutter speed and aperture settings depends on various factors such as lighting conditions, subject movement, and desired creative effects. Therefore, it’s recommended to practice and experiment with different settings in different situations to find the perfect combination for the result you want to achieve.
In conclusion, understanding the effects of shutter speed and aperture settings is vital for capturing sharp and clear images with your DSLR camera. By adjusting these settings and experimenting with different combinations, you can enhance the overall quality of your photographs and achieve the desired visual effects.
Troubleshooting tips to improve photo sharpness
If your DSLR camera is consistently taking blurry pictures, there are several things you can check and adjustments you can make to improve the sharpness of your photos.
1. Check your focus
Make sure your camera is properly focusing on the subject. Use the autofocus feature if available or manually adjust the focus until the image looks sharp through the viewfinder. Keep in mind that autofocus may struggle in low light or with fast-moving subjects.
2. Adjust your aperture settings
Using a larger aperture (smaller f-number) can result in a shallower depth of field, causing parts of the image to be out of focus. Consider increasing your aperture to ensure that the entire subject is in focus. However, keep in mind that a larger aperture can also reduce the amount of light entering the camera, so you may need to adjust other settings accordingly.
3. Increase your shutter speed
A slower shutter speed can lead to blurred images, especially when photographing moving subjects or in low light conditions. Increase the shutter speed to capture sharper images, but be careful not to make it too fast as it can result in underexposed images.
4. Use a tripod or stabilize your camera
Motion blur can be caused by camera shake, especially when shooting with slower shutter speeds. Using a tripod or any type of stable surface to support your camera can greatly improve the sharpness of your photos.
5. Clean your lens
Dust, smudges, or fingerprints on your lens can affect image quality. Use a microfiber cloth or lens cleaning solution to gently clean your lens before taking photos. Additionally, check for any dirt or debris in the camera’s sensor that may need to be cleaned.
6. Check your camera settings
Review your camera settings to ensure that there are no specific settings causing image blurriness. Pay close attention to image stabilization settings and any other relevant features that may need adjustment.
| Issue | Possible Cause | Solution |
|---|---|---|
| Blurry images in low light | High ISO settings | Lower ISO settings or use a tripod |
| Blurry images with fast-moving subjects | Slow shutter speed | Increase shutter speed or use burst mode |
| Blurry images when zoomed in | Lack of image stabilization | Use a lens with image stabilization or stabilize the camera |
By following these troubleshooting tips, you can significantly improve the sharpness of your DSLR camera images. Experiment with different settings and techniques to find what works best for your specific shooting situations.
Question-answer:
Why are all my DSLR camera pictures coming out blurry?
There could be several reasons why your DSLR camera pictures are coming out blurry. One possible reason is that your camera settings are not properly adjusted. Another reason could be that you are using a slow shutter speed, which can result in motion blur if you are not using a tripod. Another possible cause is camera shake, which can occur if you are not holding the camera steady enough while taking a photo. Additionally, it could be a problem with the autofocus system or lens of your camera.
How do I fix blurry pictures taken with my DSLR camera?
To fix blurry pictures taken with your DSLR camera, you can try several things. First, you should make sure that your camera settings are properly adjusted. Check your aperture, ISO, and shutter speed settings to ensure they are appropriate for the shooting conditions. If you are using a slow shutter speed, consider using a tripod to eliminate camera shake. If the issue persists, try cleaning the lens and autofocus sensors. It is also a good idea to practice proper handholding techniques to ensure that you are holding the camera steady while taking a photo.
Can using the wrong lens cause blurry pictures on a DSLR camera?
Yes, using the wrong lens can cause blurry pictures on a DSLR camera. Different lenses have different focusing capabilities, and using a lens that is not suitable for your shooting conditions can result in blurry images. Additionally, using a lens with a dirty or scratched surface can also lead to blurry pictures. It is important to make sure that you are using the correct lens for the type of photography you are doing and that the lens is in good condition.


