
Filters are an essential accessory in a photographer’s toolkit. They allow you to enhance your images, protect your camera lens, and create unique effects that can’t be easily replicated in post-processing. But when should you use filters on your digital camera?
One key factor to consider is the lighting conditions. Filters can help you control and manipulate the light entering your camera, which is especially useful in situations where the lighting is harsh or uneven. For example, a polarizing filter can help reduce glare and increase the contrast in bright, sunny conditions, while a neutral density filter can help you achieve longer exposure times in daylight.
Another important consideration is the subject matter. Different filters can dramatically alter the appearance of your images, so it’s essential to choose the right one for your desired effect. For instance, if you’re photographing landscapes, a graduated neutral density filter can help you balance the exposure between the sky and the foreground, creating more detail in both areas. On the other hand, if you’re capturing waterfalls or seascapes, a long exposure filter can create a dreamy, ethereal effect by blurring the motion of the water.
Filters can also be used for creative purposes. They allow you to experiment with different colors, tones, and textures, giving your images a unique and artistic look. For example, a color filter can enhance the colors of a sunset, while a soft-focus filter can add a dreamy and romantic feel to a portrait. By using filters creatively, you can push the boundaries of your photography and create images that stand out from the crowd.
In conclusion, filters are a versatile tool that can greatly enhance your digital photography. By considering factors such as lighting conditions, subject matter, and creative goals, you can determine when and how to use filters effectively. Whether you want to improve the quality of your images or add a touch of creativity, filters can help you achieve your desired results.

Understanding filters on digital camera
Filters play an important role in enhancing the quality and creativity of photographs taken with a digital camera. They are accessories that attach to the camera lens and can be used to modify the light entering the camera. Understanding how filters work can help photographers achieve their desired effects and improve the overall outcome of their images.
UV filters: These filters are commonly used to protect the camera lens from scratches, dust, and moisture. They also help reduce the effects of haze and ultraviolet light, resulting in clearer and sharper photos. UV filters are particularly useful when shooting outdoors in bright sunlight.
Polarizing filters: Polarizing filters can enhance color saturation and reduce glare. These filters are commonly used for landscape and outdoor photography, as they can improve the appearance of skies, water, and foliage. By rotating the filter, photographers can adjust the amount of polarization to achieve the desired effect.
Neutral density (ND) filters: ND filters are designed to reduce the amount of light entering the camera, allowing for longer exposures and greater control over depth of field. They are often used in situations where the available light is too bright or when photographers want to capture motion blur in their images, such as when photographing moving water or creating long exposure effects.
Graduated neutral density (GND) filters: GND filters are similar to ND filters but have a gradient that transitions from clear to dark. They are commonly used in landscape photography to balance the exposure between the bright sky and the darker foreground. By positioning the dark portion of the filter over the sky, photographers can capture well-exposed landscapes with properly exposed skies.

Special effects filters: There are various special effects filters available, such as star filters, soft focus filters, and infrared filters, which can add artistic elements to photographs. These filters can create unique and creative effects, allowing photographers to experiment and add a personal touch to their images.
It’s important to note that not all digital cameras support the use of filters. Before purchasing and using filters, make sure to check your camera’s compatibility and lens diameter to ensure a proper fit. Additionally, understanding the specific characteristics and limitations of each filter can help photographers make informed decisions when selecting and using filters for their digital camera.
Enhancing landscape photography
Landscape photography is a popular genre that allows photographers to capture the beauty of nature and the world around us. Adding filters to your digital camera can help enhance your landscape photography by manipulating light, color, and contrast, resulting in stunning images that truly capture the essence of a scene.
Neutral Density Filter
A neutral density (ND) filter is a must-have tool for landscape photographers. These filters reduce the amount of light entering the camera, allowing you to use longer shutter speeds without overexposing the image. ND filters are particularly useful for capturing movement in landscapes, such as flowing water or moving clouds. They can create a soft, dreamy effect that adds depth and drama to your images.
Polarizing Filter
A polarizing filter is another essential filter for landscape photography. It helps reduce glare and reflections, allowing you to capture the true colors and details of a scene. Polarizers are especially effective when photographing bodies of water or scenes with a lot of foliage. They can enhance the saturation of colors, making the sky appear bluer and the greenery more vibrant. The filter also helps to darken the sky, adding drama and contrast to your photos.

Graduated Neutral Density Filter
A graduated neutral density (GND) filter is useful when photographing landscapes with a significant difference in brightness between the sky and the foreground, such as a sunset or sunrise. This filter is dark on one end and gradually becomes clear on the other end. By placing the dark portion over the sky, you can balance the exposure between the sky and the foreground, resulting in a well-exposed image. GND filters help to retain details in both the highlights and shadows, creating a more balanced and pleasing photograph.
When using filters in landscape photography, it’s essential to invest in high-quality filters that won’t degrade image quality. Look for filters made with optical glass and multi-coating to minimize reflections and maximize light transmission. Experiment with different filters and combinations to achieve the desired effect and unleash your creativity in capturing stunning landscapes.
Improving exposure in bright sunlight
In bright sunlight, capturing the perfect exposure can be a challenge. The intense sunlight can create harsh shadows and blow out highlights, resulting in a loss of detail and dynamic range in the image. However, by using filters on your digital camera, you can improve your exposure and achieve better results.
Neutral density filters
One type of filter that can help improve exposure in bright sunlight is a neutral density (ND) filter. ND filters reduce the amount of light that enters the camera, allowing you to use longer shutter speeds or wider apertures without overexposing the image. This helps to balance the exposure and retain more detail in both the highlights and shadows.
ND filters come in different strengths, usually measured in stops. For example, a 1-stop ND filter reduces the light by half, a 2-stop ND filter reduces the light by a quarter, and so on. By choosing the appropriate strength of ND filter, you can control the amount of light that enters the camera and achieve a more balanced exposure.

Polarizing filters
Another type of filter that can improve exposure in bright sunlight is a polarizing filter. Polarizing filters reduce glare and reflections from non-metallic surfaces, such as water or glass, which can often cause overexposure and reduce image clarity.
By using a polarizing filter, you can selectively block the polarized light waves, resulting in reduced glare and improved contrast in your images. This helps to improve the overall exposure and highlight more details in the scene.
It’s important to note that polarizing filters work best when the light source is coming from one direction, such as the sun. Rotating the filter allows you to adjust the amount of polarization and find the optimal position for reducing glare and improving exposure.
Conclusion
When shooting in bright sunlight, filters can be a valuable tool for improving exposure. Neutral density filters help balance the exposure by reducing the amount of light that enters the camera, while polarizing filters reduce glare and reflections, resulting in improved contrast and detail. By using these filters, you can achieve better exposures and capture stunning images even in the harshest lighting conditions.

Reducing reflections and glare
One of the main benefits of using filters on a digital camera is the ability to reduce reflections and glare in your photos. These unwanted reflections and glare can occur when photographing subjects that have shiny surfaces or when shooting in bright lighting conditions.
One common type of filter that can help reduce reflections is a polarizing filter. This filter is designed to block certain angles of light, helping to reduce glare and reflections from non-metallic surfaces, such as water, glass, and foliage. By rotating the polarizing filter, you can adjust the level of reflection reduction to achieve the desired effect in your photos.
Another type of filter that can be used to reduce reflections is a neutral density filter. This filter is also designed to reduce the amount of light that enters the camera, which can help to minimize reflections and glare. Neutral density filters are particularly useful when photographing scenes with highly reflective surfaces, such as bodies of water or windows.
In addition to using filters, there are also some techniques you can use to reduce reflections and glare in your photos. One technique is to change your shooting angle or position to minimize the amount of direct light hitting the reflective surface. Another technique is to use a lens hood or shade to block out unwanted light and reduce reflections.
By using filters and employing these techniques, you can greatly improve the quality of your photos by reducing reflections and glare, resulting in more vibrant and clear images.
Adding creative effects to photos
Filters are a great tool to add creative effects to your photos and enhance their visual appeal. There are various types of filters available that can help you achieve different effects and transform your images into unique works of art.
Here are some creative effects you can achieve with filters:
- Black and white: Applying a black and white filter can give your photos a classic and timeless look. It can add drama and intensity to your images by removing color distractions and focusing on light and shadow.
- Sepia: Using a sepia filter can give your photos a vintage feel. It adds a warm brownish tone to your images, which can evoke nostalgia and enhance the overall mood.
- Soft focus: A soft focus filter can create a dreamy and romantic atmosphere in your photos. It adds a subtle blur to the image, which can help in creating a sense of depth and emphasizing the main subject.
- Gradient: A gradient filter can add a touch of color and create a gradient effect in your photos. It can be used to enhance the sky or background, giving your images a more vibrant and dynamic look.
- Fisheye: A fisheye filter can distort your photos, giving them a unique and intriguing perspective. It creates a wide-angle effect with a curved distortion, which can be great for capturing creative and unconventional compositions.
Experimenting with different filters can help you discover new ways to express your creativity and add a personal touch to your photos. Whether you want to give your images a vintage, dreamy, or dramatic look, filters can be a powerful tool to unleash your imagination and create stunning visual effects.
Balancing Color Temperature
One common use of filters on a digital camera is to balance color temperature. Color temperature refers to the color cast that can be present in photos due to different light sources. Different light sources emit light at different temperatures, measured in Kelvin (K).
For example, natural daylight has a color temperature of around 5500K to 6500K, which is considered a neutral white. However, other light sources such as incandescent bulbs or tungsten lighting have a much lower color temperature, typically around 2700K to 3200K, resulting in a warm yellowish tone in photos.

To balance the color temperature and achieve more accurate colors, filters can be used. One commonly used filter for this purpose is the “daylight” filter, which has a bluish tint to it. When shooting under warm lighting conditions, applying a daylight filter can help neutralize the warm tones and produce a more natural-looking photo.
Conversely, when shooting under cool lighting conditions, such as in shade or at dusk, a “warm-up” filter can be used to add a bit of warmth to the photo and counteract the cool blue tones.
Filters for balancing color temperature come in various strengths and are denoted by the number in the filter series. For instance, an 80A filter is stronger than an 80B filter. The choice of which filter to use depends on the specific lighting conditions and the desired effect.
It’s important to note that while digital cameras have built-in white balance settings that can automatically adjust for different lighting conditions, using filters can offer more precise control over the color temperature and allow for creative expression.
In conclusion, using filters to balance color temperature can be a useful technique in photography to achieve more accurate and pleasing colors. By selecting the appropriate filter, photographers can effectively neutralize color casts caused by different light sources and achieve their desired aesthetic.
Protecting the camera lens
One of the main reasons to use filters on a digital camera is to protect the camera lens. The lens is one of the most delicate and expensive parts of a camera, and it is susceptible to scratches, dust, and other damage.
By using a filter, you can create a barrier between the lens and potential hazards, such as dirt and water. This can help to prevent any harm from coming to the lens, ensuring that your photos are always clear and sharp.
There are several types of filters available for this purpose. The most common type is a UV filter, which not only protects the lens but also reduces the amount of ultraviolet light that reaches the sensor. This can result in clearer images, especially when shooting in bright sunlight.
Another type of filter that can be used for protection is a clear or skylight filter. This filter serves the same purpose as a UV filter but does not affect the color balance of the image.
When choosing a filter for lens protection, it is important to consider the size of your camera lens. Filters come in various diameters, so make sure to select one that fits your lens properly. You can usually find the correct size by checking the diameter of your lens or referring to the camera’s manual.
Additionally, make sure to invest in a high-quality filter. Cheap filters may not provide adequate protection and can even decrease the image quality. Look for filters made from high-quality materials and coated to reduce reflections and improve image clarity.
| Benefits of using a filter for lens protection: |
|---|
| 1. Protects the lens from scratches and damage |
| 2. Acts as a barrier against dust and water |
| 3. Reduces ultraviolet light for clearer images |
| 4. Does not affect the color balance of the image |
In conclusion, using a filter for lens protection is an essential step in preserving the quality and longevity of your camera lens. It provides a physical safeguard against potential hazards and helps to ensure that your photos are always in focus.
Achieving long exposure effects
Digital camera filters can also be used to achieve long exposure effects in your photographs. Long exposure photography is a technique where the camera’s shutter is left open for an extended period of time, typically several seconds or even minutes. This creates an effect where moving objects, such as flowing water or passing clouds, appear blurred or streaked, while stationary objects remain sharp.
One common filter used for long exposure photography is the neutral density (ND) filter. ND filters are designed to reduce the amount of light that enters the camera’s lens, allowing for longer exposure times without overexposing the image. These filters come in various strengths, ranging from ND2 to ND1000, with higher numbers indicating greater light reduction.
By using an ND filter, you can capture the motion of waterfalls or rivers and create a smooth, silky effect. The longer the exposure time, the more pronounced the blurring effect will be. This technique is particularly popular in landscape photography, as it can add a sense of tranquility and movement to the scene.
An alternative filter option for achieving long exposure effects is the variable neutral density (VND) filter. VND filters allow you to adjust the amount of light reduction by rotating the filter, giving you more flexibility in controlling the exposure time. This can be especially useful in situations where the lighting conditions are constantly changing.
When using filters for long exposure effects, it is important to use a sturdy tripod to keep the camera steady during the extended exposure. Any movement or shake can result in a blurry or distorted image. Additionally, it may be necessary to use a remote shutter release or timer function to avoid touching the camera and introducing vibration.
Experimenting with long exposure effects can yield stunning and creative results in your photography. Whether you’re capturing the flow of a waterfall or the streaks of light in a nighttime cityscape, using filters can enhance your ability to capture these long exposure effects.
Capturing motion with neutral density filters
Neutral density (ND) filters are a powerful tool for photographers looking to capture motion in their images. These filters reduce the amount of light entering the camera without affecting the color or tone of the image, allowing for longer exposure times even in bright lighting conditions.
One of the primary uses of ND filters is to capture the motion of water elements such as waterfalls and rivers. By using a long exposure, the moving water can be transformed into a smooth, silky texture, creating a sense of calm and serenity in the image. Without an ND filter, it would be difficult to achieve such long exposure times without overexposing the rest of the scene.
ND filters are also useful for capturing the motion of other moving subjects, such as cars or people. By using a longer exposure time, the movement of these subjects can be blurred, creating a sense of speed or dynamic energy in the photograph. This technique is often used in sports or action photography to convey a sense of motion and excitement.
In addition to capturing motion, ND filters can also be used to control the depth of field in an image. By using a larger aperture and a slower shutter speed, photographers can achieve a shallower depth of field, isolating the subject and creating a soft, out-of-focus background. This technique is commonly used in portrait photography to create a more pleasing and artistic look.
It’s worth noting that using ND filters requires a tripod or a stable surface to prevent camera shake during long exposures. Additionally, it’s important to experiment with different filter strengths and exposure times to achieve the desired effect. With practice and creativity, photographers can use ND filters to add a unique and captivating look to their images.
Enhancing black and white photography
Black and white photography has a timeless and classic appeal. It can bring out the beauty and emotions in a subject by eliminating the distractions of color and focusing solely on the interplay of light and shadow. However, with the right use of filters, you can further enhance the impact and drama of your black and white photographs.
1. Red filters: Red filters are commonly used to darken the sky and enhance the contrast between clouds and the rest of the scene. They can also help add depth and texture to landscapes, especially when there are green foliage and blue skies in the frame.
2. Orange filters: Orange filters can darken blues and make skies appear more dramatic. They are typically used for landscape photography to add contrast to clouds and offer a warm tone to the overall image.
3. Yellow filters: Yellow filters are milder than red and orange filters but still offer some darkening effect. They can be useful for enhancing details and textures, particularly in architectural photography, by reducing atmospheric haze.
4. Green filters: Green filters can be useful when photographing plants and foliage. They lighten greens and darken reds, giving a more vibrant and defined look to the subject.
5. Blue filters: Blue filters can be used to enhance the textures and details in certain scenes, such as water bodies or landscapes with predominantly blue elements. They can also help create a cooler tone and add a sense of calmness to the images.
| Filter | Effect |
|---|---|
| Red | Darken sky; enhance contrast in clouds |
| Orange | Darken blues; add warmth |
| Yellow | Enhance details and reduce haze |
| Green | Lighten greens; darken reds; vibrant look |
| Blue | Enhance textures; create cooler tone |
Experimenting with different filters can add depth and dimension to your black and white photography. Keep in mind that the effect of a filter may vary depending on the lighting conditions and the subject you’re photographing. It’s essential to understand the characteristics of each filter and use them judiciously to achieve the desired results.
Minimizing light pollution during astrophotography
Astrophotography is an incredible hobby that allows you to capture stunning images of the night sky. However, one of the biggest challenges faced by astrophotographers is light pollution. Light pollution is the unwanted or excessive artificial light that interferes with astronomical observations.
Fortunately, there are several techniques you can use to minimize light pollution and enhance your astrophotography results:
1. Location: Choose a dark sky location away from urban areas. Light pollution is more prevalent in cities, so finding a spot away from streetlights and buildings will give you a clearer view of the night sky.
2. Time: Schedule your astrophotography sessions during moonless nights or when the moon is not visible in the sky. Moonlight can contribute to light pollution and wash out the faint details of stars and galaxies.
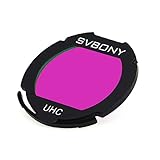
3. Filters: Use light pollution filters on your camera or telescope. Light pollution filters are designed to block specific wavelengths of light associated with artificial lighting, allowing only the desired astronomical light to pass through. You can choose from various types of filters depending on the specific light pollution conditions in your area.
4. Post-processing: In addition to using filters during capture, you can also apply post-processing techniques to further minimize light pollution in your astrophotography. Software like Adobe Photoshop or Lightroom allows you to adjust the levels of specific colors or enhance the contrast between celestial objects and light pollution.
By implementing these techniques, you can significantly reduce the impact of light pollution and capture breathtaking images of the night sky. Remember, astrophotography is a patience-demanding hobby, so take your time, experiment, and keep improving your skills.
Question-answer:
Should I always use filters on my digital camera?
Using filters on your digital camera can greatly enhance your photography in certain situations. However, it is not necessary to always use filters. It ultimately depends on the effect you are trying to achieve and the specific conditions you are shooting in.
What are some situations where using filters on a digital camera is beneficial?
There are several situations where using filters on a digital camera can be beneficial. For example, a polarizing filter can help reduce glare and reflections in landscape or water photography. A neutral density filter can be used to slow down the shutter speed and create a motion blur effect in moving subjects, such as waterfalls. A graduated neutral density filter can help balance the exposure between the sky and the foreground in landscape photography. These are just a few examples, but there are many other filters available that can enhance your photos in different ways.


