Setting up a security camera system can be an important step towards protecting your home or business. However, one of the most common questions people have when installing a security camera is where to plug in the cords. Understanding the proper cord placement is crucial to ensure that your security camera is powered and functioning correctly.
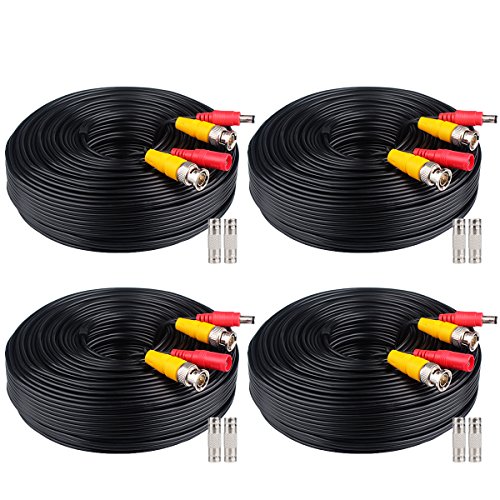
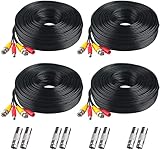
Typically, security cameras come with two cords: one for power and one for data transmission. The power cord is used to provide electrical power to the camera, while the data cord is used to transmit the video footage to a recording or monitoring device. Both cords are essential for the camera to work effectively.
To plug in the cords, you will need to locate the appropriate ports on your security camera. The power cord is usually connected to a DC power input on the camera. This input is typically located on the back or bottom of the camera and is labeled “power” or marked with a lightning bolt symbol. Make sure to insert the power cord securely into the power input to ensure a stable power connection.
The data cord, on the other hand, is usually plugged into a port labeled “Ethernet” or “network.” This port is used to connect the camera to a recording or monitoring device through a network cable. Some security cameras may also have a Wi-Fi option, allowing you to connect wirelessly to your network. In this case, you would not need to use a data cord.
It’s important to note that the specific cord placement may vary depending on the brand and model of your security camera. Therefore, it’s always recommended to consult the user manual or manufacturer’s guidelines for your specific camera to ensure proper cord placement and connection.

By understanding where cords plug in when setting up a security camera, you can ensure a successful installation and reliable monitoring of your property. Proper cord placement is essential for powering the camera and transmitting the video footage, so take the time to carefully connect the cords to the appropriate ports on your security camera.
Step-by-Step Guide: Where to Plug In Cords When Setting Up a Security Camera
Setting up a security camera involves several important steps, including the proper placement and connection of cords. In this step-by-step guide, we will walk you through the process of where to plug in the cords when setting up a security camera.
Step 1: Identify the Power Source
The first step in setting up your security camera is to identify the power source. This is typically an electrical outlet or a dedicated power supply. Make sure the power source is easily accessible and within reach of the camera’s cords.
Step 2: Connect the Power Adapter
Once you have located the power source, connect the power adapter to the security camera. The power adapter is usually included with the camera and has a cord that plugs into the camera on one end and a standard electrical plug on the other end. Insert the power adapter plug into the corresponding power input on the camera.
Step 3: Plug in the Ethernet Cable (if applicable)
If your security camera requires an internet connection or remote access, it may have an Ethernet port. In this case, you will need to plug in an Ethernet cable from your router or modem to the Ethernet port on the camera. This will allow the camera to connect to your network and enable remote access or live streaming.

Step 4: Connect the Video Cable (if applicable)
Some security cameras may require a separate video cable to transmit video signals. If your camera has this requirement, connect the video cable from the camera to your recording device or monitor. This is typically done using a BNC or RCA connector, depending on the camera and recording device.
Step 5: Secure the Cords
After plugging in all the necessary cords, make sure to secure them properly to prevent accidental disconnection or damage. Use cable clips or adhesive hooks to secure the cords along the walls or ceiling, making sure they are out of reach and not causing any tripping hazards.
By following these step-by-step instructions, you will be able to effectively plug in the cords when setting up your security camera. Remember to consult the camera’s manual for specific instructions related to the model you are using.
Determine Camera Placement
When setting up a security camera, it is crucial to determine the ideal placement to ensure optimal coverage and effectiveness. Here are some key factors to consider when deciding where to install your security camera:
|
1. Entry Points Identify the main entry points to your property, such as doors, windows, and driveways. These are the areas where potential intruders are most likely to enter. Installing cameras near these entry points will help capture any suspicious activities. |
2. Line of Sight Ensure that your cameras have a clear line of sight to the areas you want to monitor. Avoid obstructions such as trees, walls, or fences that may block the camera’s view. A clear line of sight will help maximize the camera’s coverage and provide clear footage. |
|
3. Height The height at which you place your cameras can greatly affect their effectiveness. Installing cameras at a higher vantage point can provide a wider view and minimize the risk of tampering or vandalism. |
4. Lighting Conditions Consider the lighting conditions in the areas you want to monitor. If the area is poorly lit or frequently experiences changing lighting conditions, you may need cameras with built-in infrared or night vision capabilities. |
|
5. Internet Connection Ensure that the cameras are within range of your Wi-Fi network if you are using wireless cameras. Poor signal strength can cause connection issues and affect the camera’s functionality. |
6. Weather Protection If you are installing outdoor cameras, make sure they are weatherproof and can withstand harsh weather conditions. This will help prolong the lifespan of your cameras and ensure continuous monitoring. |


By considering these factors, you can determine the best placement for your security cameras and enhance the overall security of your property.
Locate Wall Outlet
When setting up a security camera system, one of the most important steps is to locate a suitable wall outlet to power the cameras. This outlet will provide the necessary electrical supply to keep the cameras running and capturing footage. Here are some key points to consider when locating a wall outlet:
- Accessibility: Choose a wall outlet that is easily accessible and within reach of the camera’s power cord. This will make installation and maintenance easier in the long run.
- Proximity to Cameras: Try to find a wall outlet that is close to the location where you plan to install the security cameras. This will minimize the length of the power cords and reduce the risk of tripping hazards.
- Surge Protection: Consider using a wall outlet with built-in surge protection to safeguard your security camera system against power surges and voltage spikes. This can help prevent damage to the cameras and ensure uninterrupted operation.
- Outdoor vs Indoor Cameras: If you are installing outdoor cameras, make sure to choose a wall outlet that is weatherproof and suitable for outdoor use. This will protect the electrical connection from moisture and other environmental factors.
Once you have identified a suitable wall outlet, ensure that it has a compatible voltage and current rating for your security camera system. It’s also important to follow the manufacturer’s guidelines and any local electrical codes when connecting the power cords. By locating a proper wall outlet, you can ensure efficient and reliable power supply to your security cameras, allowing them to function effectively in protecting your property.
Position Camera Near Outlet
One important aspect of setting up a security camera is ensuring that it is positioned near an electrical outlet. This will allow you to connect the camera to a power source for continuous operation. Locating the camera near an outlet will also help you avoid having long cords that may pose a tripping hazard or spoil the aesthetics of your space.

When choosing the location for your security camera, consider the distance from the outlet. Make sure that the cord provided with the camera is long enough to reach the outlet. It’s also important to ensure that the camera’s field of view is not obstructed by any objects or structures when positioning it next to an outlet.
To make the installation process neater and more organized, you can use cord concealers or cable management solutions to hide the cords and prevent them from being an eyesore. These accessories can help keep the area around the camera clean and minimize the risk of cords being accidentally unplugged or damaged.
Benefits of Positioning the Camera Near an Outlet:
|
Tips for Positioning Camera Near an Outlet:
|
Connect Power Cable to Camera
Before you start setting up your security camera, it’s important to connect the power cable to the camera. Follow these steps to ensure a secure and proper connection:
- Locate the power port on the camera. It is usually found on the back or bottom of the camera.
- Take the power cable and align the connector with the power port on the camera.
- Gently push the connector into the power port, making sure it fits securely.
- Once the connector is inserted, turn it clockwise to lock it in place. Ensure that it is firmly secured.
It’s important to note that the power cable should be connected to a reliable power source. Use an electrical outlet or power adapter that is compatible with your camera’s voltage requirements. Make sure the power source is accessible and located within reach of the camera’s power cable.
By properly connecting the power cable to your security camera, you ensure that it receives the necessary power to function effectively. This is a crucial step in setting up your camera and ensuring optimal performance.

Identify Power Adapter
When setting up a security camera, it is important to correctly identify the power adapter in order to provide the necessary power supply. The power adapter is responsible for converting the standard electrical current from your outlet into the correct voltage and current required by the security camera.
Here are some steps to help you identify the power adapter:
- Check the camera’s specifications: The power adapter required by the security camera is usually mentioned in its specifications. Look for information about the input voltage and current requirements.
- Look at the camera’s cable: The power adapter is typically connected to the camera through a cable. Check the cable and look for any labels or markings that indicate the power adapter. It may mention the voltage and current ratings.
- Inspect the power adapter: Once you have located the power adapter, examine it closely. It should have a label or marking that specifies the input and output information, such as the input voltage, current, and the output voltage and current. These details should match the requirements mentioned in the camera’s specifications.
- Verify the plug type: The power adapter will have a plug that connects to the power outlet. Make sure the plug type matches the outlets in your location. If it does not, you may need an adapter to convert the plug type or a different power adapter altogether.
It is important to use the correct power adapter for your security camera to ensure proper functionality and prevent any damage to the camera or the power supply. If you are unsure about the power adapter or need further assistance, consult the camera’s user manual or contact the manufacturer for guidance.
Plug Adapter into Wall Outlet
When setting up your security camera, it is important to know where to plug the cords in. The first step is to find a convenient location near your security camera where you can plug in the adapter. This will typically be a wall outlet, but it could also be a power strip or an extension cord.
Before plugging the adapter in, make sure the power is turned off. This will help avoid any potential electrical hazards. Once you have confirmed that the power is off, take the adapter and plug it into the wall outlet. Make sure the adapter is securely inserted into the outlet to ensure a proper connection.
After plugging the adapter into the wall outlet, you can connect the cords from your security camera to the adapter. Typically, security cameras use a power cable and a data cable. The power cable will provide electrical power to the camera, while the data cable will connect the camera to your recording or monitoring device.
When connecting the cords to the adapter, make sure to match the correct connectors. The power cable will have a plug that fits into the adapter, while the data cable may have different types of connectors, such as BNC or Ethernet. Take care to match the connectors correctly to avoid damaging your security camera.
Once all the cords are connected to the adapter, you can turn the power back on. The security camera should now be properly connected and ready to use. Keep in mind that some security cameras may require additional setup steps, such as configuring the camera settings or installing software on your computer or smartphone.
Remember to always follow the manufacturer’s instructions when setting up your security camera. If you have any doubts or concerns, consult the user manual or contact the manufacturer for assistance. Following these steps will help ensure a successful installation and optimal performance of your security camera.
Use Extension Cord If Needed
If the location where you are setting up your security camera is far from the nearest power outlet, you may need to use an extension cord to connect the power cord of your camera to the power source.
Before using an extension cord, make sure it is rated for outdoor use as security cameras are often installed outside. Additionally, consider the length of the cord to ensure it reaches the desired location without being too short or too long.
Choosing the Right Extension Cord
When selecting an extension cord for your security camera, look for one that is designed for outdoor use and has a sufficient length to reach the power source. Check the cord’s gauge to ensure it can handle the power requirements of your camera.
It is also important to choose an extension cord with a polarized plug, which has one prong wider than the other. This type of plug ensures proper grounding and reduces the risk of electrical hazards.
Proper Extension Cord Usage
When using an extension cord for your security camera, avoid running it across walkways or areas where it can be easily tripped over. This not only keeps the cord safe but also prevents any accidents or damage to the camera.
Consider using cable clips or zip ties to secure the extension cord along walls or structures to minimize the risk of damage or tampering. Keep the cord away from water sources and make sure it is not twisted or tangled.
Regularly check the extension cord for any signs of wear or damage. If you notice any frayed wires or exposed insulation, replace the cord immediately to avoid potential electrical hazards.
Connect Video Cable to Camera
When setting up a security camera system, it is important to properly connect the video cable to the camera for it to function correctly. The video cable is responsible for transmitting the video feed from the camera to the recording device or monitor.
To connect the video cable to the camera, follow these steps:
| Step | Description |
|---|---|
| 1 | Locate the video output port on the camera. This port is typically labeled as “VIDEO OUT” or with an icon representing a monitor. |
| 2 | Take the video cable and identify the end with the male connector. This connector has a pin that matches the port on the camera. |
| 3 | Insert the male connector of the video cable into the video output port on the camera. Make sure it is securely plugged in. |
| 4 | If the video cable has additional plugs (e.g. power plug), connect them to the corresponding ports on the camera if required for your specific camera model. |
| 5 | Once the video cable is connected, you can proceed with attaching the other end of the cable to the recording device or monitor, following the manufacturer’s instructions. |
It is important to ensure that the video cable is securely connected to the camera to avoid any disruptions in the video feed. Double-check the connections before powering on the camera and recording device or monitor.
Route Video Cable to Monitoring Device
Once you have set up your security camera, the next step is to route the video cable to the monitoring device. This is an important step to ensure that the camera is properly connected and that the video feed can be viewed without any issues.
Determine the Location of the Monitoring Device
Before routing the cable, you need to determine the location of the monitoring device. This could be a computer, a TV screen, or a dedicated monitoring station. Once you have decided on the location, make sure it is easily accessible and within range of the security camera.
Choose the Right Video Cable
There are different types of video cables available for security cameras, such as coaxial cables, Ethernet cables, and HDMI cables. Make sure you choose the right type of cable that is compatible with your camera and monitoring device. Refer to the user manual or consult with the manufacturer if you are unsure.
Some cameras may come with a pre-attached cable, while others will require you to purchase a separate cable. Measure the distance between the camera and the monitoring device to ensure that you buy a cable of the right length.
It is also important to consider the quality of the cable. A poor-quality cable can result in a degraded video feed or other connectivity issues. Invest in a high-quality cable to ensure the best performance.
Route the Cable
Start by identifying the shortest and most direct path from the camera to the monitoring device. This will help minimize the length of cable needed and reduce the risk of any signal loss or interference. Avoid routing the cable near sources of electromagnetic interference, such as power lines or electrical appliances.
If possible, use conduits or cable channels to conceal the cable and protect it from damage. This will also give your installation a neater and more professional appearance.
Secure the cable along the chosen path using clips or cable ties. Make sure the cable is not pulled too tight, as this can damage the connectors or affect the signal quality.
If you need to pass the cable through walls or ceilings, consider using wall plates or cable pass-throughs to ensure a clean and professional-looking installation.
Connect the video cable to the appropriate ports on both the camera and the monitoring device. Make sure the connections are secure and that the cable is properly seated.
Once the cable is routed and connected, power on the camera and the monitoring device. You should now be able to view the live video feed from the security camera on your monitoring device.
Connect Video Cable to Monitoring Device
When setting up a security camera system, it is important to properly connect the video cable to the monitoring device. The video cable is responsible for transmitting the video feed from the camera to the monitoring device, allowing you to view the footage in real-time.
Step 1: Identify the Video Ports
Before connecting the video cable, you need to identify the video ports on both the camera and the monitoring device. These ports are usually labeled as “VIDEO OUT” on the camera and “VIDEO IN” on the monitoring device.
Step 2: Connect the Video Cable
Once you have identified the video ports, connect one end of the video cable to the “VIDEO OUT” port on the camera. Ensure that the connection is secure and that the cable is firmly plugged in.
Next, connect the other end of the video cable to the “VIDEO IN” port on the monitoring device. Again, make sure the connection is secure and properly plugged in.
Step 3: Power Up the System
After connecting the video cable, power up both the camera and the monitoring device. This will establish a connection between the two devices and allow the video feed to be transmitted.
Ensure that the camera is properly powered and positioned to capture the desired area. Adjust any settings on the monitoring device to optimize the video quality and display.
Overall, connecting the video cable to the monitoring device is an essential step in setting up a security camera system. By following these steps, you can ensure a proper and reliable connection, enabling you to effectively monitor your property.
FAQ,
Where do I plug in the power cord when setting up a security camera?
When setting up a security camera, you will typically plug the power cord into a power outlet near the location where you are installing the camera. Make sure to choose a power outlet that is easily accessible and convenient for connecting the camera to a power source.
Can I plug the power cord of my security camera into an extension cord?
Yes, you can plug the power cord of your security camera into an extension cord if needed. However, it is important to ensure that the extension cord is of good quality and can handle the power requirements of the camera. Additionally, make sure the extension cord is properly rated for outdoor or indoor use, depending on where your security camera is installed.


